
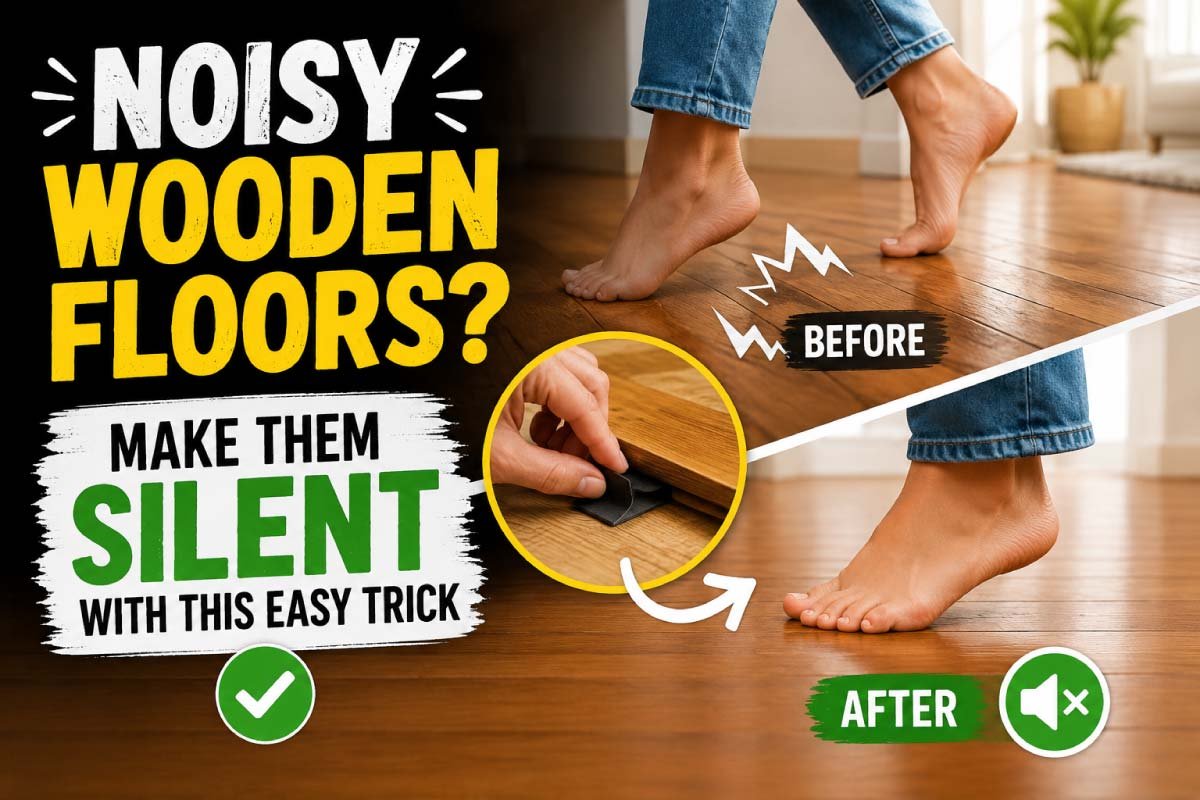
Wooden floors are beautiful. They bring warmth, character, and a natural charm to any home. But there’s one problem that can ruin the comfort they offer—noise. That familiar creak, squeak, or groan every time you step can turn a peaceful home into a frustrating soundscape.
If your wooden floors are starting to sound like an old ship, you’re not alone. This is a common issue in both older homes and newer wooden flooring installations. The good news is that you don’t need a full renovation or expensive repairs to fix it.
In most cases, you can silence noisy wooden floors with a few simple, practical tricks that target the root causes. Let’s break down why wooden floors make noise and how you can fix them quickly and effectively.
Method 3: Add Shims for Loose Floorboards
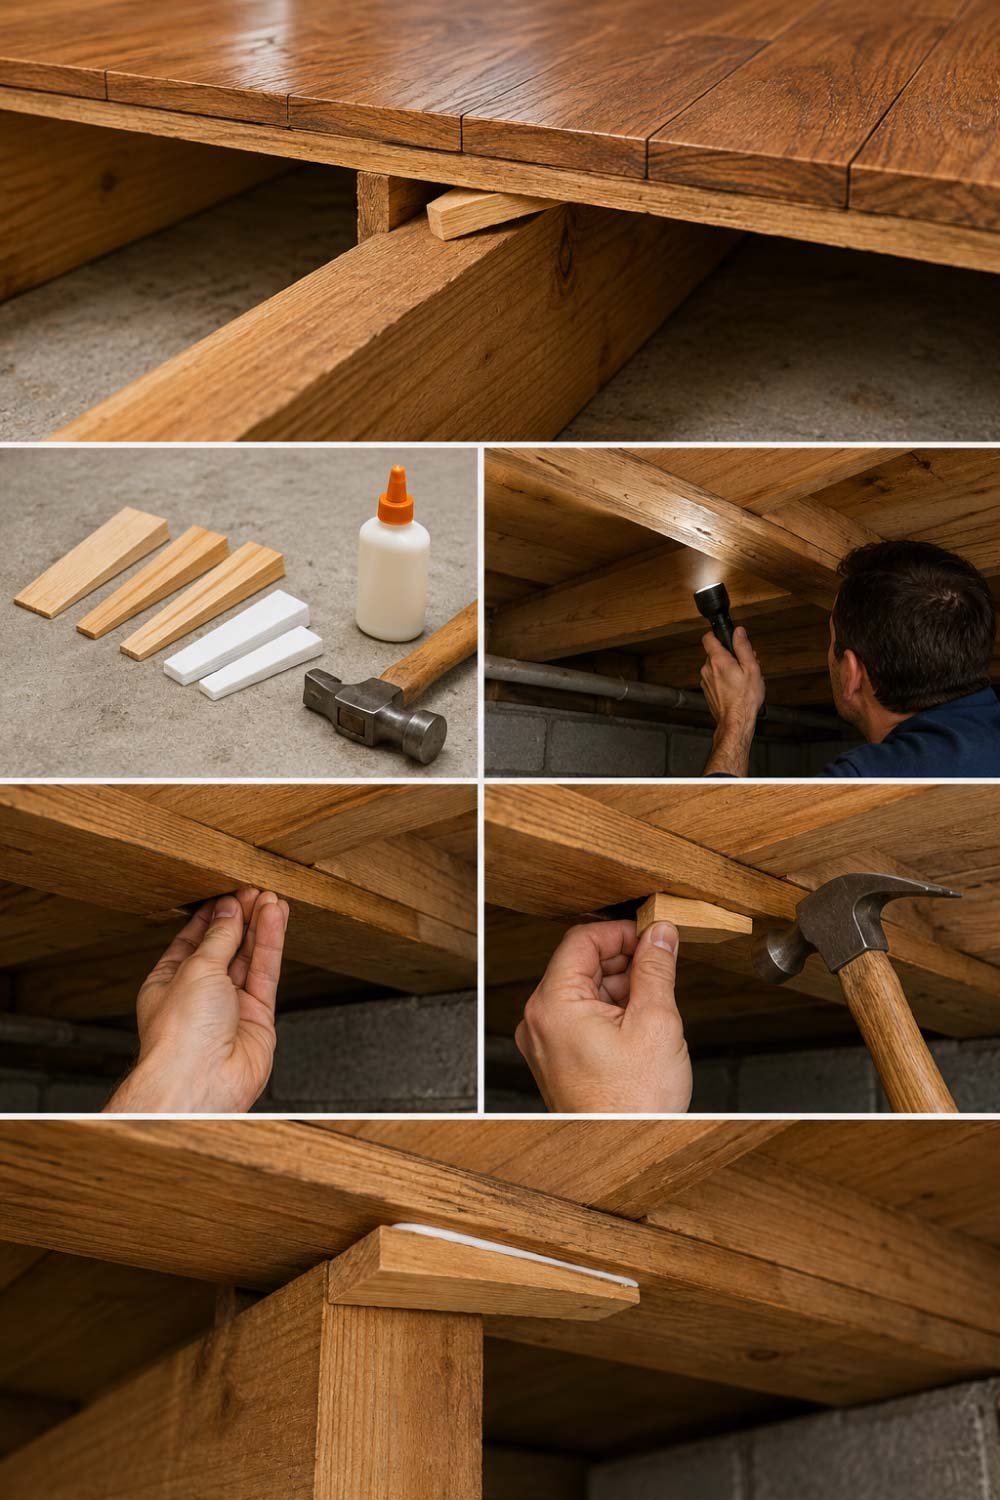
This method is especially useful for raised wooden floors where the noise is coming from underneath rather than the surface. Shims are small wedges that help fill gaps between structural parts, stopping unwanted movement that causes squeaks. It’s a simple but highly effective way to stabilize loose flooring from below.
What You Need:
Wooden shims or thin plastic wedges, a hammer (optional), and wood glue for extra holding strength if required.Access the underside of the floor
If you have a basement or crawl space, go underneath the floor to clearly see the joists and subfloor connection points.Find the loose or moving area
Look for spots where the floor bends slightly or makes noise when pressure is applied from above.Insert the shim carefully
Gently tap a wooden shim between the joist and the subfloor until it fits snugly without forcing the structure upward too much.Secure for long-term stability
Apply a small amount of wood glue to keep the shim in place and prevent future slipping or movement.Why This Works:
Shims fill the gap that causes movement, stabilizing the floor structure and eliminating noise.
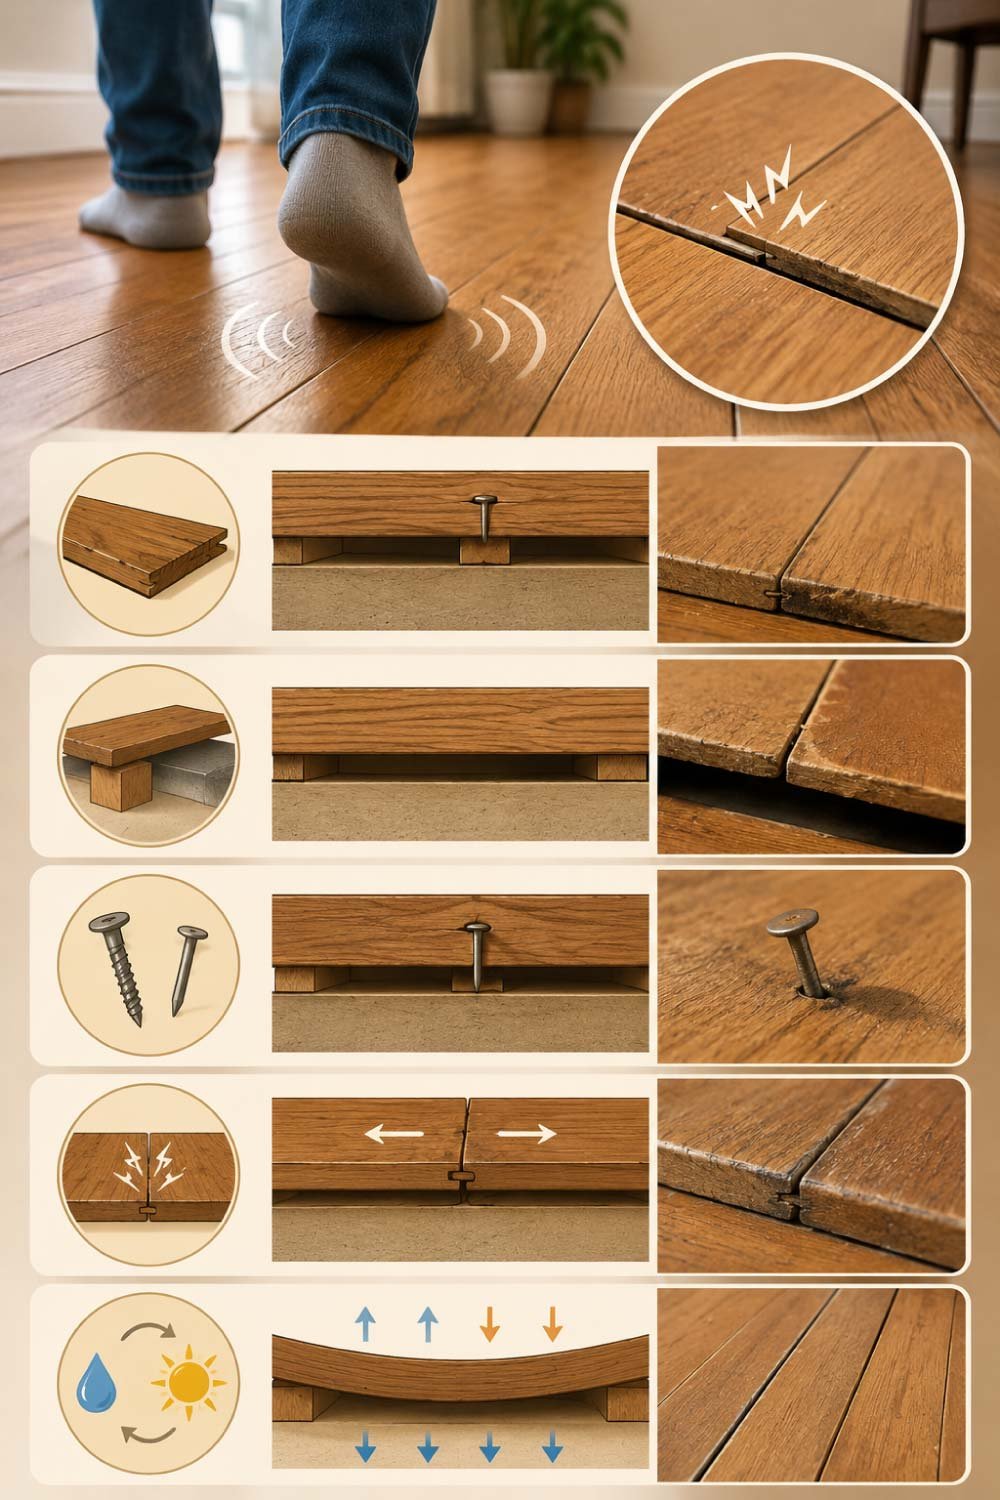
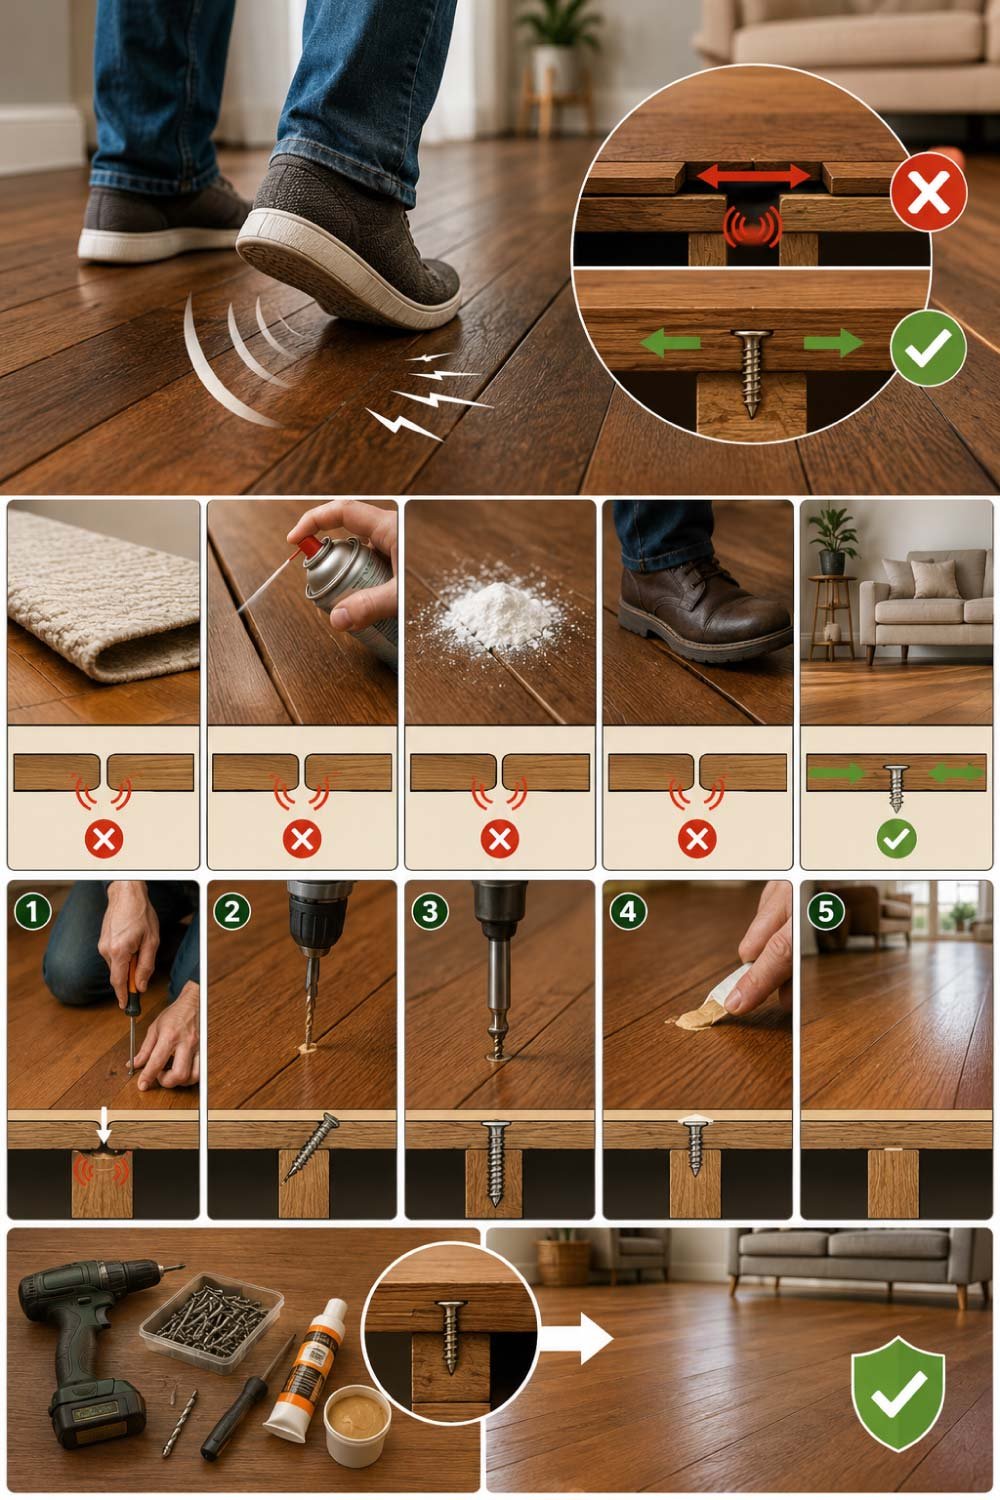
Method 4: Tighten Floor Nails or Replace Them
In many cases, noisy wooden floors are simply the result of aging nails that have loosened over time. When nails lose grip, boards begin to shift slightly under pressure, producing squeaks. Fixing or upgrading these fasteners can quickly restore stability.
Locate the noisy board
Walk across the floor and identify the exact area where the sound is strongest or most consistent.Inspect for loose nails
Look closely for nails that are slightly raised, wobbly, or no longer fully embedded in the wood.Re-secure or replace them
Hammer loose nails back into place or remove them completely and replace with screws for stronger holding power.Upgrade for durability
If possible, use screws instead of nails, as they provide a much tighter grip and resist loosening over time.Why Screws Are Better:
Unlike nails, screws grip the wood more tightly and don’t loosen easily with movement or pressure.
Method 5: Lubricate the Joints (Temporary But Useful)
This method is a quick, non-invasive way to reduce squeaky sounds without making structural changes. It works best for minor friction-related noises where boards are still secure but rubbing slightly against each other.
What You Can Use:
Dry lubricant spray, silicone spray, or even a small amount of wax for light applications.Apply directly to joints
Target the seams, cracks, or edges where wooden boards meet and friction is occurring.Allow it to settle in
Let the lubricant seep into the gaps by walking gently over the area to spread it evenly.Clean excess residue
Wipe off any extra product from the surface to avoid slippery spots or buildup.Why This Helps:
Lubrication reduces friction between wood surfaces, which can quiet squeaks instantly.
However, this is usually a short-term solution and works best in combination with other fixes.
Method 6: Reinforce Weak Areas With Extra Support
Sometimes floor noise is not just about loose boards but weak structural support underneath. If the subfloor or framing lacks strength, movement will continue no matter how many surface fixes you try. Reinforcing the structure ensures long-term stability and noise reduction.
Add extra joists if possible
Installing additional support beams under weak sections helps distribute weight more evenly.Install blocking between beams
Wood blocks placed between joists reduce flexing and improve rigidity of the entire structure.Strengthen weak sections
Reinforce any visibly sagging or flexible areas with additional wood supports or bracing.Inspect load-bearing areas carefully
Focus on high-traffic zones where pressure is most frequent and movement is noticeable.Why This Works:
Extra support reduces structural flexing, which eliminates the root cause of persistent squeaking.
Don’t miss out on this helpful guide!
Preventing Future Floor Noise

Fixing squeaky floors once is helpful, but preventing the problem from returning saves time and effort in the long run. With a few simple habits, you can keep wooden floors stable, quiet, and long-lasting.
Control Indoor Humidity
Maintain balanced humidity levels using ventilation or a dehumidifier to prevent wood expansion and contraction.
Avoid Excess Water Exposure
Never use excessive water when cleaning wooden floors, as moisture weakens joints and increases movement over time.
Regular Inspection
Check floors every few months for early signs of loose boards or popping nails before they become noisy.
Use Rugs in High-Traffic Areas
Placing rugs helps reduce direct pressure on wooden planks and minimizes wear and movement.
Don’t miss out on this helpful guide!
When You Should Call a Professional
While most squeaky floor problems can be solved with DIY methods, some situations indicate deeper structural issues that require expert attention. Ignoring these signs may lead to bigger damage over time.
Large sections of flooring are noisy
If multiple areas squeak consistently, the issue may be structural rather than surface-level.Visible structural damage
Cracks, sagging, or damaged boards suggest deeper problems that need professional repair.Subfloor is damaged or rotting
Moisture damage or decay in the subfloor requires specialized repair work.Noise returns quickly after fixes
If squeaks come back even after repairs, there may be an underlying issue that needs expert evaluation.
A professional can assess deeper structural issues that aren’t visible from the surface.
Final Thoughts
Noisy wooden floors can be annoying, especially when every step echoes through the house. But the solution is usually simpler than people think.
In most cases, the noise comes from movement—and the key to fixing it is stopping that movement entirely. Whether you choose screws for a permanent fix, powder for a quick solution, or shims for structural support, each method targets the real cause rather than just masking the sound.
With a little time and effort, you can turn those creaky, irritating floors back into the quiet, solid surface they were meant to be.
A peaceful home often starts from under your feet—and now you know exactly how to get there.
Don’t miss out on this helpful guide!