
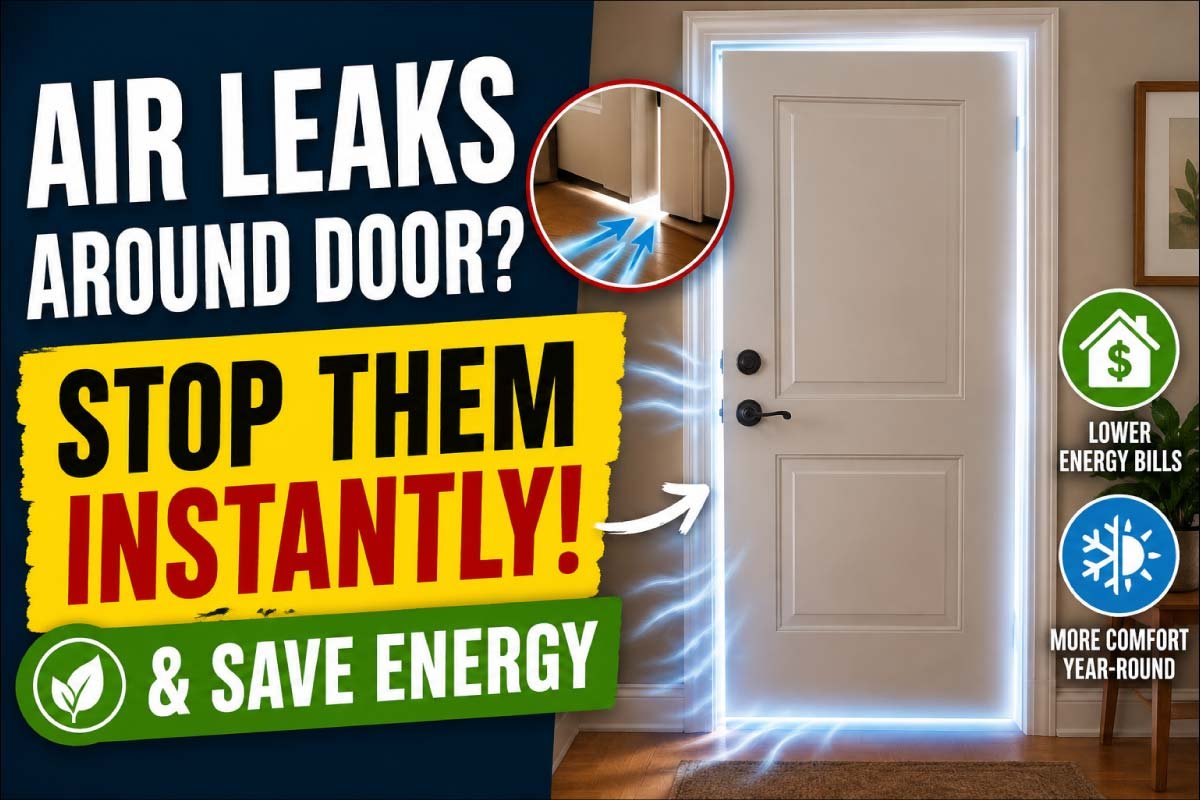
Air leaks around doors might seem like a small issue, but they can quietly drain your comfort and your wallet. If you’ve ever felt a cold draft in winter or warm air sneaking in during summer, your door is likely the culprit. The good news? Fixing air leaks is easier, faster, and cheaper than most people think—and you don’t need to be a professional to do it.
In this detailed guide, you’ll learn exactly how to identify air leaks, fix them instantly, and improve your home’s energy efficiency for the long term.
Table of Contents
ToggleWhy Air Leaks Around Doors Matter

Air leaks around doors may seem like a minor inconvenience, but they can have a surprisingly large impact on your home’s comfort, energy efficiency, and overall condition. Even small gaps can let outside air creep in and conditioned air escape. Understanding the importance of fixing these leaks helps you take action before the problem grows into something more costly.
1. Energy Loss = Higher Bills
Air leaks let conditioned air escape and outside air enter. This forces your heating and cooling system to work harder, increasing your energy consumption.
2. Reduced Comfort
Drafts create uneven temperatures in your home. One room feels cold while another feels warm—making it hard to stay comfortable.
3. Dust, Noise, and Moisture
Air gaps don’t just let air through—they also allow dust, humidity, insects, and outside noise to enter your home.
4. Long-Term Damage
Moist air entering your home can lead to mold, mildew, or damage to door frames and surrounding structures.
Signs You Have Air Leaks Around Your Door
Not all air leaks are easy to spot at first glance. Some are subtle and only become noticeable when the weather changes or your energy bills increase. By learning a few simple detection methods, you can quickly identify problem areas around your door and take action before the issue worsens.
Draft Test
Stand near the closed door on a windy day. If you feel air movement, there’s a leak.
Light Test
Turn off the lights inside and shine a flashlight around the door edges. If light passes through, air can too.
Paper Test
Close the door on a piece of paper. If you can easily pull it out without resistance, the seal isn’t tight enough.
Sound Clues
If outside noise seems unusually loud near the door, gaps may be letting sound (and air) in.
Common Causes of Door Air Leaks
Air leaks don’t happen randomly—they’re usually caused by wear and tear, poor installation, or environmental factors like humidity. Knowing the common causes makes it much easier to choose the right fix. Instead of guessing, you can directly address the root problem and prevent it from coming back.
- Worn-out weatherstripping
- Gaps under the door
- Misaligned door frame
- Loose hinges or hardware
- Warped door due to humidity or age
- Cracks in the door frame or wall
Quick Fixes to Stop Air Leaks Instantly
The good news is that most door air leaks can be fixed quickly without hiring a professional. With a few basic tools and affordable materials, you can seal gaps, improve insulation, and restore comfort in your home. These simple solutions are effective, beginner-friendly, and deliver immediate results.
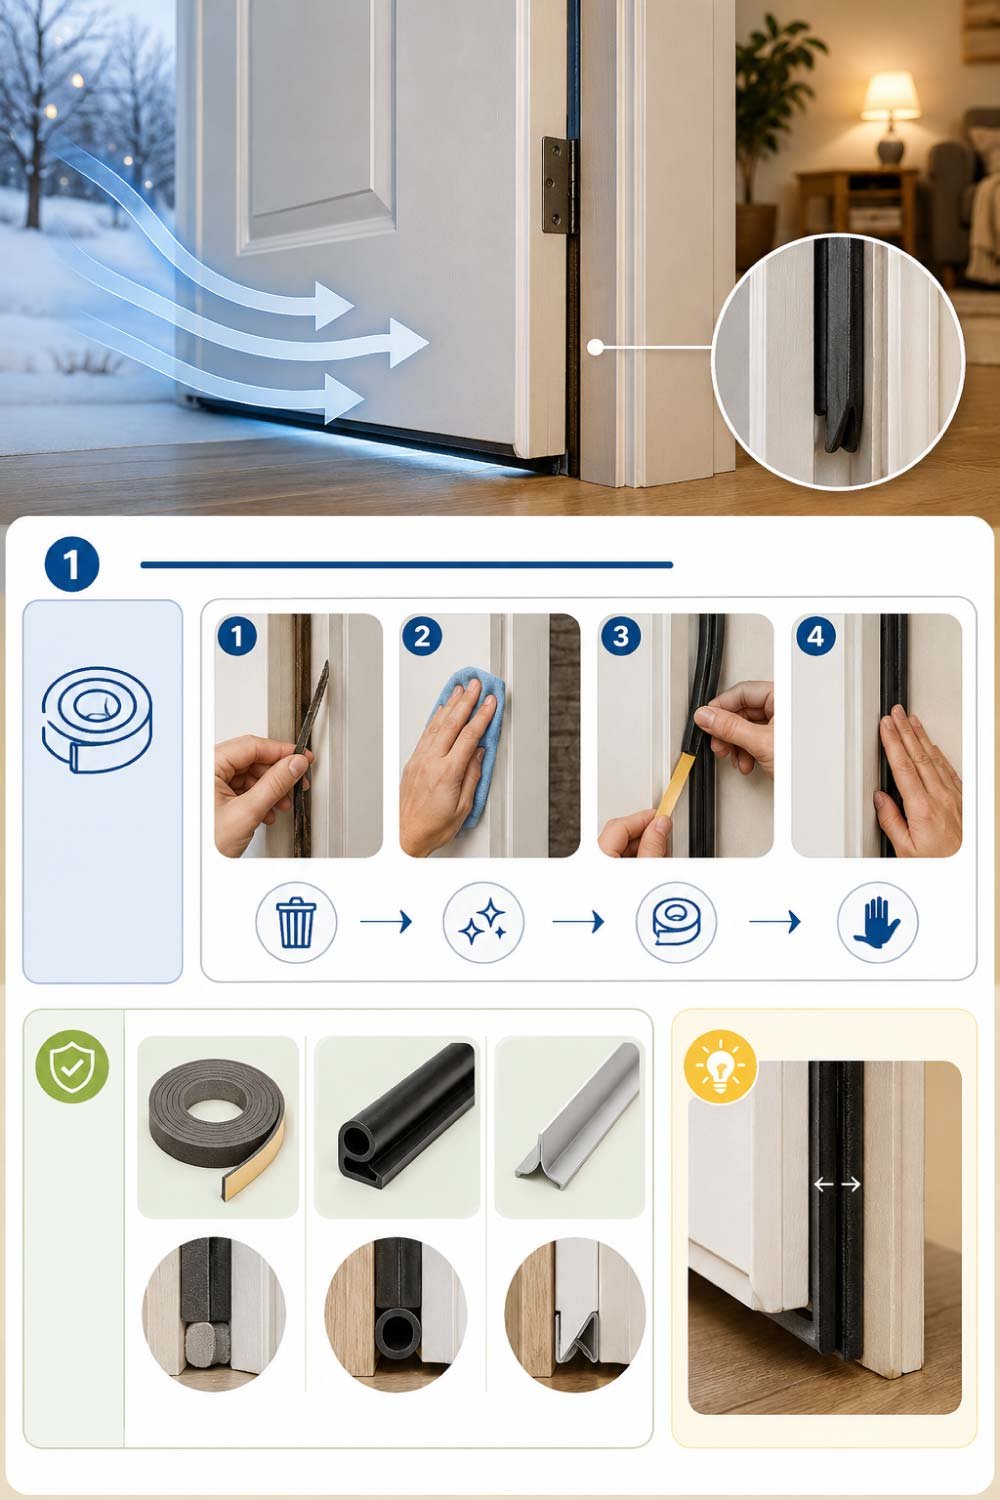
1. Install or Replace Weatherstripping
Weatherstripping is the most effective and affordable way to seal door gaps.
How to Fix It:
- Remove old or damaged weatherstripping
- Clean the surface
- Apply new adhesive-backed weatherstripping along the frame
- Press firmly for a tight seal
Best Types:
- Foam tape (easy and cheap)
- Rubber seals (more durable)
- V-strip (great for uneven gaps)
Pro Tip: Choose a thickness that compresses slightly when the door closes.
Also Read:
2. Seal the Gap Under the Door
The space under the door is often the biggest source of leaks.
Easy Solutions:
- Door sweep (attached to the bottom of the door)
- Draft stopper (fabric tube placed along the bottom)
- Automatic door seal (moves up/down when opening/closing)
DIY Hack:
Roll up a towel and place it along the bottom of the door for an instant fix.
3. Use Door Seal Tape for Small Gaps
For minor cracks around the edges, seal tape offers a fast and effective solution that requires no special tools. It’s ideal for renters or quick repairs because it can be applied in minutes. While simple, it significantly reduces drafts and improves indoor comfort when used correctly.
- Apply self-adhesive seal tape
- Focus on corners and uneven spots
- Press tightly to ensure no air passes through
This is a quick, no-tools-required solution.
4. Fix Door Alignment Issues
Sometimes the problem isn’t the seal—it’s the door position. A slightly misaligned door can create gaps that allow air to pass through, even if seals are in good condition. Fixing alignment ensures the door fits snugly in the frame and closes properly without leaving hidden openings.
Steps:
- Tighten hinge screws
- Check if the door is sagging
- Adjust hinges slightly to reposition the door
- Ensure the door sits evenly in the frame
Even a small misalignment can create noticeable air leaks.
5. Seal Cracks Around the Frame
If air is entering through the surrounding wall or frame, sealing those cracks is essential for proper insulation. Over time, materials can shrink or crack, creating hidden entry points for air. Addressing these areas not only stops leaks but also improves the overall durability and efficiency of your door structure.
- Use caulk to fill small cracks
- Apply expanding foam for larger gaps
- Smooth the surface for a clean finish
This not only blocks air but also improves insulation.
Also Read:
6. Install a Door Threshold Seal
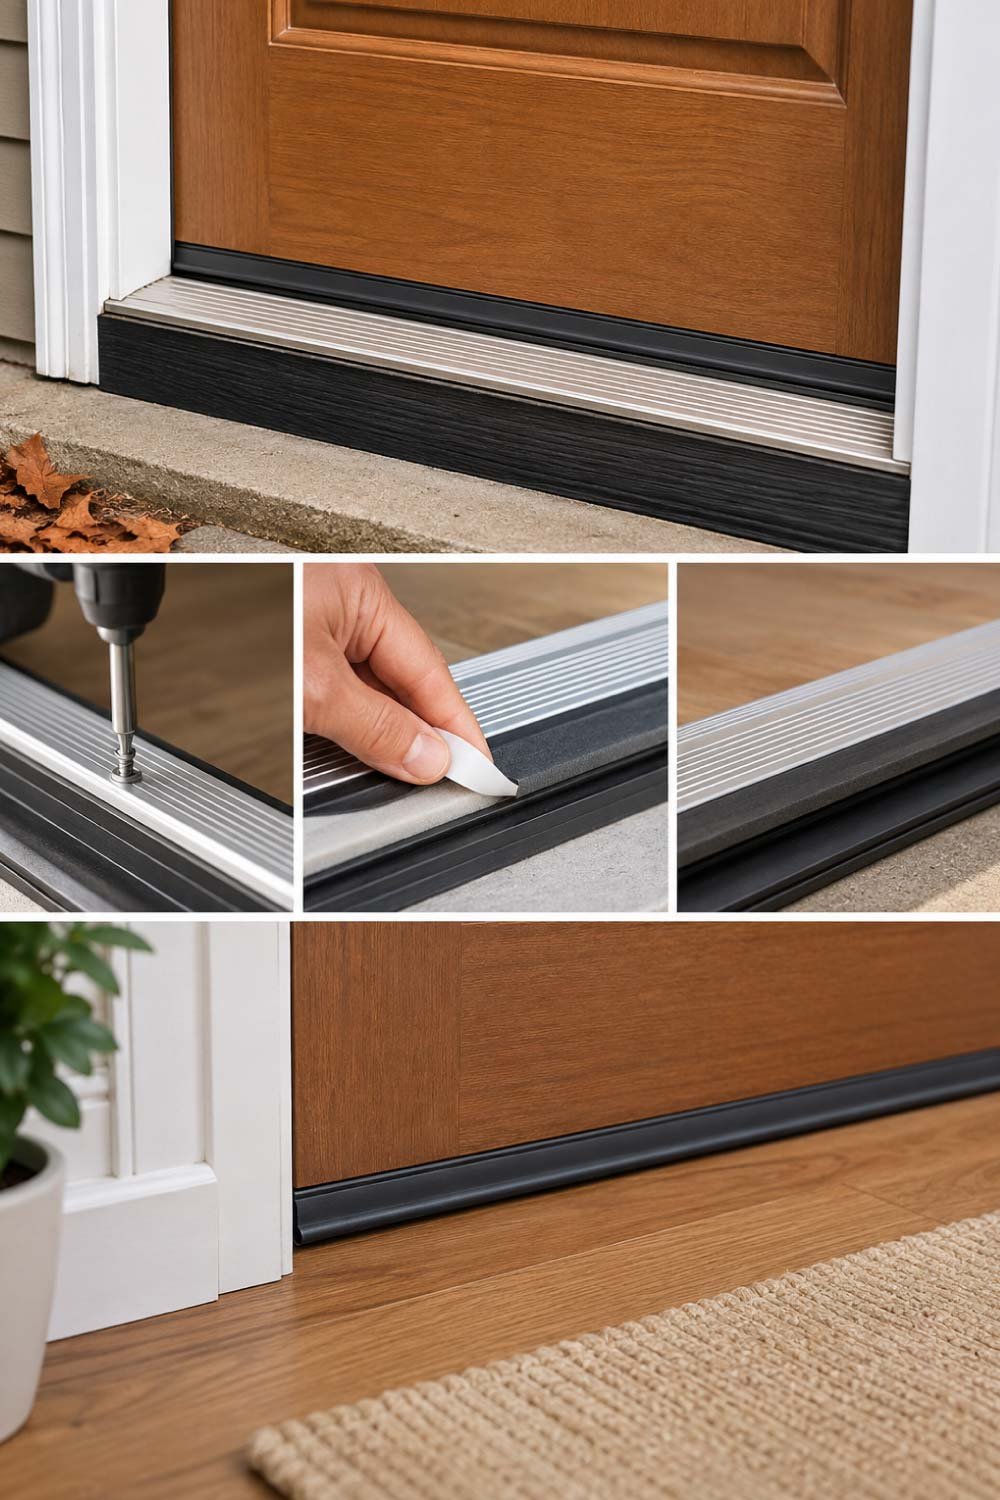
The threshold plays a key role in blocking air at the bottom of the door, but it often gets overlooked. If it becomes worn, uneven, or damaged, gaps can form that allow drafts inside. Installing or adjusting a threshold seal creates a tight, reliable barrier against outside air.
- Replace or adjust the threshold
- Add a sealing strip
- Ensure the door presses firmly against it when closed
This creates a tight barrier against air leaks.
Long-Term Solutions for Better Energy Efficiency
While quick fixes can solve immediate problems, long-term solutions provide lasting benefits and greater energy savings. Investing in better materials and upgraded doors can significantly reduce heat loss, improve insulation, and enhance your home’s overall value. These improvements pay off over time through comfort and lower utility bills.
Upgrade to Energy-Efficient Doors
Older doors often lack proper insulation. Consider upgrading to:
- Solid core doors
- Insulated steel doors
- Fiberglass doors with weather seals
These options reduce heat transfer and improve sealing.
Install Storm Doors
Adding a storm door is a smart upgrade if you want an extra layer of protection against outdoor elements. It works as a barrier between your main door and the outside environment, reducing drafts and improving insulation. This simple addition can make a noticeable difference in both comfort and energy efficiency.
- Blocks wind and drafts
- Improves insulation
- Extends the life of your main door
Also Read:
Improve Overall Insulation
Air leaks around doors are often a sign of bigger insulation issues throughout your home. Fixing just the door may not be enough if other areas are also letting air in or out. A whole-home approach ensures better temperature control, improved efficiency, and long-term energy savings.
- Windows
- Walls
- Attic insulation
Fixing these areas boosts overall energy efficiency.
Seasonal Maintenance Tips
Air leaks aren’t constant—they can worsen or improve depending on the season. Temperature changes cause materials to expand and contract, which can create new gaps or worsen existing ones. Regular seasonal maintenance helps you stay ahead of these issues and keeps your door sealing effective all year round.
Winter Preparation
Cold weather makes air leaks more noticeable and costly. Preparing your doors before winter ensures warmth stays inside and heating costs stay under control. Small preventative steps can make a big difference in comfort during colder months.
- Inspect weatherstripping for wear
- Seal all visible gaps
- Install draft stoppers
Summer Preparation
In warmer months, air leaks can let cool air escape and hot air enter, forcing your cooling system to work harder. A quick seasonal check helps maintain indoor comfort and reduces unnecessary energy usage during peak heat.
- Check for heat leaks
- Replace dried or cracked seals
- Ensure proper door alignment
Routine Checks
Regular inspections help catch small issues before they turn into bigger problems. By checking your door every few months, you can maintain a tight seal, extend the life of materials, and ensure consistent performance throughout the year.
- Inspect every 3–6 months
- Clean seals to maintain effectiveness
- Replace materials as needed
Also Read:
Cost vs Savings: Is It Worth It?
Many homeowners hesitate to fix air leaks, assuming it might be expensive or time-consuming. In reality, most solutions are low-cost and deliver immediate returns through reduced energy bills. When you compare the small upfront investment to long-term savings, it’s clear that sealing door leaks is absolutely worth it.
Low Cost Fixes
Most air leak solutions are budget-friendly and widely available. You don’t need expensive tools or professional services to make a noticeable improvement in your home’s efficiency and comfort.
- Weatherstripping: inexpensive
- Door sweeps: affordable
- Caulking: minimal cost
Energy Savings
Sealing air leaks can reduce energy bills by up to 10–20%, depending on the severity of the leaks.
Added Benefits
Beyond saving money, fixing air leaks improves your overall living experience. It creates a quieter, cleaner, and more comfortable indoor environment for you and your family.
- Increased comfort
- Reduced noise
- Better indoor air quality
Common Mistakes to Avoid
Even though fixing air leaks is relatively simple, small mistakes can reduce the effectiveness of your efforts. Being aware of these common errors helps you avoid wasted time and ensures that your repairs last longer and perform as expected.
1. Using the Wrong Size Seal
Choosing the correct seal size is crucial for proper insulation. A poor fit can either leave gaps or make the door difficult to close, reducing both comfort and functionality.
Too thin won’t block air. Too thick prevents the door from closing properly.
2. Ignoring Door Alignment
Many people focus only on seals and forget that alignment plays a major role. Even the best weatherstripping won’t work if the door isn’t sitting correctly in the frame.
Seals won’t work if the door isn’t positioned correctly.
3. Skipping Surface Cleaning
Preparation is key when applying adhesive materials. Dirt, dust, or grease can prevent proper bonding, causing seals to peel off quickly and fail.
Adhesive strips won’t stick well to dirty surfaces.
4. Overusing Expanding Foam
Expanding foam is effective but must be used carefully. Applying too much can create pressure that distorts the frame, leading to new alignment issues.
Too much foam can warp the frame.
5. Temporary Fixes Only
Quick fixes can help in the short term, but relying on them alone won’t solve the root problem. Permanent solutions provide better long-term results and energy savings.
Draft stoppers help, but permanent sealing is more effective.
When to Call a Professional
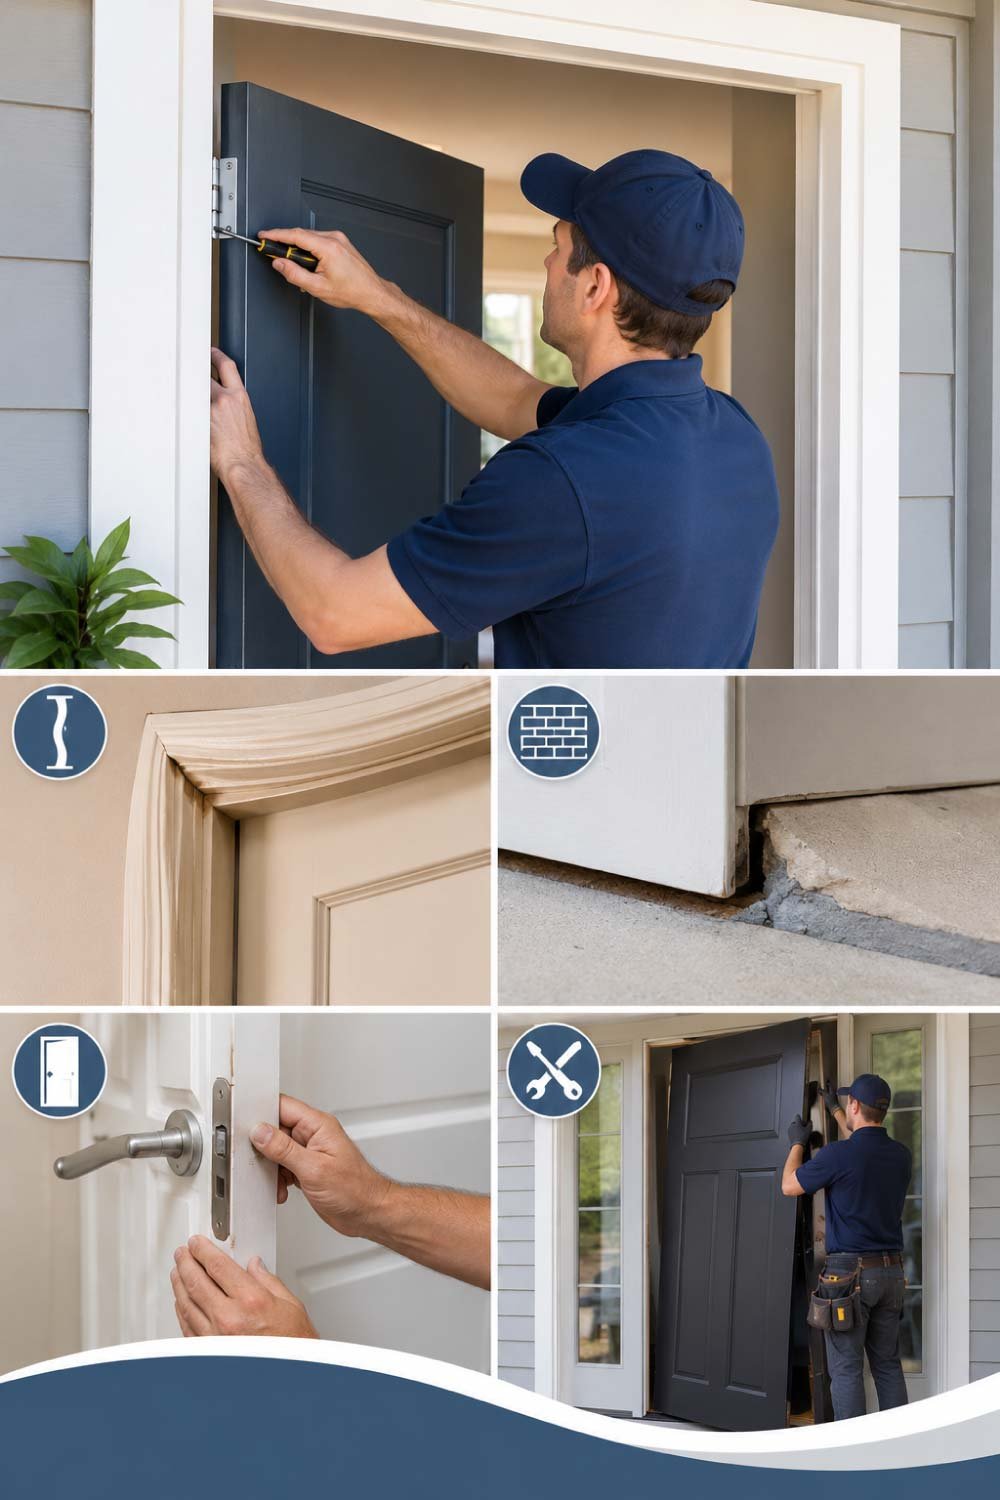
While most air leak problems can be handled with simple DIY fixes, some situations require expert attention. If the issue goes beyond basic adjustments or sealing, bringing in a professional ensures the problem is resolved safely and correctly without causing further damage.
- The door frame is severely warped
- Structural gaps are present
- The door doesn’t close properly even after adjustments
- You’re planning a full door replacement
Final Thoughts
Air leaks around doors are one of the easiest problems to fix—and one of the most rewarding. With just a little time and a few affordable materials, you can make your home more comfortable, quieter, and energy-efficient.
Start with simple steps like weatherstripping and door sweeps, then move on to sealing cracks and adjusting alignment. These small improvements add up quickly, saving you money and improving your living space year-round.
If you’ve been putting off fixing that drafty door, now’s the perfect time. A tighter seal today means lower energy bills tomorrow—and a much more comfortable home every day after that.