
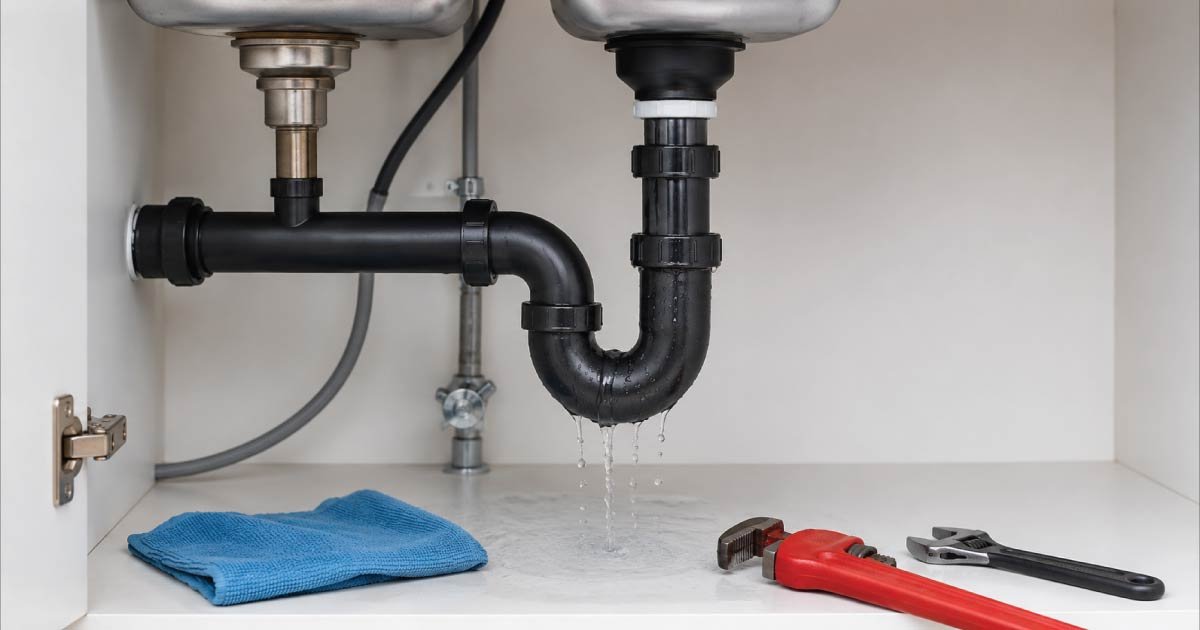
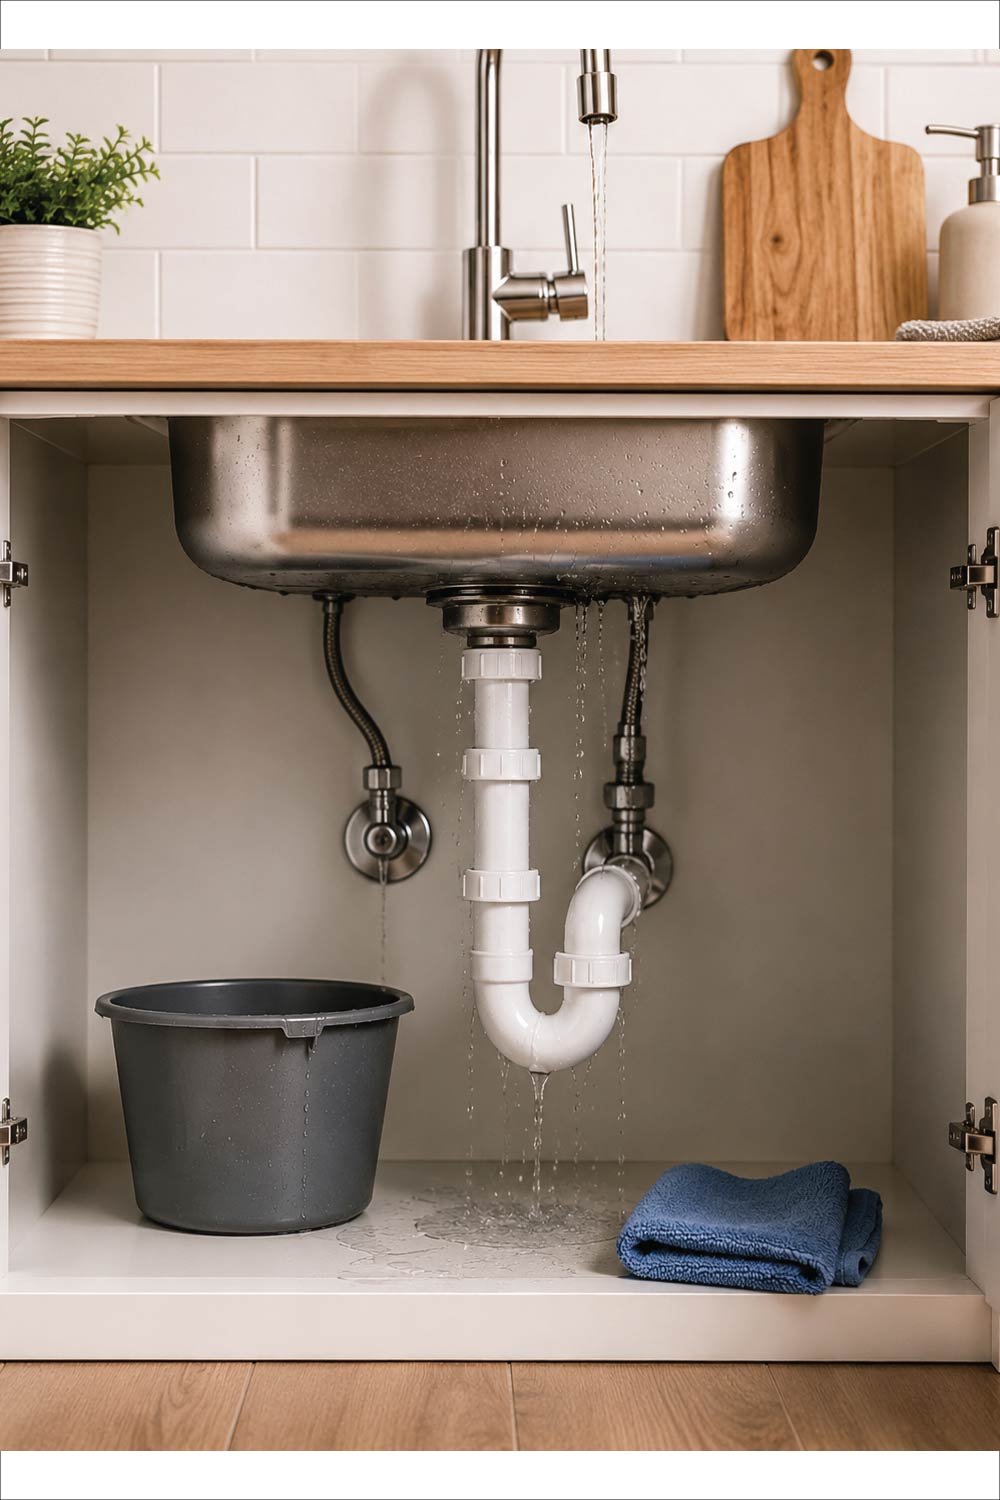
A leaking pipe under the sink is one of the most common household plumbing problems. It can start as a small drip and quickly turn into water damage, mold growth, warped cabinets, and expensive repairs if ignored. The good news is that most under-sink leaks are easy to fix, even if you have little plumbing experience.
This guide explains why pipes under the sink leak, how to identify the exact source, and step-by-step instructions to repair the problem safely and effectively.
Common Causes of Leaks Under the Sink
Under-sink leaks are usually caused by gradual wear, loose fittings, or damaged plumbing components that develop over time due to water pressure changes, corrosion, or poor installation. Identifying the exact cause early is essential because it helps you avoid unnecessary repairs and ensures the correct part is fixed instead of repeatedly guessing the problem.
Before fixing the leak, it’s important to understand what’s causing itUnderstanding the root cause of a leak before attempting repairs helps you choose the right solution and prevents wasted effort or repeated breakdowns in the plumbing system.
- Loose pipe connections
- Worn-out washers or gaskets
- Cracked or damaged pipes
- Corroded metal pipes
- Faulty P-trap connections
- Leaking shut-off valves
Knowing the cause helps you apply the correct repair instead of guessing.
Tools and Supplies You’ll Need
Repairing under-sink leaks becomes much easier when you already have the correct tools prepared in advance, as it reduces interruptions and helps you work more efficiently while preventing water damage from spreading during the repair process.
Most under-sink repairs require only basic tools:
- Adjustable wrench or channel-lock pliers
- Bucket or shallow pan
- Towels or rags
- Plumber’s tape (Teflon tape)
- Replacement washers or slip-joint nuts
- PVC cement (for glued pipes)
- Replacement pipe section (if damaged)
- Flashlight
Having everything ready will make the repair faster and cleaner.
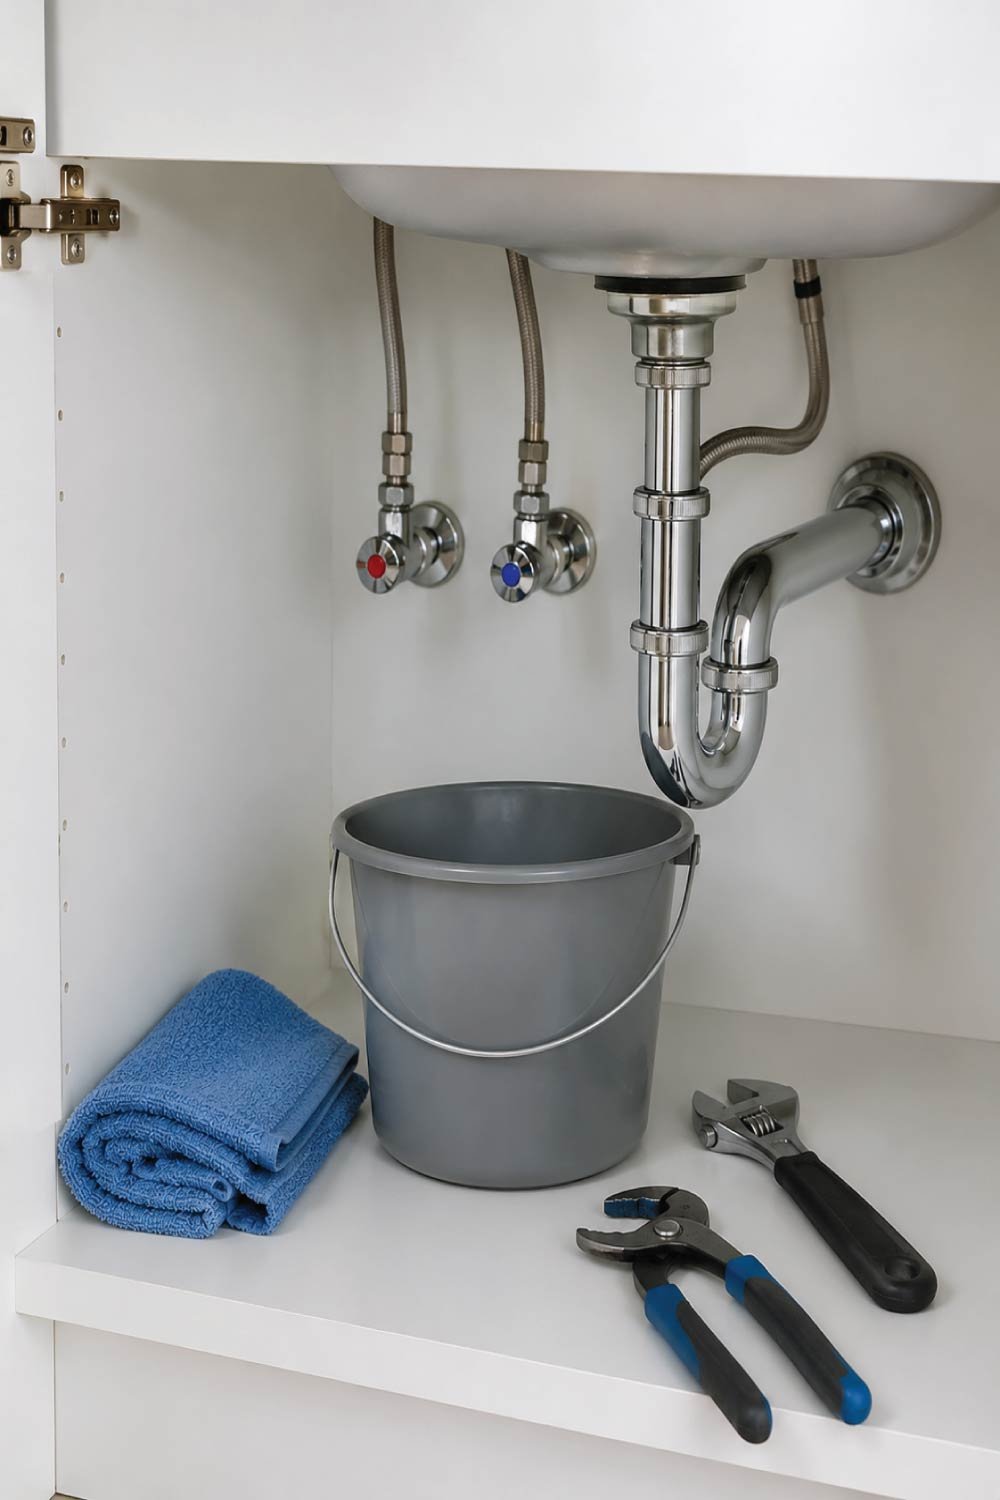
Step 1: Turn Off the Water Supply
Turning off the water supply is the most critical first step because it prevents flooding, reduces pressure in the pipes, and ensures a safe working environment while you inspect or repair any leaking components under the sink.
How to Do It
Shutting off the water correctly ensures no pressure remains in the system, making it safer and easier to inspect and repair the leaking pipes without unexpected water flow.
- Locate the hot and cold shut-off valves under the sink.
- Turn them clockwise until they stop.
- Turn on the faucet to release remaining water pressure.
- Place a bucket under the pipes to catch drips.
If the shut-off valves don’t work, you may need to turn off the main water supply to the house.
Step 2: Identify the Exact Source of the Leak
Finding the exact leak location is important because under-sink plumbing has multiple joints and connections, and misidentifying the problem can lead to unnecessary disassembly or ineffective repairs that do not solve the actual issue.
Common Leak Locations
Leaks often appear at specific weak points in the plumbing system, and checking these areas carefully helps you quickly locate the real source of the problem.
- Slip-joint connections (where pipes screw together)
- P-trap bends
- Shut-off valve connections
- Supply lines
- Cracks or pinholes in pipes
Pinpointing the leak saves time and prevents unnecessary disassembly.
Step 3: Tighten Loose Connections
Loose fittings are one of the simplest yet most common causes of under-sink leaks, and in many cases, carefully tightening the connection can completely stop the leak without needing any part replacement.
How to Fix
Proper tightening technique is important because over-tightening can damage threads or crack plastic pipes, while under-tightening may leave the leak unresolved.
- Hand-tighten the leaking connection first.
- Use a wrench to tighten slightly more (about a quarter turn).
- Do not overtighten—this can crack plastic pipes or strip threads.
Turn the water back on and check for leaks. If the leak stops, the repair is complete
Step 4: Replace Worn Washers or Slip-Joint Nuts
Worn washers or damaged slip-joint nuts often cause persistent leaks even after tightening, as the rubber loses flexibility over time and can no longer create a proper seal between pipe connections. Replacing these small components restores a tight, waterproof fit and is one of the most effective and inexpensive plumbing repairs for under-sink leaks.
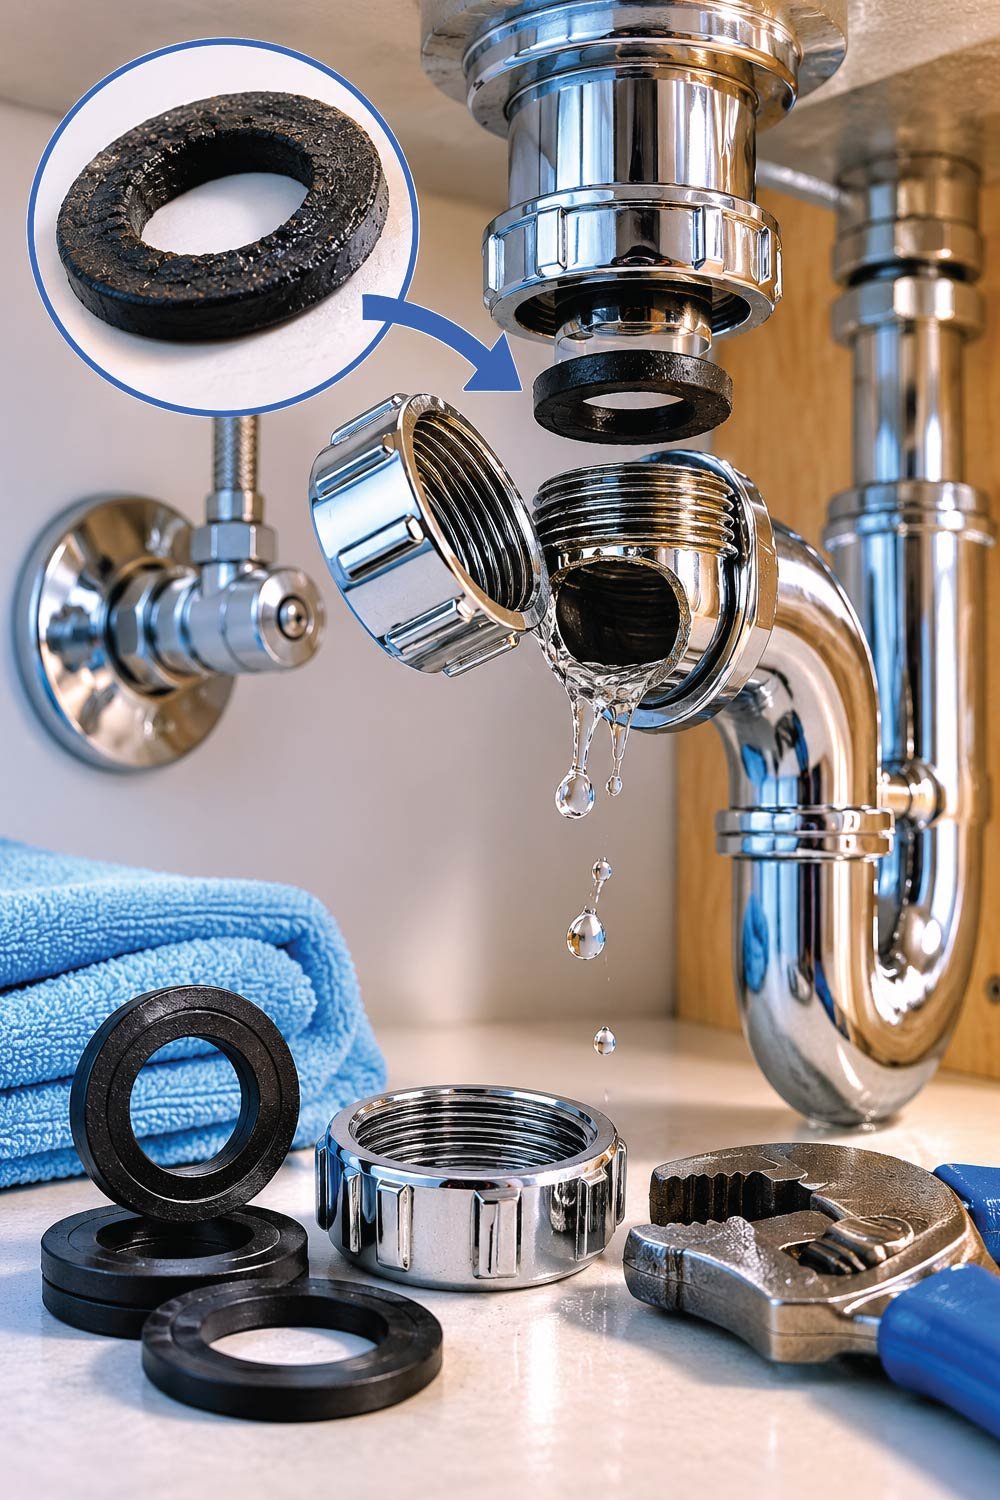
If tightening doesn’t stop the leak, the washer inside the connection may be worn or damaged.When a leak continues after tightening, the internal washer is usually the weak point, meaning it must be replaced to restore a proper seal and stop water escaping from the joint.
How to Replace a Washer
Proper replacement ensures the connection seals correctly again without damaging surrounding fittings or pipes.
- Turn off the water again.
- Unscrew the leaking connection.
- Remove the old rubber washer.
- Install a new washer of the same size.
- Reassemble the connection and hand-tighten.
- Snug gently with a wrench.
This fix resolves a large percentage of under-sink leaks.
Also Read:
Step 5: Repair or Replace the P-Trap
The P-trap is a curved section of pipe designed to prevent sewer gases from entering the home, but its shape and multiple joints make it one of the most common sources of leaks under sinks due to loosened fittings, misalignment, or aging plastic or metal material.
What to Check
Carefully inspecting the P-trap helps identify whether the issue is a simple alignment problem or a more serious crack requiring replacement.
- Cracks in the curved section
- Loose slip nuts
- Misaligned connections
Repair Options
Different issues require different fixes depending on the severity and condition of the P-trap.
- Replace washers if connections leak
- Realign the trap if it’s crooked
- Replace the entire P-trap if cracked or corroded
P-traps are inexpensive and designed for easy replacement.
Step 6: Fix Leaking Supply Lines
Supply lines deliver water from the shut-off valves to the faucet, and because they remain under constant pressure, even small wear or loose fittings can quickly lead to visible leaks that may drip continuously or damage surrounding cabinet areas if left unresolved.
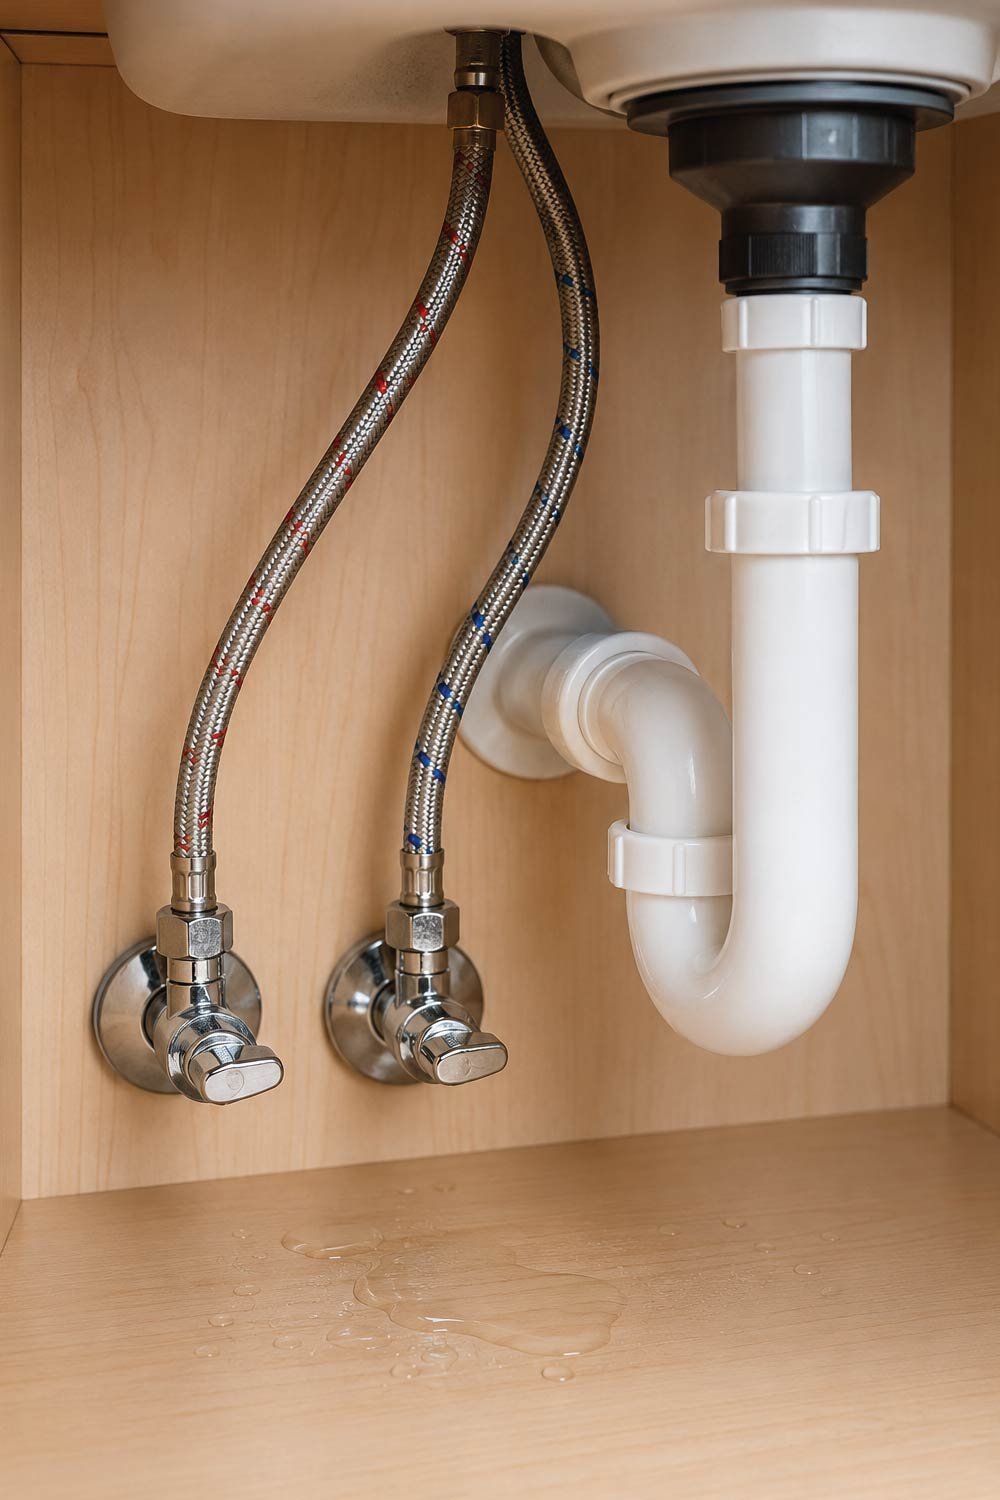
Signs of a Supply Line Leak
Recognizing early warning signs helps prevent water damage and allows for quick repair before the leak worsens.
- Water dripping near the valve or faucet base
- Moisture on the braided hose
- Corrosion at connection points
How to Fix
Correcting supply line leaks usually involves tightening or replacing the line to restore a secure, pressure-resistant connection.
- Tighten the nut connecting the supply line.
- If leaking continues, replace the supply line entirely.
- Apply plumber’s tape to threaded connections if required.
Replacing a supply line is usually safer than trying to repair a damaged one.
Also Read:
How to Fix Door Keeps Swinging Open? Stop It Fast With This Simple Fix
Step 7: Repair Small Cracks or Pinholes (Temporary Fix)
Small cracks or pinholes in pipes can sometimes be temporarily controlled using sealing materials, but these solutions are only meant to reduce immediate leakage until a full pipe replacement can be completed to ensure long-term reliability and prevent future water damage.
Temporary Options
These methods provide short-term relief but do not restore full pipe strength or durability.
- Epoxy putty
- Rubber patch with hose clamp
- Pipe repair tape
Important: These are short-term solutions only. A cracked pipe should be replaced as soon as possible.
Step 8: Replace a Damaged Pipe Section
Severely damaged pipes that are cracked, corroded, or warped cannot be reliably repaired, so replacing the affected section is the most effective long-term solution to restore proper water flow and prevent recurring leaks in the plumbing system.
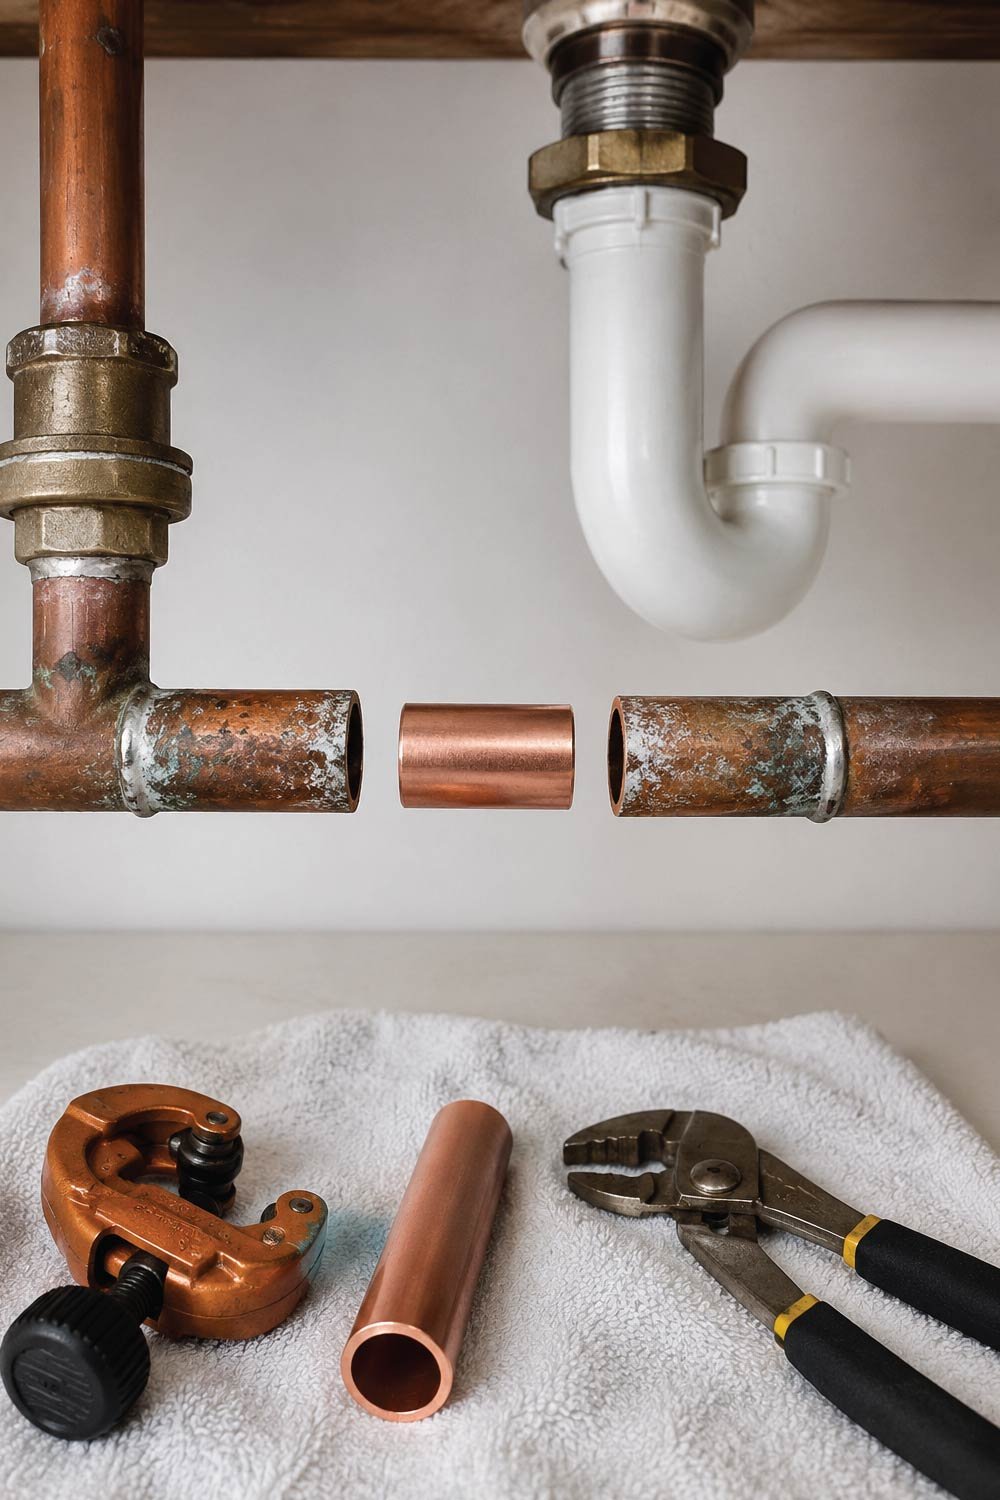
How to Replace a Pipe Section
Following a structured replacement process ensures a secure fit and prevents future leakage at connection points.
- Remove the damaged section by loosening connections or cutting it out.
- Measure the length and diameter accurately.
- Install a matching replacement pipe.
- Use slip-joint fittings or PVC cement as appropriate.
- Tighten connections and allow glue to cure if used.
Turn the water back on and inspect carefully for leaks.
Also Read:
How To Fix Loose Ceiling Fixture? Ceiling Fixture Repair Complete Guide
Step 9: Check the Shut-Off Valves
Shut-off valves control water flow to the sink, and when they wear out or develop internal seal damage, they can become a hidden source of leaks that may drip slowly but continuously, often going unnoticed until moisture or corrosion appears around the valve area.
What to Look For
Careful inspection of the valve helps identify whether the leak is coming from the stem, base, or connection points.
- Dripping from the valve stem
- Moisture at the valve base
- Corrosion around the valve
In many cases, replacing the shut-off valve is easier and more reliable than repairing it.
Step 10: Test the Repair Thoroughly
After completing all repairs, testing the system ensures that every connection is secure and no hidden leaks remain, helping confirm that the plumbing is stable and preventing future water damage inside the cabinet or surrounding areas.
Turn the water on slowly, run both hot and cold water, check all connections for leaks, and dry the area before rechecking after 10–15 minutes.
When to Call a Plumber
Some plumbing problems go beyond basic DIY repair, especially when leaks persist or structural damage is involved, and in these cases, professional intervention ensures safety, proper diagnosis, and long-lasting repair solutions.
- The leak continues after repairs
- Pipes are severely corroded
- Water is leaking inside walls or cabinets
- You can’t shut off the water
- Mold or structural damage is present
A licensed plumber can prevent further damage and ensure code-compliant repairs.
Also Read:
How to Fix a Wobbly Table? Wobbly Table Repair Complete Guide
How to Prevent Future Under-Sink Leaks
Regular maintenance and early detection are key to preventing future plumbing issues, as small leaks often begin subtly and worsen over time if not addressed quickly, leading to costly repairs and potential water damage.
- Check under sinks monthly for moisture
- Avoid overtightening fittings
- Replace plastic parts showing wear
- Clean cabinets promptly if water spills
- Address small drips immediately
Early detection prevents major plumbing failures.
Final Thoughts
Repairing a leaking pipe under the sink is a manageable DIY project for most homeowners. In many cases, the solution is as simple as tightening a fitting or replacing a washer. By following a step-by-step approach and addressing leaks promptly, you can protect your home from water damage and avoid costly repairs.
If the problem turns out to be more complex, calling a professional early is always better than waiting until damage spreads.