
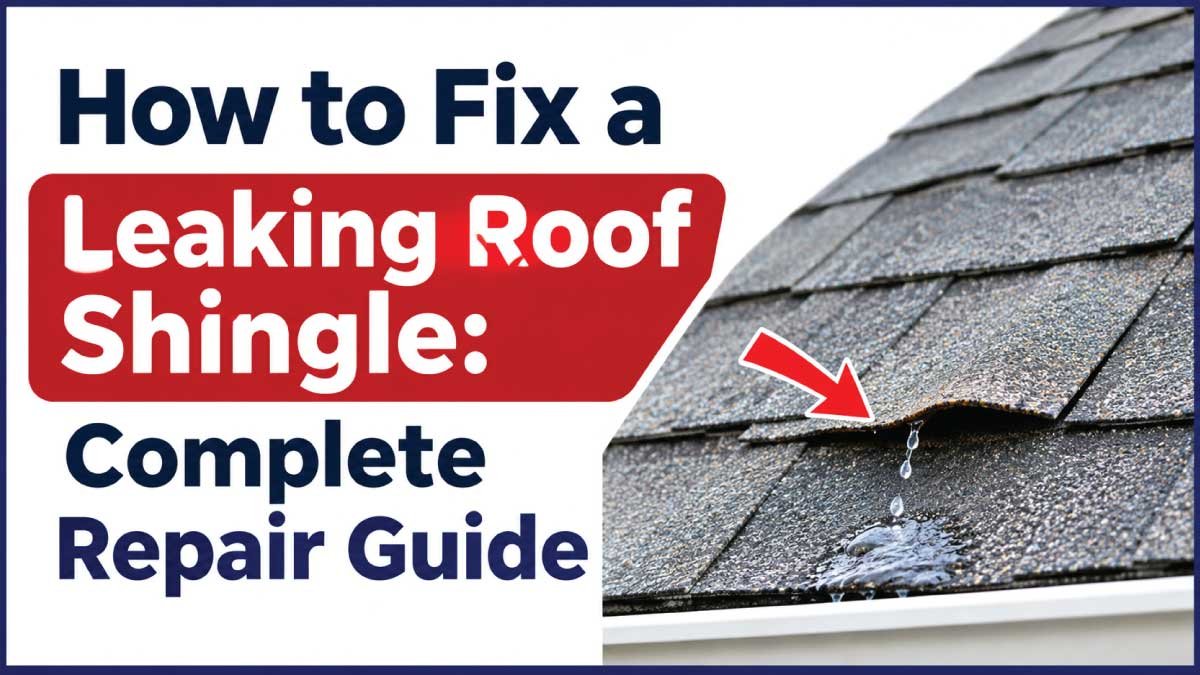
A leaking roof shingle can allow rainwater to enter your home, damage ceiling materials, soak attic insulation, and weaken wooden roof structures. Even a small opening between damaged shingles can become a serious problem during heavy rainfall or strong winds. Learning how to fix a leaking roof shingle helps homeowners identify the damage, understand suitable repair methods, and prevent further water intrusion.
Roof shingles commonly leak because of cracking, curling, missing pieces, loose roofing nails, deteriorated sealant, or damaged flashing. Sometimes, shingles appear intact from the ground but have lost their waterproof sealing strips or developed small openings underneath. These problems can allow water to reach the roof decking and eventually appear as stains or dripping inside the house.
In this comprehensive guide, you will learn how to identify a leaking roof shingle, understand its common causes, inspect damaged roofing materials, and complete suitable repairs. You will also discover when a simple repair is sufficient, when replacing shingles is necessary, and when professional roofing assistance is the safest option.
Common Signs of a Leaking Roof Shingle
A damaged shingle does not always produce an immediate indoor leak. Water may travel beneath the roofing material and along the roof decking before becoming visible inside the house. Recognizing early warning signs helps homeowners investigate the problem before moisture causes more extensive damage.
Common signs include:
- Water stains on ceilings: Brown, yellow, or dark patches may appear after rainfall, particularly on upper-floor ceilings.
- Damp attic insulation: Wet or compressed insulation can indicate that water is entering through the roof.
- Missing shingles: Empty spaces on the roof expose the underlying roofing layers to rain.
- Cracked or broken shingles: Visible cracks can allow water to pass through the roofing surface.
- Curled shingle edges: Shingles that bend upward or downward may no longer provide reliable protection.
- Loose roofing granules: Granules collecting in gutters can indicate aging or deteriorating asphalt shingles.
- Water dripping indoors: Active dripping during or after rain suggests that water has found a path through the roof.
- Mold or musty odors: Persistent moisture in the attic or ceiling cavity can encourage mold growth.
If you notice these symptoms, inspect the roof from a safe location and check the attic if it is accessible. Do not climb onto a wet, steep, or damaged roof to investigate.
How Roof Shingles Normally Prevent Water Leaks
Understanding how shingles protect a roof makes it easier to identify why a leak develops. Roof shingles are installed in overlapping rows, allowing rainwater to flow downward toward the gutters rather than entering the roof structure. Their overlapping arrangement works together with underlayment, flashing, and roof decking to create a protective roofing system.
On a typical asphalt shingle roof, each row overlaps the row below it. Roofing nails secure the shingles to the roof deck, while adhesive sealing strips help hold their lower edges in place. A waterproof underlayment beneath the shingles provides an additional layer of protection against moisture.
The main components include:
- Roof shingles: The visible outer covering that sheds rainwater.
- Underlayment: A protective layer installed beneath the shingles.
- Roof decking: The wooden or other structural surface supporting the roofing materials.
- Roofing nails: Fasteners that hold shingles securely in position.
- Flashing: Metal material installed around chimneys, vents, valleys, and roof intersections to direct water away from vulnerable areas.
- Ridge caps: Special shingles covering the roof’s upper ridge.
A leak can occur when any of these components fails. Therefore, a visible water stain does not automatically mean that the nearest shingle is responsible.
Common Causes of a Leaking Roof Shingle
Roof shingles can leak because of physical damage, incorrect installation, aging, or problems with nearby roofing components. Identifying the actual cause is essential because applying sealant to the visible area may only hide the symptom without fixing the source of the water.
1. Cracked or Broken Shingles
Cracked shingles create openings through which rainwater can enter. Cracks may develop because of aging, repeated temperature changes, impact from falling branches, or damage caused by walking on the roof.
Look for visible splits, broken corners, missing sections, or damaged edges. If a crack passes through the shingle, replacing the affected shingle is generally more reliable than covering the entire area with roofing cement.
2. Missing Shingles
Strong winds, deteriorated adhesive strips, and loose fasteners can cause shingles to detach from the roof. When a shingle is missing, the exposed area becomes more vulnerable to rainwater.
Check for an empty space in the shingle pattern or visible underlayment. Missing shingles should be replaced promptly, and the surrounding roofing materials should be inspected for additional wind damage.
3. Curling Shingle Edges
Asphalt shingles may curl as they age or become damaged by heat, moisture, and poor ventilation. Curled edges can allow wind-driven rain to move underneath the roofing material.
Look for corners that lift away from the roof surface or edges that no longer lie flat. Minor lifting on an otherwise sound shingle may sometimes be addressed with an appropriate roofing adhesive, but brittle or badly curled shingles usually need replacement.
4. Loose or Exposed Roofing Nails
Roofing nails can become loose because of incorrect installation, roof movement, or deterioration of the surrounding materials. An exposed nail may create a small opening that allows water to enter.
Inspect the roof for raised nail heads, missing fasteners, or nails that appear to have backed out. Simply covering a loose nail with sealant may not provide a durable repair. The fastener should be corrected using an appropriate roofing method.
5. Deteriorated Shingle Adhesive
Most asphalt shingles use adhesive strips to help seal overlapping edges. Heat, aging, wind, and improper installation can weaken these strips.
When the adhesive fails, shingle edges may lift during strong winds and allow rain to enter underneath. If the shingle is otherwise in good condition, suitable roofing adhesive may help restore the bond. Follow the shingle manufacturer’s instructions.
6. Damaged Roof Flashing
Sometimes, a roof leak that appears near a shingle actually originates from damaged flashing. Flashing is commonly installed around chimneys, skylights, plumbing vents, valleys, and roof-wall connections.
Look for visible gaps, rust, loose metal, cracked sealant, or damaged flashing edges from a safe viewing position. Flashing repairs often require roofing experience because incorrect installation can direct water into the roof structure.
7. Aging or Worn-Out Shingles
Asphalt shingles gradually lose protective granules and become less flexible. Older shingles may develop cracks, thin areas, or weak sealing strips.
If several shingles are deteriorating across the roof, replacing only one may not solve the larger problem. Widespread wear may indicate that the roof needs professional assessment or replacement.
Safety Precautions Before Repairing a Leaking Roof Shingle
Roof repairs involve serious fall and injury risks. Even a low roof can be dangerous, particularly when its surface is wet, covered with dust, or affected by loose roofing materials. Before attempting any repair, decide whether the work can be completed safely from the ground, attic, or another protected position.
Follow these precautions:
- Never walk on a wet, icy, or windy roof.
- Avoid working on steep roofs or roofs with damaged decking.
- Do not climb a ladder without stable ground, proper positioning, and another person nearby.
- Use appropriate fall protection when roof access is unavoidable.
- Wear slip-resistant footwear, gloves, and eye protection.
- Keep electrical wires and overhead power lines away from ladders and tools.
- Do not step on skylights, fragile roofing panels, or slate and tile shingles.
- Stop immediately if the roof feels unstable or you notice soft areas.
- Avoid working during thunderstorms or when rain is expected.
If the roof is high, steep, fragile, or difficult to access, hire a qualified roofer. You can often identify the likely problem through attic inspection and ground-level observation without climbing onto the roof.
Tools and Materials Needed to Repair a Leaking Roof Shingle
The correct tools depend on the type of shingle and the extent of the damage. A minor repair may require only an approved roofing adhesive, while replacing a damaged asphalt shingle requires additional tools and a matching replacement. Gather the necessary materials before beginning any work.
| Tool or Material | Purpose |
|---|---|
| Replacement shingle | Replaces a cracked, missing, or badly damaged shingle |
| Roofing nails | Secures replacement shingles |
| Roofing hammer | Installs roofing nails |
| Flat pry bar | Carefully separates overlapping shingles |
| Roofing adhesive | Bonds lifted shingle edges when appropriate |
| Roofing cement | Seals certain small gaps or compatible repair areas |
| Utility knife | Cuts roofing materials when necessary |
| Measuring tape | Checks shingle dimensions |
| Work gloves | Protects hands from sharp edges |
| Safety glasses | Protects eyes during repair |
| Ladder and fall protection | Provides controlled access when professionally appropriate |
Use materials compatible with the existing roofing system. Do not assume that every sealant or adhesive is suitable for every shingle type.
How to Find the Exact Source of a Roof Shingle Leak
Before repairing anything, determine where water is entering. The point where water appears inside the house may be several feet away from the actual roof opening because moisture can travel along rafters, decking, insulation, and other surfaces.
Begin by examining the ceiling and attic from a safe position. Look for damp wood, water trails, wet insulation, and dark stains. If the attic is accessible, use a flashlight to inspect the underside of the roof decking, especially after rainfall.
Next, inspect the exterior from the ground using binoculars or a camera with zoom. Look for missing shingles, lifted edges, cracked surfaces, damaged flashing, and unusual gaps.
If the source remains unclear, consider these checks:
- Identify the indoor leak location: Note where water stains or dripping appear.
- Inspect the attic: Look for the highest visible point of moisture or water staining.
- Check nearby roof features: Examine areas around vents, chimneys, valleys, and skylights from a safe position.
- Observe the roof surface: Look for visible shingle damage without walking on the roof.
- Compare the findings: Consider whether the suspected shingle is directly above or near the water trail.
Do not spray water onto the roof or ask someone to stand beneath an actively leaking ceiling during testing. If the source is difficult to locate, a roofing professional can perform a controlled inspection.
Step-by-Step Guide to Fix a Leaking Roof Shingle
The correct repair depends on whether the shingle is slightly lifted, cracked, missing, or completely deteriorated. The following procedure focuses on common asphalt shingles. Other materials, including slate, tile, metal, and wood shingles, require different repair techniques.
Step 1: Inspect the Damaged Shingle
Start by identifying the damaged area and determining whether the shingle can be repaired or needs replacement. From the ground, look for missing pieces, cracks, curling edges, or raised corners.
If a professional or appropriately protected person performs a closer inspection, the shingle should be checked for brittleness, loose nails, and damage to the surrounding rows.
A small lifted edge on a flexible shingle may be repairable. A cracked, broken, or badly deteriorated shingle generally needs replacement.
Step 2: Check the Surrounding Shingles
A leaking shingle may not be the only damaged part of the roof. Nearby shingles can also have loose edges, missing granules, or weakened adhesive strips.
Inspect the rows above and beside the affected area. Pay particular attention to overlapping sections because water can travel beneath several shingles before reaching the roof deck.
If multiple shingles are damaged, replacing only the most visible one may not provide a lasting solution.
Step 3: Clean the Repair Area
Before applying roofing adhesive or completing a replacement, the repair surface must be clean and dry. Dirt, loose granules, leaves, and moisture can prevent roofing materials from bonding correctly.
Remove loose debris without scraping away the protective granules or damaging surrounding shingles. Never attempt to clean a roof by walking on fragile or wet roofing materials.
If the area is damp, allow it to dry before using products that require a dry surface.
Step 4: Repair a Slightly Lifted Shingle
If an asphalt shingle is intact, flexible, and only slightly lifted, it may be possible to secure it with an adhesive approved by the manufacturer.
A suitable repair generally involves carefully lifting the loose edge, applying a small amount of compatible roofing adhesive beneath it, and gently pressing the shingle into position. Follow the product instructions for application and curing time.
Avoid using excessive adhesive. Large amounts can prevent proper drainage, create visible lumps, or interfere with the overlapping arrangement.
If the shingle is brittle, cracked, or badly curled, replace it instead of trying to force it flat.
Step 5: Replace a Cracked or Broken Shingle
A damaged asphalt shingle should generally be replaced rather than covered with a thick layer of roofing cement.
On a dry, low-slope roof that can be accessed safely with proper fall protection, the replacement process usually involves carefully separating the damaged shingle from the overlapping row above it. The roofing nails securing it are removed, and the damaged piece is slid out without tearing the surrounding shingles.
Measure the replacement shingle and select one that matches the existing material as closely as possible. Slide it into the correct position, align its edges with the neighboring shingles, and secure it using the nail placement specified by the manufacturer.
The nails must be positioned correctly and should not be driven too deeply or left raised. Incorrect fastening can create new leak points.
Finally, check that the replacement shingle lies flat and that its edges overlap the lower row correctly. If the surrounding shingles are brittle or cannot be lifted without breaking, stop and contact a roofer.
Step 6: Replace a Missing Shingle
A missing shingle leaves the underlying roofing layers exposed to rain and wind. Replacement should be completed as soon as practical, but the area must be inspected first to determine whether the underlayment or roof decking has also been damaged.
A professional roofer will select a compatible replacement, position it in the correct overlapping pattern, and fasten it according to the roofing manufacturer’s requirements.
If the exposed area has wet or deteriorated decking, simply installing another shingle will not correct the underlying problem. The damaged roofing layers may need repair before the replacement is installed.
Step 7: Check Roofing Nails and Fasteners
Raised or incorrectly installed nails can allow water to enter beneath the shingles. They can also prevent the roofing material from lying flat.
A roofer should check whether the fastener has loosened, whether the shingle is torn around the nail, and whether the surrounding material remains sound.
The appropriate repair may involve removing an incorrect fastener, securing the shingle correctly, and sealing compatible openings according to roofing specifications. Covering every exposed nail with random sealant is not a substitute for correct fastening.
Step 8: Inspect Flashing and Nearby Roof Components
After addressing the suspected shingle, inspect nearby flashing, roof valleys, vents, and other roof penetrations. These components can be responsible for leaks that appear close to a damaged shingle.
Look for rust, gaps, displaced metal, cracked sealant, or loose connections from a safe location. Flashing should be repaired or replaced using the correct installation method rather than covered with a temporary layer of roofing cement.
Step 9: Check the Repair
Once the repair is complete and all materials have cured as directed, check that the replacement shingle is aligned and securely positioned. Confirm that the overlapping edges remain intact and that no fasteners are exposed incorrectly.
After the next rainfall, inspect the attic and ceiling for signs of continuing moisture. Do not assume the repair has succeeded simply because the area looks dry immediately afterward.
If water continues to enter, the original leak may have been misidentified or another roofing component may also be damaged.
Also Read:
Quick Diagnosis Table for a Leaking Roof Shingle
Different types of shingle damage require different repair methods. The following table helps identify common problems and the most appropriate next step.
| Visible Problem | Possible Cause | Recommended Action |
|---|---|---|
| Slightly lifted edge | Failed adhesive strip | Use compatible roofing adhesive if the shingle is sound |
| Cracked shingle | Aging or impact damage | Replace the damaged shingle |
| Missing shingle | Wind or failed fastening | Install a compatible replacement |
| Raised nail head | Loose or incorrect fastening | Correct the fastener and inspect the shingle |
| Curled corners | Aging or moisture damage | Replace deteriorated shingles |
| Water near chimney | Flashing failure | Arrange a flashing inspection |
| Several damaged shingles | Widespread roof deterioration | Request a professional roof assessment |
| Wet roof decking | Water penetration or underlayment damage | Repair the underlying roofing layers |
How to Fix a Leaking Roof Shingle Without Replacing It
Not every shingle problem requires complete replacement. If an asphalt shingle is still flexible, structurally sound, and only slightly lifted, an appropriate roofing adhesive may restore its position. However, this approach is not suitable for broken, missing, or severely deteriorated shingles.
For a minor lifted edge, the repair generally involves cleaning and drying the area, applying a compatible adhesive beneath the loose section, and gently pressing it down. The adhesive should be applied in the quantity and pattern recommended by its manufacturer.
Small compatible openings around certain roofing components may sometimes be sealed with roofing cement, but sealant should not be used as a general solution for damaged shingles or failed flashing.
Avoid these temporary repair practices:
- Applying household glue to roofing materials.
- Covering an entire shingle with thick roofing cement.
- Using ordinary silicone without confirming compatibility.
- Driving random nails through the visible surface.
- Placing new shingles over damaged materials without inspecting the underlying roof.
- Applying adhesive to wet or dirty surfaces.
A repair product cannot restore the strength of a shingle that has become brittle or broken. Replacement is usually the better option when the roofing material has lost its structural integrity.
Also Read:
How to Fix a Roof Shingle Leak During Rain
An active roof leak during rainfall requires immediate attention, but attempting to climb onto a wet roof is extremely dangerous. The priority is to protect the interior and reduce damage until the roof can be inspected safely.
Place a bucket beneath the leak and move furniture, electronics, and other belongings away from the affected area. If water is collecting in a ceiling bulge, stay clear of the area and contact a qualified professional. A water-filled ceiling can collapse unexpectedly.
If water is near electrical fixtures, switches, or wiring, avoid touching the affected equipment. If it is safe to do so, turn off power to the affected circuit from a dry and accessible electrical panel. Contact an electrician if water has entered electrical components.
Use temporary interior protection where appropriate, but do not attempt an exterior roof repair during rain or strong winds. A professional roofer can determine whether an emergency covering or other temporary weather protection is suitable.
Permanent shingle repairs should be completed only after conditions are safe and the roof structure has been inspected.
Also Read:
Advanced Troubleshooting for Persistent Roof Shingle Leaks
Some roof leaks continue even after a visibly damaged shingle has been replaced. This often happens because the water is entering through another part of the roofing system or because hidden damage was not corrected during the original repair.
Consider the following possibilities when a leak returns:
Damaged Underlayment: Underlayment provides secondary protection beneath shingles. If it has torn, deteriorated, or separated, water may continue entering even after the outer shingle is replaced.
Roof Valley Problems: Valleys collect water from two roof sections. Poor installation, damaged valley materials, or accumulated debris can cause leaks near nearby shingles.
Incorrect Nail Placement: Nails installed too high, too low, or outside the recommended fastening area may leave vulnerable openings. Incorrectly driven nails can also damage shingles.
Roof Vent Problems: Plumbing vents and other roof penetrations use flashing or specialized boots to prevent water entry. Cracked rubber boots or loose flashing can cause leaks that appear to originate from nearby shingles.
Damaged Roof Decking: Prolonged moisture can weaken the roof deck. New shingles installed over soft or deteriorated decking may not remain secure.
Condensation in the Attic: Not every attic moisture problem comes from a roof leak. Poor ventilation, indoor humidity, and inadequate vapor control can create condensation that resembles water penetration.
If the cause remains uncertain, a professional inspection is more effective than repeatedly applying sealant to different areas.
Also Read:
When Is Replacing the Entire Roof Better Than Repairing Shingles?
Replacing one damaged shingle is usually reasonable when the rest of the roof is in good condition. However, repeated leaks, widespread deterioration, and extensive shingle damage may indicate that individual repairs are no longer cost-effective.
Consider a professional roof replacement assessment when:
- Many shingles are cracked, missing, or curling.
- Granules have worn away across large roof sections.
- Several leaks have appeared in different locations.
- The roof decking has widespread moisture damage.
- Previous repairs have repeatedly failed.
- Shingles have become too brittle to handle without breaking.
- The roofing system has reached the end of its expected service life.
The age of the roof alone does not determine whether replacement is necessary. Its condition, installation quality, climate exposure, and maintenance history should also be considered.
Preventive Maintenance to Avoid Roof Shingle Leaks
Regular roof maintenance helps identify small problems before they develop into expensive water damage. Shingles are exposed to sunlight, temperature changes, rain, wind, and debris throughout the year, so periodic inspection is important.
Follow these maintenance practices:
- Inspect the roof periodically: Check for missing, cracked, or lifted shingles from the ground.
- Clean gutters: Remove leaves and debris so rainwater can drain away properly.
- Trim overhanging branches: Reduce the risk of falling branches and repeated contact with shingles.
- Check attic conditions: Look for moisture stains, wet insulation, and signs of condensation.
- Inspect roof flashing: Have flashing around chimneys, vents, and skylights checked when maintenance is performed.
- Avoid unnecessary roof traffic: Walking on shingles can crack or displace them.
- Address minor damage early: Arrange repairs when you first notice missing or lifted shingles.
- Maintain proper ventilation: Suitable attic ventilation can help reduce excessive heat and moisture.
- Use compatible roofing materials: Replacement shingles and repair products should match the existing roofing system.
A consistent maintenance routine can extend the useful life of a roof and reduce the likelihood of unexpected leaks.
Common Mistakes to Avoid When Repairing a Leaking Roof Shingle
Roof repairs can fail when the wrong materials or methods are used. A repair that appears effective initially may allow water to enter again after several rainfall cycles. Understanding common mistakes helps homeowners avoid unnecessary damage and repair expenses.
Using Too Much Roofing Cement: Excessive roofing cement can interfere with water drainage and create an uneven surface. Use only compatible products in the amounts recommended by the manufacturer.
Repairing Wet Shingles: Adhesives and sealants may not bond correctly to wet or dirty surfaces. Wait for suitable conditions before completing a permanent repair.
Ignoring the Underlying Damage: Replacing a visible shingle without checking the underlayment or roof decking may leave the actual source of the leak unresolved.
Using the Wrong Replacement Shingle: Shingles differ in size, material, thickness, and design. An incompatible replacement may not fit or overlap correctly.
Driving Nails Incorrectly: Overdriven, exposed, or misplaced nails can damage shingles and create additional leak points.
Ignoring Flashing: A leak near a shingle may originate from flashing around a vent, chimney, or roof valley. Always consider nearby roofing components.
Climbing an Unsafe Roof: Attempting a repair on a steep or wet roof can result in serious injury. Professional assistance is the safer choice when access is difficult.
When to Call a Professional Roofer
Some minor asphalt shingle problems may be straightforward to address, but many roof repairs require specialized knowledge and safe working equipment. A professional roofer can inspect the complete roofing system, identify hidden damage, and recommend a repair that addresses the actual source of the leak.
Contact a roofing professional when:
- The roof is steep, high, wet, or difficult to access.
- Several shingles are missing or damaged.
- The roof decking feels soft or shows signs of rot.
- Water continues entering after a previous repair.
- Flashing around chimneys, skylights, or vents is damaged.
- The roof uses slate, tile, or another fragile material.
- Water has entered electrical areas or caused ceiling damage.
- You cannot identify the source of the leak.
Ask the contractor to explain what caused the leak, which materials need replacement, and whether the underlayment or decking is affected. A written estimate can help you compare repair options and avoid paying for unnecessary work.
Estimated Cost to Repair a Leaking Roof Shingle
The cost of repairing a leaking roof shingle depends on the type of roofing material, the number of damaged shingles, roof accessibility, labor rates, and whether hidden damage is present. A small repair may be inexpensive, while replacing shingles and repairing damaged decking can increase the total cost.
The following figures are broad illustrative estimates in US dollars, not guaranteed local prices. Actual costs vary by location, contractor, materials, and project conditions.
| Repair Type | Estimated Cost |
|---|---|
| Minor lifted-shingle repair | $75–$200 |
| Replacement of one or a few asphalt shingles | $100–$300 |
| Small section of damaged shingles | $200–$600 |
| Roofing nail or minor fastening repair | $100–$250 |
| Small flashing repair | $150–$500 |
| Underlayment repair | $200–$700 |
| Localized roof decking repair | $300–$1,000 or more |
| Larger roof leak repair | $500–$1,500 or more |
A contractor may charge a minimum service fee even when only one shingle needs attention. If the leak has damaged insulation, ceilings, or interior finishes, those repairs may be billed separately.
Before approving the work, ask whether the estimate includes replacement materials, labor, inspection, cleanup, and any necessary repairs to the underlying roof structure.
Frequently Asked Questions
1. Can I fix a leaking roof shingle myself?
Yes, a homeowner may be able to repair a minor lifted asphalt shingle if the roof is low-slope, dry, and safely accessible with appropriate protection. However, cracked or missing shingles usually require replacement, and hidden damage may need professional attention. Avoid climbing onto steep, wet, or fragile roofs.
2. What is the best way to seal a leaking roof shingle?
The best method depends on the damage. A slightly lifted but otherwise sound asphalt shingle may be secured with a compatible roofing adhesive. A cracked or missing shingle generally needs replacement. Roofing cement should not be used as a universal solution because excessive or incorrect application can interfere with proper drainage.
3. Can roofing cement stop a roof shingle leak?
Roofing cement can help seal certain small, compatible repair areas, but it cannot reliably repair every type of shingle damage. It should not replace a damaged shingle, correct failed flashing, or repair deteriorated roof decking. Always use a product designed for the roofing material and follow its application instructions.
4. Why does my roof leak even though the shingles look fine?
A roof can leak even when the visible shingles appear undamaged. Water may enter through failed flashing, roof valleys, damaged underlayment, exposed nails, or roof penetrations. It can then travel along the decking before appearing inside. A professional inspection may be needed to locate the actual entry point.
5. How long does it take to repair a leaking roof shingle?
A straightforward replacement of one asphalt shingle may take a professional roofer less than an hour once the area is safely accessible. More extensive repairs can take several hours or longer, especially if flashing, underlayment, or roof decking is damaged. Weather conditions and material availability can also affect completion time.
6. Should I replace one damaged shingle or the entire roof?
Replacing one shingle is generally suitable when the surrounding roof remains in good condition. However, widespread curling, cracking, missing granules, repeated leaks, or deteriorated decking may indicate a larger roofing problem. A professional inspection can help determine whether individual repairs or full replacement offers better long-term value.
7. Can a missing roof shingle cause water damage inside my house?
Yes, a missing shingle can expose the underlayment and roof decking to rainwater. If the protective layers are damaged or water moves beneath the surrounding shingles, moisture can reach attic insulation, ceiling materials, and wooden structures. Replace missing shingles promptly and inspect the underlying roof for damage.
8. How can I temporarily stop a roof shingle leak?
During rainfall, protect the interior by placing a container beneath the leak and moving belongings away from the affected area. Do not climb onto the wet roof. A professional may install temporary exterior protection when conditions are safe. Permanent repairs should be completed after the roof has been properly inspected.
9. How often should I inspect my roof shingles?
Inspect your roof from the ground at least twice a year and after major storms or strong winds. Look for missing shingles, lifted edges, damaged flashing, and debris in gutters. If you notice indoor water stains or attic moisture, arrange an inspection promptly rather than waiting for the next scheduled maintenance check.
Final Thoughts on How to Fix a Leaking Roof Shingle
Fixing a leaking roof shingle begins with identifying the actual source of water entry and determining whether the damage is limited to one shingle or involves other roofing components. Slightly lifted asphalt shingles may sometimes be secured with compatible roofing adhesive, while cracked, missing, or badly deteriorated shingles generally require replacement.
The most important part of a lasting repair is addressing the underlying problem. Damaged underlayment, loose fasteners, failed flashing, and deteriorated roof decking can all cause leaks even after a visible shingle has been repaired. Inspect the attic and surrounding roof components whenever possible, and check the repair after the next rainfall.
Always put safety first. Roof work can be dangerous, particularly on steep, wet, or fragile surfaces. If you cannot access the damaged area safely or the leak continues after a repair, contact a qualified roofer. Prompt inspection, suitable materials, and regular maintenance can help protect your roof and prevent more expensive water damage.