
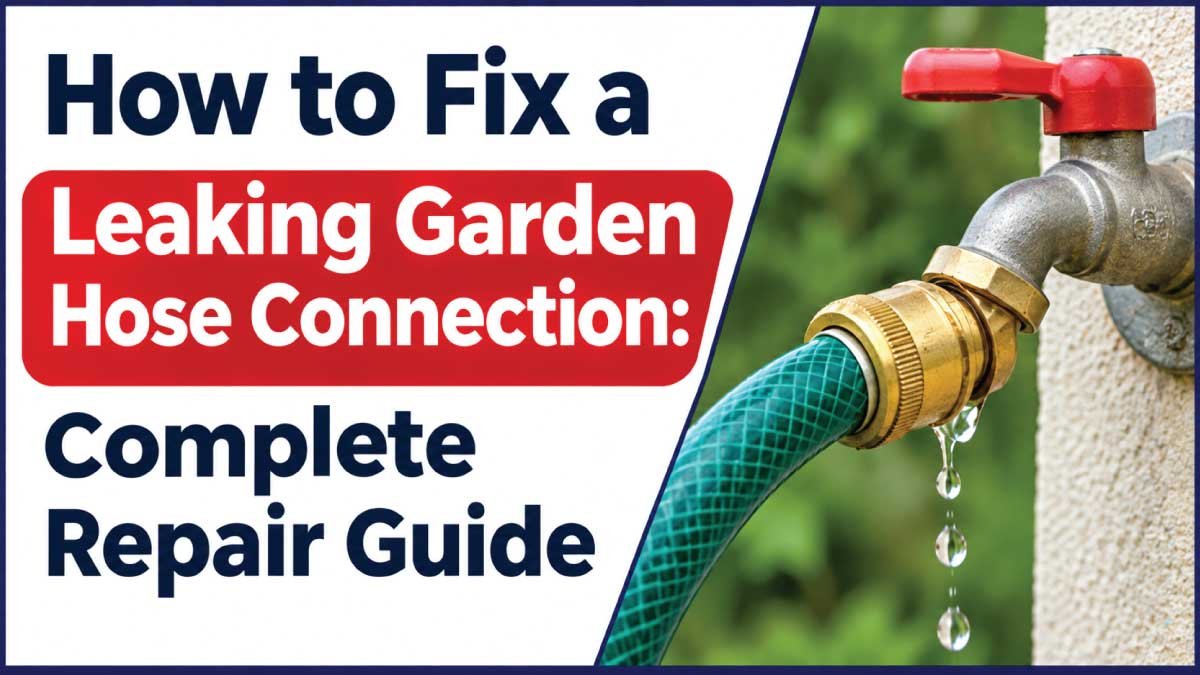
A leaking garden hose connection can waste water, reduce water pressure, and make ordinary outdoor tasks frustrating. You may notice water spraying from the point where the hose connects to an outdoor faucet, dripping around the hose coupling, or leaking where two garden hoses are joined together. Although these problems often look similar, the underlying causes can be different. A worn rubber washer, loose connector, damaged hose end, cracked fitting, or cross-threaded connection may be responsible.
The good news is that most garden hose connection leaks are inexpensive to repair. In many cases, replacing a small rubber washer or correctly tightening the coupling is enough to stop the leak. However, if the connector is cracked or the hose end is damaged, replacing the fitting may be necessary.
This guide explains how garden hose connections work, how to identify the source of a leak, and how to repair common connection problems step by step. You will also learn which tools and replacement parts are useful, which mistakes to avoid, and when replacing the hose or contacting a professional is the better option.
Common Signs of a Leaking Garden Hose Connection
Identifying the exact location and behavior of the leak helps you choose the correct repair. Before replacing parts, turn on the water briefly and observe where it escapes.
Water Dripping Around the Hose Coupling
One of the most common signs is water dripping from the threaded connection between the garden hose and faucet. You may notice drops forming around the edge of the connector shortly after turning on the water.
This usually indicates a worn, missing, incorrectly seated, or damaged rubber washer. It can also happen when the coupling is not properly tightened.
Water Spraying From the Connector
A small gap between the hose connector and faucet can allow water to spray outward under pressure. This may happen when the connection is loose, cross-threaded, or fitted with a damaged washer.
If water sprays from one side of the connection rather than dripping evenly, inspect the threads and washer alignment carefully.
Leakage Where Two Hoses Connect
If you use a hose connector to join two garden hoses, water may escape from the middle connection. The problem may be caused by worn washers, damaged coupling threads, or an incompatible connector.
Water Escaping Near the Hose End
Sometimes the leak appears close to the connector but actually comes from the hose itself. A split, cracked, or weakened hose end may allow water to escape just behind the coupling.
Look for swelling, visible cracks, loose material, or water emerging from underneath the connector.
Reduced Water Pressure
A leaking connection can release water before it reaches the spray nozzle or sprinkler. You may notice weaker water flow, particularly when the connection has a large gap or the hose has additional damage.
Reduced pressure can also have other causes, so inspect the entire hose before assuming the connector is responsible.
How a Garden Hose Connection Works
A standard garden hose connection uses a threaded coupling and a rubber washer to create a watertight seal. The hose fitting typically has internal threads that screw onto the external threads of an outdoor faucet, spray nozzle, or another hose connector.
The rubber washer sits inside the female hose coupling. When the connector is tightened, the washer is compressed against the flat sealing surface of the connected fitting. This compression prevents water from escaping through the connection.
The threads mainly hold the two fittings together and provide the force needed to compress the washer. The washer, rather than the threads themselves, normally creates the watertight seal.
This distinction is important because many people try to fix a leaking garden hose connection by wrapping the threads with plumber’s tape. However, tape generally does not solve a problem caused by a missing or damaged hose washer.
Garden hose fittings are available in different materials, including plastic, brass, aluminum, and stainless steel. Most common household garden hoses use standard garden hose thread connections, but some imported or specialty products may use different fittings.
Common Causes of a Leaking Garden Hose Connection
Understanding the cause prevents unnecessary replacement of an otherwise usable hose.
Worn or Damaged Rubber Washer
The rubber washer is one of the most important parts of a garden hose connection. Over time, repeated compression, sunlight, temperature changes, and general wear can make it hard, flattened, cracked, or brittle.
A damaged washer may no longer create an even seal. Water then escapes between the coupling and the faucet or connector.
Replacing the washer is usually the simplest and least expensive repair.
Missing or Incorrectly Installed Washer
A washer may fall out when a hose is disconnected, especially if it has become loose or stuck to the faucet. If the hose is reconnected without a washer, water will almost certainly leak.
A washer can also become tilted or trapped against the side of the coupling. This prevents it from sealing evenly.
Loose Hose Connector
A connector that is not tightened sufficiently may allow water to escape around the sealing surface. This can happen when the hose is installed quickly or becomes loose after repeated movement.
However, excessive tightening is not the solution. It can damage plastic threads, deform the washer, or crack the coupling.
Cross-Threaded Connection
Cross-threading occurs when the connector is attached at an incorrect angle and its threads do not line up properly.
The coupling may feel tight after only a few turns, even though it has not seated correctly. This can leave a gap through which water escapes.
Forcing a cross-threaded connector can permanently damage the fitting.
Cracked or Damaged Hose Coupling
Plastic and metal hose connectors can become damaged through impact, repeated tightening, corrosion, or exposure to outdoor conditions.
A small crack may remain difficult to see when the hose is dry. Once water pressure builds, the crack can allow water to escape.
A cracked coupling generally needs replacement rather than tightening.
Damaged Faucet Threads
The outdoor faucet itself may have damaged, corroded, or worn threads. If the hose connector cannot screw on smoothly or remains loose despite having a good washer, inspect the faucet outlet.
Damaged faucet threads may require professional repair or replacement of the faucet.
Incorrect or Incompatible Connector
Not every hose fitting is designed to connect directly to every outdoor water outlet. Specialty connectors, quick-connect fittings, and imported hose systems may use different connection designs.
An incompatible fitting may appear to attach but fail to create a reliable seal.
Safety Precautions Before Repairing a Garden Hose Connection
Garden hose repairs are generally straightforward, but a few precautions can prevent damage and unnecessary water exposure.
- Turn off the outdoor faucet before removing the hose connector.
- Release pressure by squeezing the spray nozzle or opening the hose outlet after shutting off the water.
- Avoid forcing a connector that feels stuck or misaligned.
- Do not use pliers aggressively on plastic fittings.
- Wear gloves if the connector has sharp edges, corrosion, or damaged metal.
- Keep electrical extension cords, outdoor power tools, and electrical equipment away from leaking water.
- Check that the replacement washer and connector are suitable for the hose fitting.
- Avoid using excessive tightening force, particularly on plastic connectors.
If the outdoor faucet is damaged, leaking from its body, or cannot be shut off properly, address that problem before continuing with the hose repair.
Tools and Materials Needed
Most garden hose connection repairs require only a few inexpensive items. Gather the necessary supplies before starting.
| Tool or Material | Purpose |
|---|---|
| Replacement hose washer | Restores the watertight seal |
| Adjustable pliers | Helps loosen stubborn metal connectors |
| Soft cloth | Cleans the sealing surfaces |
| Small brush | Removes dirt and debris |
| Replacement hose connector | Replaces a cracked or damaged coupling |
| Utility knife | Cuts damaged hose ends when appropriate |
| Hose repair kit | Provides replacement fittings and clamps |
| Screwdriver | Tightens certain repair-kit clamps |
| Silicone-based lubricant | Helps seat compatible rubber washers |
| Bucket or towel | Collects water during repair |
You may not need every item. If the problem is simply a missing or worn washer, a replacement washer and cleaning cloth may be enough.
How to Fix a Leaking Garden Hose Connection Step by Step
Follow these steps to identify and repair the most common connection leaks.
Step 1: Turn Off the Water Supply
Begin by closing the outdoor faucet completely. If the hose is connected to a separate water supply valve, shut that valve off as well.
Next, squeeze the spray nozzle or open the hose outlet to release any remaining pressure. This makes it easier and safer to disconnect the hose.
Place a towel or small bucket underneath the connection if water remains inside the hose.
Step 2: Identify the Exact Location of the Leak
Before taking the connection apart, determine where the water is escaping.
Check whether the leak is coming from:
- The connection between the faucet and hose
- The joint between two connected hoses
- A quick-connect fitting
- The hose coupling itself
- The hose immediately behind the connector
If necessary, briefly turn on the water to observe the leak, then shut it off again before making repairs.
Accurately locating the leak helps you avoid replacing the wrong component.
Step 3: Disconnect the Garden Hose
Hold the hose coupling and turn it counterclockwise to remove it from the faucet or connector.
If the coupling is difficult to loosen, try turning it by hand after wiping away dirt and moisture. For a stubborn metal connector, adjustable pliers may help, but use a cloth to protect the fitting.
Avoid squeezing plastic connectors with excessive force because they can crack.
Once the hose is disconnected, inspect the inside of the coupling.
Step 4: Inspect the Rubber Washer
Look inside the female hose connector for a rubber washer.
Remove the washer carefully and check whether it is:
- Cracked or split
- Flattened or permanently compressed
- Hard and brittle
- Swollen or misshapen
- Missing completely
- Covered with dirt or mineral deposits
A washer that looks damaged should be replaced.
Even if the washer appears intact, check whether it fits properly inside the coupling. A washer that is too small, too large, or incorrectly shaped may not seal effectively.
Step 5: Clean the Connection Surfaces
Use a soft cloth to remove dirt, sand, mineral deposits, and other debris from the inside of the coupling and the faucet outlet.
Check the flat surface where the rubber washer makes contact. It should be reasonably smooth and free of visible damage.
If dirt remains inside the connector, use a small brush to remove it.
Do not use a sharp metal object that could scratch the sealing surface or damage the threads.
Step 6: Install a New Rubber Washer
If the old washer is worn, damaged, or missing, install a compatible replacement.
Place the new washer inside the female hose coupling. Press it evenly into its seating position so that it lies flat.
The washer should not be twisted, folded, or tilted.
If necessary, apply a very small amount of compatible silicone-based lubricant to help the washer seat correctly. Avoid petroleum-based products unless the washer manufacturer specifically approves them, as some rubber materials may deteriorate when exposed to incompatible lubricants.
Step 7: Check the Connector Threads
Before reconnecting the hose, inspect the threads on both the hose coupling and faucet.
Look for:
- Flattened or missing thread sections
- Cracks around the connector
- Corrosion on metal fittings
- Dirt trapped between the threads
- Signs of cross-threading
If the threads are dirty, clean them with a cloth or soft brush.
A connector with badly damaged threads may need replacement. Do not attempt to force it onto the faucet.
Also Read:
Step 8: Reconnect the Garden Hose Correctly
Position the hose connector straight against the faucet outlet.
Turn it clockwise by hand, making sure the threads engage smoothly. The connector should screw on without unusual resistance.
If it becomes tight immediately or feels uneven, stop and remove it. Reposition the connector and try again.
Once properly aligned, tighten it by hand until the washer is compressed and the connection feels secure.
Do not overtighten it.
Step 9: Turn On the Water and Test the Connection
Open the outdoor faucet slowly.
Observe the connection for at least several seconds. Check whether water drips, sprays, or collects around the coupling.
If the connection remains dry, the repair is likely successful.
If it still leaks, shut off the water and inspect the washer alignment, connector threads, and sealing surfaces again.
Also Read:
Step 10: Replace the Connector if the Leak Continues
If a new washer and correct installation do not stop the leak, the coupling itself may be damaged.
A cracked plastic connector, badly corroded metal fitting, or deformed sealing surface may not be repairable.
Install a compatible replacement connector or use a suitable hose repair kit. Follow the manufacturer’s instructions for cutting, fitting, and securing the replacement part.
How to Fix Different Types of Garden Hose Connection Leaks
Not every connection leak has the same cause. Use the following guidance for more specific problems.
How to Fix a Leaking Connection at the Outdoor Faucet
If water escapes where the hose attaches to the outdoor faucet, start by inspecting the rubber washer inside the hose coupling.
Replace it if necessary, clean the faucet outlet, and reconnect the hose carefully.
If the hose still leaks, inspect the faucet threads and the flat surface that contacts the washer. Damaged faucet threads may prevent the coupling from sitting correctly.
If the faucet itself leaks around its handle, body, or wall connection, that is a separate plumbing problem and may require repair beyond the hose connector.
Also Read:
How to Fix a Leaking Connection Between Two Garden Hoses
When joining two hoses, a hose-to-hose connector usually has fittings on both ends.
Turn off the water and disconnect the hoses. Inspect the washers inside the female couplings on both sides.
Replace any worn or missing washers and check that the connector is compatible with both hoses.
Reconnect each hose without forcing the threads. If one side continues to leak, the connector or hose coupling may be damaged.
How to Fix a Leaking Quick-Connect Fitting
Quick-connect systems use fittings that lock together without repeatedly screwing and unscrewing the hose.
If a quick-connect fitting leaks, disconnect it and inspect its internal rubber seal or O-ring.
Clean away dirt and check whether the seal is cracked, flattened, or displaced. Replace it with the correct size and type if necessary.
Also inspect the locking mechanism. If the fitting does not lock securely, the connector may need replacement.
How to Fix a Leak Behind the Hose Connector
If water comes from the hose immediately behind the metal or plastic coupling, the hose end may be split or weakened.
A replacement hose-end repair fitting can often solve the problem.
First, check whether the damaged section can be removed without making the hose too short. Cut off the damaged portion using a suitable tool and install a compatible repair fitting according to its instructions.
If the hose has extensive cracking or deterioration, replacing the entire hose may be more reliable.
Also Read:
Garden Hose Connection Troubleshooting Table
Use this table to match common symptoms with likely causes and appropriate repairs.
| Problem | Likely Cause | Recommended Fix |
|---|---|---|
| Dripping at faucet connection | Worn washer | Replace the washer |
| Water spraying around coupling | Loose or misaligned connection | Reconnect and tighten by hand |
| Leak after installing a new hose | Incorrect washer or fitting | Check compatibility |
| Water escaping between two hoses | Damaged washer or connector | Replace the faulty part |
| Leak behind hose coupling | Split hose end | Install a repair fitting |
| Connector will not tighten | Damaged or incompatible threads | Replace the connector |
| Quick-connect fitting leaks | Worn O-ring | Replace the seal |
| Water leaks from faucet body | Faucet damage | Repair or replace the faucet |
Advanced Troubleshooting for Persistent Leaks
If basic repairs do not stop the leak, inspect the connection more carefully.
Check for a Damaged Sealing Surface
A rubber washer cannot create a reliable seal if the surface pressing against it is cracked, deeply scratched, or uneven.
Inspect both sides of the connection under good lighting. If the faucet outlet or connector has significant damage, replacing the affected fitting may be necessary.
Check for Incorrect Thread Engagement
A connector may appear secure even when the threads are not properly aligned.
Remove the hose and inspect the threads for flattened sections, cross-threading, or visible damage. Reconnect it slowly by hand.
If the fitting repeatedly catches or sits at an angle, it may be incompatible or damaged.
Check for Excessive Water Pressure
Very high water pressure can make weak connections leak more noticeably. If several outdoor hose connections leak despite having good washers and fittings, the supply pressure may need checking.
A pressure regulator or pressure adjustment may be appropriate depending on the plumbing system. A qualified plumber can measure the pressure and recommend a suitable solution.
Check for Leaks That Appear Only When the Hose Moves
A connection may remain dry while the hose is stationary but leak when it is pulled, bent, or twisted.
This can indicate a loose coupling, damaged hose end, or cracked connector.
Avoid allowing the hose to hang under tension from the faucet. Support the hose and replace damaged fittings.
When Should You Replace the Garden Hose Instead of Repairing It?
Repairing a connector is usually worthwhile when the hose itself remains in good condition. However, there are situations where replacing the hose is a better decision.
Consider replacing the entire hose if:
- Several sections have cracks or leaks.
- The outer covering is severely deteriorated.
- The hose becomes stiff, brittle, or difficult to handle.
- The connector area has been repaired repeatedly.
- The hose has multiple bulges or weak spots.
- Replacement fittings no longer stay securely attached.
A single damaged coupling does not necessarily mean the whole hose is unusable. However, repairing an old hose with widespread deterioration may only provide a temporary solution.
How to Prevent Garden Hose Connection Leaks
Simple maintenance can help extend the life of hose fittings and reduce the risk of future leaks.
Inspect Washers Regularly
Check the rubber washers whenever you disconnect the hose. Replace washers that are cracked, flattened, or brittle.
Keeping a few compatible spare washers available makes routine repairs easier.
Avoid Overtightening Connections
Tighten hose connectors by hand until they feel secure. Excessive force can damage plastic threads and deform rubber washers.
A properly seated washer should create a seal without requiring extreme tightening.
Protect the Hose From Direct Sunlight
Long-term exposure to sunlight can deteriorate rubber and plastic components. Store the hose in a shaded location when practical.
A hose reel or covered storage area can also help protect the fittings.
Drain the Hose After Use
Turn off the faucet and release remaining pressure before storing the hose.
In areas where freezing temperatures occur, drain the hose and disconnect it from the faucet before winter. Water left inside fittings can freeze, expand, and cause damage.
Avoid Pulling the Hose by Its Connector
Pulling a hose around the garden can put stress on the coupling and outdoor faucet.
Move the hose by holding the hose body rather than dragging it by the connector. Use a suitable hose guide or reel to reduce twisting.
Use Compatible Replacement Parts
Choose washers, connectors, and repair fittings designed for your hose system.
A poorly fitting replacement may create recurring leaks even when installed correctly.
Common Mistakes to Avoid When Repairing a Garden Hose Connection
Some repair attempts make the problem worse or fail to address its actual cause.
- Using plumber’s tape as the main repair: Standard garden hose connections generally seal with a rubber washer, not the threads. Tape will not replace a missing or damaged washer.
- Overtightening the connector: Excessive force can crack plastic fittings and damage the washer.
- Ignoring cross-threading: Forcing a misaligned connector can permanently damage the threads.
- Reusing a damaged washer: A hardened or cracked washer is unlikely to seal reliably.
- Replacing the entire hose unnecessarily: A simple washer replacement may solve a leak at the faucet connection.
- Using an incompatible fitting: Different connection systems may require specific adapters.
- Ignoring leaks behind the coupling: A damaged hose end needs more than a new washer.
- Testing without checking the repair: Always turn on the water and inspect the connection after completing the work.
When to Call a Professional Plumber
Most garden hose connector leaks can be repaired without professional assistance. However, some problems involve the outdoor faucet or the household plumbing rather than the hose.
Contact a plumber if:
- The outdoor faucet leaks from its body or handle.
- Water is escaping where the faucet enters the wall.
- The faucet cannot be shut off completely.
- The faucet threads are badly damaged and the outlet needs replacement.
- A connection continues leaking despite using compatible replacement parts.
- You suspect a damaged pipe behind the wall.
Do not continue tightening a hose connector if the faucet itself appears damaged. Excessive force can worsen the problem and potentially damage the plumbing connection.
Estimated Cost to Fix a Leaking Garden Hose Connection
The cost depends on the type of fitting, the extent of the damage, and whether you repair it yourself or hire a professional.
| Repair Item | Estimated Cost |
|---|---|
| Replacement rubber washer | $1–$5 |
| Small washer assortment | $3–$10 |
| Basic hose connector | $3–$10 |
| Brass hose connector | $5–$15 |
| Quick-connect fitting | $5–$20 |
| Hose-end repair kit | $5–$15 |
| Replacement garden hose | $15–$60+ |
| Basic plumber service visit | $75–$150+ |
These are approximate US-dollar retail and service estimates, not fixed prices. Actual costs vary by product quality, location, labor rates, and the condition of the outdoor faucet.
If the problem is only a worn rubber washer, a DIY repair may cost just a few dollars. More extensive faucet or plumbing repairs can cost considerably more.
Frequently Asked Questions
1. Why is my garden hose leaking at the connection?
A garden hose usually leaks at the connection because its rubber washer is worn, missing, damaged, or incorrectly positioned. A loose coupling, cross-threaded fitting, or cracked connector can also cause leakage. Disconnect the hose, inspect the washer and threads, and replace damaged components before reconnecting it.
2. How do I stop a garden hose connection from leaking?
Turn off the water, disconnect the hose, and inspect the rubber washer inside the coupling. Replace it if it is damaged or missing, clean the sealing surfaces, and reconnect the hose straight onto the faucet. Tighten it by hand and test the connection for leaks.
3. Should I use plumber’s tape on a garden hose connection?
Usually, no. Most standard garden hose connections use a flat rubber washer to create the watertight seal. Plumber’s tape on the threads generally will not correct a missing or damaged washer. Use the correct replacement washer and make sure the connector is properly aligned.
4. Can I replace the rubber washer without replacing the hose?
Yes. If the hose and coupling are in good condition, replacing the rubber washer is often enough to stop a leak. Remove the old washer, install a compatible replacement, and reconnect the hose. There is usually no reason to replace the entire hose for a simple washer problem.
5. Why does my garden hose leak even with a new washer?
A new washer may not solve the problem if it is the wrong size, incorrectly installed, or incompatible with the connector. The sealing surface may also be damaged, or the coupling could be cracked or cross-threaded. Check these parts before purchasing additional washers.
6. Can a cracked garden hose connector be repaired?
A cracked connector is generally better replaced than patched. Temporary adhesives or sealants may fail when exposed to water pressure and outdoor conditions. Install a compatible replacement connector or hose repair fitting. If the hose itself is badly deteriorated, replacing the complete hose may be more reliable.
7. Why does my hose connection leak only when the water is turned on?
The connection may appear dry when there is no water pressure because the gap is not actively allowing water to escape. When the faucet is opened, pressure pushes water through the weak seal. Inspect the washer, coupling, threads, and connector for damage.
8. Can overtightening cause a garden hose connection to leak?
Yes. Overtightening can deform the rubber washer, damage plastic threads, or crack the coupling. A damaged sealing surface may continue leaking even after the connector is tightened further. Remove the hose, inspect the parts, and reconnect it using moderate hand pressure.
9. How often should I replace garden hose washers?
There is no fixed replacement schedule. Replace a washer whenever it becomes cracked, flattened, brittle, swollen, or unable to seal properly. Inspect it during routine hose maintenance, particularly after long periods of outdoor exposure or repeated seasonal use.
10. Is it safe to leave a leaking garden hose connection running?
It is better to repair the leak rather than leave it running. Even a small leak wastes water and can create muddy or slippery areas around the faucet. A larger leak may also reduce water pressure. Turn off the faucet when the hose is not in use and repair damaged fittings promptly.
Conclusion
Fixing a leaking garden hose connection is usually a simple repair that does not require specialized plumbing skills. In many cases, the problem comes from a worn or missing rubber washer, a loose coupling, or dirt trapped between the sealing surfaces. Replacing the washer, cleaning the fitting, and reconnecting the hose correctly can restore a reliable seal.
If the connection continues leaking, inspect the threads, hose end, and connector for cracks or other damage. Replace defective fittings rather than forcing them tighter or relying on temporary sealants. Regularly checking washers, protecting the hose from sunlight, and avoiding unnecessary strain on the connector can also prevent future problems. By identifying the source of the leak and using compatible replacement parts, you can keep your garden hose working properly while avoiding unnecessary water waste and repair costs.