
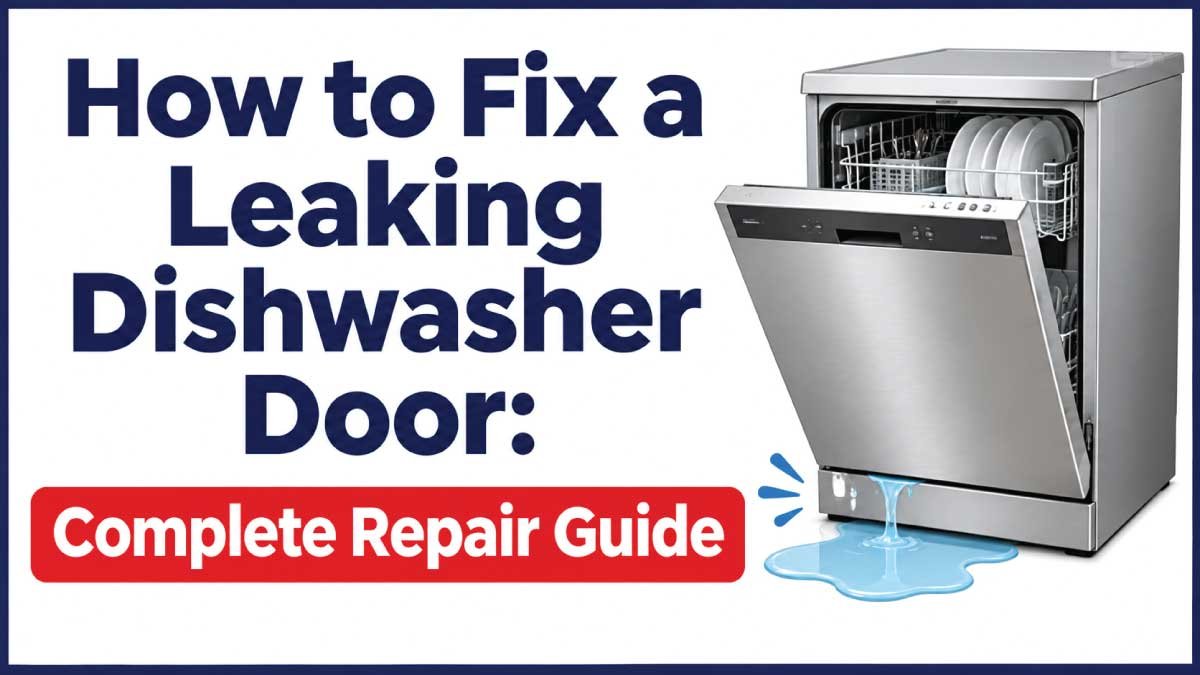
A leaking dishwasher door can create a mess in your kitchen, damage nearby cabinets, and indicate a problem with the appliance’s sealing or water distribution system. You may notice water dripping from the bottom of the door, escaping around the sides, or forming a puddle on the floor during a wash cycle. Although a worn door gasket is a common cause, other problems such as a damaged latch, incorrect leveling, excessive detergent, clogged spray arms, or excessive water levels can also cause leakage.
Learning how to fix a leaking dishwasher door starts with identifying exactly where and when the water escapes. For example, water leaking from the lower corners may indicate a damaged seal, while leakage during the wash cycle may point to excessive spraying or a dishwasher that is not level.
This comprehensive repair guide explains the common causes, warning signs, troubleshooting methods, and practical repair procedures. You will learn how to inspect the door gasket, clean spray arms, check the latch, correct leveling problems, and determine when professional appliance repair is necessary. Following the right steps can help restore a watertight door seal and prevent further kitchen water damage.
Common Signs and Symptoms
A leaking dishwasher door can produce several noticeable symptoms, depending on the damaged component and the stage of the wash cycle. Some problems appear immediately after the dishwasher starts filling, while others develop when the spray arms begin rotating. Identifying the exact leakage pattern helps narrow down the cause and makes troubleshooting more effective.
Common warning signs include:
- Water dripping from the bottom of the door: This often indicates a damaged lower door seal, excessive water level, or water escaping from the tub area.
- Water leaking from the door corners: Worn, twisted, or incorrectly installed side gaskets may fail to create a proper seal.
- Water escaping during washing: Excessive spray pressure, blocked spray arms, or incorrect loading may direct water toward the door.
- Water pooling near the dishwasher: Repeated leakage can leave standing water around the appliance.
- Wet kitchen cabinets: Water may travel beneath nearby cabinets and damage wooden surfaces.
- Door not closing properly: A damaged latch, loose hinges, or obstructed racks can prevent proper closure.
- Visible cracks in the gasket: Rubber seals may become brittle, flattened, torn, or permanently deformed.
- Leakage after adding detergent: Excessive detergent or unsuitable dishwashing liquid can produce foam that escapes through the door.
- Intermittent leakage: The dishwasher may leak only during certain wash programs or when heavily loaded.
Pay attention to whether the water appears before, during, or after the wash cycle. This timing can provide an important clue about the failed component.
How the Dishwasher Door Sealing System Normally Works
A dishwasher door is designed to keep water inside the washing compartment while the spray arms circulate water around the dishes. A flexible rubber gasket runs around the appropriate edges of the tub opening, creating a seal when the door closes. The latch holds the door securely against the gasket throughout the wash cycle.
Several components work together to prevent leakage:
- Door gasket: A flexible rubber seal creates a watertight barrier between the door and dishwasher tub.
- Door latch: Keeps the door securely closed during operation.
- Door hinges: Support the door and allow it to open and close smoothly.
- Tub frame: Provides the surface against which the gasket seals.
- Spray arms: Distribute water throughout the dishwasher without directing excessive spray toward vulnerable openings.
- Water inlet valve: Controls the amount of water entering the appliance.
- Float or water-level sensor: Helps prevent excessive filling in models equipped with these systems.
- Drainage system: Removes used water after washing.
When a gasket becomes damaged, the door loses alignment, or water is directed incorrectly, water may escape through the front opening.
Most Common Reasons This Problem Happens
Before replacing parts, determine why the dishwasher door is leaking. Several problems can produce similar symptoms, so inspecting the seal, latch, spray arms, detergent, and water level helps avoid unnecessary replacements. The following causes cover the most common reasons a dishwasher door fails to keep water inside during operation.
1. Worn or Damaged Door Gasket
The door gasket is one of the most common causes of dishwasher door leakage. It can deteriorate because of age, heat exposure, detergent residue, or repeated opening and closing.
Common symptoms include:
- Water dripping around the door edges.
- Visible cracks or tears in the rubber.
- Flattened sections that no longer seal properly.
- Leakage that gradually becomes worse.
Inspect the entire gasket for damage, particularly around the lower corners and vertical edges.
2. Dirty Door Seal
Food particles, grease, detergent residue, and mineral deposits can accumulate on the gasket and its contact surface.
This buildup prevents the rubber from sitting evenly against the dishwasher tub. Even a gasket without visible damage may leak if dirt creates small gaps.
Look for sticky residue, hardened food particles, or discoloration along the sealing surface.
3. Faulty Door Latch
The door latch keeps the dishwasher door firmly closed during operation. If it becomes loose, worn, or misaligned, the door may not press evenly against the gasket.
Symptoms include:
- Door movement during operation.
- Difficulty closing the door.
- A loose or inconsistent locking sound.
- Water escaping around one side.
A damaged latch may require adjustment or replacement.
4. Improper Dishwasher Leveling
A dishwasher that is not level can distribute water unevenly inside the tub. Depending on the design and degree of misalignment, excessive water may reach the door opening or interfere with proper sealing.
Check whether the appliance rocks or appears tilted. Use a level to assess its position according to the manufacturer’s installation instructions.
5. Blocked or Damaged Spray Arms
Spray arms rotate and direct water toward dishes. If their holes become blocked or the arms are damaged, water may spray in an unusual direction.
This can cause water to strike the door seal repeatedly.
Look for:
- Food particles inside spray-arm holes.
- Cracks in the plastic arms.
- Loose spray-arm mounting points.
- Restricted rotation caused by oversized dishes.
6. Excessive Detergent or Incorrect Soap
Dishwashers require specially formulated automatic dishwasher detergent. Regular dishwashing liquid can create excessive foam.
Too much foam may escape through the door seals, particularly during the wash cycle.
Other symptoms include unusual suds inside the dishwasher, foam around the door, and leakage that occurs shortly after detergent is added.
7. Overfilling or Excessive Water Level
A faulty water inlet valve, float mechanism, or water-level sensor can allow too much water to enter the dishwasher.
When the water level becomes excessive, it may reach areas that are not designed to remain submerged during operation.
If the dishwasher contains unusually high water levels, stop the cycle and investigate the filling system.
8. Damaged Door Hinges or Alignment
Door hinges support the appliance door and maintain its alignment.
Bent hinges, loose mounting hardware, or damaged door supports can prevent the gasket from making even contact with the tub.
The door may appear crooked, drop slightly when opened, or require unusual force to close.
9. Cracked Dishwasher Tub or Door Panel
A crack in the tub or damage to the inner door panel can allow water to escape even when the gasket and latch are working correctly.
Inspect accessible surfaces for cracks, corrosion, or damaged joints.
A cracked tub may require professional assessment to determine whether replacement is economical.
Safety Precautions Before Troubleshooting
Dishwasher troubleshooting involves electricity, water, sharp components, and potentially hot internal surfaces. Before removing panels or inspecting electrical parts, disconnect the appliance from its power source. Never attempt repairs while the dishwasher is operating, and do not ignore water near electrical connections. Following basic safety procedures reduces the risk of electric shock, burns, and accidental appliance damage.
Use these safety precautions:
- Disconnect electrical power: Switch off the dishwasher at its circuit breaker or unplug it if the plug is safely accessible.
- Turn off the water supply: Close the dishwasher’s water inlet valve before disconnecting hoses or replacing plumbing components.
- Allow hot components to cool: Wait until the wash cycle has ended and the interior has cooled before touching internal parts.
- Wear protective gloves: Use gloves when inspecting damaged plastic components, sharp edges, or broken glass.
- Keep the floor dry: Clean spilled water immediately to prevent slipping.
- Avoid exposed electrical components: Never touch wiring, control boards, or electrical connections with wet hands.
- Do not bypass the door switch: The door safety mechanism must remain functional.
- Protect surrounding cabinets: Place towels around the appliance to absorb remaining water.
- Follow manufacturer instructions: Use the correct replacement parts and repair procedures for your dishwasher model.
If the dishwasher has electrical damage, a burning smell, or repeated circuit breaker trips, contact a qualified appliance technician.
Tools Required
The tools needed depend on the type of leakage and the dishwasher model. Most basic inspections require only a few household tools, while replacing a latch, gasket, or internal component may require additional equipment. Always check the appliance manual before removing parts because fasteners and installation methods differ between manufacturers.
| Tool | Purpose |
|---|---|
| Screwdriver set | Remove door panels and accessible covers |
| Flashlight | Inspect gaskets, hinges, and internal components |
| Soft cleaning cloth | Clean the door seal |
| Mild dishwashing detergent | Remove grease and residue from the gasket |
| Soft brush | Clean dirt from gasket grooves |
| Adjustable wrench | Work on compatible water connections |
| Multimeter | Test electrical components when qualified |
| Spirit level | Check dishwasher alignment |
| Protective gloves | Protect hands during inspection |
| Replacement door gasket | Restore a damaged door seal |
| Replacement door latch | Repair a faulty locking mechanism |
| Towels | Absorb leaked water |
| Needle-nose pliers | Handle suitable clips and connectors |
Use only manufacturer-approved replacement parts or compatible components specified for the exact dishwasher model.
Step-by-Step Troubleshooting Guide
A logical troubleshooting process helps identify the cause without replacing unnecessary components. Begin with simple external inspections before removing panels or testing electrical parts. Observe the dishwasher’s leakage pattern and check whether water escapes during filling, washing, or draining. This information can help distinguish a sealing problem from an issue with water distribution or filling.
Step 1: Identify Where the Water Escapes
Inspect the dishwasher door and surrounding floor after noticing a leak.
Look for moisture around:
- The bottom edge.
- The left and right corners.
- The upper door area.
- The side edges.
Why it matters: The leakage location provides an initial indication of the failed seal or component.
Expected result: You should identify the area where water first appears.
What to do next: Inspect the corresponding gasket section and surrounding surfaces.
Step 2: Determine When the Leak Occurs
Observe whether leakage happens during filling, washing, or draining.
Why it matters: Different stages involve different components and water pressures.
Expected result: You may notice that water appears only after the spray arms begin rotating or when the appliance fills.
What to do next: Focus on the component associated with that stage.
Step 3: Inspect the Door Gasket
Disconnect power before inspecting the appliance. Open the door and examine the entire rubber seal.
Look for:
- Tears and cracks.
- Flattened sections.
- Twisted or displaced rubber.
- Hardened detergent residue.
- Sections that have pulled away from their mounting channel.
Why it matters: A damaged or dirty gasket cannot create a reliable seal.
Expected result: The gasket should be flexible, clean, and evenly positioned.
What to do next: Clean it if dirty or replace it if damaged.
Step 4: Check the Door Latch
Inspect the locking mechanism and confirm that the door closes securely.
Why it matters: A faulty latch can prevent the gasket from compressing correctly.
Expected result: The door should close evenly without excessive movement.
What to do next: Arrange latch adjustment or replacement if it is loose or damaged.
Step 5: Inspect the Spray Arms
Remove accessible spray arms according to the appliance manual.
Check the spray openings for food particles, mineral deposits, and damage.
Why it matters: Blocked or damaged spray arms may create unusual water patterns.
Expected result: The arms should rotate freely and have clear spray openings.
What to do next: Clean or replace the affected spray arm.
Step 6: Check Dishwasher Leveling
Place a spirit level on an appropriate flat surface of the appliance, following the installation instructions.
Why it matters: Incorrect positioning can contribute to water distribution and sealing problems.
Expected result: The appliance should be installed in the position specified by its manufacturer.
What to do next: Adjust the leveling feet if necessary, ensuring the dishwasher remains securely supported.
Step 7: Check the Detergent
Confirm that you are using automatic dishwasher detergent in the correct quantity.
Why it matters: Excessive foam can escape through the door opening.
Expected result: The dishwasher should produce normal washing action without excessive suds.
What to do next: Correct the detergent type and quantity if necessary.
Step 8: Investigate the Water Level
If water appears unusually high inside the tub, investigate the water inlet and level-control system.
Why it matters: Overfilling can cause water to reach the door opening.
Expected result: Water should remain within the normal operating level specified for the appliance.
What to do next: Contact an appliance technician if the float, inlet valve, or sensor appears faulty.
Quick Diagnosis Table
Use this table to connect the visible symptoms with their likely causes and recommended solutions. It is particularly useful when the dishwasher leaks intermittently or when the source is not immediately obvious. Remember that several faults can produce similar symptoms, so confirm the diagnosis before purchasing replacement components.
| Symptom | Possible Cause | Recommended Solution |
|---|---|---|
| Water leaking from bottom edge | Damaged lower seal or excessive water | Inspect gasket and water level |
| Water leaking from corners | Worn or twisted gasket | Clean or replace gasket |
| Leakage during washing | Spray-arm problem or incorrect loading | Clean arms and reposition dishes |
| Door does not close securely | Faulty latch | Inspect and replace latch |
| Excessive foam near door | Incorrect detergent | Use automatic dishwasher detergent |
| Water leaking on one side | Door misalignment | Inspect hinges and leveling |
| Water level unusually high | Faulty inlet valve or float | Professional diagnosis |
| Intermittent leakage | Dirty seal or inconsistent door closure | Clean gasket and inspect latch |
| Water escaping despite new gasket | Misaligned door or damaged tub | Inspect door alignment and tub |
How to Fix Each Common Cause
After identifying the likely problem, use the appropriate repair method. Start with cleaning and adjustment because these are inexpensive and do not require major disassembly. Replace components only when inspection confirms that they are damaged. Always disconnect electrical power before carrying out physical repairs.
1. Clean the Dishwasher Door Gasket
A dirty gasket can often be restored without replacement.
Follow these steps:
- Open the dishwasher door.
- Inspect the rubber gasket around the tub opening.
- Prepare a solution of warm water and mild detergent.
- Use a soft cloth to wipe away grease and food particles.
- Clean the gasket grooves with a soft brush.
- Wipe the surface with a clean damp cloth.
- Allow the seal to dry before using the dishwasher.
Avoid abrasive cleaners, sharp tools, and harsh chemicals that may damage the rubber.
Also Read:
2. Replace a Damaged Door Gasket
If the gasket is cracked, torn, permanently flattened, or deformed, replacement is usually the best solution.
The general process is:
- Disconnect the dishwasher from electrical power.
- Open the door fully.
- Locate the gasket mounting channel.
- Carefully remove the old gasket.
- Clean the mounting groove.
- Compare the replacement gasket with the original.
- Position the new gasket according to the manufacturer’s instructions.
- Press it evenly into the mounting channel.
- Check that the corners are correctly seated.
- Close the door and verify that it locks properly.
Some dishwasher models use additional lower door seals or separate corner components. Replace these only with the correct model-specific parts.
3. Repair or Replace the Door Latch
A damaged latch may prevent the door from closing tightly.
To inspect it:
- Disconnect electrical power.
- Open the door and inspect the latch assembly.
- Check for broken plastic parts or loose mounting screws.
- Examine the door catch for misalignment.
- Replace damaged components using compatible parts.
- Reassemble the door according to the manufacturer’s instructions.
Do not bend the latch forcefully or bypass its safety switch. If the locking mechanism includes electrical connections, have a technician handle the repair unless you are qualified.
4. Clean the Spray Arms
Spray-arm blockages can create unusual water patterns.
Follow these steps:
- Disconnect power.
- Remove the lower rack.
- Remove the spray arm if the manufacturer permits.
- Rinse it under clean water.
- Remove food particles from the spray holes using a soft brush.
- Check for cracks and warping.
- Reinstall the spray arm.
- Confirm that it rotates freely.
Never enlarge the spray holes with a drill or sharp metal object.
Also Read:
5. Correct Dishwasher Leveling
If the appliance is not installed correctly, its position may contribute to leakage.
To check the installation:
- Disconnect power before accessing installation hardware.
- Remove any accessible lower kick plate if necessary.
- Locate the adjustable leveling feet.
- Check the appliance position with a spirit level.
- Adjust the feet according to the installation manual.
- Ensure the appliance is stable and securely supported.
- Confirm that it does not rock when the door opens.
Some models have specific leveling requirements, so do not assume every dishwasher should be adjusted identically.
6. Correct Excessive Detergent and Foam
Using too much detergent or the wrong soap can cause excessive suds.
To correct the problem:
- Stop the dishwasher cycle.
- Disconnect power if you need to handle water inside the appliance.
- Remove visible excess foam using a suitable manual cleaning method.
- Check the detergent dispenser for residue.
- Clean the affected area with a damp cloth.
- Use only automatic dishwasher detergent.
- Follow the recommended detergent quantity.
If a large amount of unsuitable dish soap has entered the appliance, follow the manufacturer’s cleaning instructions or contact a technician to avoid damaging the pump.
Also Read:
7. Investigate Excessive Water Levels
An overfilled dishwasher requires more careful diagnosis.
Possible causes include:
- A faulty water inlet valve.
- A stuck float mechanism.
- A defective water-level sensor.
- A problem with the control system.
Turn off the water supply if the appliance continues filling when it should stop. Because these components involve water and electrical controls, professional diagnosis is recommended.
8. Repair Damaged Hinges or Door Alignment
If the door appears crooked or does not close evenly, inspect the hinge mechanism.
A technician can check the hinges, mounting points, door springs, and alignment. Replace damaged components rather than forcing the door into position. Incorrect hinge tension can cause the door to fall unexpectedly or place uneven pressure on the gasket.
Advanced Troubleshooting
When cleaning the gasket and inspecting the latch do not solve the problem, more advanced testing may be necessary. These methods help identify concealed faults involving the water inlet system, door alignment, electrical controls, and internal tub components. They are particularly useful when the dishwasher leaks only during certain programs or continues leaking after basic repairs.
Water Inlet Valve Testing
The water inlet valve controls water entering the dishwasher. A valve that fails to close correctly may allow continued filling.
A technician can inspect the valve, test its electrical operation, and determine whether replacement is necessary.
Float Switch Inspection
Some dishwashers use a float mechanism to monitor water levels. If the float becomes stuck or its switch fails, the appliance may not control filling correctly.
Check for visible obstructions only when the appliance is disconnected from power.
Door Alignment Testing
Uneven pressure around the gasket can be difficult to detect visually. A technician can examine the door hinges, frame, and latch to identify alignment problems.
Tub Inspection
Inspect accessible tub surfaces for cracks, corrosion, and damaged joints. Some leaks originate from the lower tub area rather than the door seal.
Electrical Control Diagnosis
If the dishwasher fills excessively or behaves unpredictably, a technician may need to test the control board, sensors, and wiring. Electrical testing should be performed only by someone qualified to work safely with appliance circuits.
Also Read:
When Repair Is Not Worth It
Replacing a dishwasher component is usually more economical than replacing the entire appliance. However, extensive damage, repeated failures, and the cost of major repairs can make replacement a better decision. Evaluate the appliance’s age, overall condition, parts availability, and estimated repair cost before making a decision.
Consider replacing the dishwasher when:
- The tub has extensive cracks or serious corrosion.
- Major internal components have failed repeatedly.
- Replacement parts are unavailable.
- Repair costs approach the price of a comparable new dishwasher.
- The appliance has multiple serious problems.
- Water damage has affected important electrical components.
- The dishwasher is old and increasingly unreliable.
A worn gasket or faulty latch alone is generally not a reason to replace an otherwise functional appliance.
Preventive Maintenance Tips
Regular dishwasher maintenance helps protect the door gasket, improve washing performance, and reduce the risk of leakage. Food residue, grease, mineral deposits, and incorrect detergent use can gradually affect sealing surfaces and internal components. A simple maintenance routine can extend appliance life and prevent avoidable repair expenses.
Follow these recommendations:
- Clean the door gasket regularly: Wipe away food residue and grease before they accumulate.
- Inspect the rubber seal: Look for cracks, flattening, and deformation.
- Use suitable detergent: Always use automatic dishwasher detergent.
- Avoid overloading racks: Keep dishes away from the door and spray-arm movement.
- Clean spray arms: Remove food particles and mineral deposits from spray openings.
- Check the door latch: Make sure the door closes and locks properly.
- Maintain proper leveling: Follow the installation instructions when checking appliance position.
- Clean the dishwasher filter: Remove food debris according to the manufacturer’s recommendations.
- Inspect water connections: Check accessible hoses and fittings for moisture.
- Avoid slamming the door: Gentle operation reduces unnecessary stress on hinges and latch components.
- Use appropriate wash cycles: Follow the manufacturer’s recommendations for different loads.
- Investigate small leaks immediately: Early repairs can prevent damage to kitchen cabinets and flooring.
Common Mistakes to Avoid
Incorrect troubleshooting can damage the gasket, create additional leaks, or make a relatively simple repair more expensive. Before replacing parts, confirm the actual cause and use components designed for your appliance. Avoid the following common mistakes when repairing a leaking dishwasher door.
- Replacing the gasket without inspection: Dirt, misalignment, or a faulty latch may be the real problem.
- Using regular dishwashing liquid: This can produce excessive foam and cause leakage.
- Installing an incorrect gasket: Different models require different seal shapes and sizes.
- Applying excessive adhesive: Most replacement gaskets use a specific mounting design and do not require improvised glue.
- Ignoring the spray arms: Incorrect water direction can cause leakage even when the seal is in good condition.
- Forcing the door closed: This can damage the latch, hinges, or sealing surfaces.
- Overtightening screws: Excessive force can damage plastic mounting points.
- Ignoring water-level problems: An overfilled dishwasher may continue leaking after gasket replacement.
- Testing while electrical components are exposed: This creates a serious electrical hazard.
- Ignoring small leaks: Repeated moisture can damage cabinets, flooring, and nearby electrical connections.
When to Call a Professional
Some dishwasher door problems are easy to fix, but others require specialized tools and electrical or plumbing knowledge. If basic cleaning and visual inspection do not identify the problem, a qualified appliance technician can diagnose the underlying fault and prevent further damage.
Contact a professional when:
- The dishwasher continues leaking after gasket replacement.
- The water inlet valve does not stop filling.
- The dishwasher repeatedly overfills.
- The door hinges or mounting points are damaged.
- The tub has a crack or structural defect.
- Electrical wiring or control boards need inspection.
- Water is entering the motor or electrical compartment.
- The door latch or safety switch has an electrical fault.
- The appliance repeatedly trips the circuit breaker.
- You cannot identify the source of the leak.
A professional can also check the dishwasher installation and determine whether the door, tub, or plumbing connections need adjustment.
Estimated Repair Costs
Dishwasher door repair costs depend on the manufacturer, model, replacement part, labor rates, and accessibility. The following amounts are broad illustrative estimates in US dollars, not fixed quotations. Local repair prices may differ significantly. Before approving a repair, ask whether the estimate includes parts, labor, diagnosis, and any additional service charges.
| Repair | Estimated Cost | DIY or Professional |
|---|---|---|
| Clean door gasket | $0–$15 | DIY |
| Replace door gasket | $20–$100 | DIY or Professional |
| Replace door latch | $30–$120 | DIY or Professional |
| Clean or replace spray arm | $15–$100 | DIY or Professional |
| Adjust dishwasher leveling | $0–$50 | DIY |
| Replace door hinge | $50–$180 | Professional |
| Replace water inlet valve | $80–$200 | Professional |
| Repair float switch | $50–$150 | Professional |
| Repair electrical control | $100–$300 | Professional |
| Repair damaged tub | $150–$400+ | Professional |
If a dishwasher has extensive structural damage or several failed components, compare the total repair estimate with the cost of replacing the appliance.
Frequently Asked Questions
1. Why is my dishwasher leaking from the bottom of the door?
A dishwasher leaking from the bottom of the door may have a damaged lower seal, excessive water inside the tub, or a problem with spray-arm direction. Food debris can also prevent proper sealing. Inspect the lower door area, clean the accessible sealing surfaces, and check whether the dishwasher is overfilling before replacing any components.
2. Can I use my dishwasher if the door gasket is leaking?
It is better to stop using the dishwasher until the leak is corrected. Continued operation can allow water to reach electrical components, damage kitchen cabinets, and weaken nearby flooring. A small gasket leak may seem harmless, but repeated exposure can create expensive problems. Repair the seal and verify that the dishwasher remains watertight before normal use.
3. How often should I replace a dishwasher door gasket?
There is no universal replacement schedule because gasket life depends on appliance usage, water conditions, cleaning habits, and material quality. Some seals last for many years without replacement. Inspect the gasket regularly and replace it when it becomes cracked, permanently flattened, torn, or unable to maintain a reliable seal.
4. Can a dirty dishwasher seal cause water leakage?
Yes, dirt and detergent residue can prevent the door gasket from making even contact with the dishwasher tub. Food particles trapped in the sealing channel may create small openings through which water escapes. Clean the gasket using warm water and a soft cloth. If leakage continues, inspect the rubber for permanent damage or deformation.
5. Why does my dishwasher leak only during the wash cycle?
A dishwasher that leaks only during washing may have a spray-arm problem, incorrectly positioned dishes, a damaged gasket, or excessive detergent foam. During washing, the spray arms circulate water under pressure, which can expose sealing problems that are not noticeable during filling. Inspect the spray arms, loading arrangement, and door seal before considering major repairs.
6. Can an unlevel dishwasher cause a door leak?
Yes, incorrect installation can contribute to water distribution and sealing problems, depending on the dishwasher design. Check the appliance position with a spirit level and compare it with the manufacturer’s installation requirements. Adjust the leveling feet if necessary. However, leveling alone will not correct a damaged gasket, faulty latch, or excessive water level.
7. Why does my dishwasher leak after I replace the door seal?
A new gasket may not solve the problem if the original cause was a damaged latch, misaligned door, excessive water level, or incorrect installation. Check that the replacement seal matches the appliance model and sits correctly in its mounting channel. If the door closes unevenly, have the hinges and alignment inspected.
8. Can I replace a dishwasher door gasket myself?
Yes, many dishwasher models allow homeowners to replace the main door gasket using basic hand tools. Disconnect electrical power, remove the old seal carefully, clean the mounting channel, and install the correct replacement. Follow the manufacturer’s instructions because some models use different sealing arrangements. If the repair involves electrical components or door disassembly, professional assistance is safer.
9. Why does my dishwasher leak when I use too much detergent?
Excessive detergent can produce more foam than the dishwasher is designed to handle. The foam may escape around the door opening and create the appearance of a faulty gasket. Use detergent specifically formulated for automatic dishwashers and follow the recommended quantity. Never use ordinary hand dishwashing liquid inside an automatic dishwasher.
10. How can I test whether my dishwasher door is sealing properly?
First, inspect the entire gasket for gaps, dirt, and damage. Confirm that the latch closes securely and the door sits evenly against the tub. After reassembling the appliance, restore power and run an appropriate test cycle with all panels and safety components installed. Observe from a safe position for moisture around the door edges.
Final Thoughts
A leaking dishwasher door can result from several problems, but a worn or dirty door gasket is one of the first things worth checking. Other common causes include a faulty latch, incorrect dishwasher leveling, blocked spray arms, excessive detergent, and problems with the water-level control system.
Start troubleshooting by identifying where and when the water escapes. Inspect the gasket, clean the sealing surfaces, check the latch, and make sure dishes are not blocking the spray arms. These basic checks can resolve many minor leakage problems without expensive replacement parts.
If the gasket is damaged, install a compatible replacement and follow the manufacturer’s instructions. More complicated problems involving water inlet valves, electrical controls, damaged hinges, or cracked tubs generally require professional diagnosis.
Always disconnect electrical power before performing repairs and turn off the water supply before working on plumbing connections. After completing a repair, verify that the dishwasher operates without leaking before returning it to regular use.
Regularly cleaning the gasket, maintaining the spray arms, and using the correct detergent can help prevent future problems. Addressing small leaks early is the best way to protect your dishwasher, kitchen cabinets, and flooring.