
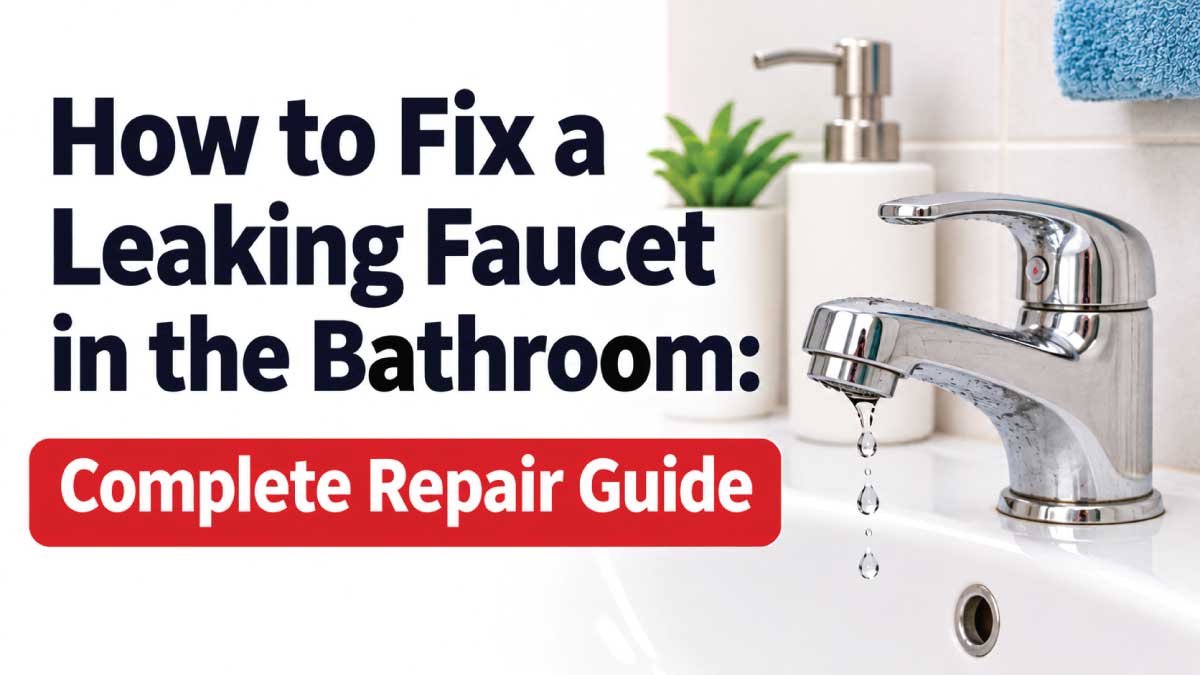
A leaking bathroom faucet may seem like a minor plumbing problem, but even a slow drip can waste water, increase utility bills, stain the sink, and damage nearby fixtures over time. The problem often develops because of worn rubber washers, damaged O-rings, deteriorated cartridges, loose connections, or mineral buildup inside the faucet. Fortunately, many bathroom faucet leaks can be repaired without replacing the entire fixture.
Learning how to fix a leaking faucet in the bathroom starts with identifying exactly where the water is escaping. A faucet that drips from the spout usually has a different problem from one that leaks around the handle or underneath the sink. Understanding this difference helps you avoid replacing the wrong part.
This repair guide explains how bathroom faucets work, the most common causes of leaks, the tools you need, and how to troubleshoot and repair different faucet designs. You will also learn important safety precautions, estimated repair costs, and when replacing the faucet or hiring a professional plumber is the better option.
Common Signs and Symptoms
A leaking bathroom faucet can show several warning signs before the problem becomes serious. Paying attention to where water appears, when it leaks, and whether the leak changes when you operate the handle can help identify the faulty component.
Common symptoms include:
- Continuous dripping from the spout: Water continues falling from the faucet even when the handle is fully closed. This commonly indicates a worn cartridge, damaged washer, or faulty valve seat.
- Water leaking around the handle: Moisture appears near the faucet handle when the water is running or when the faucet is turned off. A damaged O-ring or cartridge seal may be responsible.
- Water collecting around the faucet base: Water gathers where the faucet meets the sink, often because of damaged seals, loose mounting hardware, or water splashing onto the fixture.
- Leakage underneath the sink: Water appears around the supply connections, shutoff valves, or faucet mounting area.
- A loose or difficult handle: The handle may feel unusually stiff, loose, or difficult to turn because of mineral buildup or internal wear.
- Reduced water pressure: A partially blocked aerator or mineral deposits may restrict water flow.
- Water dripping from the faucet after use: A small amount of trapped water can drain from the spout briefly, but continuous dripping usually indicates a sealing problem.
How a Bathroom Faucet Normally Works
Understanding how a bathroom faucet operates makes troubleshooting much easier. Most modern bathroom faucets use internal valves to control water flow and temperature. When the handle is closed, these components create a seal that prevents water from passing through the spout.
A typical bathroom faucet receives hot and cold water through two flexible supply lines connected underneath the sink. These lines deliver water from the household plumbing system to the faucet.
The internal mechanism controls the flow:
- Single-handle faucets: A cartridge or ball mechanism controls both water temperature and flow through one handle.
- Two-handle faucets: Separate handles control hot and cold water using individual cartridges, compression valves, or ceramic-disc mechanisms.
- Cartridge faucets: A removable cartridge contains internal passages and seals that regulate water movement.
- Compression faucets: A rubber washer presses against a valve seat to stop water flow.
- Ceramic-disc faucets: Two precisely fitted ceramic plates slide against each other to control water flow.
When an internal seal wears out, the valve becomes damaged, or a connection loosens, water can escape even when the faucet is supposed to be closed.
Most Common Reasons This Problem Happens
Bathroom faucets experience regular use, temperature changes, water pressure fluctuations, and exposure to minerals. These conditions gradually affect internal components and external connections. Identifying the actual cause before starting repairs helps prevent unnecessary replacements.
1. Worn or Damaged Rubber Washers
Compression faucets use rubber washers to create a watertight seal when the handle closes. Over time, repeated pressure causes these washers to harden, flatten, crack, or wear away.
A common warning sign is a steady drip from the spout, particularly when the faucet is completely turned off. Removing the valve stem and inspecting the washer usually reveals whether it needs replacement.
2. Damaged Faucet Cartridge
Cartridge faucets rely on an internal cartridge to regulate water flow. Its seals and moving components can wear out because of regular operation, sediment, or mineral deposits.
A damaged cartridge may cause dripping from the spout, leakage around the handle, or difficulty controlling water temperature. If cleaning does not solve the problem, replacing the cartridge is usually the most effective repair.
3. Worn O-Rings
O-rings are small rubber seals that prevent water from escaping around moving faucet components. They are commonly found around cartridge assemblies, valve stems, and faucet handles.
When an O-ring becomes brittle, stretched, or cracked, water may escape around the handle or faucet body. Inspecting the seals after removing the handle can help identify the problem.
4. Loose Supply Line Connections
Flexible supply lines connect the faucet to the hot and cold water shutoff valves. Connections can loosen because of vibration, improper installation, or movement underneath the sink.
Water dripping from a connection usually indicates a loose fitting, damaged sealing washer, or deteriorated supply line. Look for moisture around the threaded connections while the faucet is operating.
5. Damaged Valve Seat
In compression-style faucets, the valve seat provides the surface against which the rubber washer presses. Mineral deposits, corrosion, and repeated friction can damage this surface.
A faucet may continue dripping even after installing a new washer if the valve seat is scratched or corroded. Inspecting the seat helps determine whether cleaning, resurfacing, or replacement is necessary.
6. Mineral Buildup Inside the Faucet
Hard water contains minerals that can collect around cartridges, aerators, valve openings, and other internal components.
This buildup can prevent moving parts from closing correctly. You may notice reduced water flow, stiff handles, uneven pressure, or persistent dripping. Cleaning removable components can sometimes restore normal operation.
7. Excessive Water Pressure
High household water pressure can place additional stress on faucet cartridges, seals, supply lines, and connections.
If multiple faucets develop leaks or experience unusual flow, excessive pressure may be contributing to the problem. A pressure gauge connected to an appropriate hose connection can help check the system. A plumber can investigate and install or adjust a pressure-reducing valve when necessary.
Safety Precautions Before Troubleshooting
Before attempting to repair a leaking bathroom faucet, take precautions to prevent flooding, injury, and damage to plumbing components. Although most faucet repairs are relatively simple, forcing connections or opening pressurized fittings can create additional problems.
Follow these safety precautions:
- Turn off the water supply: Close the hot and cold shutoff valves underneath the sink before disassembling the faucet.
- Release remaining pressure: Open the faucet handle after shutting off the valves to drain trapped water from the lines.
- Protect the sink: Place a towel over the drain opening to prevent small screws, clips, and other parts from falling inside.
- Avoid excessive force: Do not use unnecessary pressure when loosening handles, cartridges, or threaded connections.
- Use appropriate tools: Choose correctly sized wrenches and screwdrivers to avoid damaging decorative finishes and fittings.
- Protect your eyes: Wear safety glasses when removing corroded components or cleaning mineral deposits.
- Check electrical equipment: If an electric outlet, hair dryer, or other electrical device is near a leaking area, keep it away from water. If water reaches electrical equipment, do not touch wet equipment or standing water. Have the circuit safely isolated before handling it.
- Check for hidden damage: If the cabinet or wall is already wet, inspect for signs of prolonged moisture before proceeding.
Never remove a pressurized supply line while the shutoff valve is open.
Tools Required
Having the correct tools available makes bathroom faucet repair easier and reduces the risk of damaging the fixture. You may not need every tool because the required equipment depends on the faucet design and the location of the leak.
| Tool | Purpose |
|---|---|
| Adjustable wrench | Loosening and tightening water supply connections |
| Screwdriver set | Removing faucet handles and retaining screws |
| Allen wrench set | Removing handles secured with hex screws |
| Replacement cartridge | Replacing a damaged cartridge assembly |
| Replacement O-rings | Restoring seals around moving components |
| Rubber washers | Repairing compression faucet leaks |
| Plumber’s grease | Lubricating compatible rubber seals |
| Needle-nose pliers | Removing small clips and internal components |
| Soft cleaning brush | Removing mineral deposits |
| White vinegar | Loosening mineral buildup on removable parts |
| Cleaning cloth | Drying components and checking for leaks |
| Flashlight | Inspecting connections underneath the sink |
Always check your faucet manufacturer’s specifications before purchasing replacement parts. Similar-looking cartridges and washers are not necessarily interchangeable.
Step-by-Step Troubleshooting Guide
A systematic inspection helps you locate the source of a leak before removing the faucet. Start with the easiest checks and move toward internal repairs only when necessary. This approach saves time and prevents unnecessary disassembly.
Step 1: Identify Where the Water Is Leaking
Dry the faucet, sink, and cabinet underneath with a clean cloth. Turn the faucet on briefly and observe where water first appears.
Check these areas:
- Faucet spout
- Handle and handle base
- Faucet body
- Base where the faucet meets the sink
- Supply line connections underneath the sink
The first location where fresh moisture appears is usually the most useful diagnostic clue.
Step 2: Check the Water Shutoff Valves
Look underneath the sink for the hot and cold water shutoff valves. Inspect their bodies and connections for visible moisture or corrosion.
Turn off both valves before beginning any disassembly. If a valve is stuck, heavily corroded, or leaking around its stem, do not force it. A plumber may need to replace it.
Step 3: Inspect the Faucet Handle
Check whether the handle is loose, stiff, or difficult to operate. Look for a decorative cap covering the handle screw.
Remove the cap carefully, then inspect the screw and handle assembly. A loose handle can sometimes cause operating problems, although tightening it will not repair a damaged internal seal.
Step 4: Examine the Aerator
The aerator is the small attachment at the end of the faucet spout. It mixes air with water and helps control the flow.
Unscrew it carefully and check for mineral deposits or debris. Clean removable parts with a soft brush and suitable cleaning solution. If the faucet has a separate internal leak, cleaning the aerator will not fix it.
Step 5: Inspect the Supply Lines
Use a flashlight to inspect both flexible supply lines and their connections. Look for corrosion, cracks, bulging, or moisture.
If a connection is slightly loose, it may require careful tightening according to the manufacturer’s instructions. Replace a damaged supply line rather than attempting to patch it.
Step 6: Determine the Faucet Type
Identify whether your faucet uses a cartridge, compression valve, ceramic disc, or ball mechanism.
This matters because each design requires different replacement components and disassembly procedures. Check the manufacturer and model information if available.
Also Read:
Step 7: Inspect the Internal Seals
With the water supply safely shut off, remove the handle and access the valve assembly according to the faucet design.
Look for:
- Cracked O-rings
- Flattened washers
- Damaged cartridges
- Mineral deposits
- Corroded valve components
Compare the removed components with replacement parts before installation.
Step 8: Reassemble and Test the Faucet
Install the appropriate replacement component, reassemble the handle, and make sure all retaining clips and screws are correctly positioned.
Close the faucet handle, slowly reopen the shutoff valves, and inspect the faucet and connections for leaks. Operate both hot and cold water settings to confirm normal performance.
Quick Diagnosis Table
The location and behavior of a leak often provide enough information to narrow down the faulty component. Use this table to connect common bathroom faucet symptoms with their likely causes and appropriate solutions.
| Symptom | Possible Cause | Recommended Solution |
|---|---|---|
| Constant dripping from spout | Worn cartridge or washer | Replace faulty internal component |
| Water around handle | Damaged O-ring or cartridge seal | Replace the seal or cartridge |
| Water under sink | Loose or damaged supply line | Tighten or replace connection |
| Water around faucet base | Damaged seal or splashing | Inspect mounting seal and faucet body |
| Low water pressure | Blocked aerator | Remove and clean aerator |
| Stiff faucet handle | Mineral buildup or worn cartridge | Clean or replace affected component |
| Dripping after washer replacement | Damaged valve seat | Inspect and repair valve seat |
| Leak from shutoff valve | Worn valve or connection seal | Replace or professionally repair valve |
How to Fix Each Common Cause
Once you identify the source of the leak, choose a repair method that matches the faulty component. Always keep the water supply shut off while removing internal faucet parts, and use replacement components designed for your particular model.
1. Replace a Worn Rubber Washer
This repair applies mainly to traditional compression faucets.
- Turn off the hot and cold water supply.
- Remove the decorative handle cap and handle screw.
- Pull off the handle and access the valve stem.
- Unscrew the valve stem using the appropriate wrench.
- Locate the rubber washer at the end of the stem.
- Remove the retaining screw and worn washer.
- Install a matching replacement washer.
- Reassemble the valve stem and handle.
- Slowly restore the water supply and check for dripping.
If the faucet continues leaking, inspect the valve seat for damage.
Also Read:
2. Replace a Faulty Faucet Cartridge
A damaged cartridge is one of the most common causes of leaks in modern bathroom faucets.
- Shut off both water supply valves.
- Remove the faucet handle and decorative cover.
- Locate the retaining clip or cartridge nut.
- Remove the retaining component carefully.
- Pull out the old cartridge using the correct method.
- Compare the old cartridge with the replacement.
- Install the new cartridge in the correct orientation.
- Reinstall the retaining clip or nut.
- Reassemble the faucet handle.
- Restore water and test the faucet.
Some cartridges require a special removal tool. Avoid twisting or pulling excessively because this can damage the faucet body.
3. Replace Damaged O-Rings
If water escapes around the handle, inspect the O-rings surrounding the valve assembly.
Remove the handle and expose the relevant seals. Carefully remove the old O-rings without scratching the metal or plastic surfaces. Install replacements with matching dimensions and material.
Apply a small amount of manufacturer-approved silicone plumber’s grease to compatible rubber seals. Avoid petroleum-based grease unless the manufacturer specifically approves it.
Also Read:
4. Repair a Leaking Supply Line Connection
Water underneath the sink may originate from the flexible supply line rather than the faucet itself.
First, confirm that the water is coming from the connection and not running down from another component.
- Check whether the fitting is loose.
- Inspect the supply line for cracks or corrosion.
- Examine the sealing washer if the connection uses one.
- Replace damaged supply lines with compatible products.
- Tighten connections according to manufacturer specifications.
Do not apply thread-sealing tape to every connection automatically. Many faucet supply fittings seal through an internal washer or compression arrangement rather than the threads themselves.
5. Clean or Replace a Damaged Aerator
A clogged aerator can create uneven water flow and cause water to spray around the sink.
Unscrew the aerator and separate its removable components. Rinse away loose debris and soak compatible parts in diluted white vinegar if mineral deposits are present.
Brush away remaining buildup and reinstall the aerator. Replace it if the screen or housing is damaged.
6. Repair a Damaged Valve Seat
A worn valve seat can prevent a new washer from creating a proper seal.
After removing the valve stem, inspect the seat for corrosion, scratches, and mineral deposits. Minor buildup may be cleaned carefully, but a deeply damaged seat may require replacement.
Some compression faucets allow the valve seat to be replaced using an appropriate seat wrench. If the seat is inaccessible or badly damaged, professional repair may be more practical.
Also Read:
Advanced Troubleshooting
Some bathroom faucet leaks continue even after replacing common seals and cartridges. These situations require a closer inspection because the problem may involve hidden plumbing defects, damaged faucet components, or pressure-related issues.
Check for Cross-Leakage Between Hot and Cold Water
A damaged mixing cartridge can sometimes allow hot and cold water to pass through internal pathways incorrectly. This may create unusual temperature behavior or unexpected flow.
If the temperature changes without adjusting the handle, inspect the cartridge and verify that it is installed in the correct orientation.
Inspect the Faucet Body
Look closely for hairline cracks around the valve housing, spout connection, or faucet base. A cracked faucet body may leak even when all internal seals are new.
Small cosmetic cracks do not always indicate a water leak, so dry the fixture and observe the exact location of fresh moisture.
Investigate Water Pressure
If several fixtures leak or faucet components fail repeatedly, excessive water pressure may be responsible.
A qualified plumber can measure household pressure and inspect the pressure-reducing valve. Repeatedly replacing cartridges without addressing excessive pressure may lead to further failures.
Check for Water Traveling From Another Source
Water around a faucet does not always originate inside the faucet. Splashing, a leaking drain connection, condensation, or water running down the countertop can create similar symptoms.
Dry the entire area and test one component at a time. This helps distinguish an actual faucet leak from nearby plumbing problems.
When Repair Is Not Worth It
Repairing a bathroom faucet is usually economical when the problem involves a replaceable washer, O-ring, cartridge, or supply line. However, some situations make complete faucet replacement a more sensible investment.
Consider replacement when:
- The faucet body has cracks that allow water to escape.
- Severe corrosion prevents components from being removed safely.
- Replacement cartridges or manufacturer-specific parts are unavailable.
- Several internal components have failed simultaneously.
- The faucet repeatedly develops leaks despite correct repairs.
- The mounting hardware is badly damaged.
- Repair costs approach the price of a suitable replacement faucet.
Before replacing the fixture, check the sink’s mounting configuration, the number of faucet holes, and the spacing between connections. Choosing a compatible replacement prevents additional installation work.
Preventive Maintenance Tips
Regular maintenance can extend the life of a bathroom faucet and reduce the likelihood of unexpected leaks. Most preventive tasks take only a few minutes and do not require specialized plumbing knowledge.
Follow these practical recommendations:
- Clean the aerator regularly: Remove mineral deposits and debris before they restrict water flow.
- Avoid excessive handle force: Turn faucet handles gently instead of tightening them aggressively.
- Inspect supply lines: Check flexible hoses for cracks, corrosion, bulging, and moisture.
- Monitor water pressure: Have unusually high household pressure checked by a plumber.
- Clean faucet surfaces correctly: Use nonabrasive cleaners that are suitable for the faucet finish.
- Check underneath the sink: Occasionally inspect shutoff valves and connections for early signs of leakage.
- Repair small leaks promptly: Replace damaged seals before they cause additional wear or water damage.
- Use compatible replacement parts: Follow manufacturer specifications when purchasing cartridges, washers, and O-rings.
These simple habits help maintain reliable faucet operation and reduce avoidable plumbing expenses.
Common Mistakes to Avoid
Many unsuccessful faucet repairs happen because homeowners rush through disassembly or install incompatible components. Avoiding a few common mistakes can make the repair safer and more effective.
- Ignoring the actual leak location: Replacing a cartridge will not solve a leak coming from a supply line.
- Forcing stuck components: Excessive force can crack plastic parts, damage threads, or break the faucet body.
- Buying the wrong cartridge: Similar-looking cartridges may have different dimensions and internal designs.
- Overtightening connections: Excessive tightening can damage fittings, washers, and supply lines.
- Using unsuitable grease: Petroleum-based products can damage certain rubber seals.
- Applying thread tape incorrectly: Some faucet connections require sealing washers rather than thread tape.
- Reopening the water too quickly: Restore the supply gradually and inspect every connection.
- Ignoring persistent moisture: A small leak can damage cabinets and encourage mold growth if left untreated.
When to Call a Professional
Although many bathroom faucet repairs are suitable for DIY work, some problems require professional plumbing experience. Calling a plumber is the safer choice when the repair involves damaged shutoff valves, hidden leaks, or plumbing components that cannot be accessed easily.
Contact a professional if:
- The shutoff valves will not close completely.
- A supply pipe or valve breaks during repair.
- Water continues leaking from inside the wall or cabinet.
- The faucet body is cracked or severely corroded.
- Water pressure is unusually high throughout the property.
- You cannot identify the source of the leak.
- Replacing the cartridge or seals does not stop the dripping.
- The plumbing connections are old, damaged, or difficult to access.
A professional can inspect the complete plumbing connection, identify hidden damage, and recommend whether repairing or replacing the faucet offers better long-term value.
Estimated Repair Costs
The cost of fixing a leaking bathroom faucet depends on the faucet design, replacement parts, labor rates, and the extent of the damage. Simple repairs generally cost less than replacing an entire fixture or repairing damaged plumbing connections.
The following figures are approximate U.S. cost ranges in USD and may vary by location, brand, and service provider.
| Repair | Estimated Cost | DIY or Professional |
|---|---|---|
| Replace rubber washer | $2–$15 | DIY |
| Replace O-rings | $3–$15 | DIY |
| Clean or replace aerator | $3–$25 | DIY |
| Replace faucet cartridge | $10–$60 | DIY or Professional |
| Replace supply line | $10–$35 | DIY or Professional |
| Repair valve seat | $5–$30 | DIY or Professional |
| Replace shutoff valve | $75–$200 | Professional |
| Replace bathroom faucet | $100–$350+ | DIY or Professional |
Professional labor may add approximately $75–$200 or more, depending on the job and local rates. Complex plumbing work, difficult access, and premium faucet models can increase the total cost.
For an accurate estimate, compare the price of the replacement parts with the cost of professional labor before deciding how to proceed.
Frequently Asked Questions
1. Why does my bathroom faucet keep dripping after I turn it off?
A bathroom faucet usually continues dripping because an internal sealing component is no longer preventing water from passing through the valve. Common causes include worn cartridges, damaged rubber washers, deteriorated O-rings, and mineral buildup. If replacing the appropriate component does not stop the dripping, inspect the valve seat or consider whether the faucet body is damaged.
2. Can I fix a leaking bathroom faucet without replacing it?
Yes, most leaking bathroom faucets can be repaired without replacing the complete fixture. Depending on the design, you may only need a new cartridge, rubber washer, O-ring, or supply line. Identify the leak location first and purchase compatible replacement parts. However, a cracked or severely corroded faucet body generally requires complete fixture replacement.
3. How long does it take to repair a leaking bathroom faucet?
A straightforward faucet repair usually takes approximately 30–60 minutes if the correct tools and replacement parts are available. Cleaning an aerator may take only a few minutes, while replacing a cartridge can require more time. Older faucets with corroded or stuck components may take considerably longer, particularly when special removal tools are needed.
4. Why does my bathroom faucet leak around the handle?
Water around the faucet handle commonly indicates a damaged O-ring, worn cartridge seal, or deteriorated valve stem packing. These components prevent water from escaping around moving parts. Turn off the water supply before removing the handle and inspecting the internal seals. Replace damaged components with compatible parts rather than simply tightening the handle.
5. Can high water pressure cause a bathroom faucet to leak?
Yes, excessive household water pressure can increase stress on faucet cartridges, washers, seals, and flexible supply connections. This may contribute to premature wear or repeated leaks. If multiple faucets develop similar problems, ask a plumber to measure household water pressure. Correcting an underlying pressure problem can help protect other plumbing fixtures.
6. Should I replace both hot and cold faucet cartridges?
Not necessarily. If only one cartridge is damaged, replacing that component may be sufficient. However, if both cartridges show similar signs of wear or the faucet is old, replacing both may be a practical option when compatible parts are available. Follow the manufacturer’s recommendations because some faucet designs use different components for hot and cold water.
7. Why is my bathroom faucet leaking underneath the sink?
A leak underneath the sink may come from loose supply connections, damaged flexible hoses, leaking shutoff valves, or water escaping from the faucet mounting assembly. Dry the cabinet and inspect each connection to identify where fresh moisture appears. Replace damaged hoses or faulty fittings instead of relying on temporary sealing materials that may fail.
8. Is it safe to use a bathroom faucet that is leaking?
A small faucet drip is not usually an immediate safety emergency, but it should not be ignored. Continuous leakage wastes water and can damage countertops, cabinets, and surrounding materials. If water reaches electrical equipment, stop using the affected area and arrange safe electrical isolation. Shut off the water supply if the leak becomes substantial.
9. How do I know whether my bathroom faucet needs replacement?
A faucet may need replacement when its body is cracked, internal components are severely corroded, or compatible replacement parts are unavailable. Repeated leaks despite correct repairs are another warning sign. Compare the total repair cost with the price of a suitable replacement. Replacing an extensively damaged fixture can provide better long-term reliability.
10. Can mineral deposits cause a bathroom faucet to leak?
Yes, mineral deposits can interfere with internal valve movement and prevent sealing components from closing correctly. They can also restrict water flow and make faucet handles difficult to operate. Cleaning removable components, such as the aerator, may improve performance. If mineral buildup has damaged the cartridge or valve surfaces, replacement may be necessary.
Final Thoughts
Fixing a leaking bathroom faucet becomes much easier when you identify the source of the problem before replacing any components. A dripping spout often points to a worn washer or damaged cartridge, while water around the handle may indicate deteriorated O-rings or internal seals. Leakage underneath the sink usually requires a closer inspection of supply lines, shutoff valves, and connections.
Start by shutting off the water supply, drying the faucet, and checking where fresh moisture appears. Then identify the faucet design and choose the appropriate repair. Many common problems can be solved with basic tools and inexpensive replacement parts, provided you follow the correct installation procedure.
Avoid forcing stuck components, using incompatible replacement parts, or overtightening plumbing connections. If you discover a cracked faucet body, damaged shutoff valve, or hidden plumbing leak, professional assistance is the safer option.
Most importantly, do not ignore a small drip. Regular inspection, gentle faucet operation, and timely replacement of worn seals can prevent bigger plumbing problems. With the right troubleshooting approach and basic maintenance, you can keep your bathroom faucet working properly and avoid unnecessary repair expenses.