
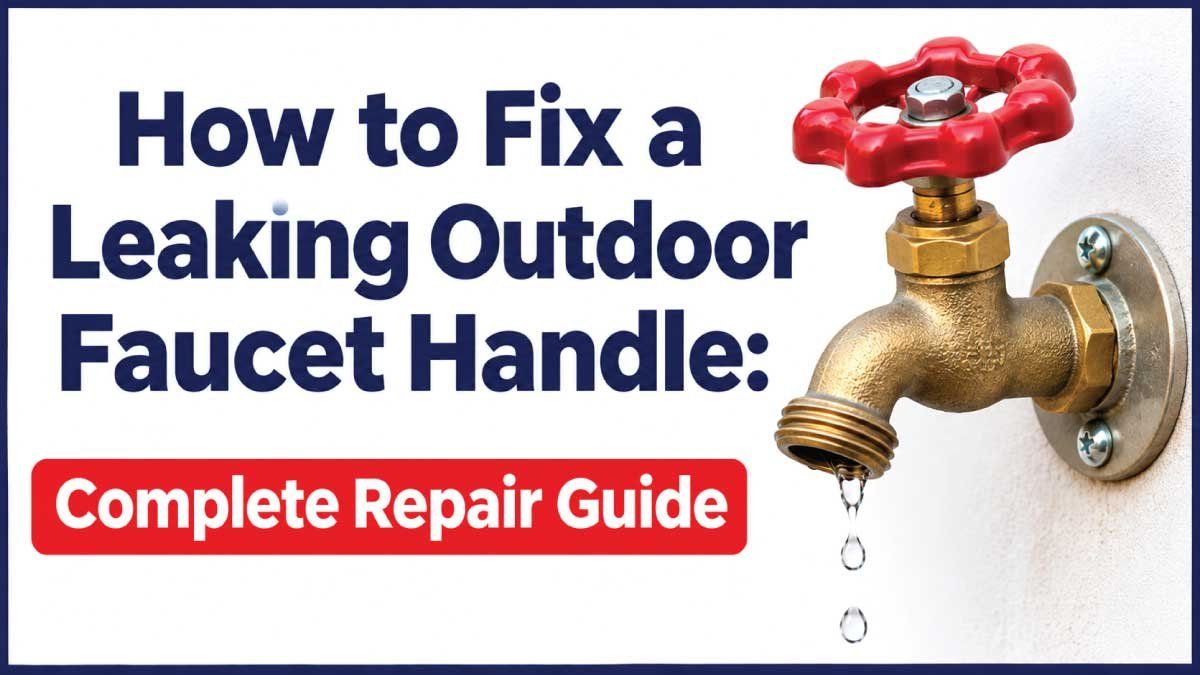
A leaking outdoor faucet handle can be frustrating, especially when water starts dripping around the handle every time you turn on the tap. This problem commonly occurs because of a worn packing washer, damaged O-ring, loose packing nut, deteriorated valve stem seal, or corrosion inside the faucet. Although the leak may appear small, ignoring it can waste water, damage exterior walls, create wet areas around the foundation, and cause further deterioration of the faucet.
Learning how to fix a leaking outdoor faucet handle begins with understanding where the water escapes. If water appears around the handle only when the faucet is running, the packing or stem seal may be worn. If the handle area remains wet even when the faucet is closed, the valve assembly or another sealing component may need attention.
Fortunately, many outdoor faucet handle leaks can be repaired using basic plumbing tools and inexpensive replacement parts. This guide explains the common causes, safety precautions, troubleshooting methods, and step-by-step repair procedures. You will also learn when tightening a packing nut is enough, when replacing an O-ring is necessary, and when a complete faucet replacement or professional plumbing repair makes more sense.
Common Signs and Symptoms
A leaking outdoor faucet handle usually produces visible warning signs that help identify the damaged component. Observing when the water appears is particularly important because a loose packing nut and a damaged valve stem seal can produce similar symptoms but require different repairs.
Common symptoms include:
- Water dripping around the handle: Water appears where the handle connects to the faucet body, particularly when the water is running.
- Water spraying near the handle: A damaged stem seal or loose packing assembly may allow water to escape under pressure.
- Handle becomes difficult to turn: Mineral deposits, corrosion, or excessive packing pressure may make the handle stiff.
- Water continues leaking after closing the faucet: A damaged internal valve washer or cartridge may prevent the faucet from shutting off completely.
- Moisture around the packing nut: Water collects around the hexagonal nut directly behind the handle.
- Corrosion around the handle assembly: Long-term moisture exposure may produce rust, mineral deposits, or greenish discoloration on brass components.
- Loose faucet handle: A worn handle screw or damaged handle connection may cause movement when operating the faucet.
- Leakage increases with water pressure: A weakened packing seal may allow more water to escape when the faucet is fully open.
How an Outdoor Faucet Normally Works
An outdoor faucet, commonly called a hose bib or garden tap, controls water flowing from the household plumbing system to an exterior outlet. Most traditional models use a threaded valve stem connected to a handle. Turning the handle moves the stem and opens or closes an internal valve.
The main components include:
- Handle: The part you turn to operate the faucet.
- Handle screw: Secures the handle to the valve stem.
- Packing nut: Holds the packing material around the valve stem.
- Packing washer or O-ring: Creates a seal that prevents water from escaping around the moving stem.
- Valve stem: Transfers handle movement to the internal valve mechanism.
- Valve washer: Presses against the valve seat in traditional compression faucets to stop water flow.
- Faucet body: Contains the internal water passage and connects to the supply pipe.
When you turn the handle, the valve stem moves and allows water to flow through the outlet. The packing seal keeps water inside the faucet body while the stem rotates.
If the packing washer becomes compressed, the O-ring cracks, or the packing nut loosens, water can escape around the handle even though the faucet continues operating normally.
Most Common Reasons This Problem Happens
Outdoor faucets experience changing weather, frequent operation, mineral deposits, and continuous exposure to moisture. These conditions gradually affect the handle assembly and its internal seals. Identifying the exact cause helps you choose the correct repair instead of replacing the entire faucet unnecessarily.
1. Loose Packing Nut
The packing nut is located directly behind the faucet handle. It holds the packing material tightly around the valve stem.
Repeated handle operation and vibration can gradually loosen this nut. When that happens, water may escape through the small gap around the stem.
Symptoms:
- Water appears around the handle when the faucet is running.
- The packing nut feels loose.
- Leakage decreases temporarily when the nut is tightened.
How to identify it: Dry the handle assembly and inspect the packing nut while briefly operating the faucet. If moisture first appears around the stem, the packing assembly may need adjustment.
2. Worn Packing Washer
Traditional outdoor faucets often use packing material or a packing washer to prevent water from escaping around the valve stem.
Over time, repeated movement and water pressure compress the packing material. It can become hardened, flattened, or damaged.
Symptoms:
- Water leaks around the handle.
- Tightening the packing nut does not completely stop the leak.
- Leakage becomes more noticeable when the faucet is open.
How to identify it: Remove the handle and packing nut after shutting off the water supply. Inspect the packing material for cracks, flattening, or deterioration.
3. Damaged O-Ring
Some modern outdoor faucets use rubber O-rings instead of traditional packing washers. These small seals fit around the valve stem and prevent water from escaping through the handle opening.
Age, friction, and mineral deposits can damage the O-ring.
Symptoms:
- Water escapes around the handle.
- The handle may feel unusually loose or stiff.
- Leakage continues even after tightening the packing nut.
How to identify it: Remove the valve stem according to the faucet manufacturer’s instructions and inspect the O-ring for cracks, stretching, or deformation.
4. Worn Valve Stem
The valve stem moves whenever you turn the outdoor faucet handle. Its surface must remain smooth enough for the packing material or O-ring to create a proper seal.
Corrosion, scratches, and mineral deposits can damage the stem surface.
Symptoms:
- Replacing the packing washer does not stop the leak.
- Water escapes from the handle assembly.
- The handle becomes difficult to operate.
- Visible corrosion appears on the exposed stem.
How to identify it: Inspect the stem after removing the packing nut. Look for deep scratches, pitting, rust, or other surface damage.
5. Excessive Water Pressure
High household water pressure places additional stress on faucet seals and plumbing connections. A weakened packing washer may begin leaking when the faucet is opened under pressure.
Symptoms:
- Water escapes more rapidly when the faucet is fully open.
- Several outdoor or indoor faucets experience similar problems.
- Seals fail repeatedly after replacement.
How to identify it: Have household water pressure measured using a suitable pressure gauge. A plumber can determine whether a pressure-reducing valve needs adjustment or replacement.
6. Mineral Deposits and Corrosion
Outdoor faucets are frequently exposed to mineral-rich water and changing temperatures. Deposits can accumulate around the valve stem and packing assembly, preventing the seal from functioning correctly.
Symptoms:
- White mineral buildup around the handle.
- Green or brown discoloration on brass components.
- Stiff handle movement.
- Persistent leakage despite apparently tight connections.
How to identify it: Inspect the handle assembly for visible deposits and corrosion after shutting off the water supply.
7. Freeze Damage
In colder climates, water trapped inside an outdoor faucet can freeze and expand. This expansion may damage the valve body, stem, internal seals, or connected pipe.
Symptoms:
- Water leaks around the handle after winter.
- The faucet body develops cracks.
- Leakage appears when the outdoor water supply is restored.
- Water may also escape inside the wall.
How to identify it: Inspect the faucet body and surrounding pipework for cracks. If water enters the wall or building structure, shut off the supply and arrange professional inspection.
Safety Precautions Before Troubleshooting
Before repairing an outdoor faucet handle, make sure the water supply is safely isolated. Even a small faucet can release a considerable amount of water when its internal components are removed under pressure.
Follow these precautions:
- Turn off the water supply: Locate the indoor shutoff valve serving the outdoor faucet and close it before disassembly.
- Release remaining pressure: Open the outdoor faucet after shutting off the supply to drain trapped water.
- Protect your hands: Wear work gloves when handling corroded metal components or sharp edges.
- Use suitable tools: Select correctly sized wrenches to avoid damaging the packing nut or valve body.
- Avoid excessive force: Do not force a rusted handle or stuck packing nut because the faucet body or connected pipe may break.
- Check for electrical hazards: Keep extension cords, electrical tools, and outdoor electrical outlets away from standing water. Never handle wet electrical equipment.
- Inspect the surrounding area: Check for water entering the wall, foundation, or basement before continuing.
- Protect against freezing: If temperatures are below freezing, avoid leaving exposed plumbing filled with water after repairs.
If the indoor shutoff valve is damaged or cannot stop the water completely, contact a plumber before removing the faucet handle assembly.
Tools Required
Most outdoor faucet handle repairs require only a few common plumbing tools. The exact equipment depends on whether your faucet uses traditional packing material, a rubber O-ring, or a replaceable valve stem assembly.
| Tool | Purpose |
|---|---|
| Adjustable wrench | Loosening and tightening the packing nut |
| Screwdriver | Removing the handle screw |
| Pliers | Holding and removing small components |
| Replacement O-ring | Replacing a damaged stem seal |
| Packing washer | Restoring the seal around the valve stem |
| Graphite packing material | Sealing traditional faucet stems |
| Silicone plumber’s grease | Lubricating compatible rubber seals |
| Cleaning brush | Removing mineral deposits |
| Clean cloth | Drying the faucet and checking for leaks |
| Flashlight | Inspecting the handle assembly |
| Safety gloves | Protecting hands during repairs |
Check the faucet manufacturer and model before purchasing replacement parts. Outdoor faucets may look similar but use different stem assemblies and seal sizes.
Step-by-Step Troubleshooting Guide
A leaking outdoor faucet handle should be inspected systematically before you remove any internal components. Start by locating the leak, checking the packing nut, and confirming that the water supply can be shut off completely.
Step 1: Locate the Exact Leak
Dry the faucet handle, packing nut, and surrounding body with a clean cloth. Turn on the faucet briefly and observe where water first appears.
Check whether the water is escaping:
- Around the handle connection.
- From the packing nut.
- Between the valve stem and faucet body.
- From a crack in the faucet body.
The first location where fresh moisture appears usually provides the strongest clue about the problem.
Step 2: Check the Packing Nut
Look behind the handle for the hexagonal packing nut. Inspect it for corrosion, looseness, or visible moisture.
If water appears around the stem, a loose packing nut may be responsible. A small adjustment may solve the problem without removing the handle.
Step 3: Inspect the Handle
Check whether the handle is loose or difficult to turn. Look for a screw securing the handle to the valve stem.
A loose handle screw can cause movement and make the faucet harder to operate. However, tightening the screw will not repair a damaged packing washer or O-ring.
Step 4: Shut Off the Water Supply
Locate the shutoff valve inside the house that controls the outdoor faucet. Close it completely.
Open the outdoor faucet to release remaining water pressure. Confirm that water flow stops before proceeding with disassembly.
Step 5: Remove the Handle
Use the appropriate screwdriver to remove the handle screw. Pull the handle away from the stem carefully.
If the handle is stuck because of corrosion, apply a suitable penetrating lubricant to the handle connection and allow it to work. Avoid striking the valve stem or applying excessive force.
Step 6: Inspect the Packing Assembly
Use an adjustable wrench to loosen the packing nut carefully.
Look for worn packing material, damaged O-rings, mineral deposits, and corrosion. Compare the existing seals with available replacement components.
Step 7: Check the Valve Stem
Inspect the exposed stem for scratches, pitting, corrosion, and damage.
If the stem is smooth and undamaged, replacing the packing material may solve the problem. A badly damaged stem may require a replacement stem assembly or complete faucet replacement.
Step 8: Reassemble and Test
Install the appropriate replacement seal, packing material, or O-ring. Reinstall the packing nut and handle.
Restore the water supply slowly and operate the faucet. Observe the handle assembly while the water is running and after the faucet is closed.
If water continues escaping, shut off the supply and inspect the repair again.
Quick Diagnosis Table
The timing and location of water leakage can help distinguish between a loose packing nut, damaged O-ring, and more serious faucet problems. Use the following table to select the most appropriate repair method.
| Symptom | Possible Cause | Recommended Solution |
|---|---|---|
| Water leaks around handle when open | Loose packing nut | Carefully tighten packing nut |
| Continuous dripping around stem | Worn packing washer | Replace packing material |
| Water leaks despite tightening nut | Damaged O-ring | Replace O-ring |
| Handle is difficult to turn | Mineral buildup or corrosion | Clean or replace affected components |
| Water leaks after seal replacement | Damaged valve stem | Replace stem assembly |
| Water sprays around handle | Severely damaged packing seal | Replace packing components |
| Leak appears after winter | Freeze damage | Inspect and replace damaged faucet |
| Multiple faucets develop leaks | Excessive water pressure | Check household water pressure |
How to Fix Each Common Cause
Once you have identified the source of the leak, select a repair method that matches the faucet design. Most handle leaks can be repaired by adjusting the packing nut or replacing worn sealing components.
1. Tighten a Loose Packing Nut
A loose packing nut is often the easiest cause to repair.
- Locate the packing nut directly behind the faucet handle.
- Dry the surrounding area so you can monitor the repair.
- Use an adjustable wrench to hold the packing nut.
- Turn it clockwise a small amount, approximately one-eighth of a turn.
- Operate the faucet and inspect the handle area.
- If necessary, make another small adjustment.
Do not overtighten the packing nut. Excessive pressure can make the handle difficult to turn and damage the packing material.
If tightening the nut does not stop the leak, the packing washer or O-ring may need replacement.
2. Replace Worn Packing Material
Traditional outdoor faucets often use packing material around the valve stem.
Follow these steps:
- Shut off the indoor water supply.
- Open the outdoor faucet to release pressure.
- Remove the handle screw and handle.
- Loosen the packing nut.
- Remove the old packing material carefully.
- Clean the packing area and inspect the stem.
- Install compatible replacement packing material around the stem according to the manufacturer’s instructions.
- Reinstall the packing nut.
- Tighten it enough to create a seal while allowing smooth handle movement.
- Reinstall the handle and restore the water supply.
Some faucets use graphite packing string, while others require a specific packing washer. Use the correct material rather than substituting an unsuitable seal.
Also Read:
3. Replace a Damaged O-Ring
If your outdoor faucet uses an O-ring, replacing it can restore the seal around the handle assembly.
- Shut off the water supply.
- Remove the handle and packing nut.
- Remove the valve stem if required by the faucet design.
- Locate the O-ring around the stem.
- Remove the damaged seal without scratching the surrounding surface.
- Clean the groove.
- Install a new O-ring with matching dimensions.
- Apply a small amount of compatible silicone plumber’s grease.
- Reassemble the faucet.
- Restore water and check for leaks.
Avoid stretching the O-ring during installation because an incorrectly fitted seal may leak again.
4. Repair a Corroded Valve Stem
If the valve stem has surface deposits, remove loose mineral buildup using a soft brush and suitable cleaning solution.
Avoid aggressive sanding that could change the stem’s diameter or damage its sealing surface.
If the stem has deep scratches, severe corrosion, or pitting, replacing the stem assembly is usually more reliable than attempting to repair the damaged surface.
Also Read:
5. Replace a Damaged Handle Screw or Handle
Sometimes the problem is not the water seal but the mechanical connection between the handle and valve stem.
Remove the handle and inspect its screw hole, retaining screw, and stem connection. Replace a damaged screw with a compatible part.
If the handle itself is cracked or stripped, install a suitable replacement handle. Do not force an incorrectly sized handle onto the stem.
6. Repair Mineral Buildup
Mineral deposits can prevent the packing assembly from moving and sealing correctly.
After shutting off the water supply and removing the appropriate components, clean removable parts using a soft brush. Compatible parts can be soaked in diluted white vinegar to loosen mineral deposits.
Rinse and dry the components before reinstalling them. Replace rubber seals if they have hardened or deteriorated.
Also Read:
Advanced Troubleshooting
If the outdoor faucet handle continues leaking after replacing its packing material or O-ring, investigate less common problems. A leak that returns repeatedly may indicate damaged internal components or a wider plumbing issue.
Inspect the Valve Stem Threads
The valve stem threads allow the handle mechanism to move correctly. Damaged or corroded threads can prevent the packing assembly from fitting properly.
Remove and inspect the stem for stripped threads, corrosion, or mechanical damage. Replace the stem if its threads cannot hold the assembly securely.
Check the Faucet Body for Cracks
A cracked faucet body can allow water to escape around the handle or other connections.
Inspect the body carefully, particularly near the handle opening and threaded pipe connection. A cracked body generally requires replacement rather than another packing adjustment.
Investigate Excessive Water Pressure
If the same problem occurs repeatedly, household water pressure may be contributing to seal failure.
A plumber can measure the pressure and check the pressure-reducing valve. Correcting excessive pressure can help prevent similar problems in other fixtures.
Inspect Hidden Pipe Leakage
Water around an outdoor faucet does not always originate from the handle. A leaking connection inside the wall may allow water to travel along the pipe and appear near the faucet assembly.
If the wall becomes damp or water appears inside the house, shut off the supply and arrange professional inspection.
Also Read:
Check for a Frozen or Burst Pipe
If the faucet starts leaking after cold weather, inspect the connected pipe and faucet body for freeze damage. A damaged pipe may leak inside the wall even when the exterior faucet appears normal.
Do not assume that replacing the handle seal will solve a leak caused by a burst pipe.
When Repair Is Not Worth It
Repairing a leaking outdoor faucet handle is generally inexpensive when the problem involves a loose packing nut, worn O-ring, or damaged packing washer. However, some conditions make complete faucet replacement the better long-term solution.
Consider replacing the outdoor faucet when:
- The faucet body has visible cracks.
- The valve stem is severely corroded or damaged.
- Replacement seals and internal components are unavailable.
- The packing assembly repeatedly leaks after correct repairs.
- Freeze damage has affected the faucet body.
- The threaded connections are badly deteriorated.
- Repairing the faucet costs nearly as much as installing a new one.
If the faucet connects to a damaged pipe inside the wall, the connected plumbing must also be inspected. Replacing only the exterior faucet will not solve an underlying pipe leak.
Preventive Maintenance Tips
Regular maintenance helps prevent outdoor faucet handle leaks and extends the life of the fixture. Outdoor plumbing requires additional attention because it is exposed to changing temperatures, rain, dust, and other environmental conditions.
Follow these maintenance practices:
- Inspect the packing nut: Check periodically for looseness and moisture around the handle.
- Operate the handle gently: Avoid excessive force when opening or closing the faucet.
- Clean mineral deposits: Remove buildup before it interferes with handle movement.
- Check water pressure: Have unusually high household pressure investigated.
- Inspect exposed pipework: Look for corrosion, loose connections, and signs of leakage.
- Protect against freezing: Disconnect garden hoses before winter and follow the manufacturer’s winterization instructions.
- Replace worn seals promptly: Do not wait for a small leak to become a larger problem.
- Check after seasonal changes: Inspect outdoor faucets after particularly cold weather.
- Use compatible replacement parts: Always match seals and internal components to the faucet model.
For frost-prone locations, consider a properly installed frost-free sillcock. These faucets are designed to shut off water farther inside the warmer part of the building, reducing the risk of freezing when installed and maintained correctly.
Common Mistakes to Avoid
A simple outdoor faucet repair can become complicated if the wrong tools or replacement components are used. Avoid these mistakes to prevent additional leaks and unnecessary plumbing damage.
- Overtightening the packing nut: Excessive tightening can damage seals and make the handle stiff.
- Replacing the entire faucet unnecessarily: A loose packing nut may only require a small adjustment.
- Ignoring the water supply: Never remove the packing nut while the faucet is pressurized.
- Using the wrong O-ring: Incorrect dimensions can prevent proper sealing.
- Forcing a corroded handle: Excessive force may break the stem or connected pipe.
- Using unsuitable lubricants: Some lubricants can damage rubber seals.
- Ignoring freeze damage: A damaged pipe can leak inside the wall even after the handle is repaired.
- Failing to test the repair: Always inspect the handle assembly under normal operating conditions.
- Using excessive thread tape: Thread tape does not repair a damaged stem packing seal.
When to Call a Professional
Most minor outdoor faucet handle leaks are suitable for DIY repair. However, professional plumbing assistance is necessary when the damage involves the main water connection, hidden pipework, or severely corroded components.
Call a plumber if:
- The indoor shutoff valve does not stop the water completely.
- The faucet handle or packing nut is seized and cannot be removed safely.
- The faucet body has cracked.
- A connected pipe breaks during disassembly.
- Water is leaking inside the wall.
- The outdoor faucet has suffered freeze damage.
- The faucet continues leaking after replacing the packing assembly.
- Water pressure is unusually high throughout the property.
A professional plumber can determine whether the faucet needs a new stem, replacement seals, or complete replacement. This can prevent repeated repairs and protect the surrounding plumbing.
Estimated Repair Costs
The cost of repairing an outdoor faucet handle depends on the faucet design, replacement parts, accessibility, and local plumbing labor rates. Minor sealing repairs are generally inexpensive, while replacing a damaged outdoor faucet or repairing hidden pipework can cost considerably more.
The following are approximate U.S. cost estimates in USD.
| Repair | Estimated Cost | DIY or Professional |
|---|---|---|
| Tighten packing nut | $0–$5 | DIY |
| Replace packing washer | $2–$15 | DIY |
| Replace O-ring | $2–$12 | DIY |
| Replace packing material | $3–$15 | DIY |
| Replace handle screw | $2–$10 | DIY |
| Replace faucet handle | $5–$25 | DIY |
| Replace valve stem | $10–$40 | DIY or Professional |
| Replace outdoor faucet | $20–$100+ | DIY or Professional |
| Repair hidden pipe leak | $100–$400+ | Professional |
Professional labor may add approximately $75–$200 or more, depending on the complexity of the repair and local service rates. Costs can be higher when wall access, pipe replacement, or extensive corrosion is involved.
Frequently Asked Questions
1. Why does my outdoor faucet leak around the handle when turned on?
An outdoor faucet usually leaks around the handle because its packing washer, O-ring, or stem seal has deteriorated. Water pressure pushes moisture through the damaged sealing area when the valve opens. A slightly loose packing nut can also cause this problem. Inspect the packing assembly first and tighten or replace the affected component as necessary.
2. Can I stop an outdoor faucet handle leak by tightening the packing nut?
Yes, tightening the packing nut can stop a minor leak if the existing packing material is still in good condition. Turn it clockwise in small increments and check whether the leakage stops. Avoid overtightening because excessive pressure can damage the packing material and make the handle difficult to operate. Replace the seal if tightening does not work.
3. What is the packing nut on an outdoor faucet?
The packing nut is the hexagonal fitting located directly behind the outdoor faucet handle. It holds packing material around the valve stem to prevent water from escaping while the handle turns. When this nut becomes loose or its internal packing deteriorates, water can leak around the handle. Proper adjustment or replacement of the packing usually restores the seal.
4. How do I know whether my outdoor faucet needs a new O-ring?
A damaged O-ring may cause water to escape around the handle even when the packing nut appears properly tightened. The handle may also feel unusually stiff or loose. After shutting off the water supply and removing the appropriate components, inspect the O-ring for cracks, stretching, or flattening. Replace it with an identical compatible seal.
5. Why does my outdoor faucet leak only when the water is running?
A faucet that leaks around the handle only while operating usually has a problem with its packing assembly or valve stem seal. Water pressure exposes weaknesses in these components when the valve opens. A loose packing nut is a common cause. If careful tightening does not stop the leak, inspect the packing material or O-ring for damage.
6. Can I use plumber’s tape to fix a leaking outdoor faucet handle?
No, plumber’s thread-sealing tape is generally not the correct solution for a leak around the handle. That area is normally sealed by packing material, an O-ring, or a stem washer rather than threaded pipe connections. Applying tape around the handle will not restore the internal seal. Replace the damaged packing component instead.
7. Why does my outdoor faucet handle become difficult to turn after tightening the packing nut?
The packing nut may have been tightened too much, compressing the packing material against the valve stem. This creates excessive friction and makes the handle difficult to operate. Loosen the nut slightly until the handle moves smoothly while maintaining a watertight seal. If the problem continues, inspect the packing material for incorrect installation or damage.
8. Can freezing temperatures cause an outdoor faucet handle to leak?
Yes, freezing temperatures can damage outdoor faucets by causing trapped water to expand inside the valve body or connected pipe. This may crack internal components and create leakage around the handle when water is restored. Inspect the entire faucet and connected plumbing after freezing weather. Replace damaged components and arrange professional inspection if a hidden pipe has burst.
9. Should I replace the entire outdoor faucet if the handle leaks?
Not always. Most handle leaks can be repaired by tightening the packing nut or replacing a worn washer or O-ring. Complete replacement becomes more practical when the faucet body is cracked, the stem is severely corroded, or replacement parts are unavailable. Inspect the fixture carefully before purchasing a new faucet.
10. How often should I inspect an outdoor faucet for leaks?
Inspect outdoor faucets at least twice a year and after periods of unusually cold weather. Check the handle, packing nut, faucet body, and connected pipework for moisture or corrosion. Also inspect the faucet before and after seasonal hose use. Regular checks help identify worn seals early and reduce the likelihood of expensive plumbing damage.
Final Thoughts
A leaking outdoor faucet handle is usually caused by a loose packing nut, worn packing washer, damaged O-ring, or deteriorated valve stem seal. Fortunately, these problems are often straightforward to repair with basic plumbing tools and compatible replacement parts.
Start by drying the faucet and identifying exactly where water escapes. If the leak comes from the handle area, inspect the packing nut before removing the entire valve assembly. A small adjustment may solve the problem. If tightening does not work, shut off the water supply and examine the packing material, O-ring, and valve stem for damage.
Avoid overtightening components or forcing corroded parts because these mistakes can turn a minor repair into a more expensive plumbing problem. If you discover a cracked faucet body, hidden pipe leakage, or freeze damage, contact a qualified plumber.
Regular inspection, gentle handle operation, and timely seal replacement can help keep your outdoor faucet in good condition. Addressing small leaks early protects your water supply, prevents unnecessary waste, and reduces the risk of damage to your home’s exterior plumbing.