
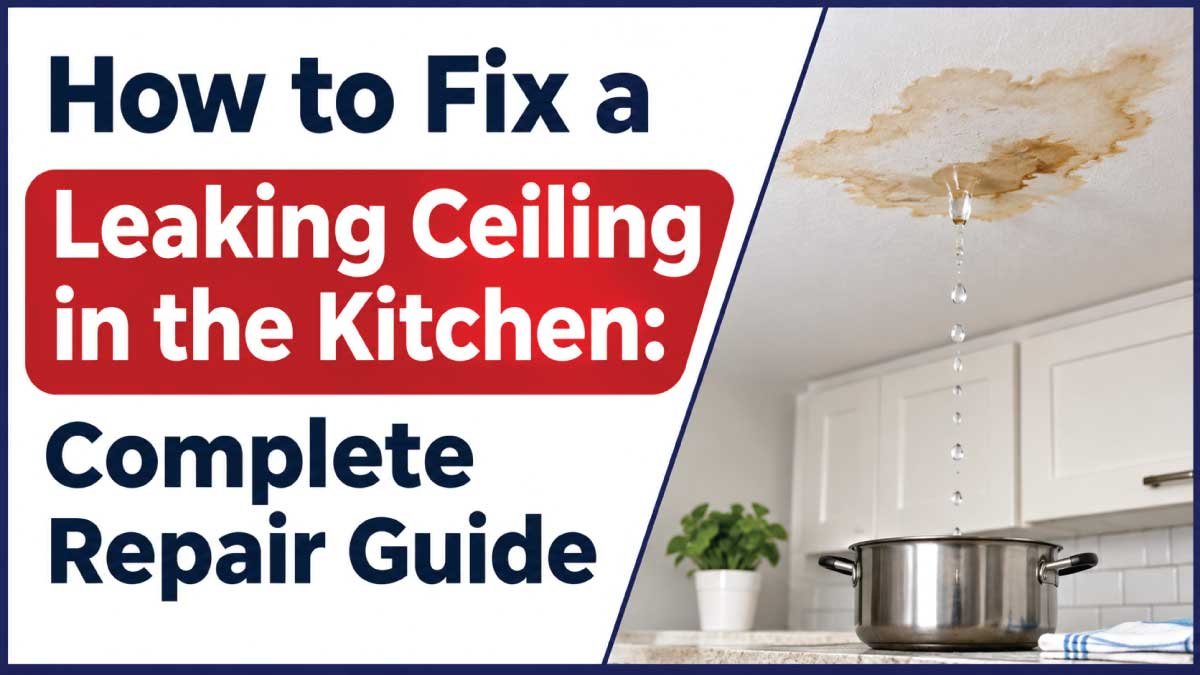
A leaking ceiling in the kitchen is a problem that requires immediate attention because water can damage cabinets, appliances, electrical fixtures, and the ceiling structure. You may notice brown stains, peeling paint, dripping water, damp patches, or bubbling plaster. Sometimes the leak appears suddenly, while in other cases, moisture gradually spreads until visible damage develops.
Learning how to fix a leaking ceiling in the kitchen starts with identifying where the water originates. Common causes include leaking pipes, damaged plumbing connections, upstairs bathroom fixtures, roof damage, faulty drainage systems, and condensation. The visible water stain does not always indicate the exact location of the leak because water can travel along pipes, beams, and ceiling materials before appearing in the kitchen.
This comprehensive repair guide explains how to recognize warning signs, identify common causes, and troubleshoot a leaking kitchen ceiling safely. You will also learn how to repair different types of leaks, determine when ceiling materials need replacement, estimate repair costs, and prevent future water damage. Following the correct repair process can help protect your kitchen and avoid unnecessary expenses.
Common Signs and Symptoms
A kitchen ceiling leak can develop slowly or appear suddenly, depending on the amount of water entering the ceiling cavity. Some homeowners first notice discoloration, while others discover active dripping or damaged paint. Recognizing these symptoms early helps identify the problem before water spreads into electrical systems, cabinets, and structural materials.
Common warning signs include:
- Brown or yellow water stains: Discolored patches usually indicate that water has soaked into plaster, drywall, or ceiling paint.
- Dripping water: Water falling from the ceiling suggests an active leak that needs immediate investigation.
- Peeling or bubbling paint: Moisture weakens the bond between paint and the ceiling surface.
- Sagging ceiling: Waterlogged drywall or plaster may become heavy and lose its structural strength.
- Musty smell: A persistent damp odor may indicate moisture trapped above the ceiling.
- Mold growth: Dark spots or fuzzy patches can develop when wet materials remain damp.
- Cracked plaster: Repeated exposure to water can weaken plaster and cause cracks.
- Damp kitchen cabinets: Water may travel from the ceiling into cabinet tops, walls, and wooden surfaces.
- Rust around light fixtures: Moisture can cause corrosion around metal electrical components.
- Recurring ceiling stains: Reappearing stains may indicate that an earlier repair did not solve the original leak.
Pay attention to whether the symptoms become worse after rainfall, using an upstairs bathroom, running the kitchen sink, or operating an appliance. These observations help narrow down the source.
How the Kitchen Ceiling System Normally Works
A properly constructed kitchen ceiling protects the room from water entering the roof, upper floor, and plumbing systems. Plumbing pipes, drainage connections, roofing materials, and waterproofing systems should prevent water from reaching the ceiling surface. When these components work correctly, the ceiling remains dry even when water is used in the kitchen or an upstairs bathroom.
Several building systems help prevent leaks:
- Water supply pipes: Deliver water to kitchen faucets, refrigerators, dishwashers, and other connected appliances.
- Drainage pipes: Carry wastewater away from sinks, dishwashers, and washing appliances.
- Roof coverings: Protect the kitchen from rainfall and prevent water from entering the building.
- Roof flashing: Seals joints around chimneys, vents, and other roof openings.
- Floor waterproofing: Prevents water from upstairs bathrooms and laundry areas from entering the floor structure.
- Ceiling materials: Drywall, plaster, and supporting structures form the visible ceiling surface.
- Ventilation: Removes excess humidity and reduces condensation.
A failure in any of these systems can allow water to enter the ceiling cavity and eventually appear inside the kitchen.
Most Common Reasons This Problem Happens
Finding the original water source is the most important part of repairing a leaking kitchen ceiling. Water can travel through concealed spaces, meaning the visible stain may be several feet away from the actual problem. Understanding the following causes will help you perform a more accurate inspection and choose the correct repair method.
1. Leaking Water Supply Pipe
A damaged or loose water supply pipe can release water continuously into the ceiling cavity. Pipes may deteriorate because of corrosion, aging materials, excessive pressure, or poor installation.
Common symptoms include:
- Continuous dripping.
- Expanding ceiling stains.
- Dampness even when nobody uses the kitchen.
- Unexplained increases in water consumption.
If the ceiling leak continues when all nearby fixtures are turned off, a pressurized water pipe may be responsible.
2. Leaking Upstairs Bathroom
An upstairs bathroom is a common source of kitchen ceiling leaks, especially when the kitchen is directly below a shower, bathtub, toilet, or sink.
Water may escape through damaged shower waterproofing, faulty drain connections, cracked pipes, or a leaking toilet seal.
If the ceiling becomes wet after someone showers, flushes a toilet, or drains a bathtub upstairs, investigate the corresponding fixture.
3. Damaged Roof or Roof Flashing
If your kitchen is located directly beneath the roof, damaged roofing materials may allow rainwater to enter the ceiling.
Common causes include:
- Cracked or missing roof tiles.
- Damaged waterproof membranes.
- Loose flashing.
- Blocked roof drainage.
- Deteriorated roof joints.
- Damaged gutters.
A ceiling that becomes wet only during rainfall is a strong indication of a roof-related problem.
4. Leaking Kitchen Sink Plumbing
Water connections beneath or behind the kitchen sink can leak and travel into surrounding cabinets and walls.
A damaged faucet connection, supply hose, drain trap, or waste pipe may release water that eventually reaches the ceiling below.
Inspect the sink cabinet for dripping connections, standing water, corrosion, and damp surfaces.
5. Dishwasher or Washing Machine Leakage
Dishwashers and washing machines use water supply and drainage connections that can deteriorate over time.
A damaged hose, loose fitting, blocked drain, or faulty appliance connection may allow water to escape into nearby building materials.
If the kitchen ceiling is below an appliance area, compare the leak with appliance operating times.
6. Refrigerator Water Line Leakage
Refrigerators with ice makers or water dispensers may have a dedicated water supply line.
A cracked plastic tube, loose connector, or damaged valve can release water behind the refrigerator. Moisture may spread beneath flooring or through nearby structural spaces before appearing on the kitchen ceiling below.
7. Blocked or Damaged Drainage Pipe
Kitchen drainage systems carry wastewater from sinks and appliances. Food debris, grease, and other materials can create blockages that increase the risk of leakage at weak joints.
Look for slow drainage, unpleasant odors, water around drain connections, or leakage that occurs when the sink is emptied.
8. Condensation Around Pipes or Ducts
Cold water pipes and air-conditioning ducts can collect condensation when warm, humid kitchen air contacts their cooler surfaces.
If insulation is missing or ventilation is poor, moisture may accumulate above the ceiling.
Look for droplets around cold pipes, damp insulation, and moisture that appears during periods of high humidity.
9. Air Conditioner Drainage Problems
An air-conditioning system located above the kitchen may leak when its condensate drain becomes blocked, disconnected, or damaged.
Water can accumulate in the drain pan and overflow into the ceiling cavity.
A leak that appears while the air conditioner operates may indicate a drainage problem.
10. Damaged Bathroom or Balcony Waterproofing
Water from an upstairs balcony, laundry room, or bathroom may penetrate damaged waterproofing and move through the floor structure.
This problem is especially common when waterproofing membranes have deteriorated or floor drainage is inadequate.
Inspect the areas directly above the kitchen for standing water, damaged joints, and recurring dampness.
Safety Precautions Before Troubleshooting
Water leaking through a kitchen ceiling can create serious hazards because kitchens contain electrical appliances, lighting, switches, and sometimes gas equipment. Before inspecting the affected area, make sure the ceiling is stable and electrical components are safe. Never touch wet switches, exposed wires, or appliances standing in water. Taking precautions before troubleshooting reduces the risk of injury and additional property damage.
Follow these safety measures:
- Turn off electricity: If water is near ceiling lights, wiring, or electrical appliances, switch off the affected circuit at the breaker if it is safe to access.
- Avoid sagging ceilings: A waterlogged ceiling can collapse. Keep people away from the affected area.
- Stop the water supply: Close the appropriate isolation valve or main water valve if a plumbing leak is suspected.
- Protect appliances: Move electrical appliances away from wet areas when it is safe to do so.
- Wear protective equipment: Use gloves, safety glasses, and suitable respiratory protection when inspecting damaged materials.
- Keep the floor dry: Remove standing water to prevent slipping.
- Check for gas hazards: If water has reached gas appliances or their controls, stop using them and contact a qualified technician.
- Avoid cutting wet ceilings: Do not puncture or remove sagging materials yourself.
- Check older building materials: Some older ceiling materials may contain asbestos. Do not disturb suspicious materials without professional assessment.
If the ceiling is bulging, cracking, or making unusual sounds, leave the area and arrange professional assistance.
Tools Required
The tools needed depend on whether the leak comes from plumbing, roofing, an appliance, or condensation. Basic inspection equipment is usually enough to identify visible moisture, while specialized tools may be required for concealed plumbing problems. Start with simple tools and avoid removing ceiling materials until the source of the leak has been identified.
| Tool | Purpose |
|---|---|
| Flashlight | Inspect dark ceiling spaces and plumbing connections |
| Adjustable wrench | Tighten suitable plumbing fittings |
| Screwdriver set | Remove accessible covers and panels |
| Moisture meter | Measure moisture inside ceiling materials |
| Bucket | Collect dripping water |
| Dry cloths | Remove visible moisture |
| Spirit level | Check appliance or fixture alignment where relevant |
| Utility knife | Remove damaged materials when safe and appropriate |
| Silicone sealant | Repair suitable plumbing and fixture joints |
| Caulking gun | Apply sealant evenly |
| Replacement pipe fittings | Repair compatible damaged connections |
| Pipe insulation | Reduce condensation |
| Protective gloves | Protect hands during inspection |
| Safety glasses | Protect eyes from debris |
A professional may also use thermal imaging equipment, plumbing pressure-testing tools, drain cameras, or roof inspection equipment.
Step-by-Step Troubleshooting Guide
A systematic inspection helps locate the source of a kitchen ceiling leak without unnecessary demolition. Start by observing the leak pattern and identifying what activities make the moisture worse. Then inspect accessible plumbing, appliances, and the roof. Following these steps in order can help distinguish between a supply-line leak, drainage problem, roof leak, and condensation.
Step 1: Identify the Location of the Water Stain
Inspect the ceiling and identify where water first becomes visible.
Look for:
- Brown or yellow patches.
- Active dripping.
- Peeling paint.
- Sagging sections.
- Damp areas near lights or ventilation openings.
Why it matters: The location provides an initial clue about the possible water source.
Expected result: You should identify the affected ceiling area.
What to do next: Compare its position with the rooms, appliances, and plumbing above it.
Step 2: Determine When the Leak Appears
Observe whether water appears during rainfall, cooking, washing dishes, using an upstairs bathroom, or operating an air conditioner.
Why it matters: The timing helps identify which system may be responsible.
Expected result: You may notice a consistent relationship between a particular activity and the leakage.
What to do next: Inspect the corresponding plumbing fixture or building system.
Step 3: Inspect the Kitchen Sink and Plumbing
Check the faucet connections, supply hoses, drain trap, and visible waste pipes beneath the sink.
Why it matters: Loose connections and damaged pipes can release water into surrounding structures.
Expected result: Look for droplets, corrosion, mineral deposits, and damp cabinet surfaces.
What to do next: Close the water supply if an active leak is discovered.
Step 4: Check Dishwashers and Other Appliances
Inspect the water supply and drainage connections of nearby appliances.
Look for:
- Cracked hoses.
- Loose connectors.
- Water beneath the appliance.
- Damp flooring.
- Leakage during operation.
Why it matters: Appliance leaks can travel into walls and ceiling cavities.
Expected result: You should identify whether leakage is connected to appliance use.
What to do next: Stop using the affected appliance until the source is repaired.
Step 5: Inspect the Upstairs Bathroom
If there is a bathroom above the kitchen, inspect its toilet, shower, bathtub, sink, and visible plumbing.
Why it matters: Water can escape through damaged seals and concealed drainage connections.
Expected result: Look for damp floors, damaged grout, loose sealant, or leaking fixtures.
What to do next: Arrange plumbing or waterproofing repairs if necessary.
Step 6: Check the Roof and Exterior Areas
If the ceiling becomes wet during rainfall, inspect accessible roof drainage, gutters, flashing, and roof coverings.
Why it matters: Rainwater can enter through small openings and travel along structural materials.
Expected result: You may identify damaged roofing or blocked drainage.
What to do next: Arrange appropriate roof repairs.
Step 7: Investigate Condensation and Air Conditioning
Check accessible cold pipes, ventilation ducts, and air-conditioning drain lines.
Why it matters: Condensation and blocked condensate drains can produce moisture that resembles a plumbing leak.
Expected result: Look for droplets, wet insulation, or water around the drain pan.
What to do next: Improve insulation or arrange air-conditioning drainage repairs.
Step 8: Assess the Ceiling Damage
After the water source has been controlled, assess the affected ceiling materials.
Why it matters: Wet drywall, plaster, and insulation may lose strength or develop mold.
Expected result: Determine whether the ceiling is dry and stable or requires professional restoration.
What to do next: Arrange proper drying and replace materials that cannot be safely restored.
Also Read:
Quick Diagnosis Table
The following table connects common kitchen ceiling leak symptoms with possible causes and recommended solutions. Use it as a reference after performing the initial inspection. Although these patterns can help narrow down the problem, they are not a substitute for professional testing when water is entering concealed plumbing or structural areas.
| Symptom | Possible Cause | Recommended Solution |
|---|---|---|
| Ceiling leaks during rainfall | Damaged roof or flashing | Repair roof covering and joints |
| Water appears after upstairs showers | Shower drain or waterproofing failure | Inspect and repair bathroom plumbing |
| Continuous dripping | Pressurized supply pipe leak | Repair damaged pipe or fitting |
| Leakage after using the sink | Faulty sink drain or supply connection | Inspect and repair plumbing |
| Water appears during dishwasher operation | Damaged appliance hose or connection | Repair appliance plumbing |
| Dampness near air-conditioning ducts | Blocked condensate drain | Clean and repair drainage |
| Brown ceiling stains | Previous or active water damage | Identify source and assess materials |
| Musty odor | Trapped moisture or mold | Dry affected area and assess contamination |
| Water around refrigerator area | Leaking refrigerator supply line | Replace damaged tubing or connector |
| Dampness during humid weather | Pipe or duct condensation | Improve insulation and ventilation |
How to Fix Each Common Cause
Once the source has been identified, choose a repair method that addresses the actual failure. Avoid repairing the ceiling before correcting the plumbing, roofing, or appliance problem. The following methods explain common repairs and help distinguish simple maintenance tasks from jobs that require professional assistance.
1. Repair a Leaking Water Supply Pipe
A leaking supply pipe requires a repair appropriate to its material and location.
The general process involves:
- Shut off the water supply.
- Identify the damaged pipe section or connection.
- Drain remaining water from the affected line.
- Remove the damaged fitting or pipe section using suitable tools.
- Install compatible replacement components.
- Restore the water supply carefully.
- Check the repair for leakage.
Copper, PEX, PVC, and other plumbing materials require different fittings and joining methods. Concealed pipe repairs should generally be handled by a qualified plumber.
Also Read:
2. Repair an Upstairs Bathroom Leak
If the source is an upstairs bathroom, identify the failed fixture or waterproofing component.
Common repairs include:
- Replacing damaged shower drain gaskets.
- Repairing leaking bathtub connections.
- Replacing a faulty toilet seal.
- Repairing damaged shower waterproofing.
- Replacing deteriorated silicone around suitable joints.
Do not simply apply sealant over a suspected waterproofing failure. The underlying membrane and floor structure may require professional inspection.
3. Repair a Leaking Kitchen Sink Connection
A loose or damaged sink connection can often be repaired without major construction.
Follow these steps:
- Empty the cabinet beneath the sink.
- Turn off the water supply if a supply connection is leaking.
- Inspect the faucet hoses and drain trap.
- Identify the damaged gasket, connector, or fitting.
- Replace the defective component with a compatible part.
- Tighten connections according to the manufacturer’s instructions.
- Run water and check for leakage.
Avoid excessive tightening because plastic fittings and threaded connections can crack.
Also Read:
4. Fix a Leaking Dishwasher Connection
If water escapes from the dishwasher supply or drainage connection, inspect the hoses and fittings.
The repair may involve:
- Disconnecting the dishwasher from electrical power.
- Turning off its water supply.
- Inspecting accessible hose connections.
- Replacing damaged hoses or seals.
- Securing compatible connections.
- Testing the appliance for leakage.
If the dishwasher itself is leaking from its door, pump, or internal components, follow the appropriate appliance repair procedure rather than assuming the external connection is responsible.
5. Repair a Leaking Refrigerator Water Line
Refrigerator water lines can leak behind the appliance or near their connection points.
To address an accessible leak:
- Turn off the refrigerator’s water supply.
- Disconnect power if water has reached electrical components.
- Inspect the tubing and connectors.
- Replace cracked or damaged tubing with compatible material.
- Secure the connections according to the manufacturer’s instructions.
- Restore the water supply and check for leakage.
Do not use unsuitable adhesive or ordinary tape as a permanent repair for a pressurized water line.
6. Repair Roof Leakage
Roof leaks require locating the entry point rather than sealing the interior ceiling stain.
Depending on the roof type, repairs may include:
- Replacing cracked or missing roof tiles.
- Repairing damaged waterproof membranes.
- Replacing deteriorated flashing.
- Clearing blocked roof drains and gutters.
- Resealing appropriate roof joints.
Roof work can involve fall hazards. Leave steep, wet, or difficult-to-access roofs to qualified professionals.
Also Read:
7. Repair an Air Conditioner Drainage Problem
A blocked or disconnected air-conditioning drain can cause water to overflow into the ceiling.
A technician may:
- Inspect the condensate drain line.
- Remove accumulated dirt or algae.
- Check the drain pan for cracks.
- Confirm that the drain line has the correct slope.
- Reconnect or replace damaged drainage components.
- Test the system to verify proper drainage.
If water has reached electrical components, disconnect the affected circuit safely and arrange professional inspection.
8. Reduce Pipe and Duct Condensation
Condensation problems can often be reduced through insulation and ventilation improvements.
Recommended measures include:
- Installing suitable insulation around cold pipes.
- Repairing damaged duct insulation.
- Sealing gaps that allow humid air to reach cold surfaces.
- Improving kitchen ventilation.
- Maintaining suitable indoor humidity.
- Repairing ventilation equipment that is not operating correctly.
If condensation continues, confirm that the moisture is not coming from an actual plumbing leak.
Advanced Troubleshooting
Some kitchen ceiling leaks originate in concealed spaces and cannot be identified through visual inspection alone. When the water source remains unclear, professional diagnostic methods can help locate hidden moisture and determine whether the problem involves plumbing, roofing, drainage, or building materials.
Moisture Meter Testing
A moisture meter measures moisture levels in suitable ceiling and wall materials. A technician can compare readings around the damaged area with readings from dry sections.
Higher readings indicate possible moisture accumulation, but the meter does not independently identify the source.
Plumbing Pressure Testing
A plumber can isolate and pressure-test suitable water supply sections to identify concealed leaks.
This method is particularly useful when water continues appearing even though all visible fixtures are turned off.
Thermal Imaging
Thermal imaging equipment identifies temperature differences that may help locate hidden moisture. It can be useful when water has spread behind drywall or across a ceiling cavity.
However, thermal imaging does not independently confirm a plumbing leak.
Drain Camera Inspection
A specialist can use a small inspection camera to examine accessible drainage pipes for cracks, blockages, and damaged joints.
This is especially useful when leakage occurs after using a sink, dishwasher, or upstairs bathroom.
Roof Inspection
A roofing professional can inspect roof coverings, flashing, drainage outlets, and waterproof membranes to locate rainwater entry points.
When Repair Is Not Worth It
Repairing a ceiling is not always the most economical option, particularly when water has damaged a large area or weakened supporting materials. The decision should consider the extent of the damage, the cost of restoration, and whether the underlying leak has been permanently corrected.
Consider replacing damaged ceiling materials when:
- Drywall has become heavily swollen or lost its strength.
- Plaster is separating from the supporting surface.
- Insulation has become extensively wet or contaminated.
- Mold has spread into concealed materials.
- Ceiling sections repeatedly deteriorate after previous repairs.
- Wooden supports show significant water damage or decay.
- The damaged ceiling area is too large for a reliable patch.
If structural framing is damaged, have it inspected before installing new ceiling materials. Replacing the visible surface without repairing weakened supports can create further problems.
Preventive Maintenance Tips
Preventing kitchen ceiling leaks requires regular attention to plumbing, appliances, roofing, and moisture control. Small problems such as loose pipe connections, damaged hoses, and deteriorating waterproofing can become expensive when ignored. A simple maintenance routine helps detect early warning signs and protects kitchen surfaces and building materials.
Follow these preventive measures:
- Inspect visible plumbing: Check faucet connections, supply hoses, and drainage pipes periodically.
- Maintain kitchen appliances: Inspect dishwasher, washing machine, and refrigerator water connections.
- Check upstairs bathrooms: Monitor showers, toilets, bathtubs, and sink connections for moisture.
- Inspect the roof: Check roof coverings, flashing, and gutters regularly.
- Clean drainage systems: Remove grease and debris from accessible drains.
- Maintain air conditioning: Keep condensate drain lines clear and inspect drain pans.
- Insulate cold pipes: Proper insulation reduces condensation.
- Improve ventilation: Remove excess moisture from the kitchen and nearby rooms.
- Monitor ceiling stains: Investigate new discoloration rather than covering it with paint.
- Check cabinets: Look for dampness and unpleasant odors beneath sinks.
- Repair small leaks promptly: Replace damaged fittings and hoses before moisture spreads.
- Monitor water consumption: Unexpected increases may indicate hidden plumbing problems.
Regular inspections can help identify developing leaks before they cause extensive ceiling damage.
Common Mistakes to Avoid
Many homeowners make the mistake of repairing the visible ceiling damage without addressing the source of the water. This often leads to recurring stains, peeling paint, mold, and additional repair expenses. Avoid these common mistakes when troubleshooting a leaking kitchen ceiling.
- Painting over water stains: Paint does not stop active leakage or remove trapped moisture.
- Ignoring small drips: Even a slow leak can damage insulation and structural materials.
- Cutting into a sagging ceiling: Waterlogged ceiling materials may collapse unexpectedly.
- Using excessive sealant: Silicone cannot repair a cracked pipe or failed waterproofing membrane.
- Replacing drywall too early: New materials should not be installed before proper drying.
- Ignoring electrical hazards: Water near ceiling lights and kitchen appliances requires immediate attention.
- Assuming every leak comes from plumbing: Roof damage and condensation can produce similar symptoms.
- Overtightening pipe connections: Excessive force can damage fittings and create additional leaks.
- Ignoring mold: Covering contaminated materials with paint does not remove the underlying problem.
- Repairing the wrong area: The visible water stain may not be directly below the actual leak.
- Ignoring repeated leakage: A recurring problem indicates that the original repair may have been incomplete.
When to Call a Professional
Some kitchen ceiling leaks are suitable for basic DIY troubleshooting, but concealed plumbing, electrical damage, roof problems, and structural deterioration require professional assistance. Contacting the right specialist early can prevent further damage and reduce the risk of unsafe repairs.
Call a qualified professional when:
- Water continues dripping despite shutting off nearby fixtures.
- A concealed supply pipe is leaking.
- Water has entered ceiling lights or electrical wiring.
- The ceiling is sagging, cracking, or showing signs of collapse.
- An upstairs bathroom has failed waterproofing.
- A roof leak requires access to a steep or difficult surface.
- Mold has spread into concealed ceiling materials.
- An air-conditioning drainage system continues overflowing.
- The leak returns after previous repairs.
- Wooden ceiling supports or other structural materials appear damaged.
A plumber should repair plumbing failures, a roofing professional should address roof leakage, and a qualified electrician should inspect affected electrical systems. A ceiling contractor can restore damaged drywall or plaster once the source has been corrected and the materials are dry.
Estimated Repair Costs
Kitchen ceiling leak repair costs depend on the source, accessibility, materials, labor rates, and extent of water damage. The following figures are broad illustrative estimates in US dollars rather than verified local quotations. Actual costs in Pakistan and other markets can differ significantly. Always request a detailed quotation before approving extensive repairs.
| Repair | Estimated Cost | DIY or Professional |
|---|---|---|
| Replace minor plumbing seal | $10–$40 | DIY |
| Repair accessible pipe fitting | $75–$200 | Professional |
| Replace damaged supply pipe section | $100–$400 | Professional |
| Repair kitchen sink drain | $50–$180 | DIY or Professional |
| Repair dishwasher water connection | $50–$150 | DIY or Professional |
| Replace refrigerator water line | $30–$120 | DIY or Professional |
| Repair roof flashing | $150–$500 | Professional |
| Repair roof waterproofing | $200–$800+ | Professional |
| Clean air conditioner drain | $50–$150 | Professional |
| Replace damaged drywall ceiling | $150–$600 | DIY or Professional |
| Professional mold remediation | $500–$3,000+ | Professional |
These estimates may exclude extensive structural repairs, replacement of cabinets, and major roof reconstruction. Ask whether the quotation includes leak detection, plumbing work, drying, material replacement, and painting.
Frequently Asked Questions
1. Why is my kitchen ceiling leaking when it is not raining?
A kitchen ceiling can leak without rainfall because a damaged water supply pipe, drainage connection, upstairs bathroom fixture, or appliance hose may be releasing water. Air-conditioning drainage problems can also cause ceiling moisture. Inspect the timing of the leak and check accessible plumbing connections. If dripping continues when fixtures are unused, arrange a professional plumbing inspection.
2. Can a leaking kitchen ceiling collapse?
Yes, a severely water-damaged ceiling can collapse when drywall, plaster, or supporting materials become saturated and lose strength. Warning signs include bulging, sagging, cracking, and unusual movement. Keep people away from the affected area and avoid touching or puncturing the ceiling. Arrange professional assessment before attempting any removal or restoration work.
3. How do I know if my kitchen ceiling leak comes from the roof?
A roof leak is likely when the ceiling becomes wet during or shortly after rainfall, particularly if the kitchen is directly beneath the roof. Damaged flashing, roof tiles, waterproof membranes, and blocked drainage can allow water inside. A roofing professional can inspect the exterior and identify the entry point before interior ceiling repairs begin.
4. Can a leaking pipe above the kitchen ceiling be repaired without removing the ceiling?
Yes, if the damaged pipe or connection is accessible through an existing service opening or another suitable access point. However, concealed pipes may require a carefully planned opening in the ceiling or adjoining wall. A plumber should locate the leak first to avoid unnecessary demolition and ensure the repair addresses the actual damaged section.
5. Why does my kitchen ceiling leak after someone uses the upstairs bathroom?
A kitchen ceiling that becomes wet after upstairs bathroom use may have a leaking shower drain, bathtub connection, toilet seal, or damaged waterproofing. Water may escape beneath the bathroom floor and travel along structural materials before appearing downstairs. Stop using the suspected fixture and arrange an inspection to identify the exact failure.
6. Is a brown stain on the kitchen ceiling dangerous?
A brown stain is not necessarily dangerous by itself, but it can indicate previous or ongoing water damage. If the area remains damp, mold may develop and ceiling materials may weaken. Check whether the stain is expanding, soft, or discolored further. Have the moisture source identified and repair any damaged materials before repainting.
7. How long does it take to repair a leaking kitchen ceiling?
The repair time depends on the source and severity of the damage. Replacing an accessible pipe fitting may take a few hours, while locating a concealed leak can take longer. Drying wet insulation and ceiling materials may require additional time. Extensive roof, waterproofing, or structural repairs can take several days or more.
8. Can I paint over a kitchen ceiling water stain?
You can repaint a water stain after the original leak has been repaired and the ceiling has dried completely. Remove loose paint, replace damaged materials if necessary, and apply a suitable stain-blocking primer before painting. Using ordinary paint over an active leak or damp ceiling will not solve the problem and may lead to recurring discoloration.
9. Can an air conditioner cause a kitchen ceiling leak?
Yes, an air conditioner installed above the kitchen or in a nearby ceiling space can leak if its condensate drain becomes blocked, disconnected, or damaged. Water may overflow from the drain pan and enter ceiling materials. If moisture appears while the air conditioner operates, stop using the affected unit and arrange drainage inspection.
10. Should I turn off the water supply when my kitchen ceiling leaks?
Turn off the appropriate water supply when you suspect a leaking pipe, fixture, or appliance connection. If the source is unclear and water continues spreading, closing the main supply may help prevent additional damage until a plumber investigates. However, if the leak comes from rainfall or condensation, shutting off the water will not resolve the underlying problem.
Final Thoughts
Fixing a leaking ceiling in the kitchen requires more than repairing a water stain or applying fresh paint. The first priority is identifying where the water comes from and stopping it before additional damage develops. Common causes include leaking supply pipes, faulty drainage connections, upstairs bathroom problems, damaged roofing, appliance hoses, and air-conditioning drainage failures.
Begin with a careful inspection of the affected ceiling and accessible plumbing connections. Pay attention to when the leak appears because rainfall, appliance operation, and bathroom use can provide important clues. Always disconnect affected electrical circuits when water is near electrical equipment, and stay away from ceilings that are sagging or structurally unstable.
Once the source is repaired, allow the ceiling cavity to dry properly before replacing drywall, plaster, insulation, or paint. More complicated problems involving concealed plumbing, roof damage, electrical systems, and structural deterioration should be handled by qualified professionals.
Regularly inspecting pipes, appliances, drainage systems, and roof coverings can help prevent future leaks. Most importantly, address small signs of moisture early. Prompt diagnosis and proper repairs are the best ways to protect your kitchen, ceiling structure, and home from expensive water damage.