
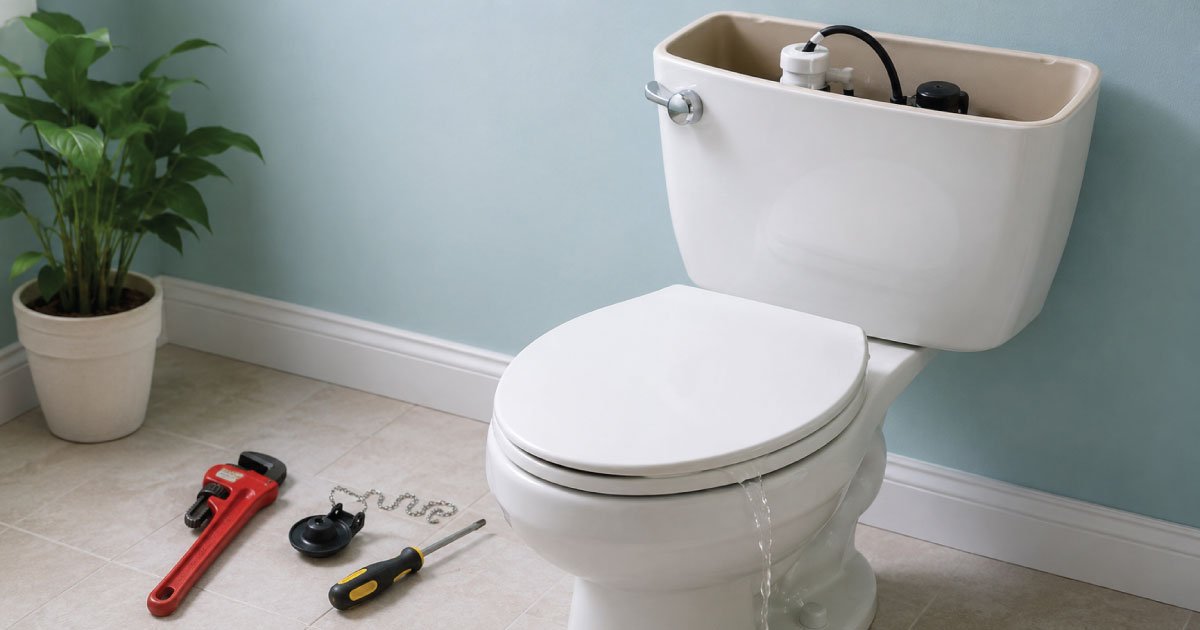
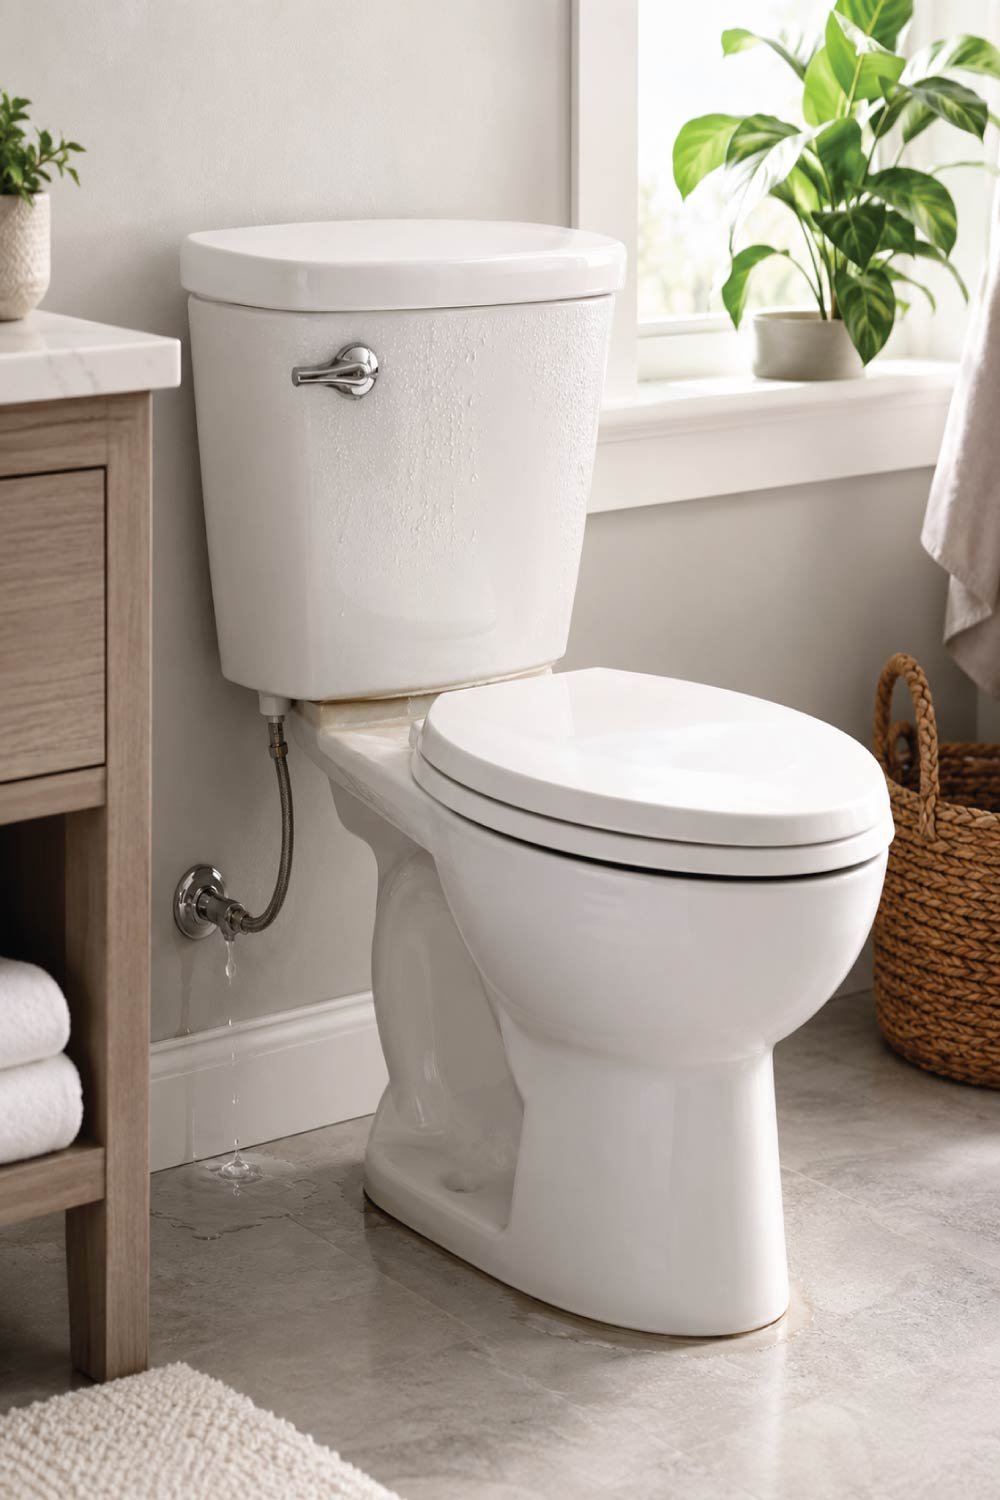
A running toilet is one of the most common household plumbing problems and also one of the most wasteful. That constant sound of water refilling the tank may seem harmless, but a running toilet can waste hundreds of gallons of water every day, driving up your water bill and putting unnecessary strain on your plumbing system.
The good news is that fixing a running toilet is usually straightforward, inexpensive, and well within the skill level of most homeowners. In many cases, the repair takes less than 30 minutes and requires only basic tools. This guide will explain why toilets run, how toilet mechanisms work, and exactly how to diagnose and fix the problem step by step.
Table of Contents
ToggleWhat Does “Running Toilet” Mean?
A running toilet refers to a situation where water keeps flowing into the bowl or tank even after a flush has completed. Instead of stopping once the tank refills, the system continues losing water due to a sealing or valve issue. This problem can happen constantly or in short repeating cycles, wasting water and increasing utility costs over time.
You may notice:
- A constant hissing or trickling sound
- Water flowing into the overflow tube
- The tank refilling every few minutes without flushing
- A higher-than-normal water bill
All of these signs indicate that water is escaping from the tank when it shouldn’t.
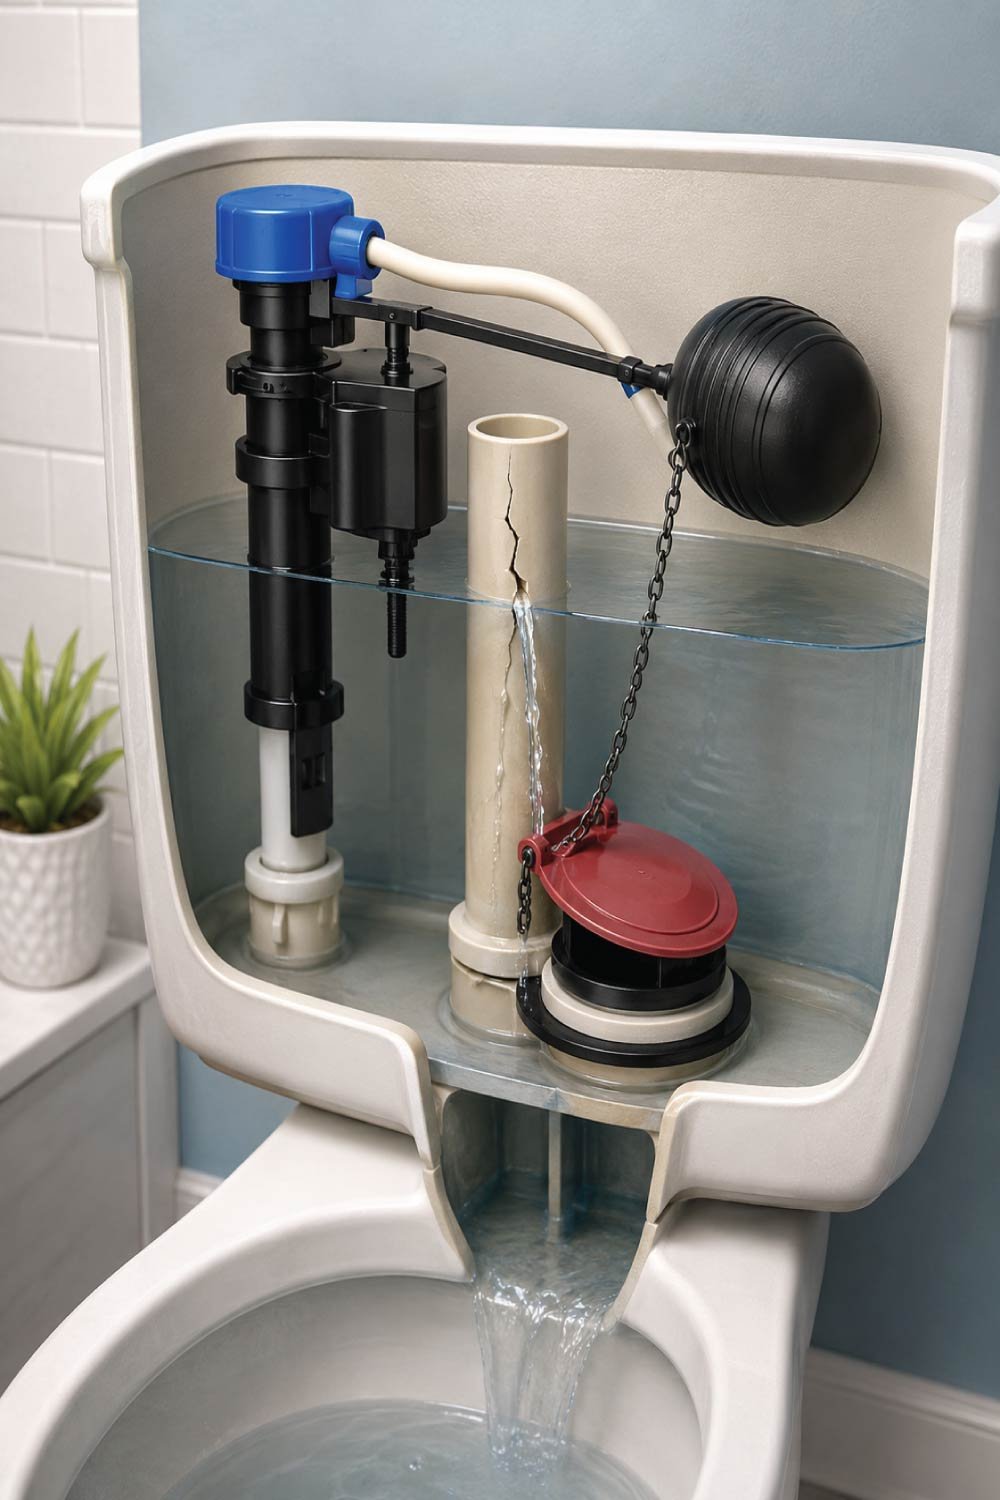
How a Toilet Tank Works (Simple Explanation)
A toilet tank operates through a simple balance of mechanical parts that control water flow, storage, and release. When you flush, water is released into the bowl, and then the tank automatically refills until a set level is reached. If any component fails, the system cannot regulate water properly, leading to continuous running or leakage.
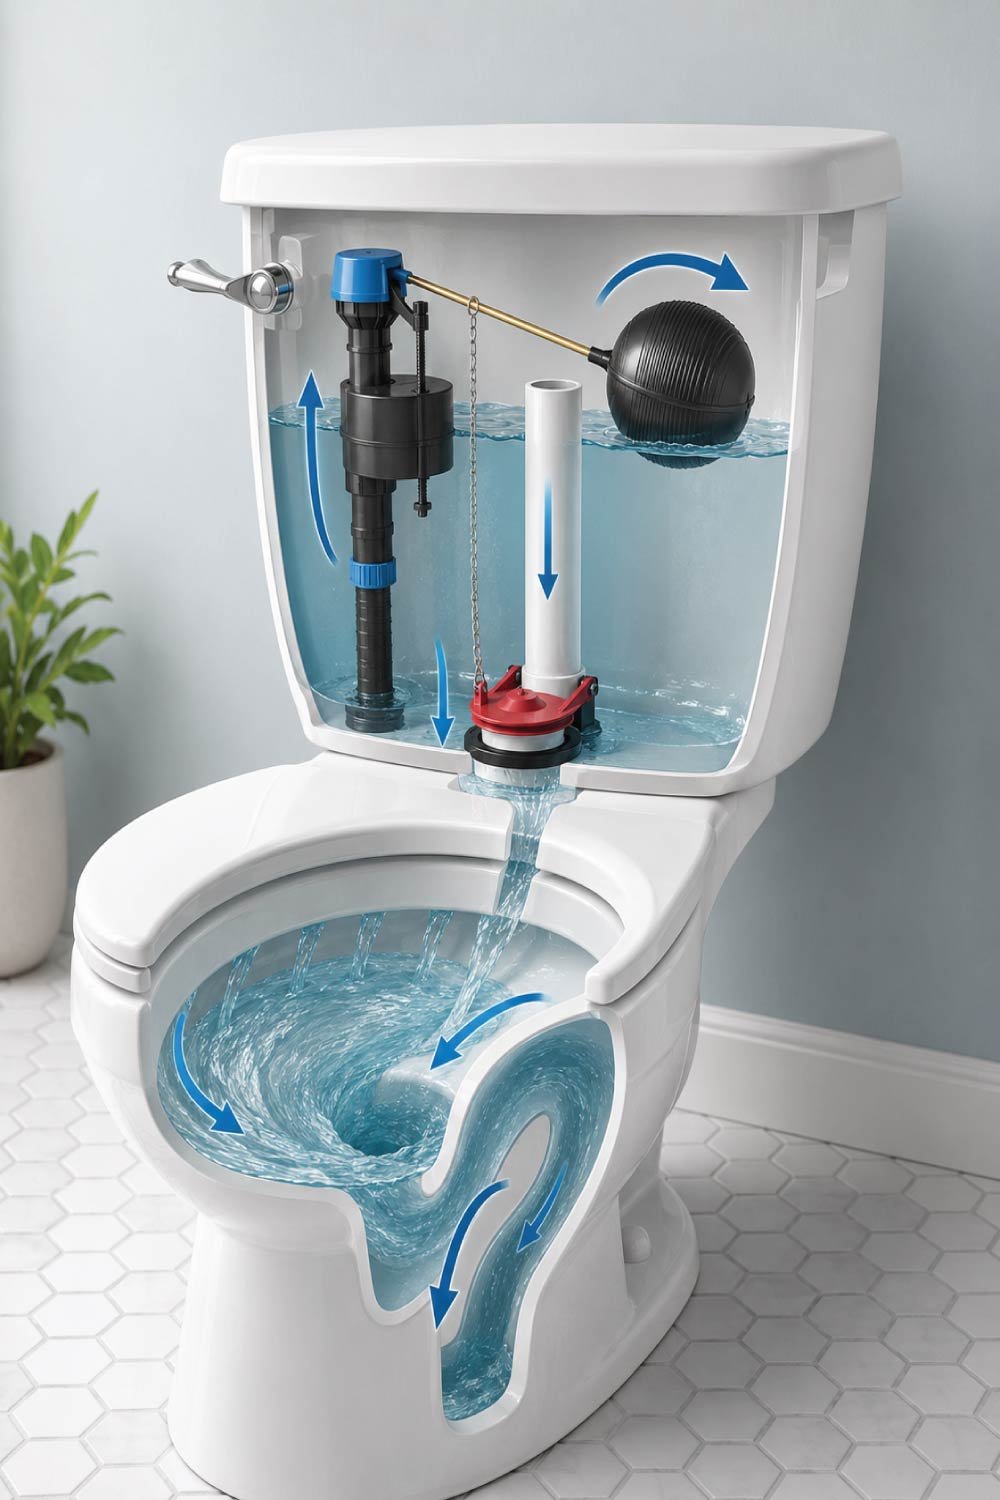
- Fill valve – Controls how water enters the tank
- Float – Signals the fill valve when to shut off
- Flapper – Seals the opening between the tank and bowl
- Overflow tube – Prevents tank overflow
- Flush handle and chain – Lifts the flapper during a flush
When everything works correctly, flushing lifts the flapper, water flows into the bowl, and the fill valve refills the tank until the float reaches the correct level. A running toilet means one of these components isn’t sealing or shutting off properly.
Common Causes of a Running Toilet
A running toilet usually develops because one or more internal parts are not sealing, aligning, or functioning correctly. These issues often develop gradually due to wear, mineral buildup, or improper adjustment. Identifying the exact cause is essential for applying the correct repair and preventing repeated water loss.
- A worn or misaligned flapper
- A float set too high or too low
- A faulty fill valve
- A tangled or overly tight chain
- A cracked overflow tube
- Mineral buildup from hard water
Identifying which part is failing is the key to fixing the problem efficiently.
Tools and Supplies You’ll Need
Repairing a running toilet typically requires only basic household tools and inexpensive replacement parts. Most homeowners can complete the repair without professional equipment. Having everything prepared beforehand makes the process faster and reduces interruptions during troubleshooting and replacement steps.
- Adjustable wrench
- Sponge or towel
- Replacement flapper or fill valve (if needed)
- Bucket or container
- Rubber gloves (optional)
Most toilet repair parts are inexpensive and widely available at hardware stores.
Step 1: Remove the Tank Lid and Inspect
The first step in diagnosing a running toilet is to visually inspect the internal tank components while it is operating. This helps you quickly identify abnormal water movement, incorrect float levels, or improper sealing of the flapper. Careful observation often reveals the issue without needing immediate disassembly.
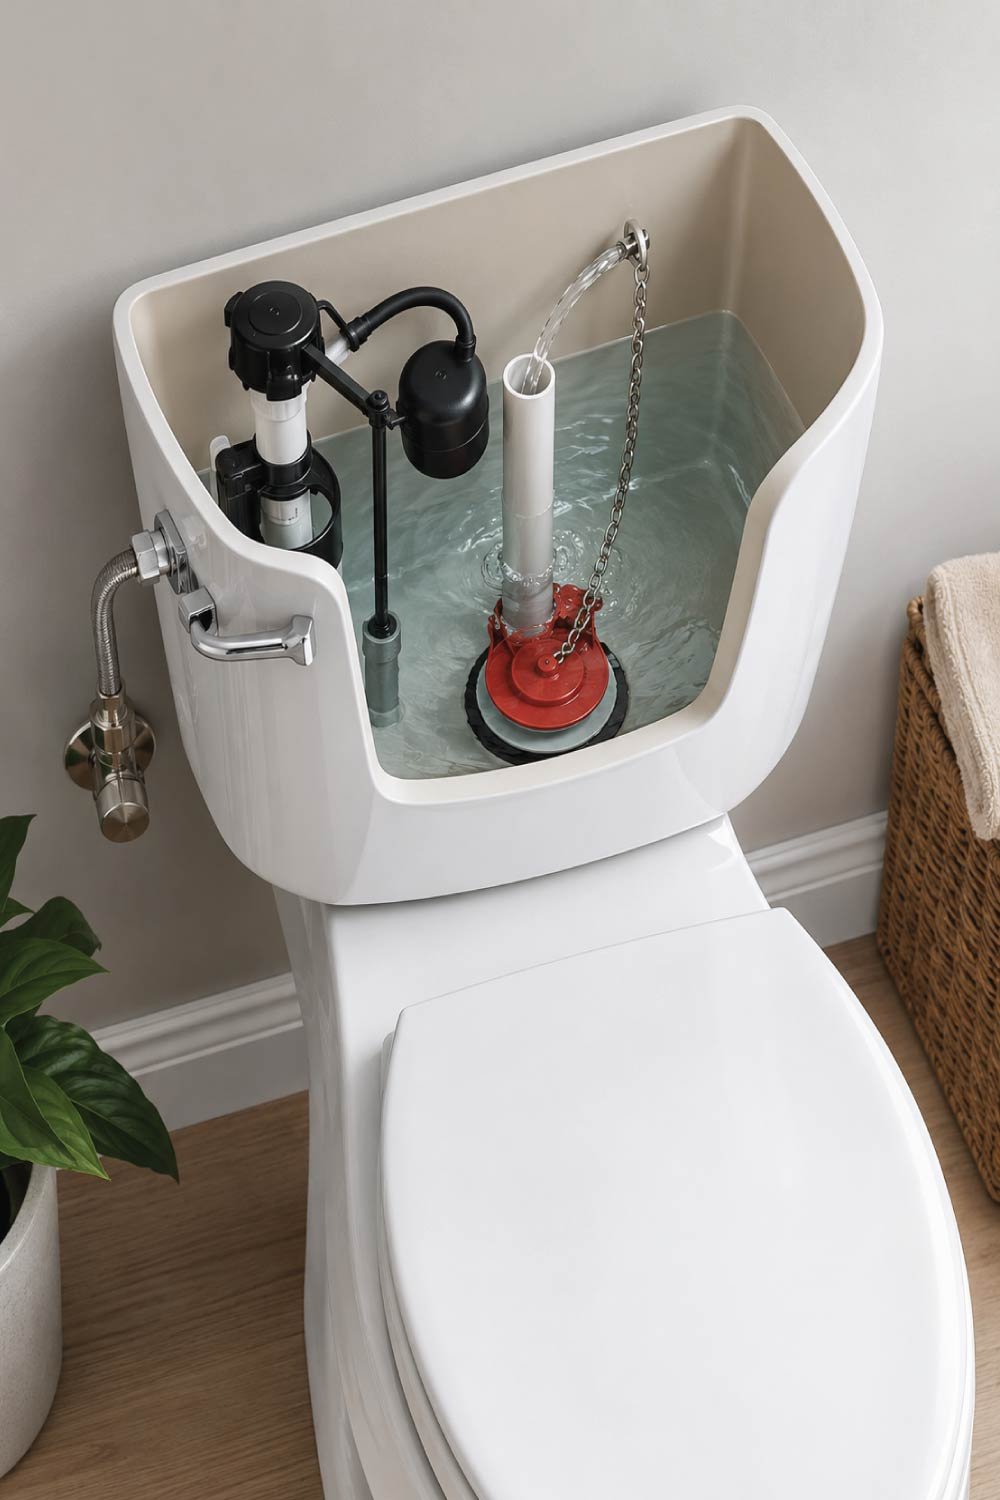
Look for:
- Water flowing into the overflow tube
- The flapper sealing properly after the flush
- The float rising and stopping the water
- Chain length and movement
This visual inspection often reveals the problem immediately.
Step 2: Check the Flapper (Most Common Fix)
The flapper is one of the most common failure points in a toilet tank because it is constantly exposed to water, pressure changes, and mineral buildup. When it does not seal properly, water continuously leaks into the bowl, causing the toilet to run even when it is not being flushed.
What to Look For
- Flapper doesn’t sit flat
- Rubber is warped, cracked, or brittle
- Flapper closes too slowly
- Water leaks into the bowl after refilling
To test it, press down gently on the flapper while the tank is full. If the running stops, the flapper needs adjustment or replacement.
How to Fix or Replace the Flapper
- Turn off the water supply valve behind the toilet.
- Flush the toilet to drain the tank.
- Unhook the chain and remove the flapper from the overflow tube.
- Install a new flapper of the same size and type.
- Reattach the chain with slight slack (about ½ inch).
Turn the water back on and test the flush.
Also Read:
Step 3: Adjust the Chain Length
The chain inside the toilet tank plays a small but very important role in controlling the flapper’s movement during flushing. If it is not set correctly, the flapper cannot seal properly or lift efficiently. This can lead to continuous water leakage or weak flushing performance, both of which contribute to a running toilet problem that wastes water.
If the chain is too short, it can prevent the flapper from sealing. If it’s too long, it can get stuck under the flapper.
The chain should:
- Lift the flapper fully during a flush
- Have a little slack when the flapper is closed
Adjusting the chain alone can sometimes stop a running toilet instantly.
Step 4: Inspect and Adjust the Float
The float is responsible for controlling when the fill valve shuts off, making it one of the most important parts in maintaining proper water levels inside the tank. If it is set incorrectly, water may rise too high and spill into the overflow tube, causing continuous running and unnecessary water waste even when the toilet is not in use.
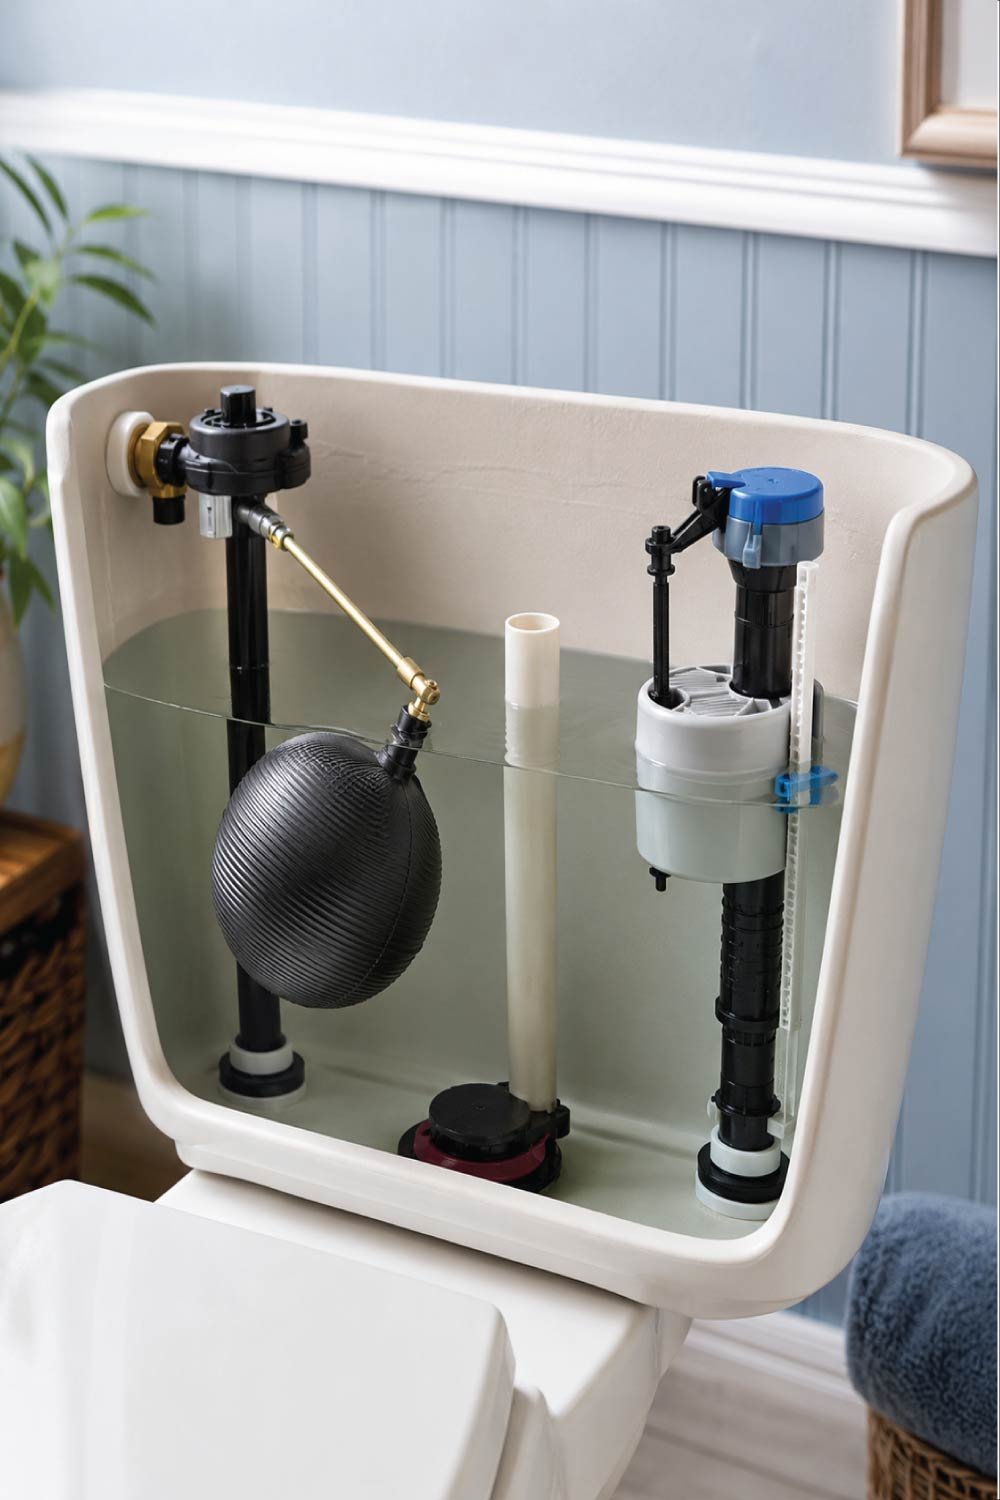
Types of Floats
- Ball float – A floating ball on a metal arm
- Cup float – A cylinder that slides up and down the fill valve
How to Adjust
- For a ball float, gently bend the metal arm downward to lower the water level.
- For a cup float, adjust the screw or clip on the fill valve.
The correct water level is usually about 1 inch below the top of the overflow tube.
Step 5: Test the Fill Valve
The fill valve controls the flow of water into the tank and stops it once the correct level is reached. If it becomes worn or damaged, it may fail to shut off properly, leading to constant water flow. Testing it helps confirm whether replacement is necessary for restoring normal toilet function.
Signs of a bad fill valve include:
- Water never shuts off
- Inconsistent water levels
- Loud or whistling noises
Replacing the Fill Valve
- Turn off the water supply.
- Flush and sponge out remaining water.
- Disconnect the water supply line.
- Remove the old fill valve.
- Install the new valve following manufacturer instructions.
This repair is slightly more involved but still DIY-friendly.
Also Read:
How to Fix a Broken Window Frame? Complete Guide About Broken Window Frame Repair
Step 6: Check the Overflow Tube
The overflow tube is designed to prevent tank overfilling, but if it is cracked or damaged, it can become a pathway for constant water loss. Even small structural issues in this part can mimic other toilet problems, making inspection important before assuming other components are faulty.
Inspect the overflow tube for cracks or damage. A cracked tube can allow water to leak continuously into the bowl.If the overflow tube is damaged, it often means replacing the flush valve assembly, which may justify calling a plumber if you’re uncomfortable with more advanced repairs.
Step 7: Clean Mineral Buildup
Mineral buildup from hard water can interfere with the movement and sealing of internal toilet components. Over time, deposits can prevent proper function of valves and flappers, leading to persistent running issues. Regular cleaning helps maintain smooth operation and extends the life of internal parts.
Hard water can leave mineral deposits that interfere with seals and moving parts.
To clean:
- Turn off the water
- Use vinegar to dissolve buildup
- Gently scrub with a cloth or soft brush
Avoid abrasive tools that could damage plastic or rubber components.
Also Read:
How to Fix Cracks in Ceiling? Complete Guide About Ceiling Cracks Repair
Common Mistakes to Avoid
Even small errors during toilet repair can lead to repeated issues or incomplete fixes. Many problems occur when steps are rushed or components are installed incorrectly. Careful attention during each stage helps ensure the repair lasts and prevents unnecessary repeat maintenance.
- Forgetting to turn off the water supply
- Overtightening plastic parts
- Using the wrong flapper size
- Ignoring small leaks until they worsen
- Mixing incompatible toilet components
Taking a few extra minutes to do things carefully can prevent repeat problems.
When a Running Toilet Isn’t the Problem
Sometimes the sound of running water is mistaken for a toilet issue when the actual source lies elsewhere in the plumbing system. External leaks or condensation can create similar sounds, so inspecting surrounding areas is important before assuming internal tank failure.
Sometimes the sound of running water comes from elsewhere, such as:
- A leaking supply line
- Condensation dripping into the bowl
- A loose tank-to-bowl gasket
Inspect the area around the toilet to rule out external leaks.
When to Call a Plumber
While many running toilet issues can be fixed with basic tools, some situations require professional attention. If multiple repairs fail or structural damage is suspected, expert help ensures the problem is resolved safely and prevents further water damage or costly mistakes.
DIY repairs are ideal for most running toilets, but call a professional if:
- The toilet continues running after replacing parts
- You see cracks in the porcelain tank or bowl
- Water leaks onto the floor
- You’re uncomfortable disconnecting plumbing
Knowing your limits can save time and prevent costly damage.
Also Read:
Squeaky Door Hinges? Make Them Silent Instantly (Easy Fix Guide)
How Much Water and Money You Can Save
A running toilet can waste a significant amount of water each day, leading to higher utility bills and unnecessary environmental strain. Fixing the issue promptly is one of the most cost-effective home maintenance tasks because it immediately stops continuous water loss.
A running toilet can waste up to 200 gallons of water per day. Fixing it promptly can:
- Lower your monthly water bill
- Reduce environmental impact
- Prevent wear on plumbing components
- Improve toilet performance
It’s one of the highest-return plumbing repairs you can make.
Preventing Future Toilet Problems
Preventive maintenance helps avoid recurring toilet issues and extends the lifespan of internal components. Simple habits such as regular cleaning and timely part replacement can significantly reduce the chances of future leaks or running problems.
To keep your toilet running efficiently:
- Avoid using harsh chemical cleaners in the tank
- Replace flappers every few years
- Clean mineral buildup regularly
- Address minor issues early
Routine maintenance goes a long way.
Also Read:
Helpful Authoritative References
Trusted plumbing and environmental resources can provide additional diagrams and step-by-step guidance for deeper understanding. These references are useful for homeowners who want to verify repair methods or explore more detailed troubleshooting techniques.
Final Thoughts
A running toilet may be annoying, but it is rarely complicated to fix. With a basic understanding of how your toilet works and a few inexpensive parts, you can stop the water waste, reduce your bills, and restore quiet to your bathroom.
Once you’ve fixed a running toilet yourself, you’ll gain confidence in handling other simple home repairs and you’ll never ignore that sound again.