
Wall cracks are one of those home issues that can quietly appear and suddenly start bothering you every time you walk past them. At first, they look harmless—just a thin line in the paint—but over time, they can spread, deepen, and make your walls look old or poorly maintained. The good news is that most wall cracks are not serious structural threats and can be fixed at home with the right approach.
In this detailed guide, you’ll learn why wall cracks appear, how to identify their severity, and step-by-step methods to repair them like a professional. Whether you’re dealing with hairline cracks in paint or slightly deeper plaster splits, this guide will help you restore your walls quickly and effectively.
Understanding Why Wall Cracks Appear
Wall cracks are more than just cosmetic issues; they often indicate underlying movement, moisture, or construction quality problems. Understanding the root causes helps you choose the right repair method and ensures the cracks don’t return after patching effectively over time.
Before jumping into repairs, it’s important to understand what causes cracks in the first place. Knowing the reason helps you fix them properly and prevent them from coming back.
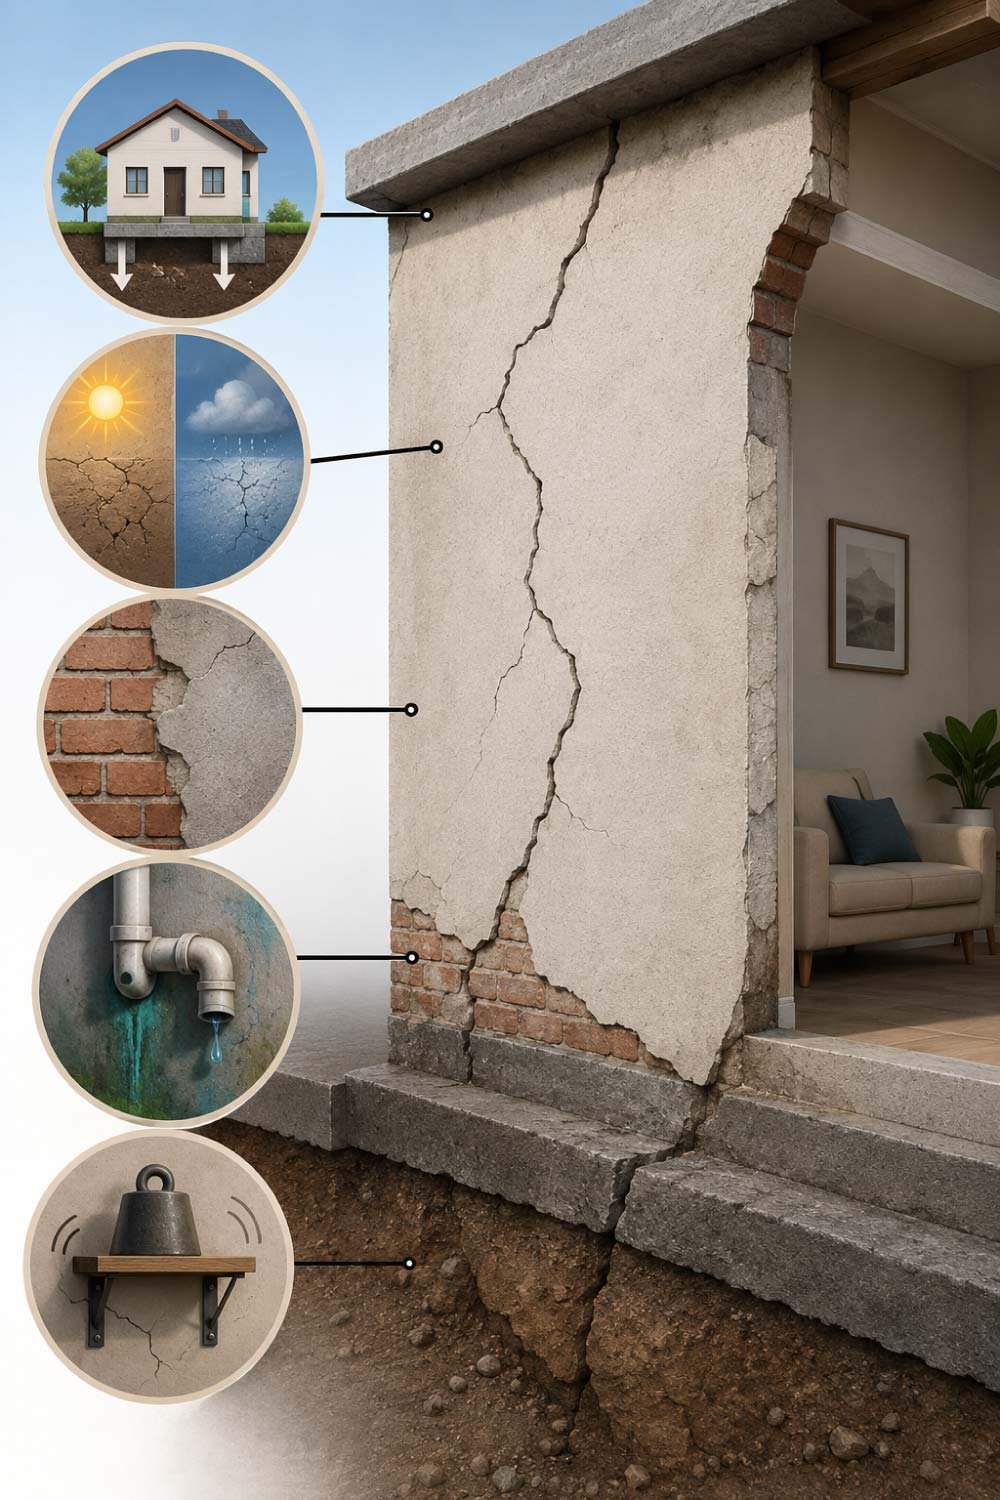
1. Natural Settling of the House
Every building settles over time. As the foundation adjusts to soil conditions, small movements occur in walls. This often results in thin vertical or diagonal cracks, especially in newly built homes.
2. Temperature and Humidity Changes
Walls expand in heat and contract in cold. Similarly, moisture in the air can cause plaster and paint to swell or shrink. Over time, this repeated movement creates fine cracks on the surface.
3. Poor Construction Work
If low-quality materials were used or plastering was not done correctly, cracks may appear sooner than expected. Weak bonding between wall layers is a common cause.
4. Water Leakage
Hidden plumbing leaks or roof seepage can weaken wall material. Once moisture enters the structure, it softens plaster and leads to cracking or bulging.
5. Heavy Load or Vibration
Walls near doors, windows, or busy roads may experience constant vibration. Similarly, hanging heavy items without proper support can stress the wall and create cracks.
Types of Wall Cracks You Should Know
Not every crack signals serious damage. Some are purely cosmetic while others may point to structural concerns. Learning to identify different crack patterns allows homeowners to respond correctly and avoid unnecessary repairs or missed warning signs early on effectively issues.
Not all cracks are the same. Some are harmless, while others may need deeper attention. Identifying the type helps you decide the right repair method.
Hairline Cracks
These are very thin cracks, usually less than 1 mm wide. They appear on paint or plaster surfaces and are mostly cosmetic.
Vertical Cracks
These run straight up and down and are often caused by normal settling of the structure.
Horizontal Cracks
These are more serious than vertical ones and may indicate pressure on the wall or structural movement.
Diagonal Cracks
Often seen near doors and windows, these are usually caused by uneven settling or stress points.
Deep or Wide Cracks
If a crack is wide enough to fit a coin edge or deeper into the wall, it may require professional inspection.
Tools and Materials You Will Need
Having the right tools and materials ready before starting the repair makes the process faster, cleaner, and more effective. Proper preparation also ensures the filler bonds well and the repaired surface blends seamlessly with the surrounding wall finish later on.
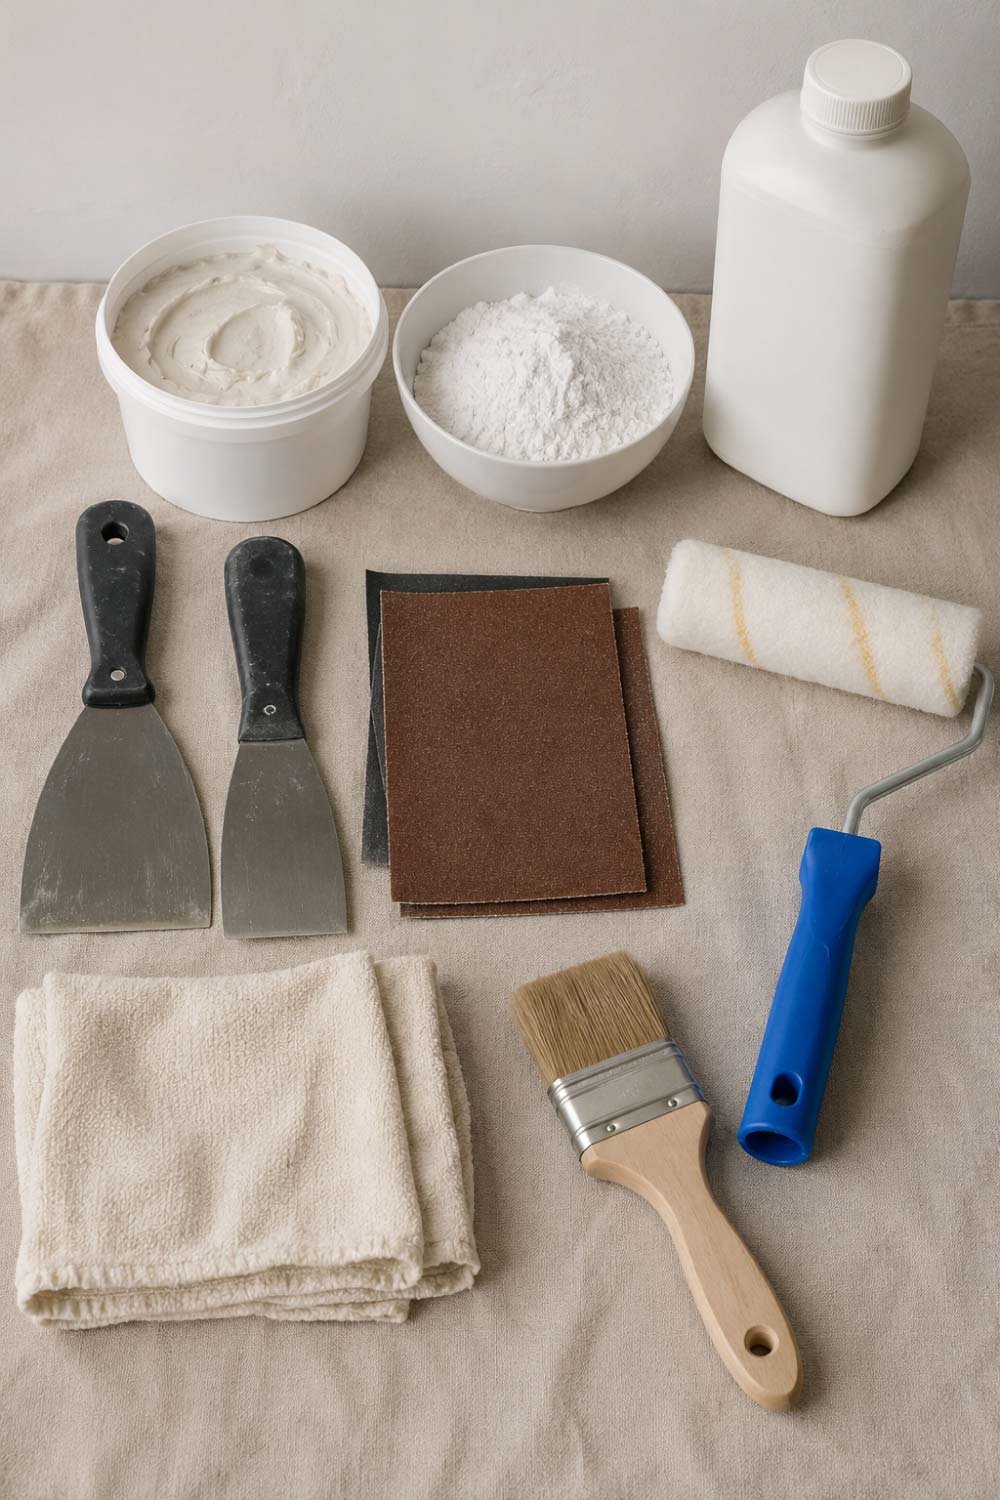
Before starting the repair, gather everything you need so the process goes smoothly:
- Putty knife or scraper
- Sandpaper (medium and fine grit)
- Wall filler or spackling paste
- Plaster of Paris (for deeper cracks)
- Primer
- Paint matching your wall color
- Brush or roller
- Clean cloth or sponge
Having the right tools ensures a clean and long-lasting repair.
Step-by-Step Guide to Fix Wall Cracks Like a Pro
Repairing wall cracks is a step-by-step process that requires patience and attention to detail. Following a structured method helps achieve a smooth, durable finish and prevents the cracks from reappearing after painting or finishing work easily again soon over time.
Now let’s move into the actual repair process. Follow each step carefully for the best results.
Step 1: Clean the Crack Area
Start by removing loose paint, dust, or debris from the crack. Use a scraper or putty knife to gently widen the crack slightly. This may sound strange, but it helps the filler stick better.
After scraping, wipe the area with a damp cloth and let it dry completely.
Step 2: Prepare the Crack for Filling
If the crack is very fine, you can fill it directly. For slightly deeper cracks, widen it in a V-shape using a scraper. This allows the filler to reach inside properly instead of sitting only on the surface.
Make sure the area is dry before moving to the next step.
Also Read:
Step 3: Apply Wall Filler or Plaster
At this stage, you are actually rebuilding the damaged section of the wall. The goal is to completely seal the crack from inside so it doesn’t reopen later. Using the right technique here ensures strength, durability, and a smooth base ready for sanding and painting without visible flaws.
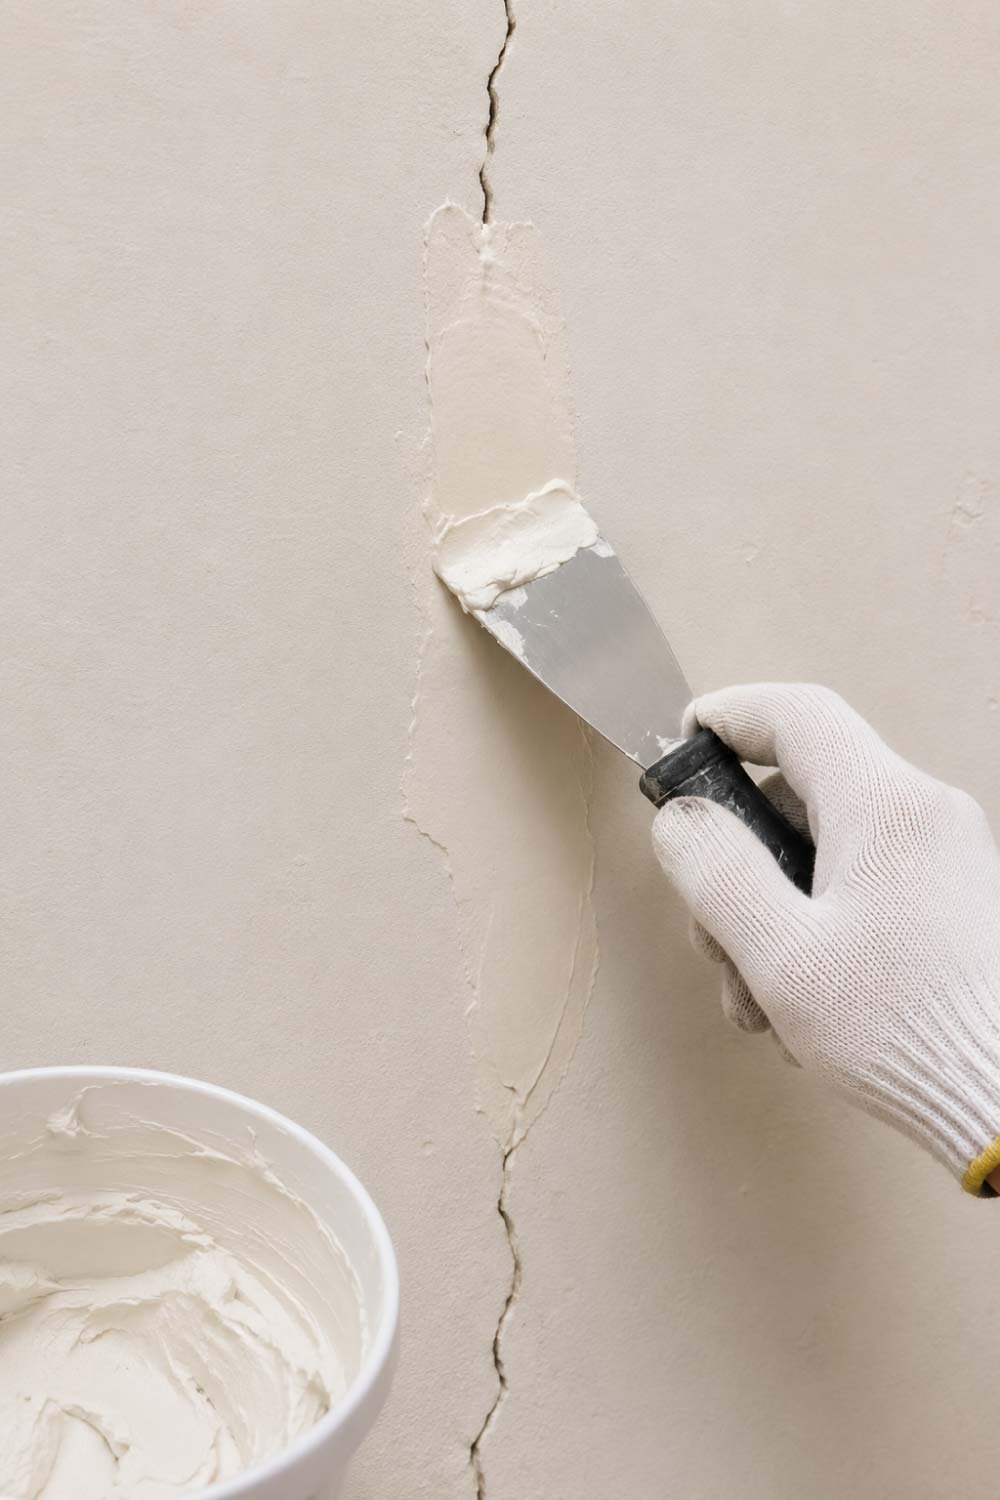
Now take your wall filler or plaster of Paris and apply it using a putty knife. Press it firmly into the crack so there are no air gaps.
Smooth the surface as much as possible. For deeper cracks, you may need to apply two layers. Let the first layer dry before applying the second.
Tip: Don’t rush this step. A well-filled crack is the key to a long-lasting repair.
Step 4: Sand the Surface Smooth
Once the filler has fully dried, the repaired area needs to be leveled with the surrounding wall. Sanding is essential because it removes uneven patches and ensures a clean, professional finish. A properly sanded surface helps paint blend smoothly without highlighting the repaired area.
Once the filler is completely dry, use sandpaper to smooth the surface. Start with medium-grit sandpaper and finish with fine grit for a polished look.
The goal is to make the repaired area blend with the rest of the wall so it doesn’t stand out after painting.
Step 5: Apply Primer
Priming is a crucial step that prepares the wall for painting and improves paint adhesion. It also prevents uneven absorption of paint, which can lead to patchy results. A good primer coat ensures that the repaired area blends seamlessly with the rest of the wall color.
Primer is an important step that many people skip—but it shouldn’t be ignored. It helps the paint stick properly and prevents uneven color patches.
Apply a thin coat of primer over the repaired area and let it dry completely.
Step 6: Repaint the Wall
This is the final stage where the repair becomes invisible. Painting restores the wall’s original appearance and helps unify the repaired section with the surrounding surface. Careful application ensures there are no visible lines, patches, or color differences after finishing.
Now comes the final touch. Use paint that matches your existing wall color. Apply one or two coats depending on coverage.
Blend the edges carefully so the repaired area becomes invisible. A roller works best for large areas, while a brush is ideal for small spots.
Fixing Different Types of Cracks
Different cracks require different repair approaches, and identifying them correctly saves time and effort. This section helps you understand how to handle each type effectively so you can choose the right materials and method for a strong, lasting wall repair solution.
Let’s look at how to handle specific crack situations more effectively.
Fixing Hairline Cracks
Hairline cracks are very common and usually only affect the surface layer of paint or plaster. They are easy to repair and mostly cosmetic. With simple filling and repainting, you can restore the wall quickly without needing any major tools or structural fixes.
- Clean the area
- Apply lightweight filler or wall putty
- Sand lightly
- Repaint
These cracks usually don’t return if the wall is stable.
Also Read:
Fixing Deep Cracks
Deep cracks require stronger reinforcement because they go beyond the surface layer. If not treated properly, they can reappear. Using layered filling techniques and reinforcement materials helps restore structural strength and ensures the crack stays sealed for a long time.
- Enlarge the crack slightly
- Fill with plaster of Paris in layers
- Reinforce with mesh tape if needed
- Sand and paint
This ensures better strength and durability.
Fixing Cracks Near Doors and Windows
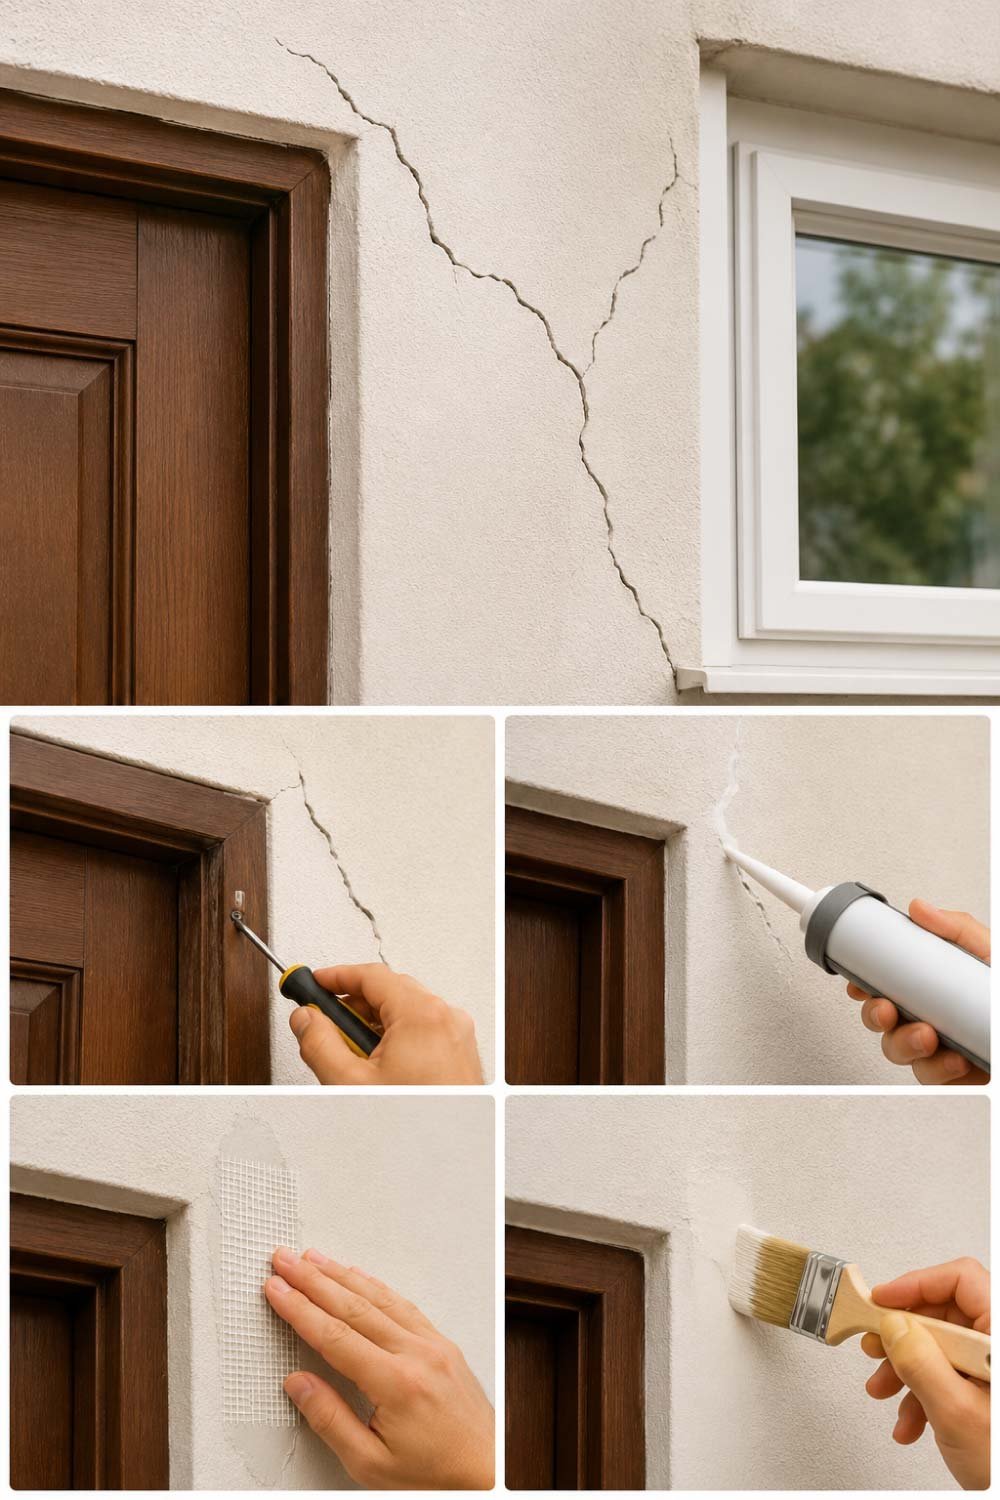
Cracks near doors and windows are caused by stress and movement in the frame area. These sections need extra reinforcement because they experience daily pressure. Proper sealing and support prevent the crack from spreading or returning after repair.
- Check for loose frames
- Seal gaps with flexible filler
- Use mesh tape for reinforcement
- Paint after proper drying
Preventing Wall Cracks in the Future
Preventing cracks is always better than repairing them repeatedly. With proper maintenance and care, you can significantly reduce the chances of new cracks forming. This section focuses on simple habits that help maintain wall strength and long-term durability.
Fixing cracks is important, but preventing them saves you time and effort.
Maintain Proper Moisture Levels
Fix leaks quickly and ensure good ventilation in your home.
Use Quality Paint and Plaster
Cheap materials may save money initially but often lead to early cracking.
Avoid Excess Weight on Walls
Use proper anchors for heavy frames or shelves.
Inspect Your Home Regularly
Small cracks are easier to fix than large ones. Regular inspection helps catch issues early.
Control Temperature Changes
Use curtains or insulation in areas exposed to extreme heat or cold.
Also Read:
When You Should Call a Professional
Some wall cracks go beyond simple DIY repair and may indicate deeper structural issues. Knowing when to call an expert is important to avoid further damage. Professional help ensures safety, proper diagnosis, and long-term stability of your building structure.
While most wall cracks are harmless, some require expert attention:
- Cracks wider than 3 mm
- Cracks that keep growing
- Multiple cracks appearing suddenly
- Signs of water damage or dampness
- Cracks in structural walls or beams
If you notice any of these, it’s better to consult a professional before doing repairs.
Final Thoughts
Wall cracks may look worrying at first, but most of them are easy to repair with simple tools and a little patience. The key is identifying the type of crack and choosing the right repair method. Small hairline cracks can be fixed in minutes, while deeper ones require layering and proper finishing.
By following the steps in this guide, you can restore your walls to a smooth, clean finish without needing expensive repairs. More importantly, regular maintenance and early action can keep your home looking fresh and well-maintained for years.
A well-repaired wall doesn’t just improve appearance—it also adds to the comfort and value of your home.