
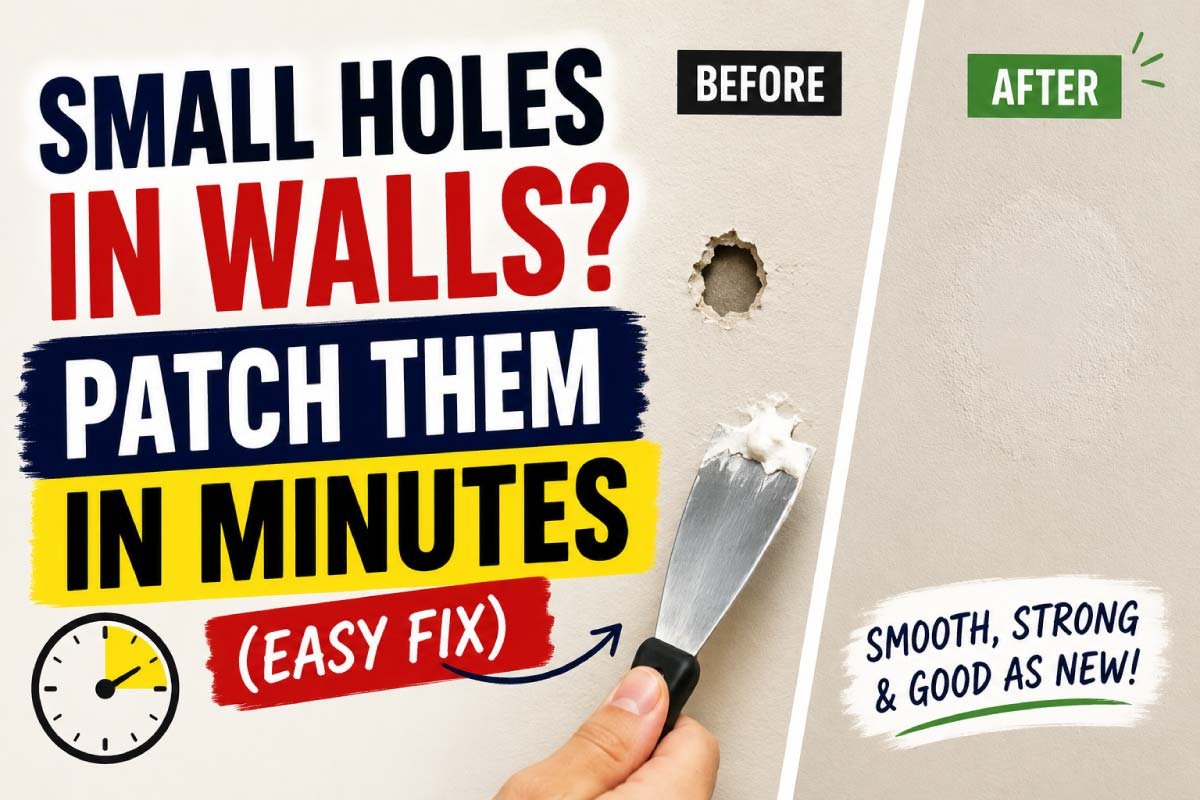
Small holes in walls might seem like a minor issue, but they can quickly make your home look older, poorly maintained, or unfinished. Whether they’re from nails, screws, wall hooks, or accidental bumps, these tiny imperfections stand out more than you think—especially under lighting.
The good news? You don’t need a professional or expensive tools to fix them. With a few basic materials and a simple process, you can repair small wall holes in just a few minutes and restore your wall to a smooth, clean finish.
In this guide, you’ll learn why these holes happen, what tools you need, and a step-by-step method to fix them like a pro—even if you’ve never done any home repair before.
Table of Contents
ToggleWhy Small Holes Appear in Walls
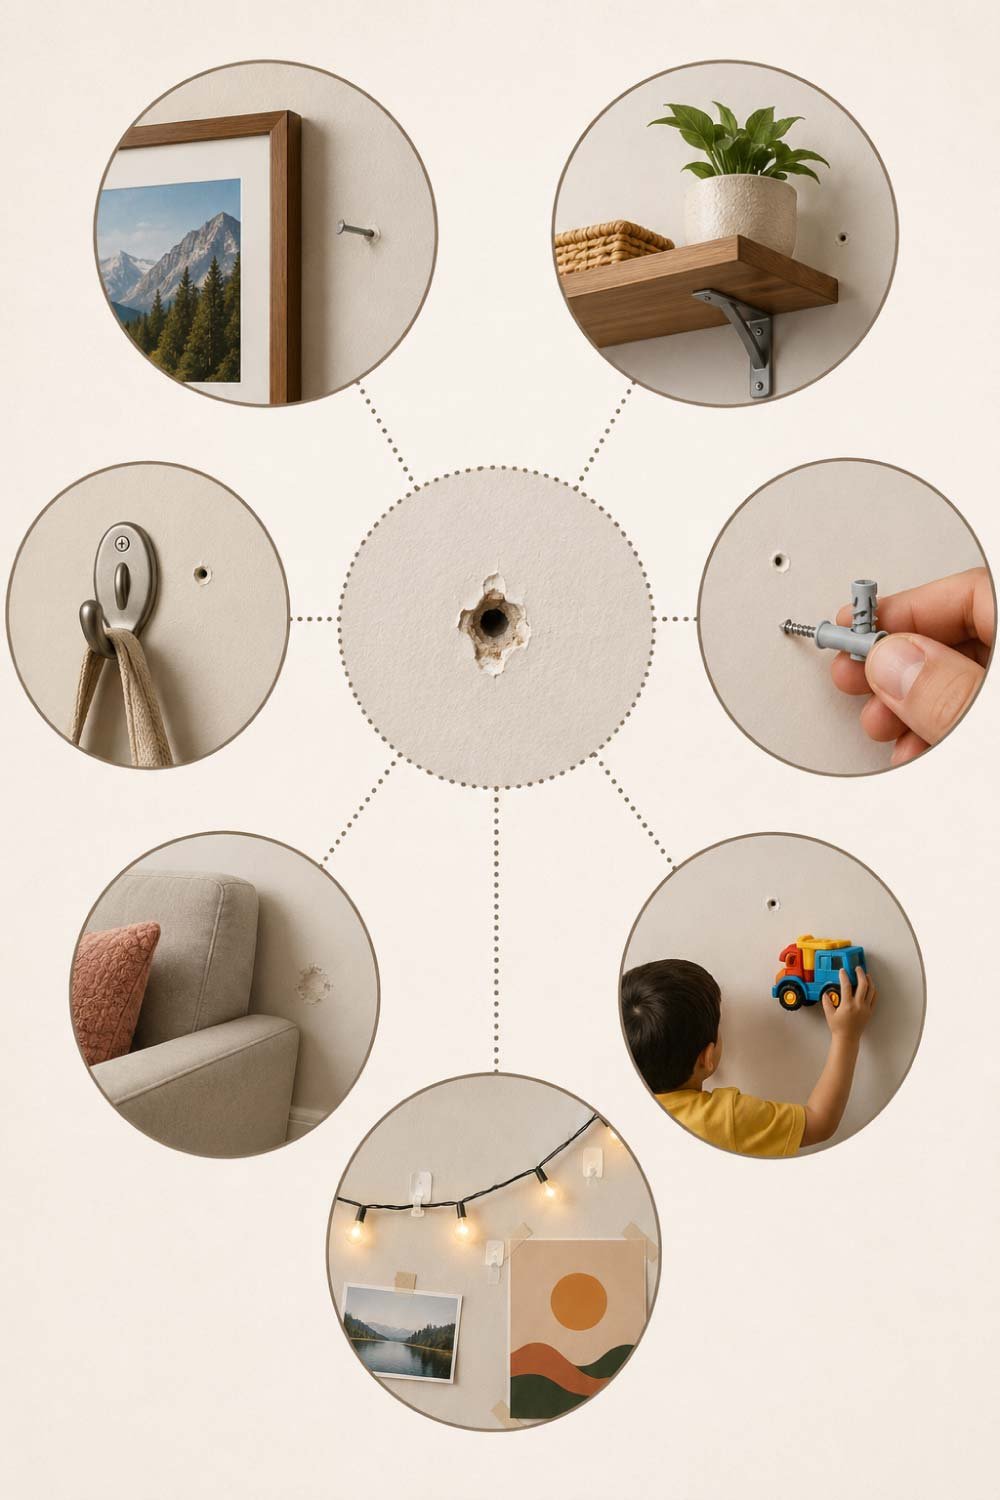
Before starting any repair, it’s useful to understand why these tiny holes appear in the first place. In most homes, they are completely normal and often unavoidable due to daily activities, decoration changes, or minor household use over time.
- Hanging pictures, frames, or mirrors
- Installing shelves or wall hooks
- Removing nails, screws, or anchors
- Furniture bumps against walls
- Kids playing indoors
- Temporary décor setups (like lights or posters)
Even though these holes are small, leaving them unpatched can allow dust buildup, moisture entry, or cracks to slowly expand over time.
Tools and Materials You’ll Need
Repairing small wall holes doesn’t require expensive tools or professional help. In fact, most homeowners already have the basic supplies at home. With just a few simple materials, you can achieve a clean and smooth finish quickly.
- Wall filler / spackle / putty
- Putty knife or scraper
- Fine-grit sandpaper (180–220)
- Clean cloth or sponge
- Matching wall paint
- Primer (optional but recommended)
Optional but helpful:
- Small brush for paint touch-up
- Gloves to keep hands clean
- Dust mask for sanding multiple spots
You don’t need power tools or complex equipment. This is a quick, beginner-friendly DIY fix designed for everyday home repairs.
Also Read:
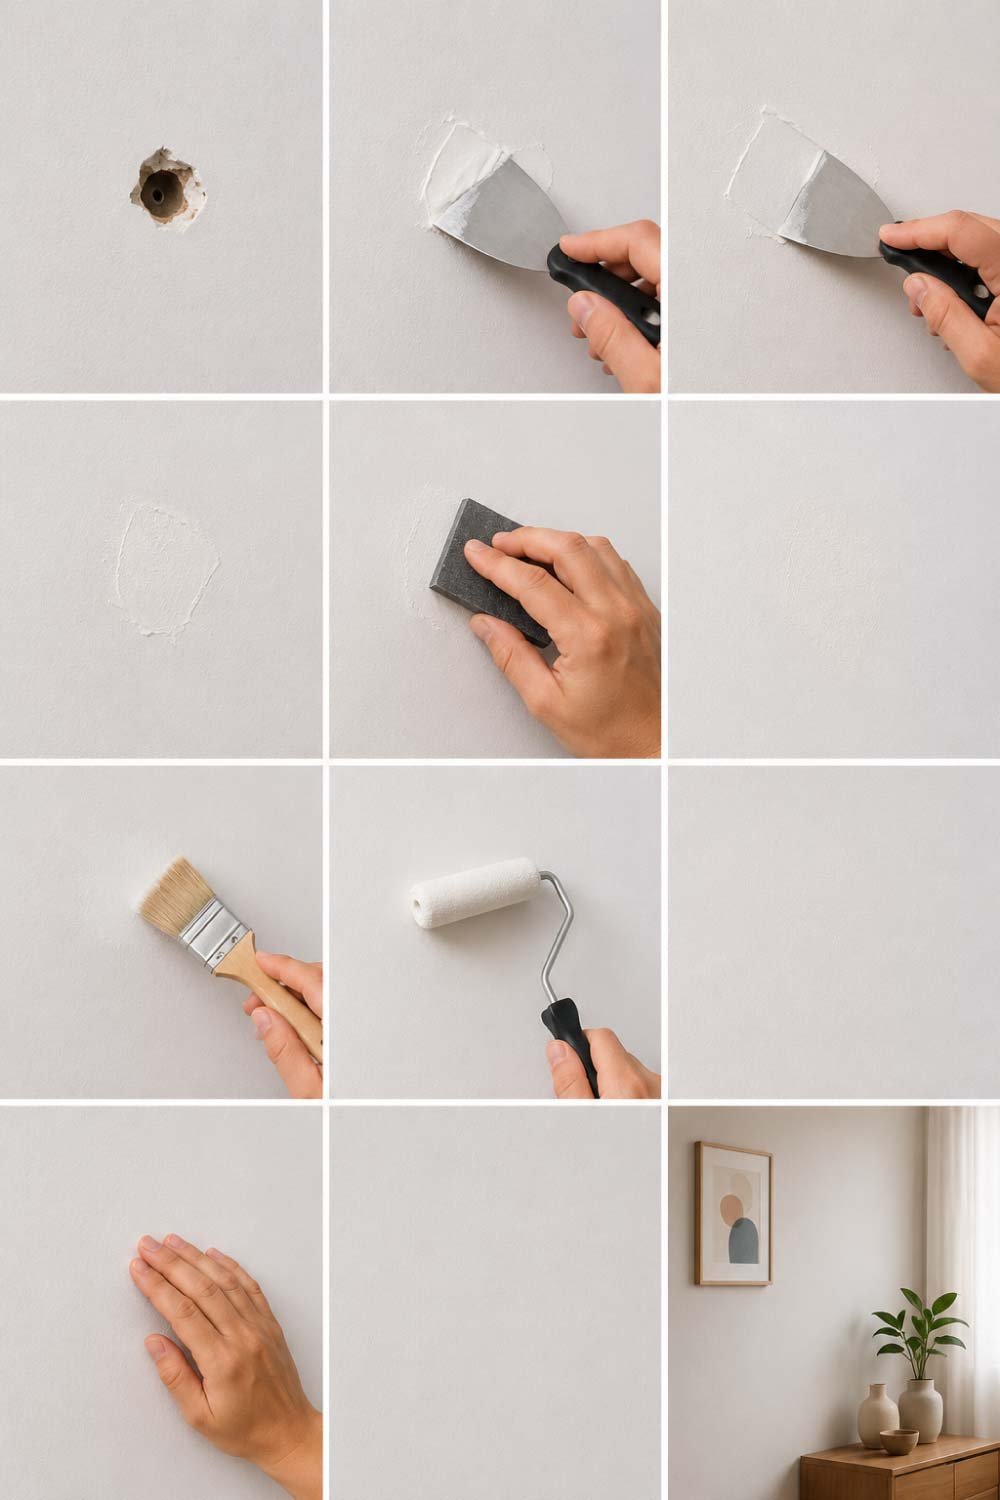
Step-by-Step Guide to Fix Small Holes in Walls
Now that your tools are ready, it’s time to move into the practical repair process. By following each step carefully, you can restore your wall to a smooth, almost invisible finish without much effort.
Step 1: Clean the Area Around the Hole
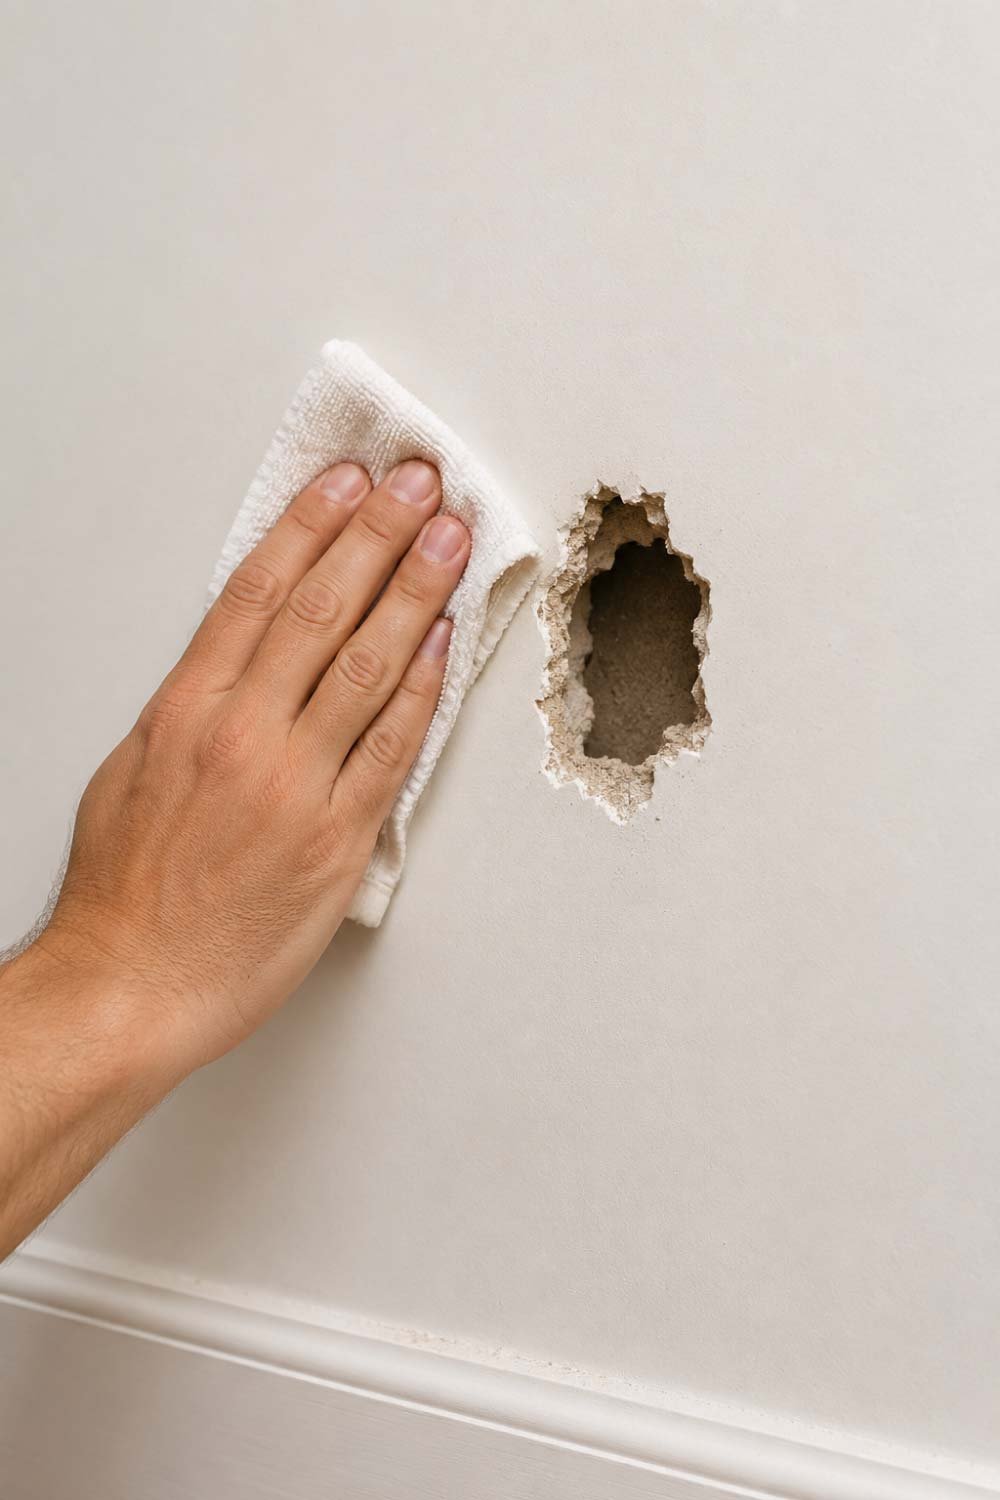
Before applying any filler, the wall surface must be clean and free from dust, grease, or loose paint. A properly prepared surface ensures the filler sticks well and does not crack or fall off later.
- Wipe the area using a dry or slightly damp cloth
- Remove loose plaster, dust, or peeling paint
- Allow the area to dry completely before proceeding
If the edges around the hole are rough or flaky, gently scrape them with a putty knife for a cleaner surface.
Tip: A clean surface ensures stronger adhesion and a longer-lasting repair.
Step 2: Apply Wall Filler or Spackle
This is the most important step in the entire repair process. The filler works as the main material that seals the hole and brings the wall back to a smooth, even surface.
- Take a small amount of wall filler on a putty knife
- Press it firmly into the hole
- Spread it evenly across the surface
- Ensure there are no air gaps or empty spaces
For tiny nail holes, one thin layer is usually enough. For slightly larger holes, applying two layers may be necessary, allowing the first layer to dry before adding the next.
Pro Tip: Avoid using too much filler at once—thin layers dry faster and give a smoother finish.
Step 3: Smooth the Surface
Once the hole is filled, the next step is to level and smooth the surface so it blends naturally with the surrounding wall. This step plays a major role in achieving a professional-looking finish.
- Use a putty knife to flatten the filled area
- Remove any excess filler from the edges
- Match the surface level with the surrounding wall
The smoother this stage is, the less sanding you will need later, saving time and effort.
Tip: Hold the putty knife at a slight angle for a cleaner, more even finish.
Step 4: Let It Dry Completely
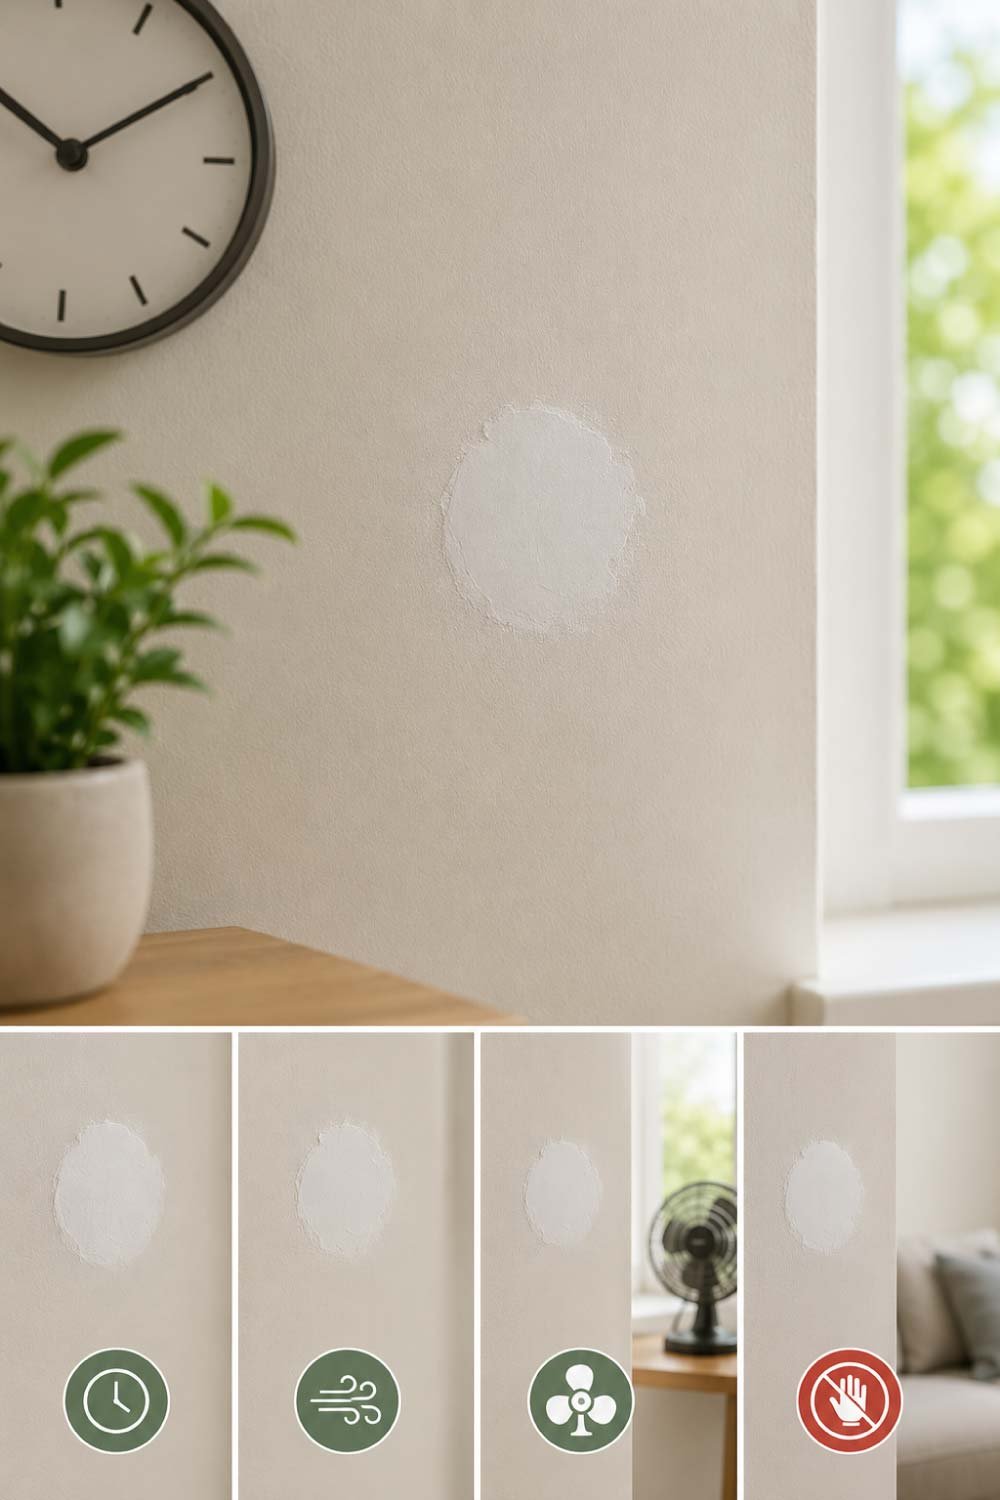
After applying wall filler, patience is key. Proper drying ensures the patch becomes strong, stable, and ready for sanding or painting. Drying time varies depending on the product type, humidity, and hole size, but most quick-dry fillers are ready within an hour for small repairs.
- Most spackles dry in 20–60 minutes for small holes
- Thicker applications may take longer
- Good airflow speeds up drying naturally
- Cooler or humid rooms may slow the process
Avoid touching or pressing the patched area while it dries, as this can create dents or weaken the repair. It’s also important not to rush into painting too soon, since premature painting can lead to cracking or sinking later.
Tip: Let the patch dry fully even if it looks ready on the surface—inner layers may still be soft.
Step 5: Sand the Area Smooth
Once the filler has fully dried, sanding is what transforms a basic patch into a seamless wall repair. This step removes excess material and levels the surface so it blends naturally with the surrounding paint and texture.
- Use fine-grit sandpaper (180–220 grit)
- Sand gently in circular or light back-and-forth motions
- Focus on leveling the patch with the wall surface
- Avoid aggressive sanding that can create dips or scratches
After sanding, wipe the area with a clean cloth to remove dust particles. This ensures better paint adhesion in the next step.
Tip: Run your fingers over the patch—if it feels smooth and even, it’s ready for painting.
Also Read:
Step 6: Apply Primer (Optional but Recommended)
Primer is not always necessary, but it significantly improves the final look of your repair. It helps the patched area absorb paint evenly, preventing dull patches or visible differences in color and texture.
- Ideal for dark or highly textured walls
- Useful when patch is still slightly visible after sanding
- Helps create a more durable, professional finish
Apply a thin, even coat over the repaired area and allow it to dry completely before painting. This small step can make a big difference in how seamless the final result looks.
Tip: If you’re unsure, using primer is always safer for achieving a uniform finish.
Step 7: Paint Over the Patch
The final step is blending the repaired area into the rest of the wall using matching paint. This is where the repair truly disappears and the surface looks like new again.
- Use paint that matches your wall color
- Apply with a small brush or roller
- Feather edges outward to blend with surrounding paint
- Apply a second coat if needed for full coverage
Once dry, the patched area should be nearly invisible, especially if all previous steps were done carefully.
Tip: If you don’t have an exact match, take a small paint chip to a store for accurate color matching.
Extra Tips for a Perfect Finish
A few small adjustments in technique can make your repair look completely professional. These simple tips help avoid visible patches and ensure long-lasting results.
- Work in natural light to spot imperfections easily
- Always sand properly before painting
- Match texture if your wall is patterned or rough
- Use small tools for better control on tiny holes
- Repair multiple holes together for efficiency
These small details can greatly improve the final appearance and help your wall look untouched.
Common Mistakes to Avoid
Even simple wall repairs can go wrong if certain steps are rushed or skipped. Avoiding these mistakes will save you time and ensure a cleaner finish.
- Applying too much filler at once
- Painting before the patch is fully dry
- Skipping the sanding step
- Using mismatched paint colors
- Not cleaning the surface before starting
Careful attention to each step ensures a smooth, professional-looking repair that blends perfectly with the rest of the wall.
Also Read:
When Should You Call a Professional?
While small holes are easy to fix at home, some situations require expert attention to avoid further damage or costly repairs later.
- Large cracks or structural wall damage
- Moisture or water-damaged areas
- Repeated holes in the same section
- Walls that appear uneven or bulging
In such cases, a deeper inspection and professional repair may be needed beyond simple patching.
Final Thoughts
Small holes in walls are nothing to worry about—but they can make your home look unfinished if ignored. The good news is that fixing them is quick, affordable, and beginner-friendly.
With just a little wall filler, sandpaper, and paint, you can restore your wall in minutes and make it look as good as new. Once you learn this simple skill, you’ll never feel the need to call a professional for minor wall damage again.
A smooth wall isn’t just about appearance—it also reflects care and attention to detail in your home.