How to Repair Wooden Door Scratches: A Complete Step-by-Step Guide

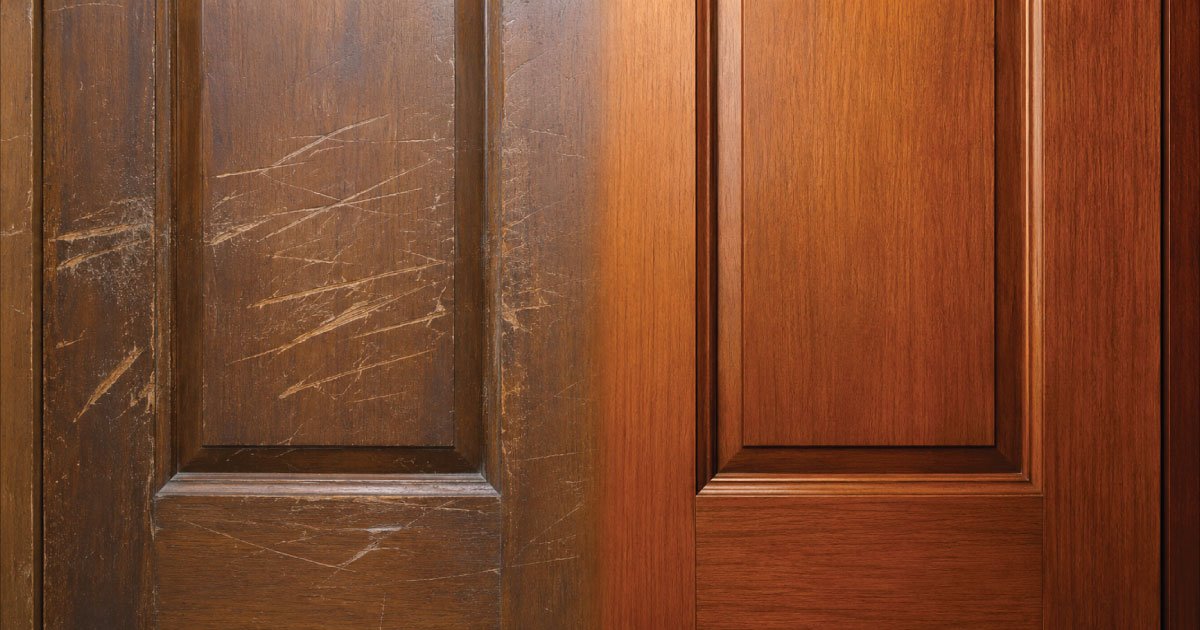
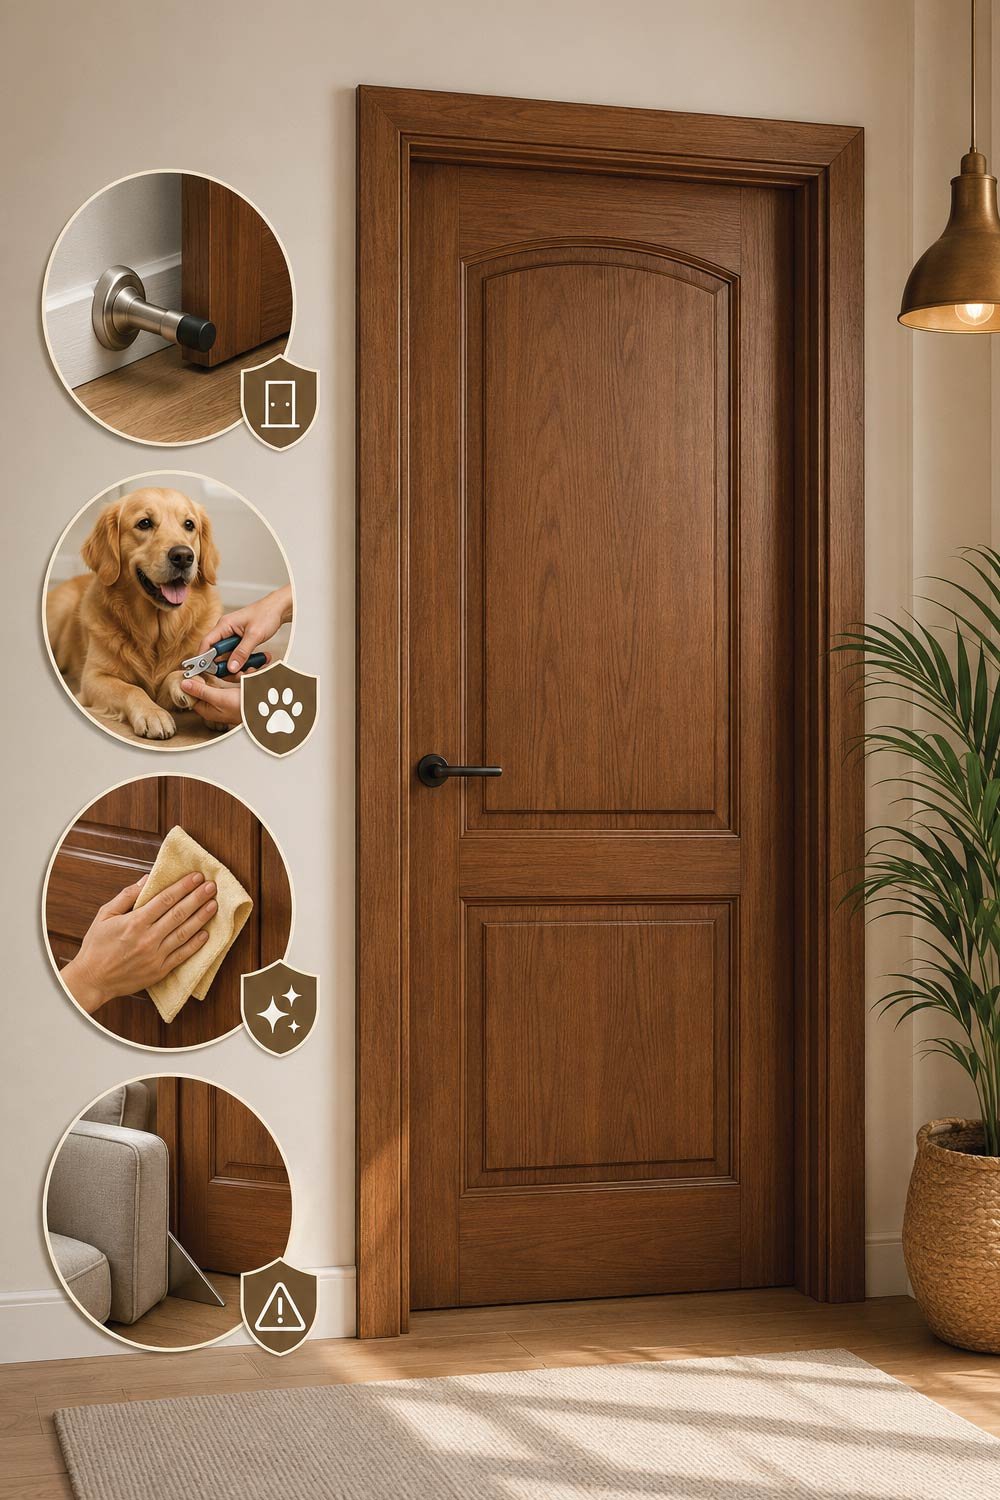
Wooden doors add warmth, elegance, and durability to any home. However, over time, even the best-quality wooden doors can develop scratches due to daily use, pets, moving furniture, or accidental impacts. While these imperfections may seem minor, they can significantly affect the overall appearance of your space.

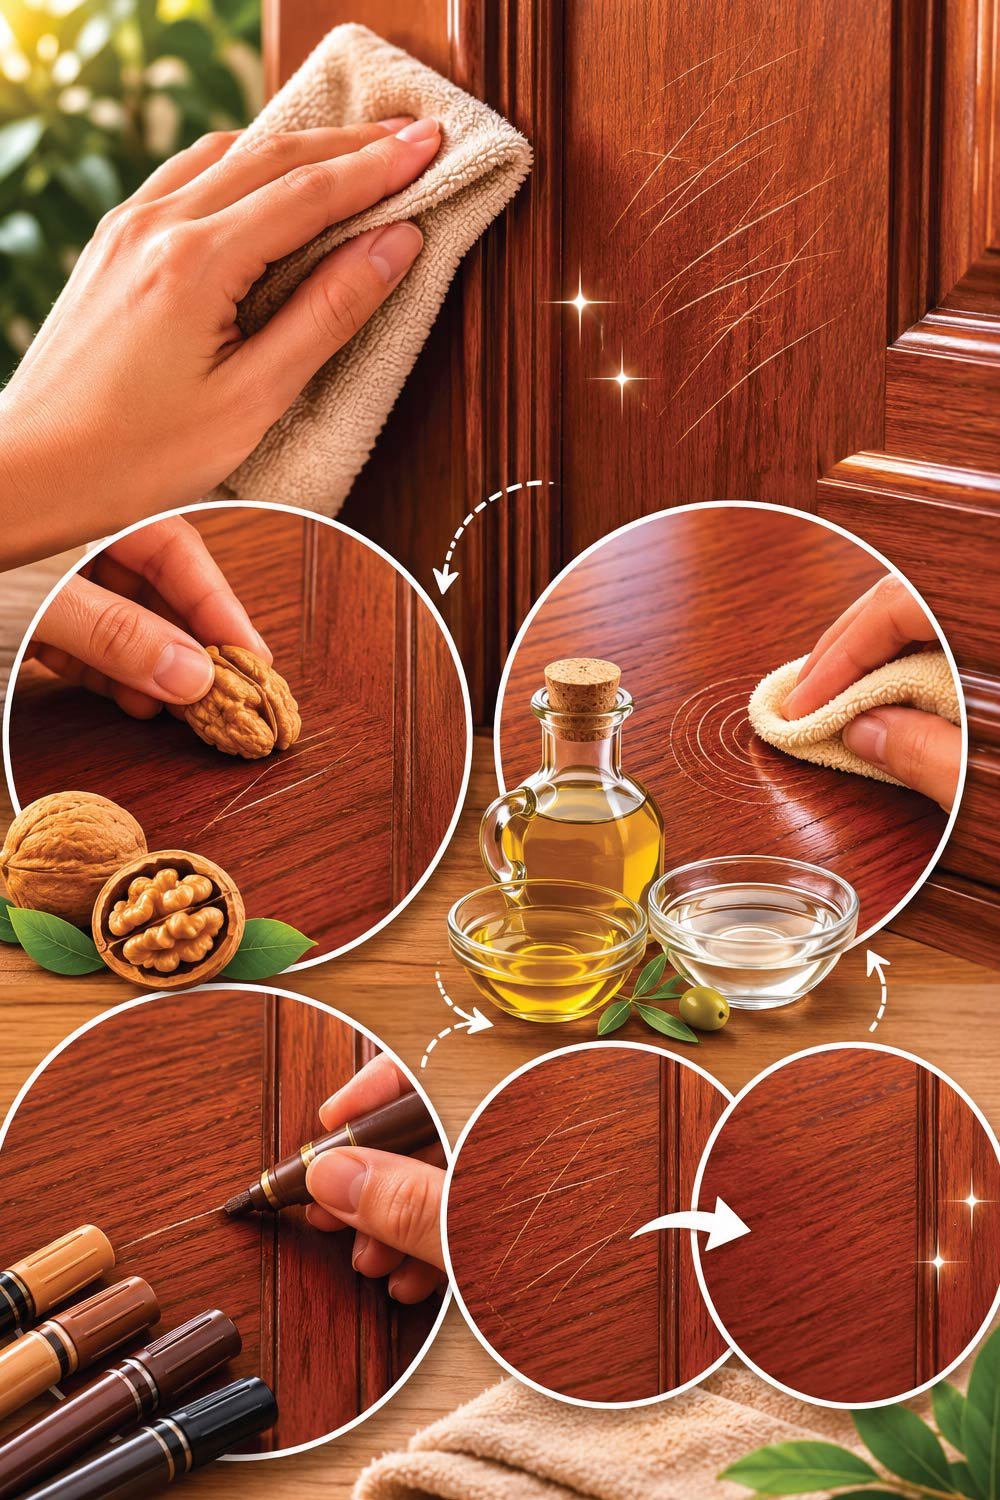
The good news is that repairing wooden door scratches is easier than you might think. With the right tools, techniques, and a bit of patience, you can restore your door to its original beauty without needing professional help. In this comprehensive guide, we’ll walk you through everything you need to know about fixing scratches on wooden doors—from light surface marks to deeper damage.


Understanding the Type of Scratch 

Before starting any repair, it’s important to identify the type and depth of the scratch. Different levels of damage require different techniques, and proper identification helps you avoid unnecessary work while achieving better results.

Understanding the Type of Scratch

1. Surface Scratches

Surface scratches are the most minor type and only affect the top finish layer. These are usually easy to fix with simple household methods.

These are light scratches that only affect the finish or top coating of the wood. They are usually shallow and don’t penetrate deeply into the wood.

2. Medium Scratches

Medium scratches go slightly deeper and affect both the finish and the upper layer of the wood. They are more visible and may need filling or blending.

These scratches go beyond the finish and lightly damage the wood underneath. They may appear more visible and require some filling.

3. Deep Scratches or Gouges

Deep scratches are more severe and penetrate into the wood structure. These require more effort, including filling, sanding, and refinishing.

These are severe scratches that dig deep into the wood. They often require filling, sanding, and refinishing.

Understanding the severity will help you choose the right repair method and avoid unnecessary work.


Tools and Materials You’ll Need

Having the right tools ready ensures a smooth and efficient repair process. Most materials are easy to find and can handle a variety of scratch types.

  • Soft cloths
  • Mild soap or wood cleaner
  • Sandpaper (fine and medium grit)
  • Wood filler or putty
  • Wood stain or matching paint
  • Clear varnish or polyurethane
  • Furniture marker or wax sticks
  • Olive oil or walnut (for minor scratches)

Having everything ready will make the repair process smoother and more efficient.


Step 1: Clean the Surface 

Cleaning is the first and most important step before repairing any scratches. A clean surface ensures that repair materials adhere properly and produce a better finish.

Clean the Surface

How to Clean

Proper cleaning removes dirt and grease that could interfere with the repair process.

Mix a small amount of mild soap with warm water and use a soft cloth to wipe down the scratched area. Avoid soaking the wood—just dampen the cloth slightly. Once cleaned, let the surface dry completely.


Step 2: Fixing Light Surface Scratches

Light scratches can often be repaired using simple household methods. These techniques are quick, effective, and require minimal effort while significantly improving the appearance.

Method 1: Use a Walnut

This natural method works by using the oils in the walnut to darken and blend the scratch into the surrounding wood.

Yes, a regular walnut can help fix light scratches. Rub the walnut gently over the scratched area. The natural oils in the nut help darken the scratch and blend it with the surrounding wood. After rubbing, buff the area with a soft cloth.

Method 2: Olive Oil and Vinegar

This mixture helps nourish the wood and reduce the visibility of scratches by blending them with the surface.

Mix equal parts olive oil and vinegar. Dip a soft cloth into the mixture and rub it over the scratch. This helps moisturize the wood and reduce the appearance of the mark.

Method 3: Furniture Markers

Furniture markers provide a quick color fix by matching the tone of the wood and covering the scratch effectively.

Furniture repair markers are available in various wood tones. Choose a color that closely matches your door and gently color over the scratch. Wipe away any excess with a cloth.

These quick fixes are ideal for small imperfections and can significantly improve the appearance of your door.


Step 3: Repairing Medium Scratches

Medium scratches go beyond the surface finish and require a more structured repair process. With careful sanding, filling, and finishing, you can restore the door’s appearance and make the damage nearly invisible.

Light Sanding

Sanding helps smooth out rough edges and prepares the surface for filler. Doing it correctly ensures you don’t worsen the scratch.

Use fine-grit sandpaper (around 220 grit) to gently sand the scratched area. Always sand in the direction of the wood grain to avoid further damage. The goal is to smooth out the edges of the scratch, not remove a large amount of material.

Apply Wood Filler

Filling the scratch restores the surface and prepares it for finishing. Proper application ensures a strong and even repair.

Once sanded, apply a small amount of wood filler or putty into the scratch using a putty knife. Press it firmly to fill the gap completely. Allow it to dry according to the manufacturer’s instructions.

Sand Again

A second round of sanding ensures the repaired area blends seamlessly with the surrounding wood surface.

After the filler has dried, lightly sand the area again to make it smooth and level with the surrounding surface.

Apply Matching Stain

Staining helps match the repaired section with the rest of the door. Choosing the right color is essential for a natural look.

Use a wood stain that matches your door color. Apply it carefully over the repaired area using a cloth or small brush. Let it dry completely.

Seal the Surface

Sealing protects the repaired area and restores the door’s original finish. It also adds durability and shine.

Finish by applying a clear varnish or polyurethane to protect the area and restore shine. This step ensures durability and a uniform appearance.

Also Read:

How to Fix a Water Pipe Leak: Easy DIY Methods That Work


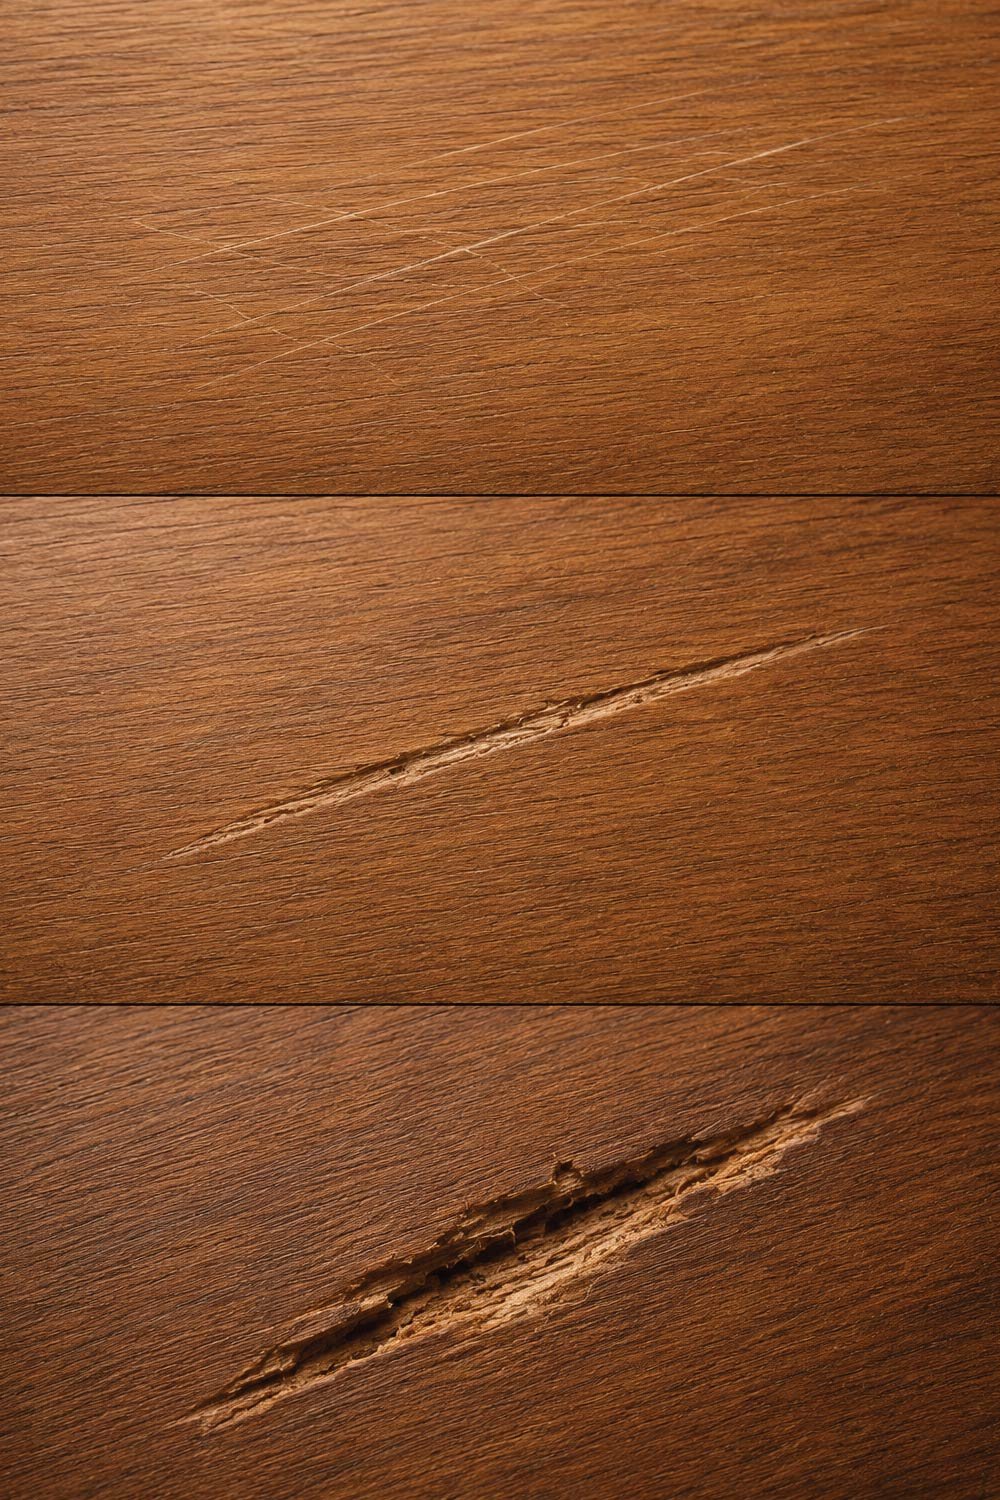
Step 4: Fixing Deep Scratches and Gouges 

Deep scratches and gouges require more effort but can still be repaired effectively without replacing the entire door. A careful step-by-step approach ensures strong and visually appealing results.

Fixing Deep Scratches and Gouges

Clean and Sand

Proper preparation is essential for deep repairs. Cleaning and sanding remove debris and create a workable surface.

Start by cleaning the area thoroughly. Then use medium-grit sandpaper to smooth the edges of the scratch.

Fill the Damage

Filling deep gouges completely restores the structure of the wood. Proper filling prevents weak spots and ensures durability.

Apply wood filler generously into the gouge. Make sure it fills the entire damaged area. Smooth it out with a putty knife and let it dry completely.

Shape and Smooth

Once the filler has dried, shaping and smoothing are necessary to blend the repair with the surrounding surface.Once dry, sand the area carefully until it blends seamlessly with the surrounding wood.

Stain and Finish

Final finishing restores the door’s original appearance. Multiple coats may be needed for a perfect color match.Apply stain to match the rest of the door. You may need to apply multiple coats to achieve the correct color. Once satisfied, seal it with a clear finish.This process may take a bit longer, but the results are worth it.

Also Read:

DIY Plumbing Repair Guide: Fix Common Plumbing Problems Without a Professional


Tips for Best Results

Achieving a smooth and professional repair finish requires attention to detail and proper technique. Following these practical tips will help ensure your repairs blend seamlessly with the rest of the door.

Pro Tips

Applying the right approach at each step improves both appearance and durability. Small details can make a significant difference in the final outcome.

  • Always test products first: Try stains or fillers on a hidden area before applying them to visible parts.
  • Match the grain direction: Sanding against the grain can worsen the damage.
  • Work in good lighting: This helps you see imperfections clearly.
  • Be patient: Rushing can lead to uneven finishes or noticeable repairs.

Also Read:

How to Fix Kitchen Plumbing Issues: A Step-by-Step DIY Guide


Preventing Future Scratches 4

Once your door has been repaired, taking preventive measures will help maintain its appearance and reduce the chances of future damage. Consistent care keeps the surface looking new for longer.

Preventing Future Scratches

Prevention Methods

Simple habits and protective measures can significantly extend the life of your wooden door and preserve its finish.

  • Use Door Stoppers

Install door stoppers to prevent impact damage from walls or furniture.

  • Keep Pets’ Nails Trimmed

If you have pets, their claws can easily scratch wooden surfaces.

  • Regular Maintenance

Clean and polish your doors regularly to maintain their finish and durability.

  • Avoid Sharp Objects

Be mindful when moving furniture or handling tools near wooden doors.


When to Call a Professional

While most scratches can be repaired at home, some situations require expert attention. Knowing when to seek professional help ensures the best results, especially for valuable or heavily damaged doors.

Situations That Need Expert Help

Certain types of damage are more complex and may require specialized tools or experience to repair properly.

  • Extensive damage covering large areas
  • Antique or high-value wooden doors
  • Deep structural cracks
  • When color matching becomes too difficult

A professional can ensure a flawless finish, especially for valuable or decorative doors.

Also Read:

How to Fix Common Bathroom Plumbing Issues at Home


Final Thoughts

Wooden door scratches are a common issue, but they don’t have to be permanent. Whether you’re dealing with light surface marks or deeper gouges, there are practical and affordable solutions available. By understanding the type of scratch and using the right techniques, you can restore your door’s appearance and extend its lifespan.

With a little effort and attention to detail, your wooden door can look as good as new again. Not only does this improve the aesthetics of your home, but it also helps maintain the value and quality of your interior features.

So next time you notice a scratch, don’t panic—just follow this guide and fix it like a pro.

Leave a Comment