
Kitchen plumbing problems are among the most common issues homeowners face. From clogged sinks and leaky faucets to garbage disposal troubles, these problems can disrupt daily routines and lead to costly water damage if ignored. The good news is that many kitchen plumbing issues can be fixed at home without calling a plumber, saving both time and money.
This guide explains the most common kitchen plumbing problems, why they happen, and how to fix them safely using basic tools and simple techniques. Whether you’re a beginner or a confident DIYer, this article will help you handle kitchen plumbing repairs with confidence.
Understanding Kitchen Plumbing Basics
This section explains the fundamental structure of kitchen plumbing systems so you can better identify problems before attempting repairs. A kitchen typically has two main systems working together: one delivers clean water under pressure, while the other removes wastewater using gravity, each requiring different handling during maintenance or repair work.
Water Supply System
This system delivers pressurized clean water to kitchen fixtures such as faucets and appliances. It includes supply lines for hot and cold water, shut-off valves under the sink, and internal faucet components that regulate flow and temperature for daily use.
Leaks in this system usually involve pressurized water and require turning off the supply before repairs.
Drainage System
This system removes wastewater from the sink using gravity-based flow. It includes the sink drain, P-trap, and drain pipes connected to the wall plumbing, all designed to prevent blockages and stop sewer gases from entering the kitchen.
Most kitchen plumbing issues involve blockages or buildup in the drainage system.
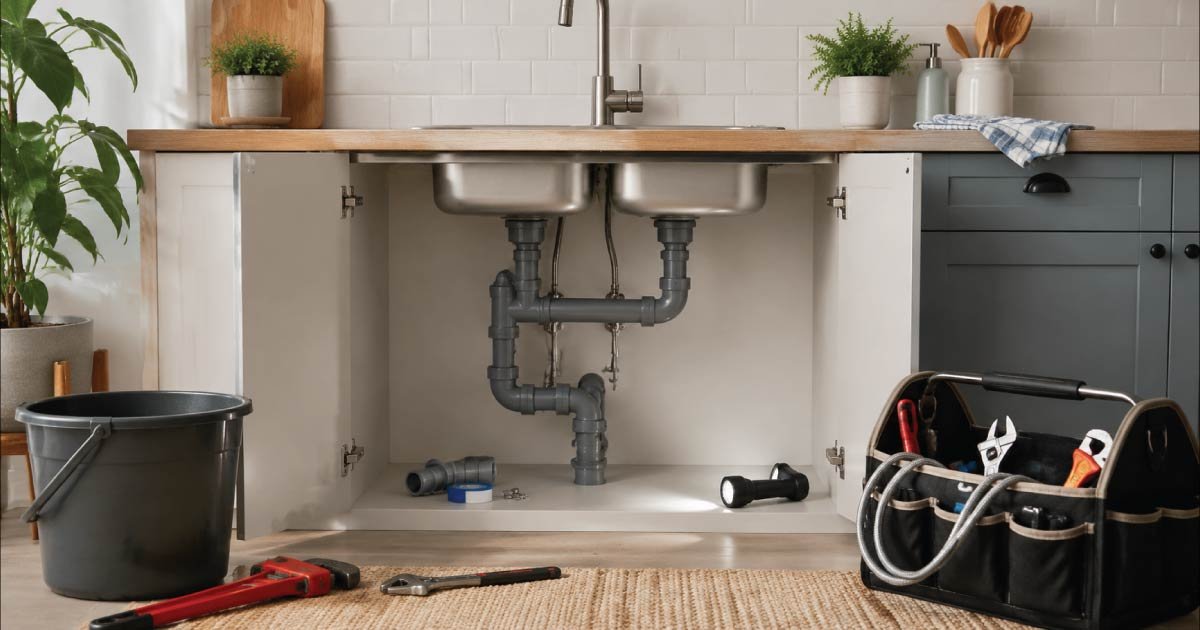
Tools You’ll Need for Kitchen Plumbing Repairs
This section outlines the essential tools required for common kitchen plumbing repairs. Having these tools ready makes it easier to handle leaks, clogs, and minor installations efficiently while reducing the risk of damage and ensuring safer, smoother repair work without unnecessary delays or complications.
- Adjustable wrench
- Pipe wrench or channel-lock pliers
- Plunger (cup plunger)
- Drain snake or auger
- Screwdrivers
- Plumber’s tape (Teflon tape)
- Bucket and old towels
- Baking soda and vinegar
Having the right tools makes repairs faster and safer.
Safety First: What to Do Before Any Repair
This section emphasizes essential safety steps that must be followed before starting any kitchen plumbing repair. Proper preparation helps prevent water damage, electrical hazards, and accidental injuries while ensuring a controlled and safe working environment for handling pipes and fixtures effectively.
- Turn off the water supply under the sink or at the main valve.
- Relieve pressure by opening the faucet.
- Unplug appliances like dishwashers or garbage disposals.
- Place a bucket under pipes to catch water.
- Wear gloves to protect your hands.
Skipping these steps can lead to flooding or injury.
Fixing a Clogged Kitchen Sink
This section explains how to handle one of the most common kitchen plumbing issues: a clogged sink. Blockages often form due to grease, food waste, and residue buildup, and can usually be resolved using simple household methods before considering professional assistance.
Common Causes
This section lists the main reasons kitchen sinks become clogged, helping you understand what leads to blockages so you can prevent them in the future through better kitchen habits and maintenance practices.
- Grease and oil buildup
- Food scraps
- Coffee grounds
- Soap residue
1. Boiling Water
This method helps dissolve grease-based clogs by using high-temperature water to break down fat and oil buildup inside the drain, allowing smoother water flow through the pipes.
- Pour boiling water slowly down the drain in stages. This works well for grease buildup.
2. Baking Soda and Vinegar
This natural cleaning method uses a chemical reaction between baking soda and vinegar to loosen debris, break down buildup, and help clear minor drain clogs effectively without harsh chemicals.
- Pour ½ cup baking soda into the drain
- Add 1 cup vinegar
- Cover the drain and wait 20–30 minutes
- Flush with hot water
3. Plunger
A plunger creates suction and pressure to dislodge blockages inside the drain pipe, making it effective for removing medium-level clogs that are not too deep within the plumbing system.
- Fill the sink with a few inches of water
- Place the plunger over the drain
- Pump firmly for 20–30 seconds
4. Drain Snake
A drain snake is a flexible tool designed to reach deeper clogs inside pipes, physically breaking up or pulling out trapped debris that cannot be removed with basic plunging or flushing methods.
If the clog is deeper, use a drain snake to pull out debris.
Avoid chemical drain cleaners, as they can damage pipes and worsen clogs over time.
Cleaning the P-Trap Under the Sink
This section explains how to clean the P-trap, a common location where kitchen sink clogs form due to trapped grease, food particles, and debris. Understanding how to safely remove and clean it helps restore proper drainage flow and prevents recurring blockages in the kitchen plumbing system effectively.
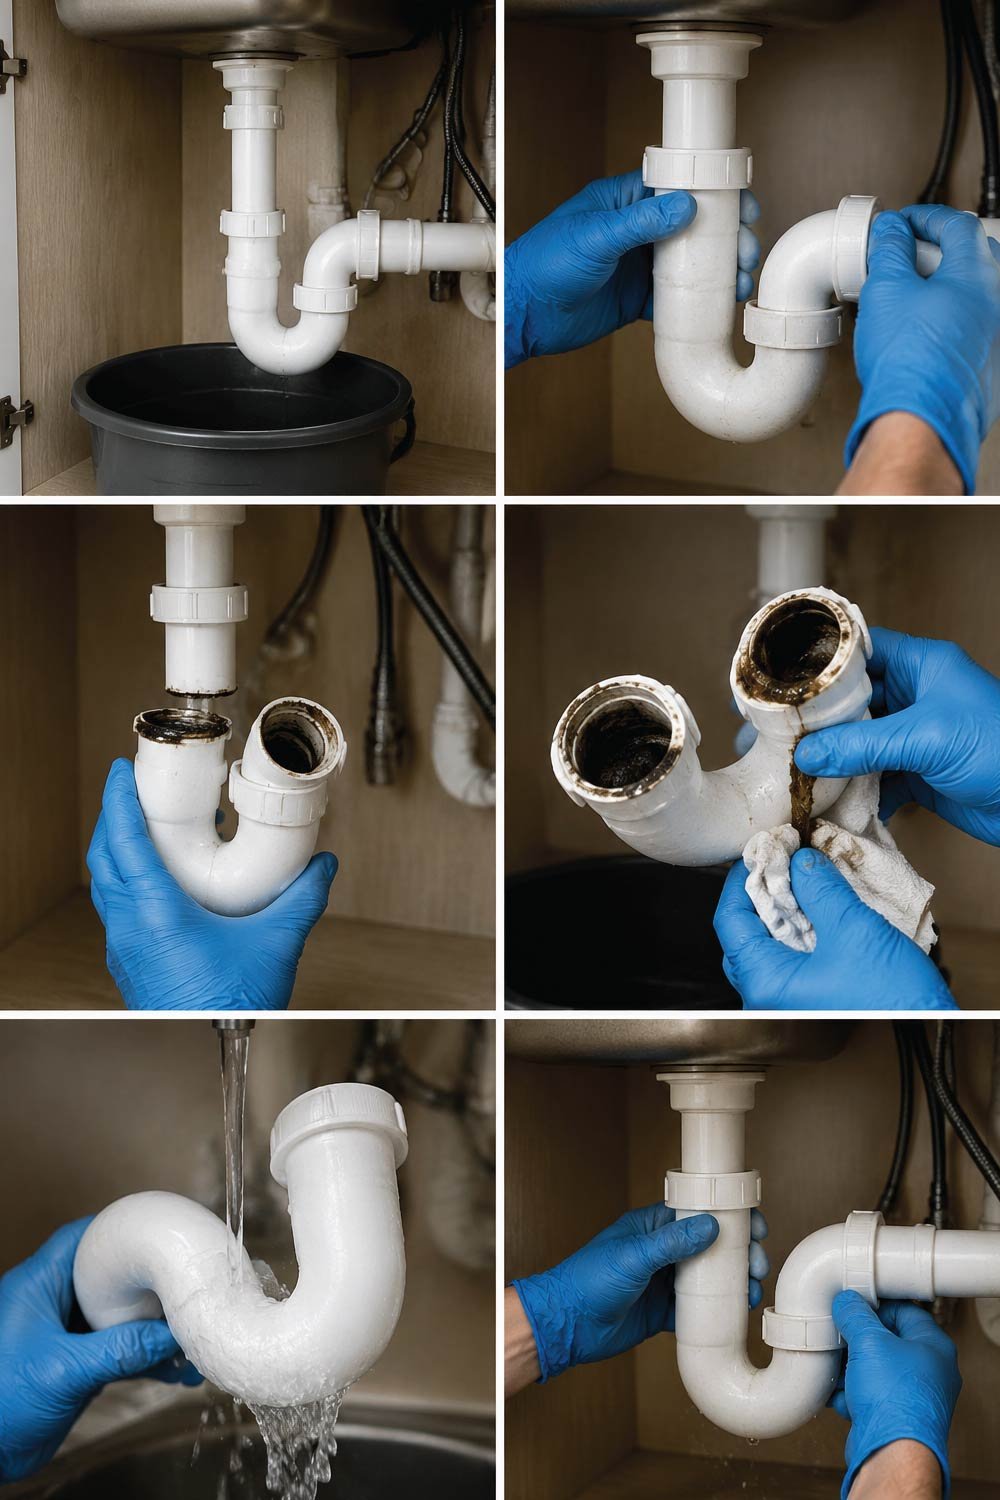
Steps to Clean a P-Trap
This section provides a clear step-by-step process for removing, cleaning, and reinstalling the P-trap to eliminate clogs that restrict water flow and cause slow draining or backups in the sink plumbing system.
- Place a bucket underneath.
- Loosen the slip nuts on both sides.
- Remove the P-trap carefully.
- Clean out food debris and grease.
- Rinse and reinstall the trap.
- Run water to check for leaks.
This method often clears stubborn kitchen sink clogs instantly.
Fixing a Leaky Kitchen Faucet
This section explains how to repair a dripping kitchen faucet, which is a common issue caused by worn internal components. Fixing it not only stops water wastage but also reduces utility bills and restores smooth faucet operation efficiently.
Common Causes
This section highlights the most frequent reasons behind faucet leaks, helping you identify whether the issue is related to internal seals, cartridges, or loose components that need repair or replacement.
- Worn washer or O-ring
- Faulty cartridge
- Loose parts
DIY Repair Steps
This section explains the basic process of disassembling a faucet, replacing damaged internal parts, and reassembling it to stop leaks and restore proper water flow in a simple, effective way.
- Turn off water under the sink.
- Remove the faucet handle.
- Take out the cartridge or valve stem.
- Replace worn washers or O-rings.
- Reassemble and test.
Most faucet repairs take less than 30 minutes.
Also Read:
Repairing Leaks Under the Kitchen Sink
This section focuses on identifying and fixing leaks that occur under the sink, which can lead to cabinet damage, mold growth, and structural issues if left untreated. Early detection and proper repair help maintain a dry and safe kitchen environment.
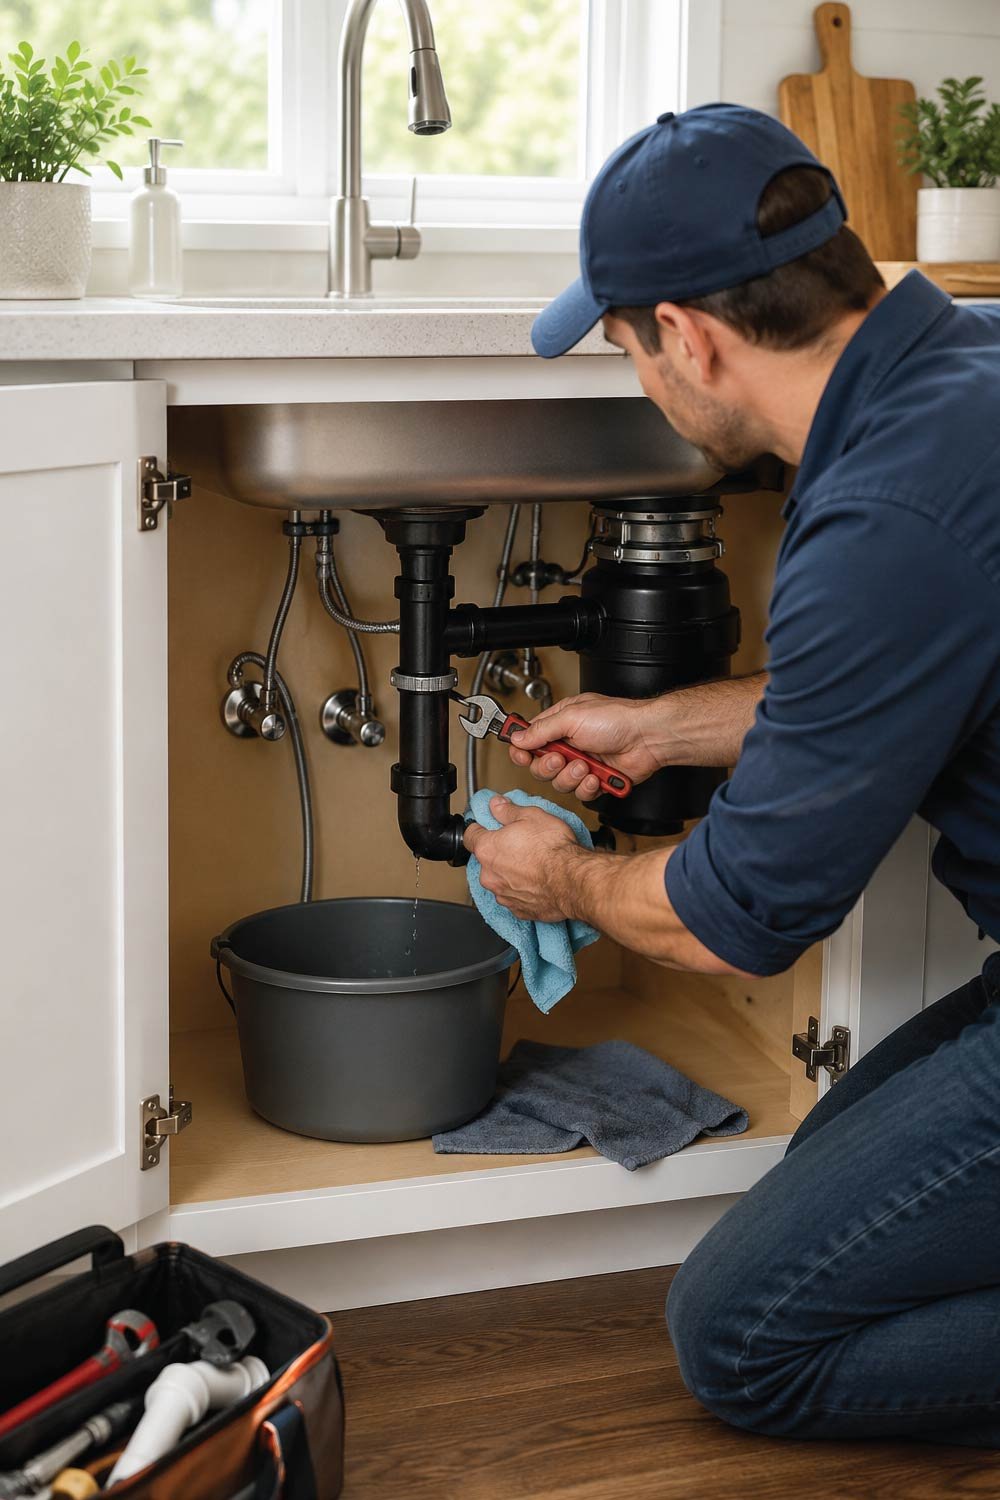
Common Leak Locations
This section outlines the typical areas where leaks occur under the kitchen sink, helping you quickly locate the source of water damage and take targeted repair action.
- Supply line connections
- Drain pipe joints
- Garbage disposal seals
How to Fix
This section explains a step-by-step method for diagnosing and repairing under-sink leaks by inspecting connections, tightening fittings, and replacing damaged components where necessary.
- Dry all pipes and connections.
- Turn on the water and observe where leaks appear.
- Tighten loose connections gently.
- Rewrap threaded fittings with plumber’s tape if needed.
- Replace worn washers or hoses if leaking continues.
Never overtighten fittings, as this can crack pipes.
Fixing Garbage Disposal Problems
This section explains how to troubleshoot common garbage disposal issues, including power failures, jams, and clogs. Understanding these problems helps restore proper function and prevents damage caused by improper use or food waste buildup inside the unit.
Disposal Not Turning On
This section explains how to fix a garbage disposal that won’t start, usually due to power issues or internal overload protection being triggered, requiring simple resets or basic checks.
- Press the reset button underneath
- Check the power connection
- Ensure the unit isn’t jammed
Disposal Is Jammed
This section explains how to safely clear a jammed disposal unit by manually freeing the blades and removing trapped debris without damaging the motor or internal components.
- Turn off power.
- Use a hex key in the bottom slot.
- Turn back and forth to free the blades.
- Remove debris with tongs (never hands).
Disposal Is Clogged
This section explains how to handle drainage blockages connected to the garbage disposal, which often require plunging or cleaning the drain line to restore proper water flow.
- Use a plunger
- Disconnect and clean the disposal drain line
Never put grease, bones, or fibrous foods down the disposal.
Also Read:
Fixing Low Water Pressure in the Kitchen Sink
This section explains how to diagnose and fix low water pressure in the kitchen sink, which can make daily tasks difficult. The issue is often caused by buildup, partially closed valves, or clogged faucet components that restrict water flow.
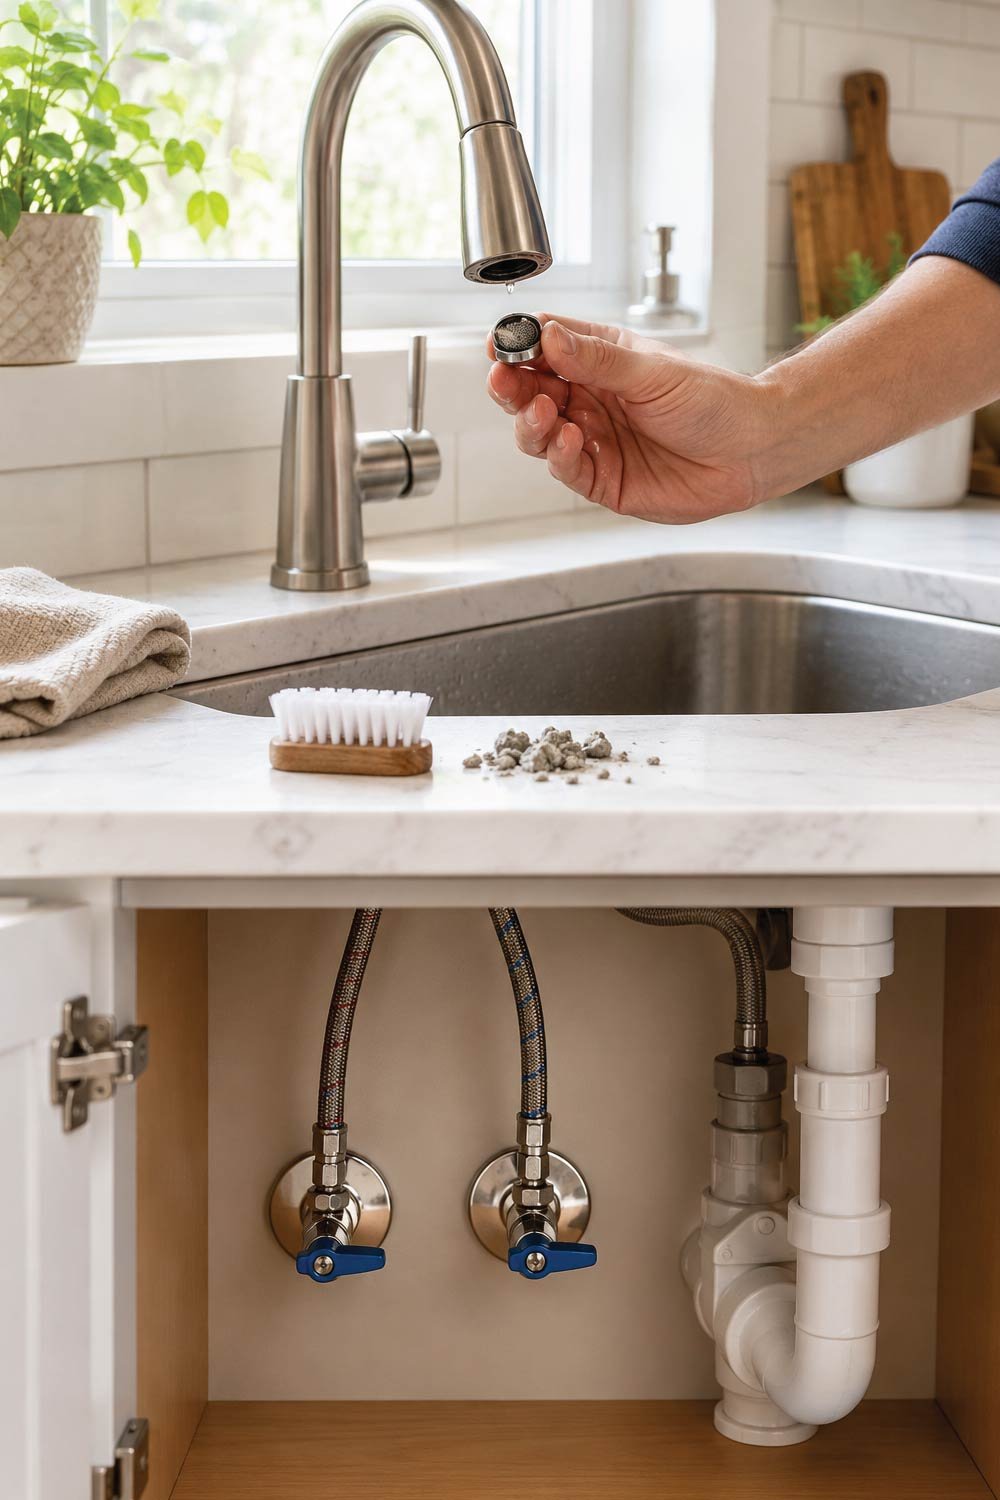
Common Causes
This section highlights the typical reasons for reduced water pressure, helping you identify whether the issue is local to the faucet or part of a larger plumbing system problem.
- Clogged faucet aerator
- Mineral buildup in supply lines
- Partially closed shut-off valves
DIY Fix
This section explains simple steps to restore normal water pressure by cleaning faucet components and ensuring proper valve positioning for unrestricted water flow.
- Unscrew the faucet aerator.
- Clean debris and mineral deposits.
- Reinstall and test pressure.
- Ensure shut-off valves are fully open.
If pressure is low throughout the house, the issue may be more serious.
Repairing a Leaking Dishwasher Connection
This section explains how to fix leaks in dishwasher connections, which commonly occur at hose joints. Addressing these leaks quickly is important to prevent water damage to flooring, cabinets, and surrounding kitchen structures.
Steps to Fix
This section outlines the proper procedure for inspecting, tightening, and replacing dishwasher hoses to eliminate leaks and ensure secure water flow connections.
- Turn off water and power.
- Inspect the inlet hose and drain hose.
- Tighten loose connections.
- Replace cracked or worn hoses.
- Check for leaks after reconnecting.
A leaking dishwasher hose can quickly cause floor damage if ignored.
Also Read:
Noisy Door Driving You Crazy? Make It Silent in Seconds (Simple Fix Guide)
Preventing Kitchen Plumbing Problems
This section focuses on long-term prevention strategies that help reduce kitchen plumbing issues. Regular maintenance and good daily habits significantly lower the risk of clogs, leaks, and costly repairs while improving overall system performance.
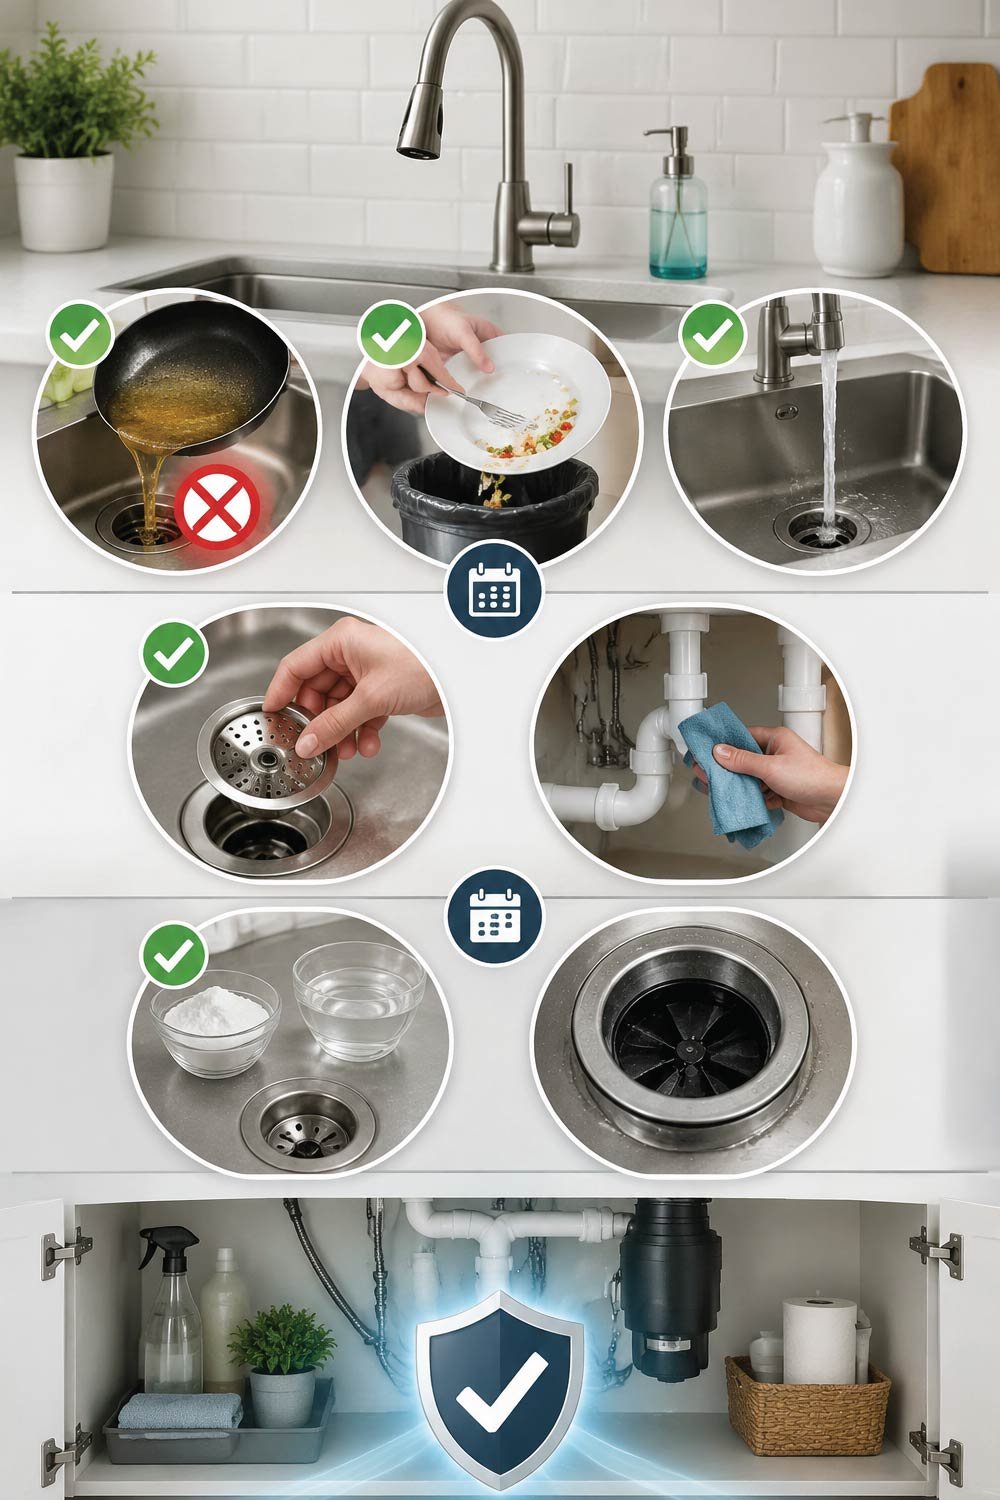
Daily Habits
This section explains simple everyday practices that help keep kitchen drains and plumbing systems clean and free from buildup that can lead to clogs or damage over time.
- Never pour grease down the drain
- Scrape plates into the trash
- Run hot water after washing dishes
Weekly Maintenance
This section describes weekly cleaning habits that help identify early signs of plumbing issues and keep sink components clean and functioning properly.
- Clean sink strainers
- Wipe under-sink pipes to check for leaks
Monthly Maintenance
This section highlights deeper monthly cleaning and inspection routines that help maintain long-term plumbing health and prevent buildup or odor issues in drains and disposals.
- Use baking soda and vinegar to clean drains
- Inspect garbage disposal for odors or buildup
Good habits greatly reduce plumbing issues over time.
When to Stop DIY and Call a Professional
This section explains the point where simple home repairs are no longer safe or effective and professional plumbing help becomes necessary. Recognizing these warning signs early helps prevent serious water damage, structural issues, and costly repairs that can result from attempting complex fixes without proper tools or training.
- Burst or cracked pipes
- Sewage smells
- Water damage inside walls
- Multiple drains backing up
- No water supply to the kitchen
Attempting complex repairs without training can make the problem worse.
Also Read:
Final Thoughts
Fixing kitchen plumbing issues doesn’t have to be intimidating. With basic tools, careful preparation, and a clear understanding of common problems, most kitchen plumbing repairs can be handled safely at home. From unclogging drains to fixing leaks and maintaining your garbage disposal, DIY plumbing skills save money and protect your home.
Start with small repairs, work patiently, and always prioritize safety. Knowing how to fix kitchen plumbing issues gives you confidence, independence, and peace of mind and helps keep your kitchen running smoothly every day.