
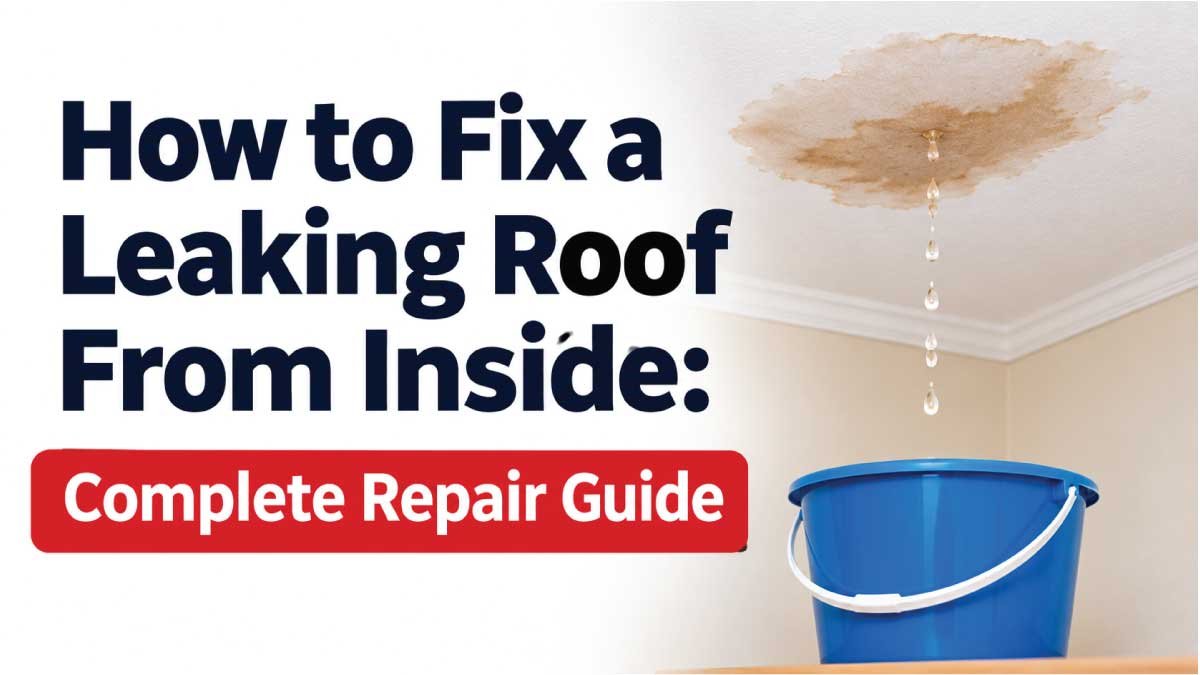
A leaking roof can cause serious problems inside your home, especially during heavy rain or storms. Water may drip through the ceiling, create damp patches, damage paint, weaken drywall, and eventually lead to mold growth. Learning how to fix a leaking roof from inside can help you control the damage, protect your belongings, and reduce the risk of expensive repairs while arranging a permanent solution.
Roof leaks commonly occur because of damaged shingles, cracked flashing, deteriorated roof valleys, loose roofing materials, or blocked drainage systems. Sometimes, water travels along roof rafters or ceiling structures before appearing inside, making the original leak difficult to locate. Fortunately, homeowners can take several temporary measures from inside the attic or ceiling area to control incoming water.
In this guide, you will learn how to identify the source of a roof leak, safely contain dripping water, apply temporary waterproofing solutions, and recognize when professional roof repair is necessary. You will also discover common causes, troubleshooting methods, estimated repair costs, and preventive maintenance tips.
Common Signs and Symptoms
A roof leak does not always appear as water dripping directly from the ceiling. Sometimes, moisture travels through insulation, wooden framing, and other building materials before becoming visible. Recognizing the early warning signs helps homeowners identify potential problems before water causes extensive structural damage.
Watch for these common symptoms:
- Water dripping from the ceiling: Small or continuous drops during rainfall usually indicate an active leak.
- Brown or yellow ceiling stains: Discolored patches often develop when water repeatedly soaks drywall or plaster.
- Peeling ceiling paint: Moisture weakens the bond between paint and the ceiling surface.
- Bubbling or sagging drywall: Water trapped above the ceiling can cause drywall to swell, soften, or lose its shape.
- Damp attic insulation: Wet insulation may indicate water entering through the roof structure.
- Musty odors: Persistent moisture creates conditions that encourage mold and mildew growth.
- Wet roof rafters: Darkened or damp wooden framing can reveal the direction of water movement.
- Mold spots: Black, green, or gray patches may develop on ceilings, insulation, or wooden surfaces.
- Water appearing around ceiling fixtures: Moisture near lights or electrical fittings can indicate a particularly dangerous leak.
How a Roof Normally Protects Your Home
A properly installed roof creates several protective layers that prevent rainwater from entering the house. The outer roofing material sheds most of the water, while underlayment provides additional protection. Flashing seals vulnerable joints, and the roof drainage system directs water toward gutters and downspouts.
The basic roof structure usually includes:
- Roof covering: Shingles, metal panels, tiles, or another material that sheds rainwater.
- Underlayment: A protective membrane installed beneath the outer roofing material.
- Roof decking: Wooden or engineered panels that support the roofing system.
- Flashing: Metal or specialized waterproof material installed around chimneys, vents, valleys, and roof edges.
- Roof framing: Rafters and trusses that support the roof structure.
- Attic insulation: Material that helps regulate indoor temperatures.
When one of these components becomes damaged, water can enter the roof assembly. It may then travel along the decking or framing before reaching the ceiling. This explains why the visible water stain is not always directly below the actual roof opening.
Most Common Reasons a Roof Leaks
Understanding why water enters your roof makes troubleshooting easier. Different roofing problems produce similar indoor symptoms, so inspect the attic and surrounding structures carefully before choosing a temporary repair method.
1. Damaged or Missing Roof Shingles
Asphalt shingles can crack, curl, loosen, or disappear during strong winds and storms. Missing shingles expose the protective layers underneath, allowing rainwater to reach the roof decking.
Look for daylight through the roof, damaged shingle fragments, or damp areas beneath exposed sections.
2. Damaged Roof Flashing
Flashing protects joints around chimneys, skylights, vents, and other roof openings. Over time, metal flashing can loosen, corrode, or separate from surrounding materials.
Leaks near chimneys or ventilation pipes often suggest flashing problems.
3. Cracked Roof Underlayment
Underlayment provides an additional waterproof barrier beneath roofing materials. Aging, poor installation, or previous damage can create openings that allow moisture to reach the decking.
A leak may appear even when the outer roofing material looks relatively normal.
4. Blocked Gutters and Downspouts
Leaves, dirt, and debris can prevent rainwater from draining properly. Overflowing gutters may allow water to collect near roof edges and enter vulnerable sections of the roof.
Check for overflowing gutters, standing water, and dampness near exterior walls.
5. Damaged Roof Valleys
Roof valleys collect water from two intersecting roof slopes. Damaged valley flashing, deteriorated roofing materials, or accumulated debris can allow water to enter beneath the roof covering.
Leaks may become noticeable after prolonged or heavy rainfall.
6. Cracked Skylight Seals
Skylights have several joints that require proper waterproofing. Aging seals, damaged flashing, and installation problems can allow water to enter around the frame.
Water stains near a skylight usually indicate that the surrounding roof assembly needs inspection.
7. Loose Roofing Nails and Fasteners
Improperly installed or exposed fasteners can create small openings. Thermal expansion, vibration, and aging roofing materials may also loosen fasteners over time.
These leaks can be difficult to identify because the entry points are sometimes very small.
8. Condensation in the Attic
Not every damp attic indicates a roof leak. Poor ventilation, indoor humidity, and inadequate vapor control can create condensation on cold roof surfaces.
Widespread moisture, dripping from multiple roof surfaces, or dampness during dry weather may indicate a condensation problem rather than rainwater entering from outside.
Safety Precautions Before Troubleshooting
Working inside a roof space involves electrical, structural, and environmental hazards. Before investigating a leak, protect yourself and other household members. Never enter a dangerous attic or attempt an emergency repair if water, damaged ceilings, or unstable structures make the area unsafe.
Follow these precautions:
- Avoid electrical hazards: If water is near ceiling lights, outlets, wiring, or electrical equipment, stay away. Switch off the affected circuit from a dry, safely accessible electrical panel if possible. Contact a qualified electrician when necessary.
- Do not touch wet electrical fixtures: Never handle dripping light fittings, switches, or exposed wiring.
- Stay away from sagging ceilings: A water-filled ceiling can collapse unexpectedly.
- Use proper protective equipment: Wear gloves, safety glasses, sturdy footwear, and a suitable respirator when dealing with dusty insulation or suspected mold.
- Avoid damaged roof structures: Do not walk on weakened ceiling joists or roof decking.
- Watch for nails: Exposed roofing nails and sharp metal edges can cause injuries.
- Avoid wet roof surfaces: Never climb onto a roof during rain, strong winds, or icy conditions.
- Protect against mold: Avoid disturbing extensive mold growth or contaminated insulation.
If the ceiling is bulging, do not stand underneath it or puncture it casually. Have a qualified professional assess the situation before attempting to release trapped water.
Tools Required
Having the right equipment makes temporary leak control easier and reduces unnecessary damage. Most homeowners only need basic supplies for containing water and applying a temporary interior patch. More specialized equipment may be required when inspecting attic spaces or handling damaged insulation.
| Tool | Purpose |
|---|---|
| Flashlight or headlamp | Inspect dark attic areas |
| Bucket or container | Collect dripping water |
| Plastic sheeting | Protect floors and belongings |
| Waterproof tarp | Provide temporary water protection where safely installed |
| Roofing repair tape | Seal suitable small, accessible surfaces temporarily |
| Roofing sealant | Temporarily seal compatible small openings |
| Utility knife | Cut damaged insulation or materials when appropriate |
| Work gloves | Protect hands from sharp objects |
| Safety glasses | Protect eyes from dust and debris |
| Moisture meter | Identify damp wood and building materials |
| Dry towels | Absorb small amounts of water |
| Respirator | Reduce exposure to dust and suitable airborne contaminants |
Always check product instructions before applying roofing tape or sealant. Not every product bonds properly to wet wood, metal, insulation, or other roofing materials.
Step-by-Step Troubleshooting Guide
Start by controlling the water rather than immediately attempting to seal the roof. A systematic inspection helps distinguish an active roof leak from condensation or plumbing problems and prevents unnecessary damage to ceilings and attic materials.
Step 1: Identify Where Water Is Entering
Inspect the ceiling and attic from a safe position. Look for dripping water, dark stains, wet insulation, and damp wooden framing.
Why it matters: Identifying the affected area helps narrow down the source.
Expected result: You should locate one or more areas showing active moisture.
What to do next: Mark the affected area mentally or with a safe, removable marker for further inspection.
Step 2: Protect Furniture and Flooring
Move furniture, electronics, carpets, and other belongings away from the leak. Place a bucket beneath active dripping and use plastic sheeting to protect nearby surfaces.
Why it matters: Water can damage household belongings even when the roof opening is relatively small.
Expected result: Dripping water is contained without spreading across the room.
What to do next: Continue monitoring the container and empty it before it overflows.
Step 3: Inspect the Attic Carefully
If the attic is safely accessible, use a flashlight to inspect the underside of the roof decking, rafters, and insulation.
Why it matters: Water may travel along wooden framing before reaching the ceiling.
Expected result: You may notice wet wood, water trails, damaged insulation, or visible openings.
What to do next: Trace the moisture toward its highest visible point without walking on unsupported surfaces.
Step 4: Check for Condensation
Look for widespread moisture, droplets on several roof surfaces, and dampness around ventilation areas. Consider whether the problem occurs during dry weather.
Why it matters: Condensation can resemble a roof leak but requires a different repair approach.
Expected result: A localized water trail suggests a leak, while widespread moisture may indicate condensation.
What to do next: Investigate ventilation and indoor humidity if condensation appears more likely.
Step 5: Check the Roof Penetrations
From a safe attic position, inspect the areas around chimneys, vents, skylights, and plumbing stacks.
Why it matters: These locations contain joints where water can enter if flashing or seals fail.
Expected result: You may find damp framing or moisture trails near one of these openings.
What to do next: Record the suspected location for exterior inspection by a qualified roofer.
Step 6: Apply Temporary Interior Protection
If the damaged area is accessible and the surface is suitable, use compatible roofing repair tape or sealant according to the manufacturer’s instructions.
Why it matters: A temporary patch may reduce minor water entry, but it cannot replace a proper exterior roofing repair.
Expected result: Water entry may decrease if the actual opening has been reached and the product bonds correctly.
What to do next: Monitor the area during the next rainfall and arrange permanent repairs.
Step 7: Dry and Monitor the Affected Area
Once the leak has stopped, remove standing water and arrange appropriate drying. Check insulation, wood, and ceiling materials for remaining moisture.
Why it matters: Hidden moisture can lead to mold, material deterioration, and recurring ceiling damage.
Expected result: The affected materials should gradually become dry.
What to do next: Replace insulation or ceiling materials only after the leak is repaired and the area is properly dried.
Also Read:
Quick Diagnosis Table
The location and appearance of water damage provide useful clues about the underlying problem. Use this table as an initial troubleshooting reference rather than treating symptoms as a confirmed diagnosis.
| Symptom | Possible Cause | Recommended Solution |
|---|---|---|
| Water near chimney | Damaged flashing | Professional flashing repair |
| Dripping around skylight | Failed seals or flashing | Inspect and repair skylight joints |
| Wet attic insulation | Roof opening or condensation | Identify moisture source |
| Brown ceiling stains | Repeated water intrusion | Trace leak and repair roof |
| Water near roof edges | Blocked gutters | Clean and inspect drainage |
| Leak during strong winds | Loose or missing shingles | Exterior roofing repair |
| Moisture across roof decking | Condensation or multiple leaks | Inspect ventilation and roofing |
| Water near ventilation pipe | Damaged pipe flashing | Replace or repair flashing |
| Sagging ceiling | Trapped water or damaged drywall | Professional assessment |
How to Fix Each Common Cause
After identifying the likely problem, choose a repair method that addresses the actual source. Interior repairs can help control minor leaks, but most roofing failures require exterior work to restore the roof’s waterproofing system.
1. Fixing a Small Roof Opening From Inside
For a small, accessible opening, a compatible roofing repair tape or sealant may provide temporary protection. Clean the application surface only when safe, follow the product’s preparation instructions, and allow the recommended curing time.
Do not apply ordinary household adhesive, paint, or general-purpose caulk as a substitute for roofing materials. These products may fail when exposed to moisture and temperature changes.
2. Managing Water From a Damaged Shingle
Missing or cracked shingles generally require exterior replacement. From inside, you can contain dripping water with a bucket and protect insulation and belongings.
Avoid inserting random pieces of wood, plastic, or foam into the opening. Such materials can obstruct drainage or hide continuing water damage.
3. Controlling Leaks Around Flashing
Leaks near chimneys, vents, and skylights usually require flashing repair. Temporary interior protection can reduce damage while waiting for a roofer, but sealing the visible ceiling stain will not repair the failed roof joint.
A professional should inspect the flashing, surrounding roofing materials, and underlayment.
4. Repairing Water Damage Around Gutters
If blocked gutters are causing water overflow, arrange cleaning and check whether the gutters have proper alignment and drainage. Clear downspouts and remove accumulated debris from accessible areas.
If water has already entered the roof, inspect the fascia, soffit, roof edge, and surrounding wood for deterioration.
5. Handling a Roof Valley Leak
Roof valleys require careful exterior repair because they carry concentrated rainwater. A roofer may need to replace damaged valley flashing or surrounding roofing materials.
From inside, avoid covering the entire affected area with sealant. This may conceal moisture without correcting the underlying drainage problem.
Advanced Troubleshooting
Some roof leaks are difficult to identify because water travels through hidden spaces before appearing indoors. Advanced inspection methods can help locate the source when ordinary visual checks do not provide a clear answer.
Consider these diagnostic approaches:
- Moisture meter testing: A moisture meter can identify damp sections of wood and help determine how far water has spread.
- Infrared inspection: Thermal imaging may reveal temperature differences associated with hidden moisture, although results require professional interpretation.
- Controlled water testing: A roofer may test specific roof sections using carefully controlled water application to identify an entry point.
- Attic ventilation inspection: Check whether ventilation openings are blocked or insufficient.
- Plumbing investigation: If moisture appears without rainfall, inspect nearby plumbing, bathroom fixtures, and water supply lines.
- Structural inspection: Check for weakened rafters, damaged roof decking, and long-term moisture deterioration.
Never perform water testing from the roof yourself, particularly when surfaces are wet or access is difficult.
When Repair Is Not Worth It
Sometimes, repeated temporary repairs cost more than addressing the roofing problem properly. A roof that has extensive deterioration may require major restoration or complete replacement rather than another small patch.
Consider professional assessment or replacement when:
- Large sections of roofing materials are damaged or missing.
- Roof decking has extensive rot or structural weakness.
- Leaks occur in several different locations.
- The underlayment has deteriorated across a large area.
- Previous repairs repeatedly fail.
- The roof has reached the end of its expected service life.
- Water damage has affected structural framing.
The decision should depend on the roof’s overall condition, repair costs, remaining lifespan, and extent of damage. A professional inspection can help determine whether targeted repairs or replacement offer better long-term value.
Preventive Maintenance Tips
Regular roof maintenance reduces the likelihood of leaks and helps identify minor problems before they damage ceilings, insulation, and wooden structures. A basic inspection schedule is particularly useful before the rainy season and after severe storms.
Follow these maintenance practices:
- Inspect roofing materials at least twice a year.
- Check for missing, cracked, or curled shingles.
- Keep gutters and downspouts free from leaves and debris.
- Examine flashing around chimneys, vents, and skylights.
- Maintain appropriate attic ventilation.
- Check attic insulation for signs of moisture.
- Repair loose roofing components promptly.
- Trim overhanging tree branches that could damage roofing.
- Inspect ceilings periodically for new stains or peeling paint.
- Arrange professional roof inspections when problems appear.
Avoid pressure-washing shingles or walking on fragile roofing materials. Improper maintenance can create damage instead of preventing it.
Common Mistakes to Avoid
A rushed repair can make a roof leak worse, especially when homeowners treat visible ceiling damage instead of identifying the actual water entry point. Avoid these common mistakes when troubleshooting and managing a leaking roof.
- Sealing only the ceiling stain: Paint and filler hide discoloration but do not stop water entering through the roof.
- Using unsuitable adhesives: Ordinary glue and household caulk may not withstand roofing conditions.
- Ignoring wet insulation: Damp insulation can remain wet after visible dripping stops.
- Patching without identifying the source: A temporary patch may fail if water enters somewhere else.
- Walking on damaged roof structures: Weak decking and ceiling framing can collapse.
- Ignoring electrical hazards: Water near electrical fixtures requires immediate caution.
- Covering mold without treatment: Painting over mold does not solve the moisture problem.
- Delaying permanent repairs: Small leaks can eventually damage larger areas of the roof and ceiling.
Also Read:
When to Call a Professional
Although homeowners can manage water collection and basic interior protection, some roofing problems require professional equipment and experience. Contact a qualified roofer when the leak involves structural damage, complicated flashing, extensive water intrusion, or an inaccessible roof area.
Professional assistance is especially important when:
- The ceiling is sagging or appears close to collapse.
- Water is entering near electrical wiring or fixtures.
- Multiple roof sections are leaking.
- Roof decking or rafters appear rotten.
- The leak involves a chimney, skylight, or complicated roof valley.
- You cannot safely access the attic.
- Mold covers a large area.
- Temporary repairs repeatedly fail.
- The roof requires shingle, tile, metal panel, or underlayment replacement.
If water is near electrical equipment, contact an electrician as well. For extensive structural damage, a qualified building professional may also be necessary.
Estimated Repair Costs
Roof repair expenses depend on roofing material, damage severity, labor rates, roof accessibility, and local market conditions. The following figures are broad illustrative estimates in US dollars, not fixed quotations. Actual prices may vary significantly by location and contractor.
| Repair | Estimated Cost | DIY or Professional |
|---|---|---|
| Bucket and temporary water protection | $10–$40 | DIY |
| Roofing repair tape | $10–$35 | DIY, if suitable |
| Compatible roofing sealant | $10–$40 | DIY, for suitable minor repairs |
| Small shingle replacement | $150–$400 | Professional |
| Flashing repair | $200–$600 | Professional |
| Skylight leak repair | $200–$700 | Professional |
| Roof valley repair | $300–$1,000 | Professional |
| Ceiling drywall repair | $150–$500 | DIY or professional |
| Attic insulation replacement | $200–$1,000 | Professional or suitable DIY |
| Major roof replacement | $5,000–$15,000+ | Professional |
These costs do not necessarily include extensive structural repairs, mold remediation, permits, or additional water damage restoration. Obtain multiple written estimates before approving major work.
Also Read:
Frequently Asked Questions
Homeowners often have similar questions when water starts entering through a roof. The following answers explain what interior repairs can accomplish, how to recognize serious problems, and when additional professional assistance is necessary.
1. Can You Fix a Leaking Roof From Inside the House?
Yes, you can sometimes control a small roof leak from inside using suitable temporary roofing materials. However, most roof leaks require exterior repairs because the damaged shingles, flashing, or underlayment are located outside. Interior patches should be treated as short-term protection, not a permanent solution.
2. What Is the Best Temporary Fix for a Roof Leak?
The best immediate approach is to collect dripping water, protect household belongings, and prevent additional water damage. A compatible roofing repair tape or sealant may help with certain accessible openings. However, the correct solution depends on the roofing material, moisture conditions, and location of the damage.
3. Can Roofing Sealant Stop a Leak From Inside?
Roofing sealant can temporarily reduce water entry when applied to a compatible, accessible surface. However, it may not bond properly to wet, dusty, or unsuitable materials. Always follow the manufacturer’s instructions and understand that exterior repairs are usually necessary to restore the roof’s waterproofing system.
4. Why Does My Roof Leak Only During Heavy Rain?
A roof may leak during heavy rain because damaged flashing, missing shingles, or small openings cannot handle large amounts of water. Strong winds can also push rain beneath roofing materials. Blocked gutters and poorly drained roof valleys may contribute to the problem.
5. How Do I Find a Roof Leak in the Attic?
Use a flashlight to inspect the underside of the roof decking, rafters, and insulation. Look for dark stains, wet wood, water trails, and damaged roofing materials. Remember that water can travel along framing before dripping, so the wettest ceiling area may not be directly beneath the roof opening.
6. Can a Small Roof Leak Cause Mold?
Yes, even a small roof leak can encourage mold growth when insulation, drywall, or wooden structures remain damp. Persistent moisture creates favorable conditions for mold and mildew. Dry affected materials promptly, correct the source of the leak, and arrange professional remediation if mold growth is extensive.
7. Should I Puncture a Bulging Ceiling to Release Water?
Do not puncture a bulging ceiling without first having the situation assessed. The ceiling may contain a substantial amount of water and could collapse unexpectedly. Electrical wiring may also be present. Keep people away from the affected area and contact a qualified professional to manage the damage safely.
8. Can a Roof Leak Stop on Its Own?
A roof leak may stop temporarily when rainfall ends or wind direction changes, but the underlying damage usually remains. Water may return during the next storm, especially when damaged flashing, shingles, or underlayment have not been repaired. Always investigate recurring moisture rather than assuming the problem has disappeared.
9. How Long Can I Leave a Roof Leak Unrepaired?
You should arrange a permanent repair as soon as possible after discovering a roof leak. Even occasional water entry can damage insulation, drywall, wooden framing, and electrical components. Temporary protection may reduce immediate damage, but delaying repairs increases the possibility of more extensive restoration work.
10. Does Homeowners Insurance Cover a Leaking Roof?
Homeowners insurance may cover roof damage caused by certain sudden and accidental events, such as storm damage, depending on the policy. However, gradual deterioration, poor maintenance, and ordinary wear may be excluded. Review your policy, document the damage, and contact your insurer before authorizing major repairs.
Also Read:
Final Thoughts
Learning how to fix a leaking roof from inside can help you control water damage and protect your home while arranging a permanent repair. The first priority should always be safety. Keep away from wet electrical fixtures, unstable ceilings, damaged roof structures, and unsafe attic spaces.
Start by identifying the affected area, collecting dripping water, protecting furniture, and checking accessible attic spaces for moisture. Look for wet insulation, damaged roof decking, water trails, and signs of condensation. Temporary roofing tape or compatible sealant may help in certain situations, but these materials cannot replace proper exterior repairs.
Remember that the visible ceiling stain does not always reveal the actual entry point. Water can travel along rafters and roof decking before reaching the room below. For this reason, professional inspection is often necessary when the source remains unclear or the damage is extensive.
Regular roof inspections, clean gutters, properly maintained flashing, and good attic ventilation can help prevent future problems. Address small warning signs early, avoid risky DIY work, and choose permanent repairs that restore your roof’s protection rather than simply hiding the symptoms.