
A dripping shower head is more than just annoying it wastes water, increases utility bills, and can lead to long-term plumbing damage if ignored. The good news is that most dripping shower heads are caused by simple, inexpensive issues that homeowners can fix without calling a plumber.
This guide explains why shower heads drip, how to identify the exact cause, and step-by-step solutions to stop the leak for good.
Why Is My Shower Head Dripping?
A dripping shower head is usually caused by incomplete water shutoff inside the plumbing system, where worn internal parts or buildup prevent a perfect seal, allowing small amounts of water to continue leaking even after the faucet is turned off. This issue often develops gradually and becomes more noticeable over time as components degrade.
A shower head usually drips because water is not fully shutting off at the valveWhen internal seals or valve components fail to close properly, water slowly escapes through the shower head even when the handle is fully turned off, resulting in constant or intermittent dripping.
Common causes include:
- Worn-out rubber washers or O-rings
- A faulty cartridge or valve
- Mineral buildup from hard water
- Loose connections
- High water pressure
Identifying the cause helps you choose the right fix.
Tools You’ll Need
Having the right tools ready before starting the repair makes the process smoother and helps prevent damage to fittings, while also ensuring you can properly clean, tighten, or replace components without unnecessary delays during the repair process.
Before starting, gather a few basic tools:
- Adjustable wrench or pliers
- Flathead and Phillips screwdrivers
- Replacement washers or O-rings
- Plumber’s tape (Teflon tape)
- White vinegar
- Old toothbrush or small brush
- Towel or rag
Most of these are inexpensive and easy to find at a hardware store.
Step 1: Turn Off the Water Supply
Turning off the water supply is an essential first step because it prevents accidental spraying, reduces pressure in the shower system, and ensures a safe working environment while you inspect or repair the shower head without water interference.
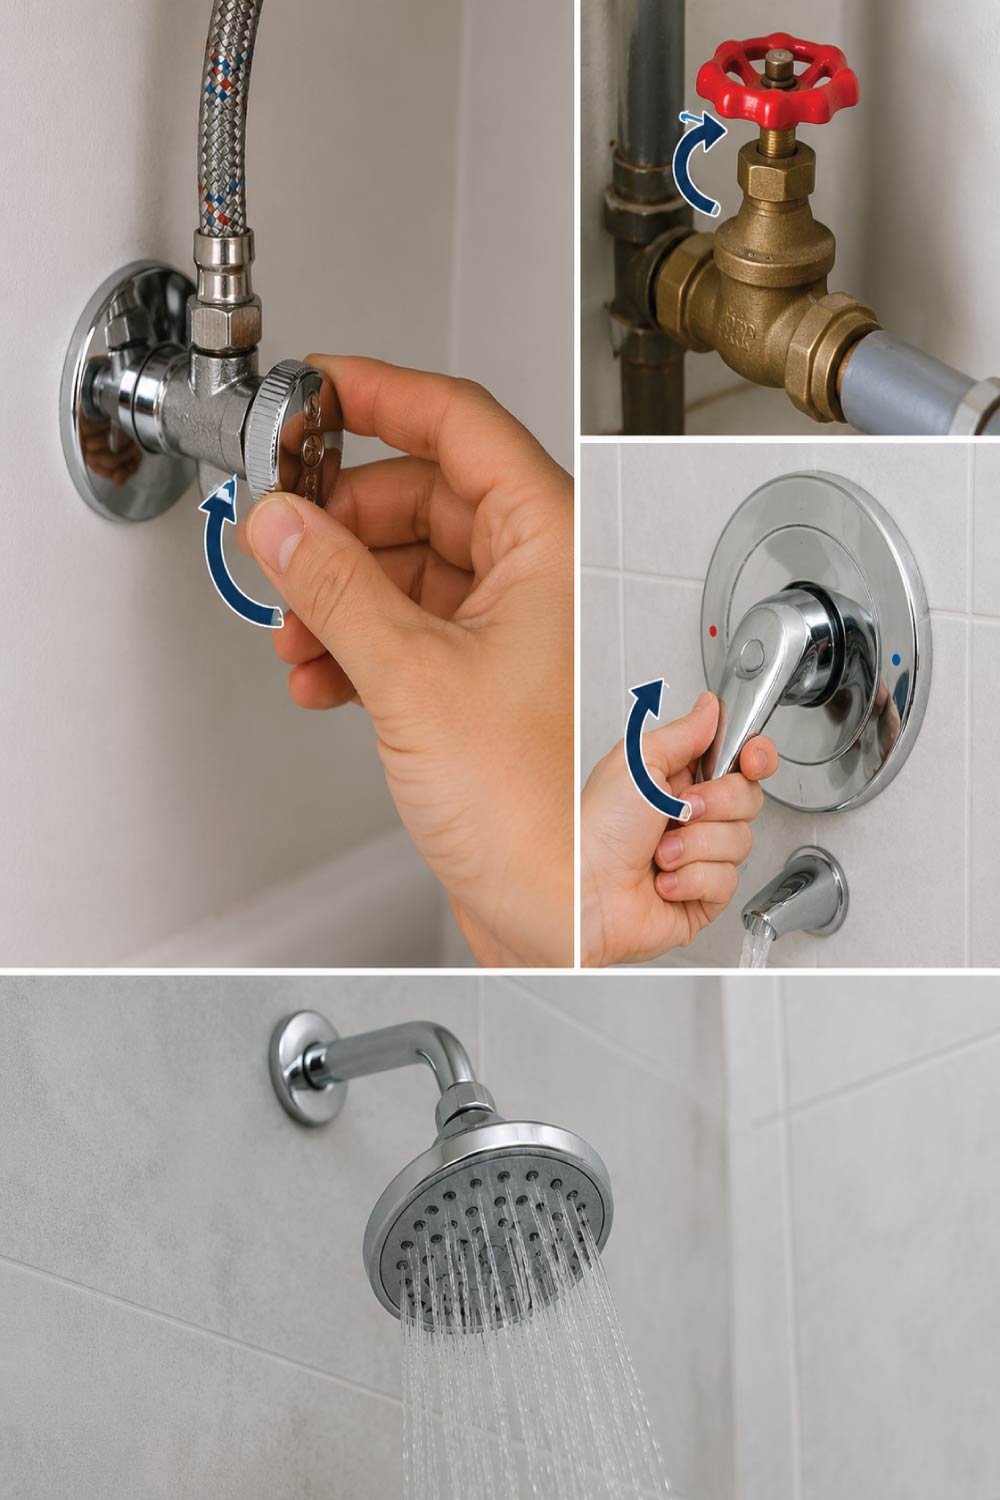
If your bathroom has a local shut-off valve, turn it offShutting off the correct valve ensures no water flows into the shower system, making it safe to disassemble parts and check for internal issues.
- If your bathroom has a local shut-off valve, turn it off.
- If not, shut off the main water supply to your home.
- Open the shower faucet briefly to drain any remaining water.
This step is essential for safety and cleanliness.
Step 2: Determine Where the Drip Is Coming From
Identifying the exact source of the drip is important because different causes—such as internal valve failure, buildup, or loose fittings require different repair approaches, and misdiagnosis can lead to unnecessary part replacement or ineffective fixes.
Pay attention to when and how the shower head dripsObserving the timing and pattern of dripping helps quickly narrow down the underlying issue and guides the correct repair method.
- Drips continuously, even when off → Likely a worn washer, cartridge, or valve.
- Drips only after showering → Often caused by residual water draining (normal) or mineral buildup.
- Leaks from the connection point → Loose fitting or worn plumber’s tape.
Once you know the source, you can apply the correct fix.
Step 3: Remove the Shower Head
Removing the shower head allows full access for inspection and cleaning, making it easier to identify buildup, worn seals, or connection issues that may be causing leaks or reduced sealing performance at the joint.
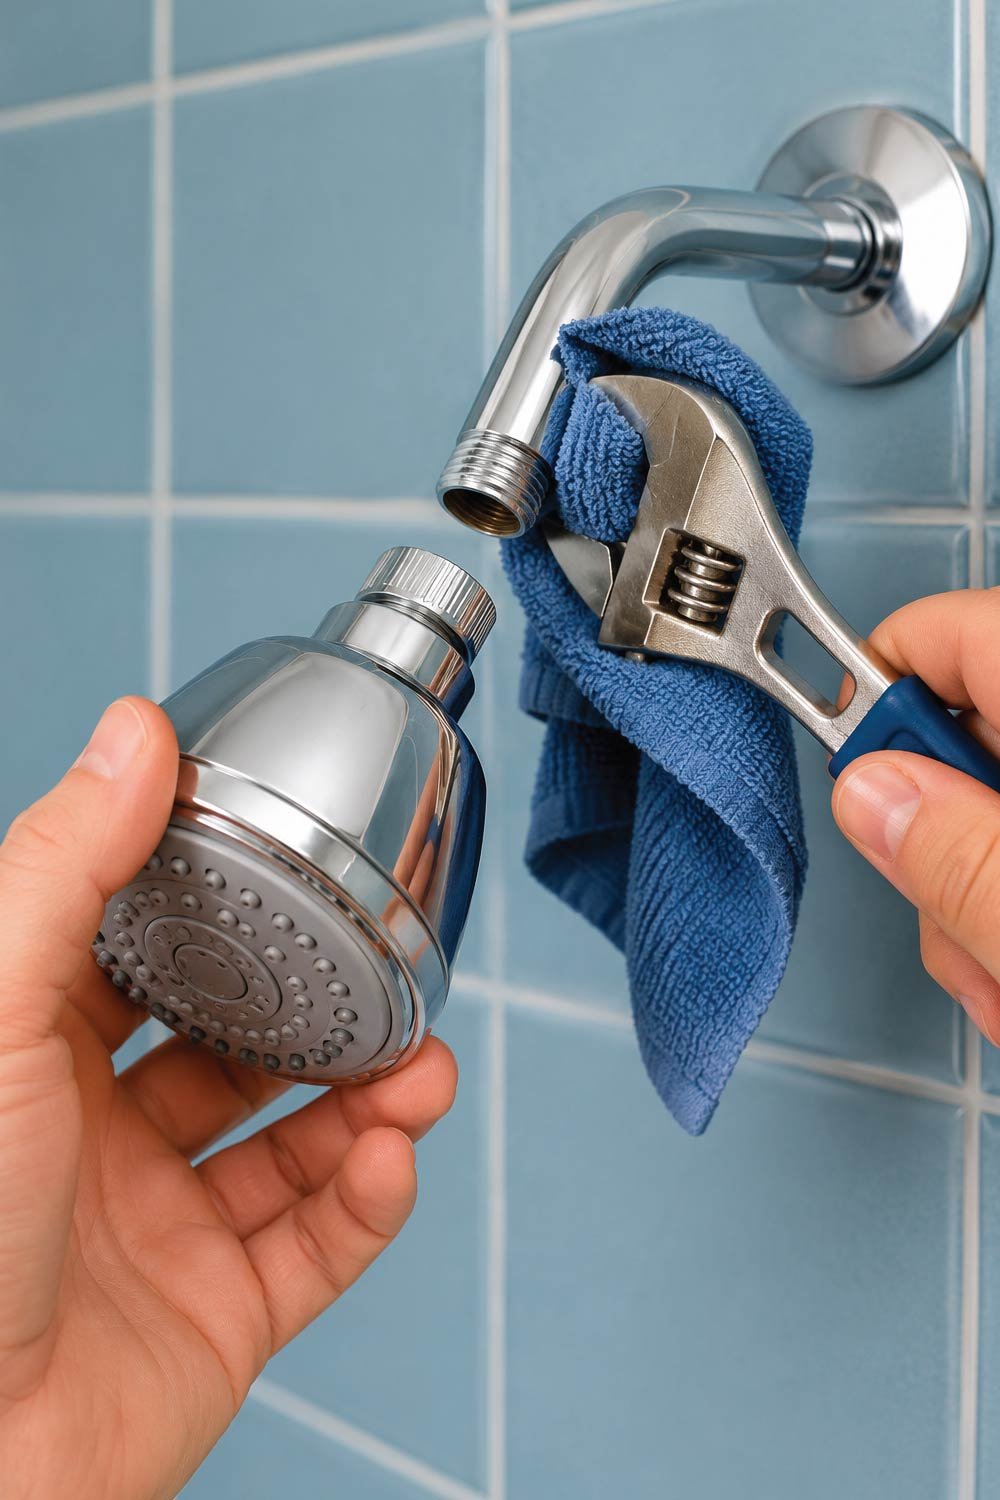
Use an adjustable wrench or pliers to loosen the shower head from the shower arm.Proper removal technique helps prevent damage to the finish or threads while allowing safe disassembly of the fixture.
- Wrap a towel around the fitting to avoid scratching the finish.
- Turn counterclockwise to loosen.
- If it’s stuck, apply a small amount of penetrating oil and wait a few minutes.
Once removed, inspect the shower head and the threads on the shower arm.
Also Read:
Step 4: Clean Mineral Buildup
Mineral buildup from hard water can block water flow and prevent proper sealing, leading to dripping or uneven spray patterns, and cleaning these deposits often restores normal function without needing replacement parts.
How to Clean
Thorough cleaning removes deposits that interfere with seals and internal flow pathways, improving performance and stopping minor leaks.
- Soak the shower head in white vinegar for 30–60 minutes.
- Use an old toothbrush to scrub away buildup.
- Rinse thoroughly with water.
If mineral buildup was the issue, reinstall the shower head and test it. Many drips stop at this stage.
Step 5: Replace the Washer or O-Ring
Worn washers or O-rings are one of the most common reasons for shower head leaks because they lose flexibility over time, preventing a tight seal and allowing water to escape even when connections appear secure.
How to Do It
Replacing these small sealing components restores proper pressure control and eliminates most dripping issues when cleaning alone is not enough.
- Locate the rubber washer or O-ring inside the shower head or connector.
- Remove the old washer—it may be cracked, flattened, or brittle.
- Install a new washer of the same size.
- Apply plumber’s tape to the shower arm threads.
- Reinstall the shower head and tighten snugly (not too tight).
This simple fix solves the majority of dripping shower head problems.
Step 6: Check and Replace the Shower Cartridge (If Needed)
When basic fixes like cleaning and washer replacement do not stop the dripping, the problem is often located inside the shower valve itself, where the cartridge controls water flow and mixing, and wear or internal damage can allow water to pass through even when the system is turned off.
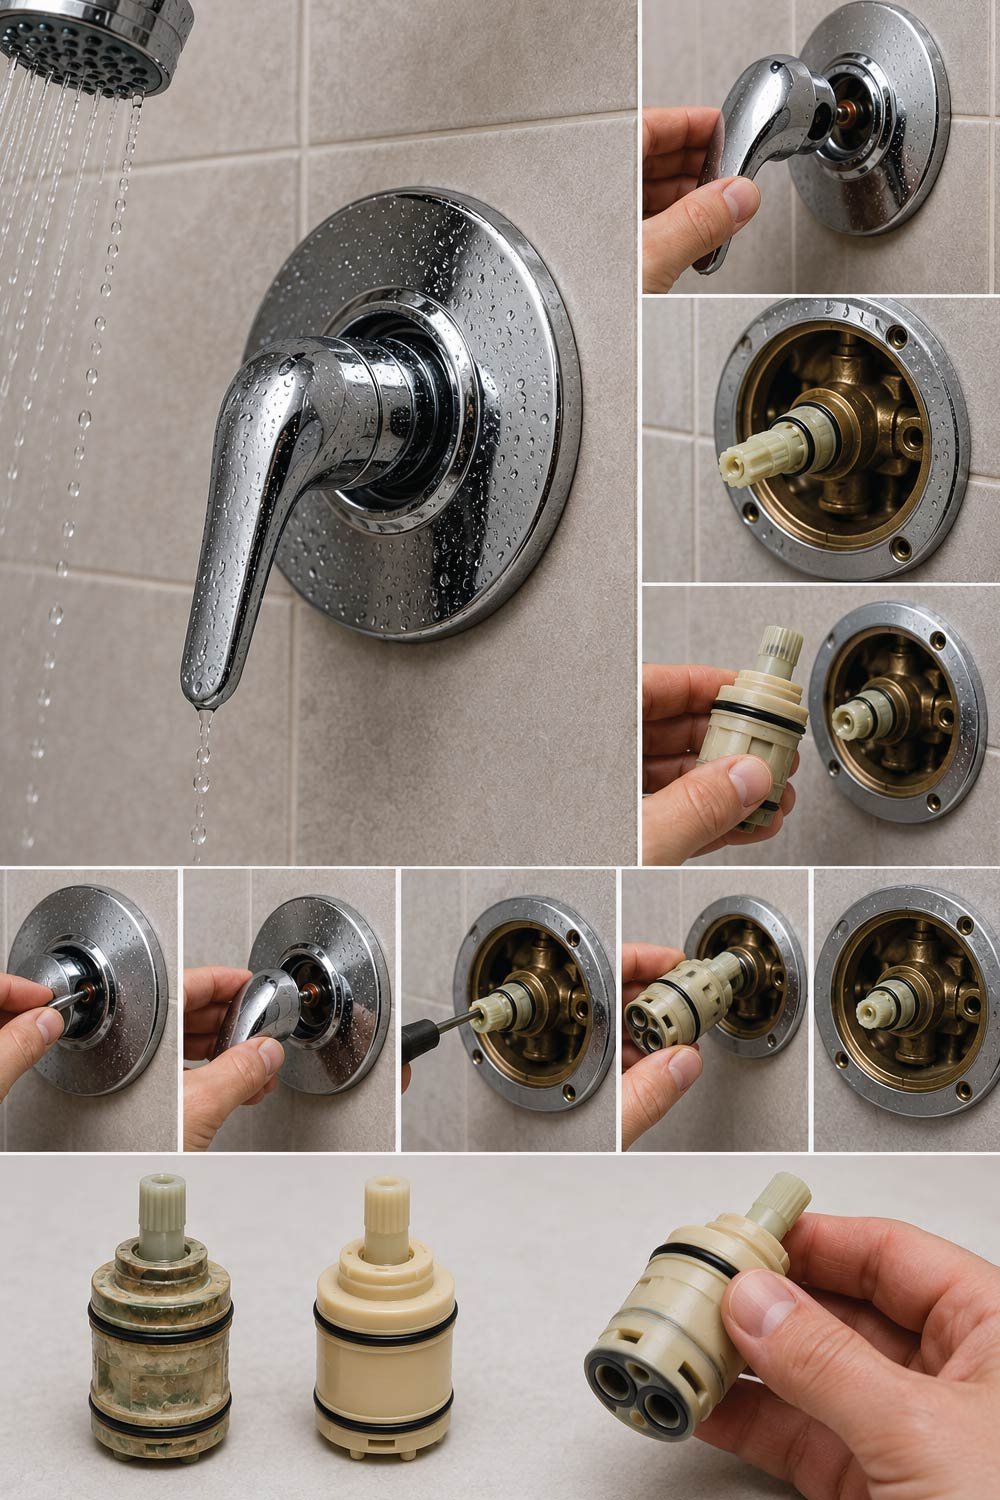
If the shower head still drips, the issue may be inside the shower valve, not the shower head itself.A failing cartridge inside the valve can cause ongoing leakage because it no longer seals properly, allowing water to slowly escape even after repairs at the shower head level.
Signs of a Faulty Cartridge
These symptoms help confirm that the internal valve component is the source of the problem rather than external fittings or seals.
- Dripping continues after washer replacement
- Water temperature fluctuates
- Handle feels loose or stiff
Basic Process
Replacing the cartridge restores proper control of water flow and is often necessary when internal wear is causing persistent leakage.
- Remove the shower handle.
- Access the cartridge inside the valve.
- Remove and replace it with a matching model.
- Reassemble and test.
Cartridges vary by brand and model, so take the old one to the hardware store to ensure a proper match.
Also Read:
Step 7: Check for Loose or Damaged Connections
Loose or damaged connections can create small but continuous leaks in the shower system, often caused by vibration, aging threads, or improper sealing during installation, and checking these points ensures that all external fittings are properly secured.
Inspect the shower arm threads for cracks or corrosion.Careful inspection helps identify whether the leak is coming from structural damage or simply an issue with sealing materials like plumber’s tape.
- Ensure plumber’s tape is wrapped clockwise (2–3 turns).
- Tighten fittings firmly, but avoid overtightening.
A cracked shower arm may need replacement, which is usually inexpensive.
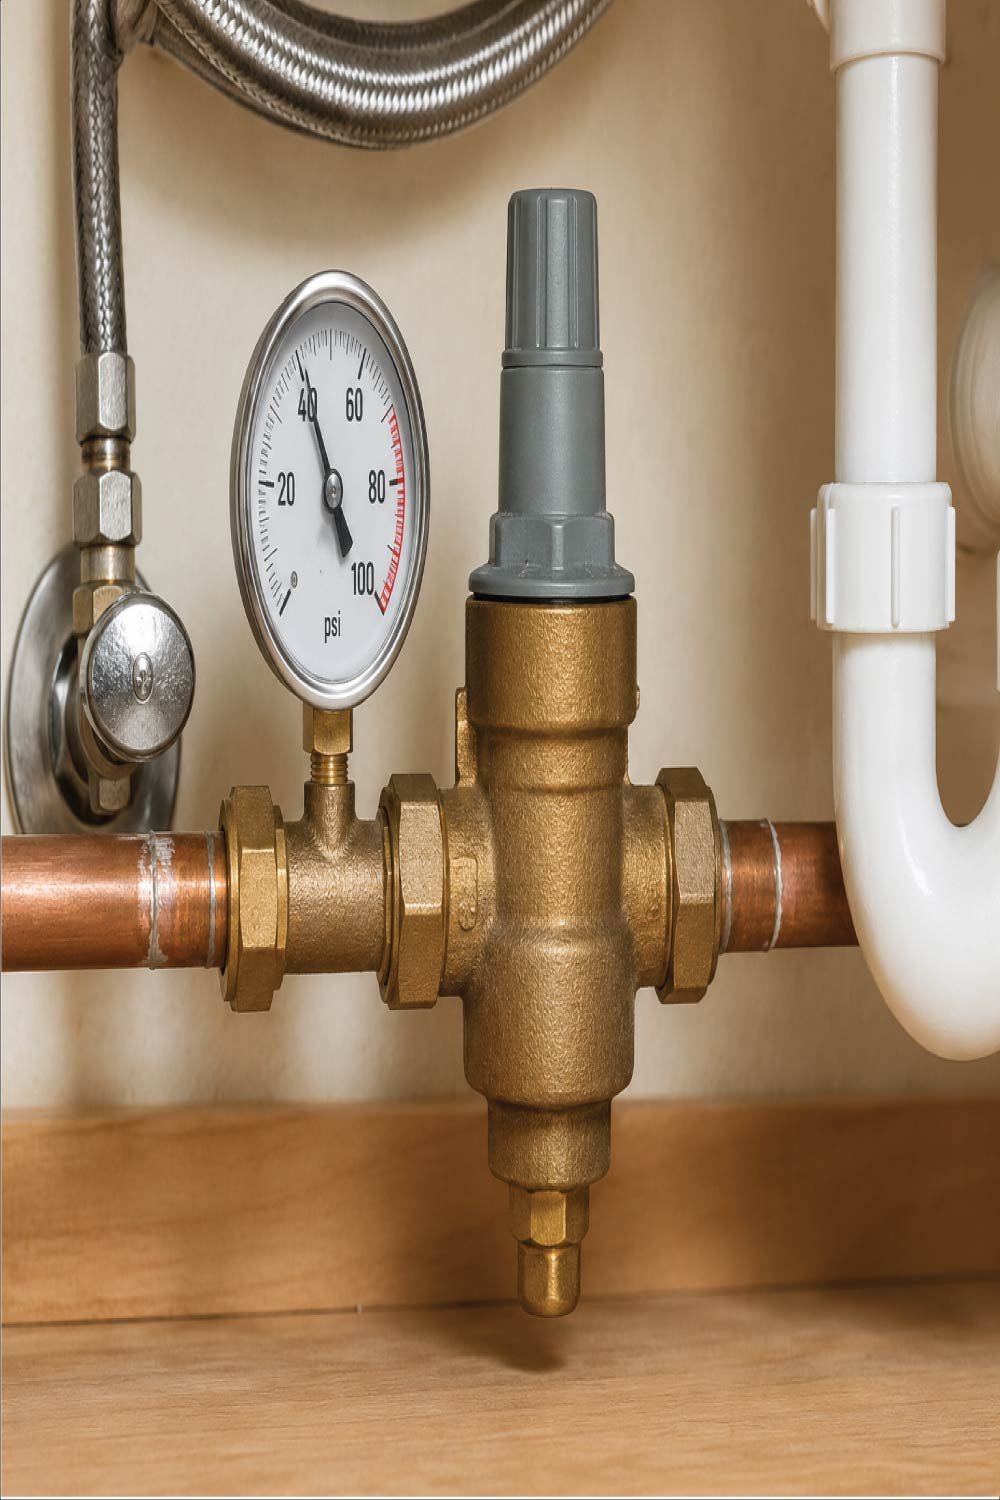
Step 8: Test Your Water Pressure
Water pressure that is too high can strain plumbing components, weaken seals, and contribute to dripping issues, making it important to ensure the system operates within a safe and balanced pressure range for long-term durability.
Signs of High Water Pressure
Recognizing pressure-related symptoms helps prevent repeated plumbing problems and unnecessary part replacements.
- Dripping faucets throughout the house
- Banging or knocking pipes
- Appliances wearing out quickly
Normal household water pressure should be between 40–60 PSI. If pressure is too high, installing or adjusting a pressure-reducing valve may be necessary.
Step 9: Replace the Shower Head (If Necessary)
When a shower head becomes worn, corroded, or poorly designed, internal seals and spray mechanisms may fail repeatedly, making replacement a more practical and cost-effective solution than ongoing repairs.
New shower heads:
- Seal better
- Use water more efficiently
- Resist mineral buildup
- Improve water flow
Installing a new shower head takes only a few minutes and often costs less than repeated repairs.
Also Read:
When to Call a Plumber
Some dripping issues indicate deeper plumbing system problems that cannot be resolved with basic repairs, and in these cases, professional diagnosis ensures the underlying cause is properly identified and safely fixed.
- The drip continues after replacing washers and cartridges
- Water leaks behind the wall
- You see signs of pipe corrosion
- Multiple fixtures are dripping
- You’re uncomfortable disassembling the valve
Persistent dripping can indicate deeper plumbing issues that require expert diagnosis.
How Much Water Does a Dripping Shower Waste?
A constantly dripping shower may seem minor, but over time it leads to significant water loss, higher utility bills, and unnecessary strain on plumbing systems, making timely repairs both economically and environmentally important.
A single drip per second can waste over 3,000 gallons of water per year. That’s money down the drain literally.
Fixing a dripping shower head:
- Reduces water bills
- Prevents mold and water damage
- Extends the life of plumbing fixtures
- Improves household comfort
Final Thoughts
Fixing a dripping shower head is one of the easiest and most cost-effective home plumbing repairs. In many cases, all it takes is cleaning mineral buildup or replacing a small rubber washer.
By following a step-by-step approach starting with simple fixes and working toward more advanced solutions you can stop the drip, save water, and avoid costly plumbing repairs down the line.
If the problem persists, don’t ignore it. A small drip today can turn into a major repair tomorrow.