
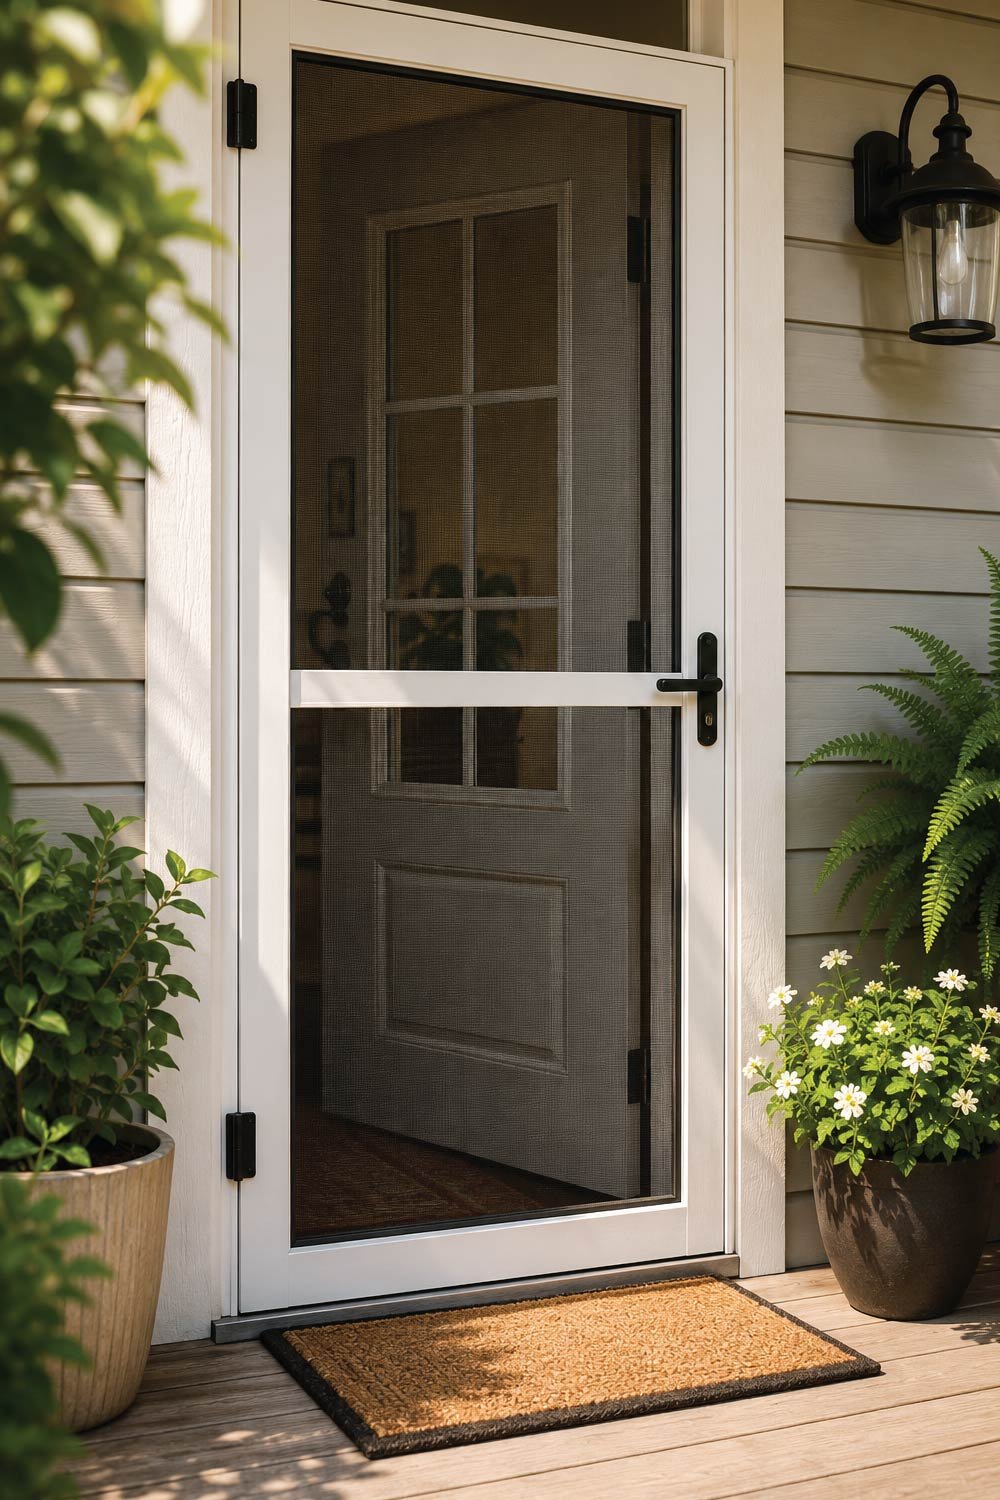
A damaged screen door can be more than just an eyesore it can let insects inside, reduce airflow, and compromise the comfort of your home. Whether your screen has small tears, large holes, or a loose frame, the good news is that repairing a screen door is a straightforward DIY project that most homeowners can complete in under an hour.
In this guide, you’ll learn everything you need to know about screen door repair, from identifying the problem to fixing it like a pro. With just a few basic tools and materials, you can restore your screen door and extend its lifespan.
Why Repair Your Screen Door?
Before diving into the repair process, it’s important to understand why fixing your screen door matters. A damaged screen may seem minor, but it can affect comfort, cleanliness, and airflow in your home. Repairing it on time helps maintain a healthy indoor environment and prevents more costly replacements later.
Benefits of a Properly Functioning Screen Door
A well-maintained screen door plays an important role in everyday living. It not only improves comfort but also protects your home from unwanted elements while allowing fresh air to circulate freely.
Key Advantages You Should Know
Understanding these benefits highlights why timely repairs are essential and worth your effort.
- Keeps insects like mosquitoes and flies out
- Allows fresh air to circulate through your home
- Enhances the appearance of your entryway
- Improves energy efficiency by supporting ventilation
Ignoring small damages can lead to bigger problems, such as larger tears or a completely detached screen. Timely repairs save money and prevent the need for full replacement.
Common Screen Door Problems
Screen doors can suffer from several types of damage over time. Identifying the exact issue is the first and most important step toward an effective repair. Each problem requires a slightly different approach, so proper diagnosis ensures better and longer-lasting results.
Types of Damage You May Encounter
From minor wear and tear to structural issues, screen doors can develop various problems. Knowing these common issues helps you decide whether a quick fix or full replacement is needed.
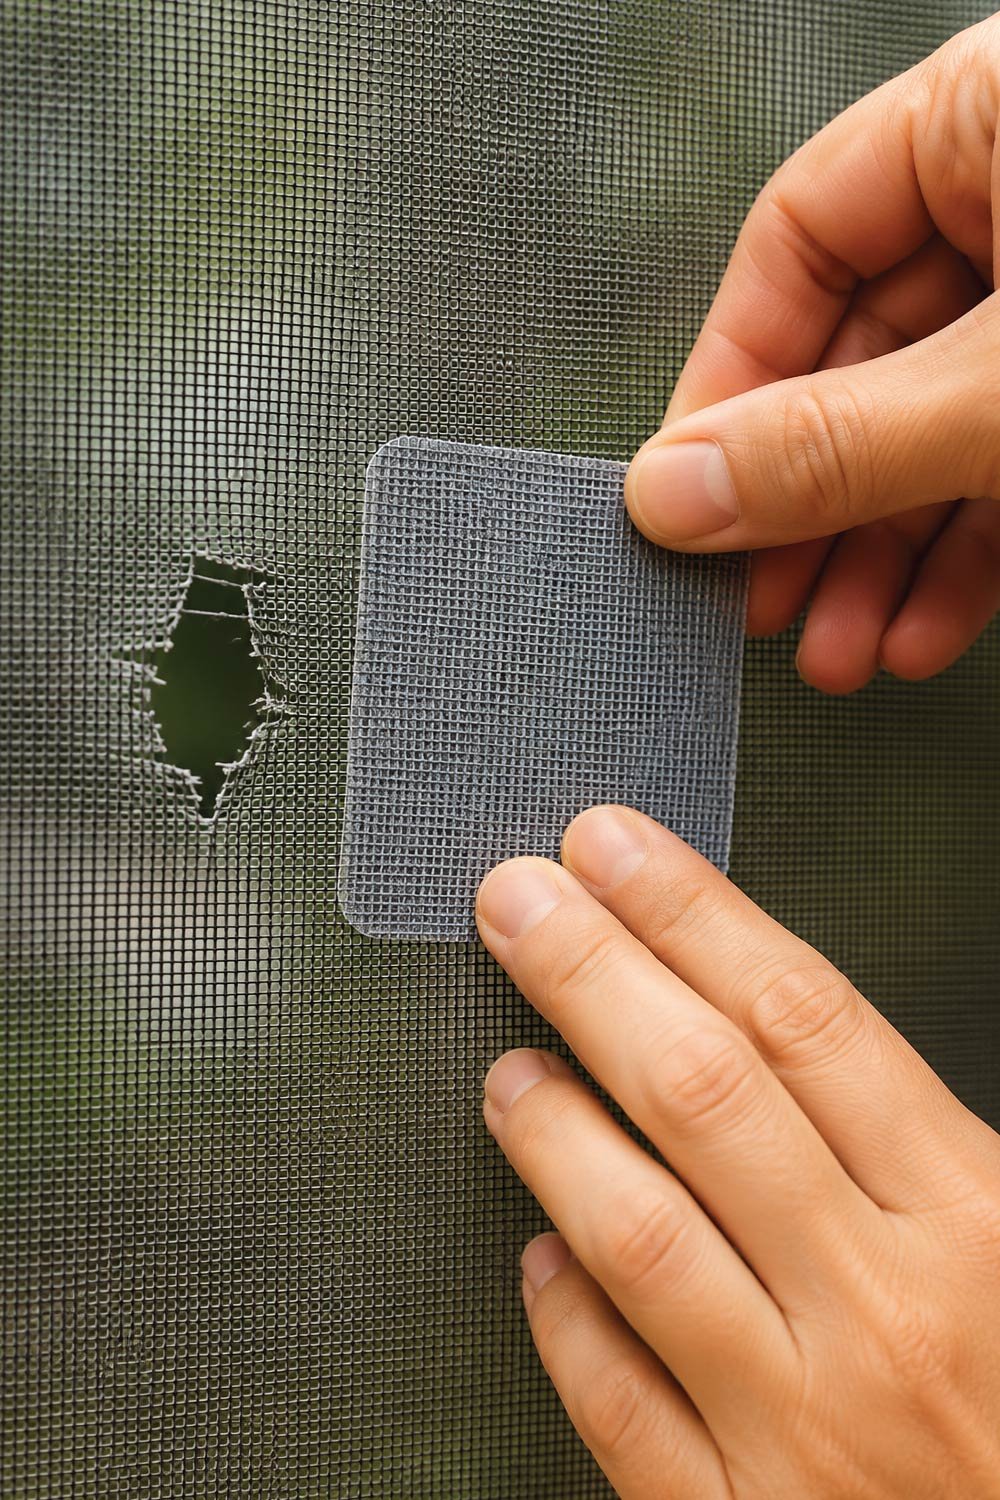
1. Small Holes or Tears
These minor damages are very common and usually caused by pets, weather exposure, or daily use. They are simple to fix and often require only a patch for repair.
- These are usually caused by pets, weather, or general wear and tear. They’re easy to fix with patches.
2. Large Rips
Larger tears can compromise the entire screen structure and usually need more extensive repair or replacement for proper functionality.
- Bigger tears require replacing a section or the entire screen mesh.
3. Loose or Sagging Screen
Over time, the screen may lose its tightness, making it look uneven and less effective in keeping insects out.
- This happens when the screen material loses tension or the spline (rubber cord) comes loose.
4. Bent or Damaged Frame
A damaged frame can affect the alignment and overall stability of the screen door, making repairs more challenging.
- If the frame is bent, you may need to straighten or replace it.
5. Worn-Out Spline
The spline is a small but crucial component that holds the screen in place. If it fails, the entire screen becomes loose.
- The spline holds the screen in place. If it’s cracked or loose, the screen won’t stay tight.
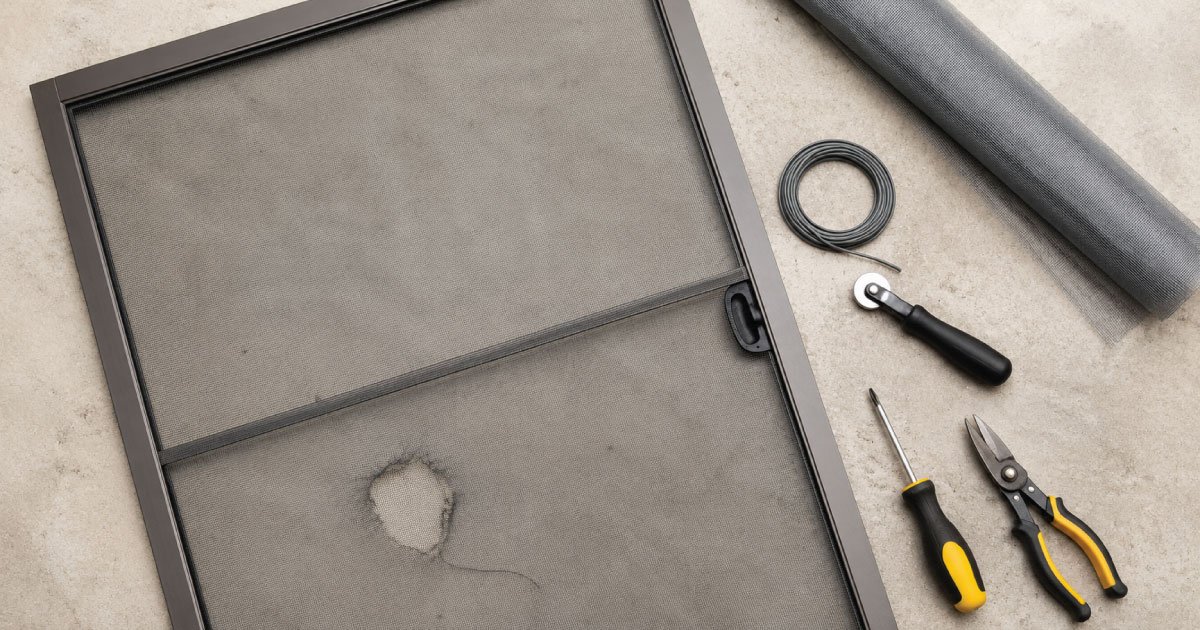
Tools and Materials You’ll Need
Before starting the repair, it’s important to gather all necessary tools and materials. Having everything ready not only saves time but also ensures a smoother workflow without interruptions during the repair process.
Essential Tools and Supplies
Using the right tools makes the repair process easier and more efficient. Each item plays a specific role in fixing or replacing the screen properly.
Basic Equipment Checklist
These commonly available tools are sufficient for handling both minor and major screen door repairs at home.
- Replacement screen mesh (fiberglass or aluminum)
- Spline (rubber cord)
- Spline roller tool
- Utility knife or scissors
- Flathead screwdriver
- Measuring tape
- Screen repair patch kit (for minor fixes)
- Work gloves
Having everything ready will make the process smooth and efficient.
Step-by-Step Guide to Repairing a Screen Door
Repairing a screen door becomes simple when broken down into clear steps. Following a structured approach helps ensure accuracy, better results, and a longer-lasting fix without damaging the frame or screen material.
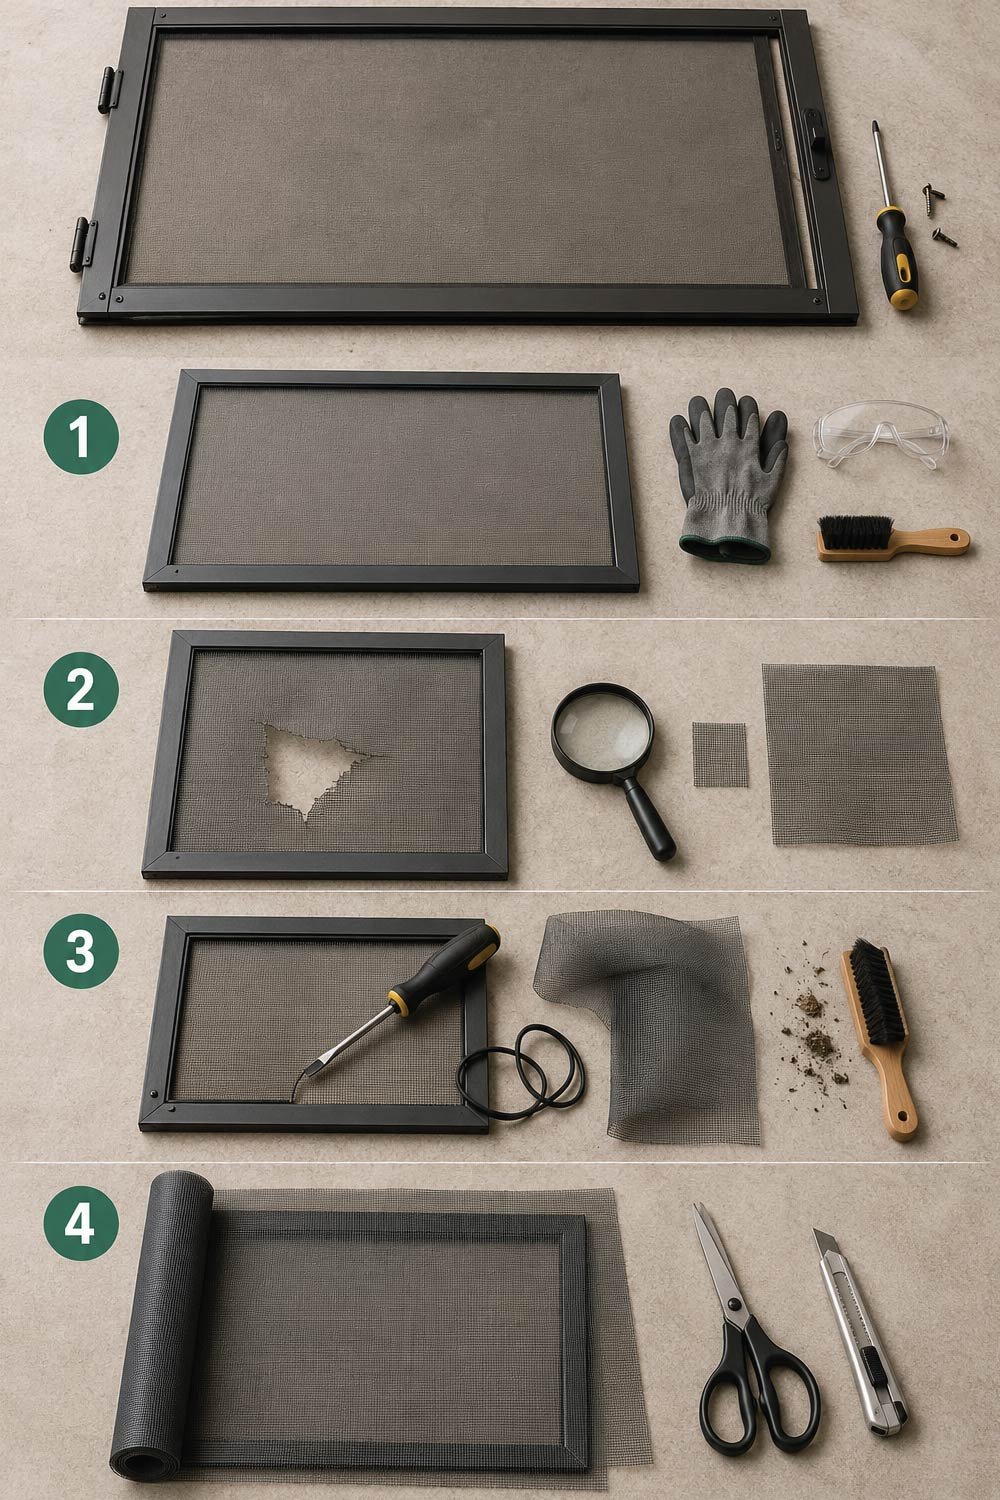
Step 1: Remove the Screen Door
The first step is to carefully remove the screen door from its position. This allows you to work more comfortably and ensures better control during the repair process.
Preparing Your Workspace
Setting up a stable and clean working area is essential for safe and effective repair work.
- Start by taking the screen door off its hinges or sliding track. Lay it flat on a clean, stable surface like a workbench or floor.
This makes it easier to work on and ensures better results.
Step 2: Inspect the Damage
Once the door is removed, closely examine the screen and frame to understand the extent of the damage. This step helps determine the right repair method.
Assessing Repair Needs
Careful inspection ensures you choose between patching or full replacement based on the severity of the damage.
- Carefully examine the screen and frame. Determine whether you need a simple patch or a full replacement.
- If the tear is less than 2 inches, a patch may be enough
- If the damage is extensive, replacing the entire screen is recommended
Step 3: Remove the Old Screen (If Necessary)
If the damage is severe, removing the old screen is necessary before installing a new one. This step requires patience to avoid damaging the frame.
Safe Removal Process
Handling this step carefully ensures the frame remains intact and ready for the new screen installation.
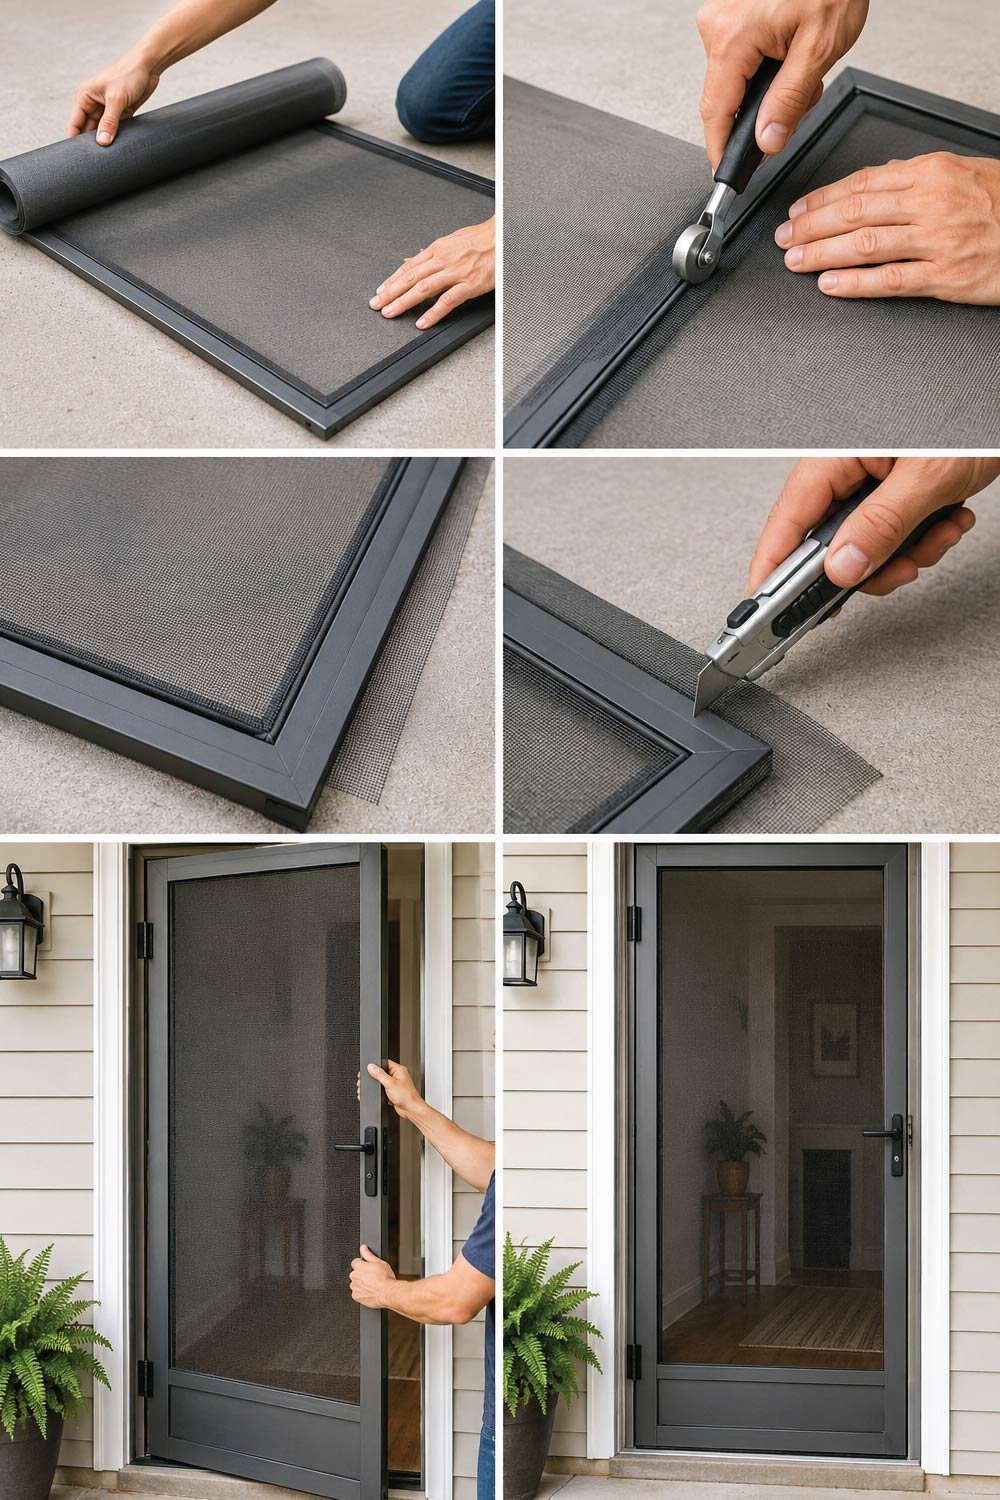
- Use a flathead screwdriver to lift the spline from the groove
- Pull out the old screen mesh
- Clean the frame and remove any debris
Take your time during this step to avoid damaging the frame.
Step 4: Cut the New Screen
After removing the old material, prepare the new screen mesh for installation. Proper measurement and cutting are crucial for a neat and secure fit.
Measuring and Cutting Tips
Accurate cutting ensures the screen fits tightly and stays in place without wrinkles or gaps.
- Roll out your new screen mesh over the frame. Make sure it overlaps the frame by at least 1–2 inches on all sides.
- Cut the mesh to size using scissors or a utility knife.
Choosing the Right Screen Material
Selecting the right screen material is an important step when replacing your screen door. Each type offers different benefits in terms of durability, flexibility, and cost. Understanding these options helps you make a better decision based on your home’s needs, usage, and budget.
Types of Screen Materials
There are several common materials used for screen doors, each designed for specific situations. Choosing the right one ensures better performance and longer lifespan.
Fiberglass Screen
This is one of the most popular options due to its affordability and ease of use. It works well for general household needs.
- Affordable and flexible
- Easy to install
- Resistant to rust and corrosion
Aluminum Screen
Aluminum screens offer greater strength and are ideal for areas with heavy usage. However, they require careful handling to avoid damage.
- Stronger and more durable
- Better for high-traffic areas
- Can dent more easily
Pet-Resistant Screen
Designed for homes with pets, this material is much tougher and can withstand scratches and pressure better than standard screens.
- Extra strong material
- Ideal for homes with pets
- Slightly more expensive
Choose the material based on your needs and budget.
Also Read:
When to Replace Instead of Repair
While many screen door issues can be fixed, there are times when replacement is the better option. Severe damage or repeated repair failures can reduce the effectiveness and appearance of your door.
Situations That Require Replacement
Recognizing when repair is no longer enough helps you avoid wasting time and effort. In such cases, replacing the entire door provides a more reliable solution.
Signs You Need a New Screen Door
These conditions usually indicate that the door has reached the end of its usable life and should be replaced.
- The frame is severely bent or broken
- The door doesn’t close properly
- There is extensive rust or corrosion
- Multiple repairs have failed
A new screen door can improve both functionality and aesthetics.
Maintenance Tips to Prevent Future Damage
Once your screen door is repaired or replaced, proper maintenance is essential to keep it in good condition. Regular care helps extend its lifespan and reduces the chances of recurring damage.
Simple Preventive Measures
Following a few easy maintenance practices can keep your screen door functioning smoothly and looking clean over time.
Best Practices for Longevity
These habits are simple to follow and can save you from frequent repairs or replacements in the future.
- Clean the screen regularly with mild soap and water
- Avoid slamming the door
- Keep pets from scratching the screen
- Inspect the spline and frame periodically
- Fix small tears immediately
Preventive care reduces the need for frequent repairs.
Also Read:
Final Thoughts
Repairing a screen door is a simple yet rewarding DIY project that can significantly improve your home’s comfort and appearance. Whether you’re dealing with a small tear or replacing the entire screen, the process is manageable with basic tools and a little patience.By following this guide, you can restore your screen door to like-new condition and enjoy fresh air without the nuisance of bugs. Plus, you’ll save money by avoiding professional repair costs.So the next time your screen door gets damaged, don’t rush to replace it repair it yourself and enjoy the satisfaction of a job well done.