How to Fix a Sticking Door: A Complete Step-by-Step Guide

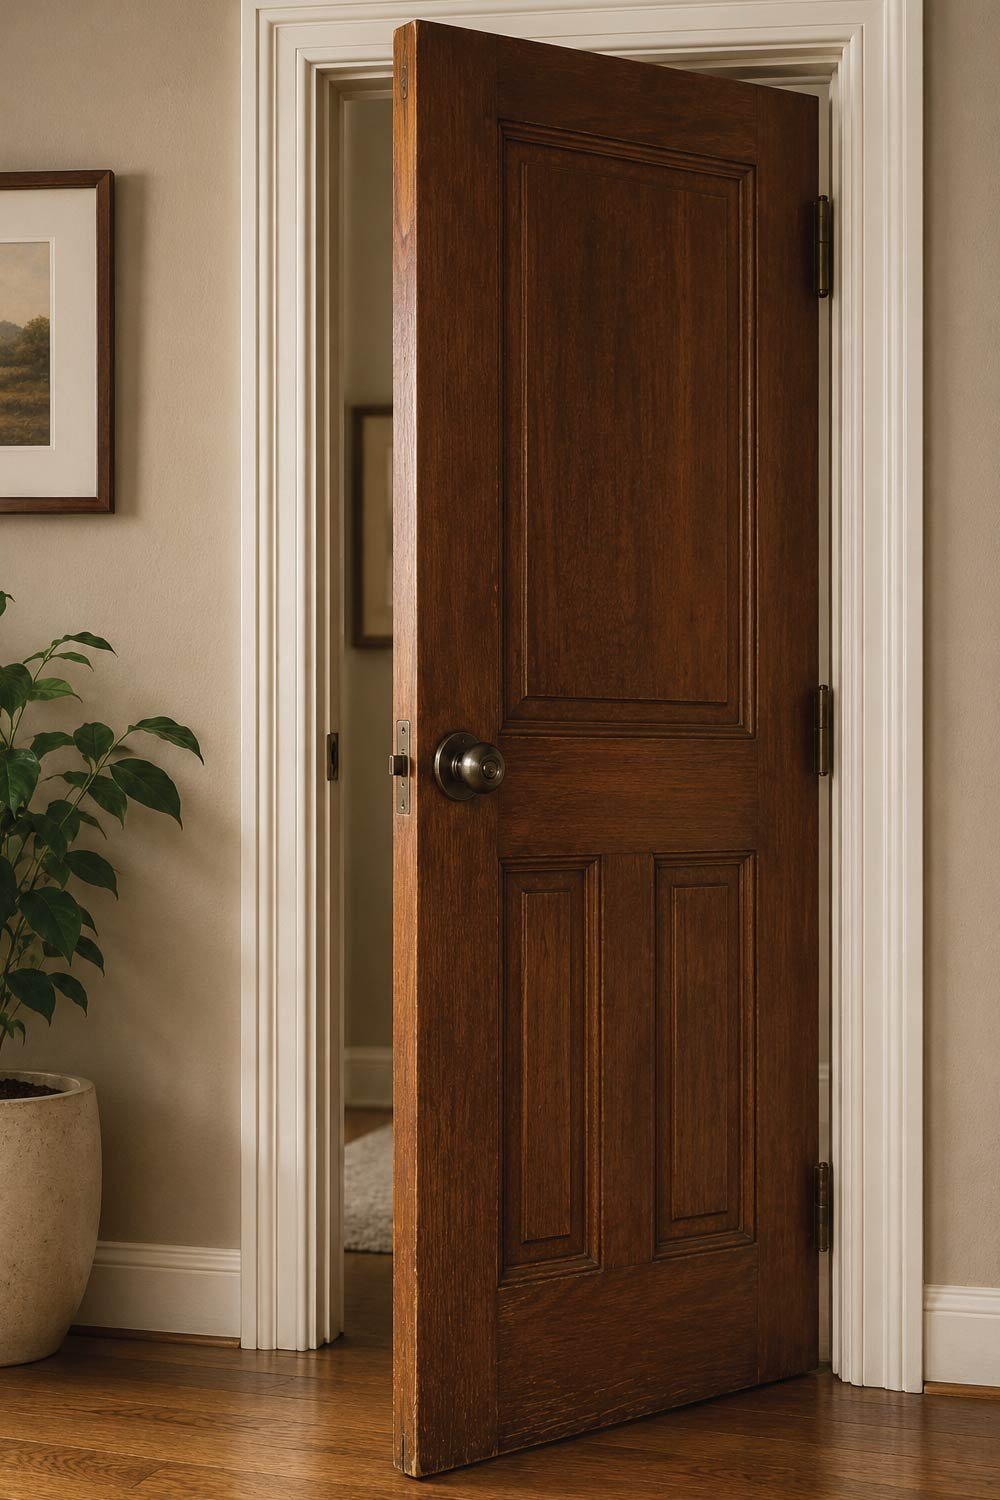
A sticking door is one of those small household problems that can quickly become annoying in daily life. You push it, it scrapes the frame, it squeaks, or it refuses to close properly unless you give it an extra shove. The good news is that in most cases, a sticking door is not a serious issue and can be fixed at home with basic tools and a little patience.

This guide will walk you through the causes of a sticking door, how to diagnose the problem, and several practical solutions ranging from quick fixes to more permanent repairs.


Why Doors Start Sticking

Doors sticking is a common household issue that can quickly become frustrating if ignored. Understanding the root cause helps you apply the right fix instead of guessing. From environmental factors to structural shifts, several small issues can lead to noticeable sticking problems over time.

Why Doors Start Sticking

Before jumping into repairs, it helps to understand why doors stick in the first place. Common causes include:

1. Humidity and Weather Changes

Wood is a natural material that reacts to environmental conditions, especially moisture in the air. During humid seasons, doors tend to absorb moisture and expand, which leads to tight movement against the frame.

Wood naturally expands and contracts depending on moisture in the air. In humid weather, wooden doors absorb moisture and swell, causing them to rub against the frame.

2. Loose or Misaligned Hinges

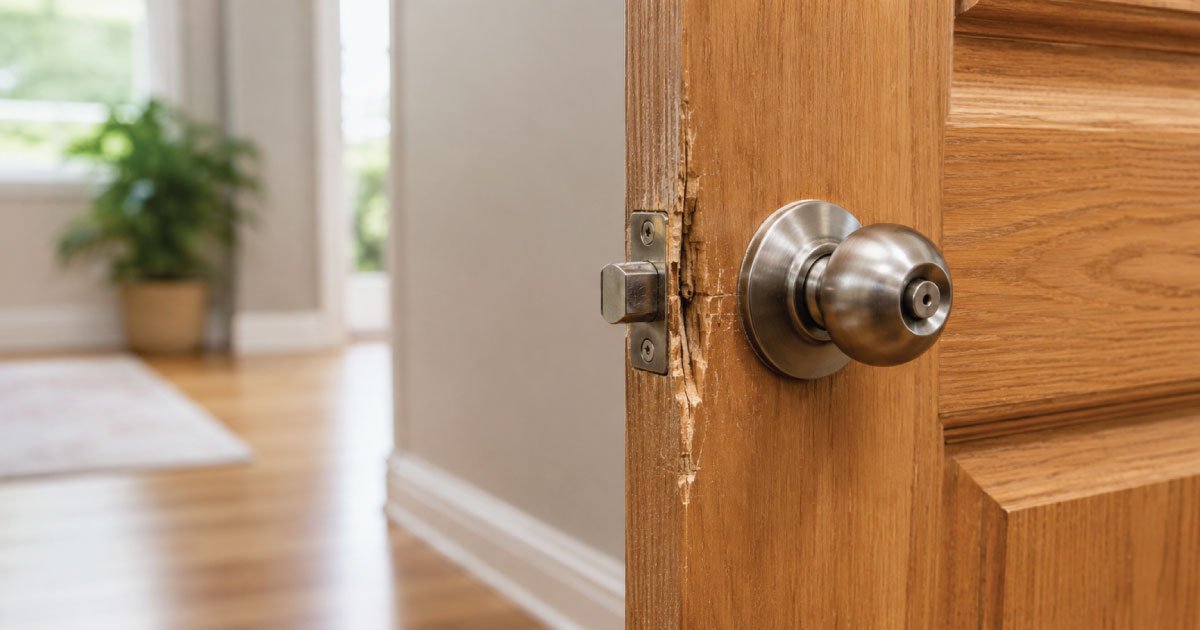
Hinges play a critical role in keeping the door aligned properly. Over time, screws may loosen due to regular usage, causing even slight misalignment that leads to friction and sticking.

Over time, screws in the hinges can loosen, causing the door to sag slightly. Even a few millimeters of movement can make the door scrape the floor or frame.

3. House Settling

As buildings age, natural settling can slightly shift structural elements. This can affect door frames and alignment, making doors stick even if they were perfectly installed initially.

Buildings naturally shift over time. This can slightly distort door frames and lead to misalignment.

4. Paint Build-Up

Repeated painting without proper sanding can add layers to the door edges. This increases thickness and creates resistance when opening or closing the door.

Multiple layers of paint can accumulate along edges, making the door thicker than it should be.

5. Warped Door

Warping is a gradual deformation caused by moisture, heat, or age. A warped door may no longer sit evenly within the frame, leading to uneven contact points and sticking.

Wood can warp due to age, moisture, or heat exposure. A warped door may bow in the middle or twist slightly.

6. Debris or Obstructions

Small particles or hidden obstructions can interfere with smooth door movement. Even minor buildup in hinges or along the frame can create noticeable friction.

Sometimes dust, dirt, or small objects in the hinge or frame area can cause friction.

Understanding the cause is important because it determines the best fix.


Step 1: Identify Where the Door Is Sticking 

Understanding exactly where your door is sticking is the most important first step before attempting any fix. Careful observation helps prevent unnecessary work and ensures you apply the right solution directly to the problem area, saving both time and effort.

Identify Where the Door Is Sticking

Simple Test

This quick test helps you pinpoint the exact friction point by using both sight and touch. Performing it slowly allows you to detect even minor resistance areas that may not be obvious at first glance.

  • Open and close the door slowly.
  • Listen and feel where it rubs.
  • Look for scuff marks or shiny spots on the door or frame.

Typical Sticking Points

Different sticking areas indicate different underlying issues. Identifying the exact location helps you understand whether the problem is related to hinges, alignment, swelling, or structural deformation.

  • Top corner near the hinge → hinge issue
  • Bottom edge → sagging or floor swelling
  • Side edge → frame misalignment or swelling
  • Entire edge → warped door or paint buildup

Once you identify the contact point, you can choose the correct solution.


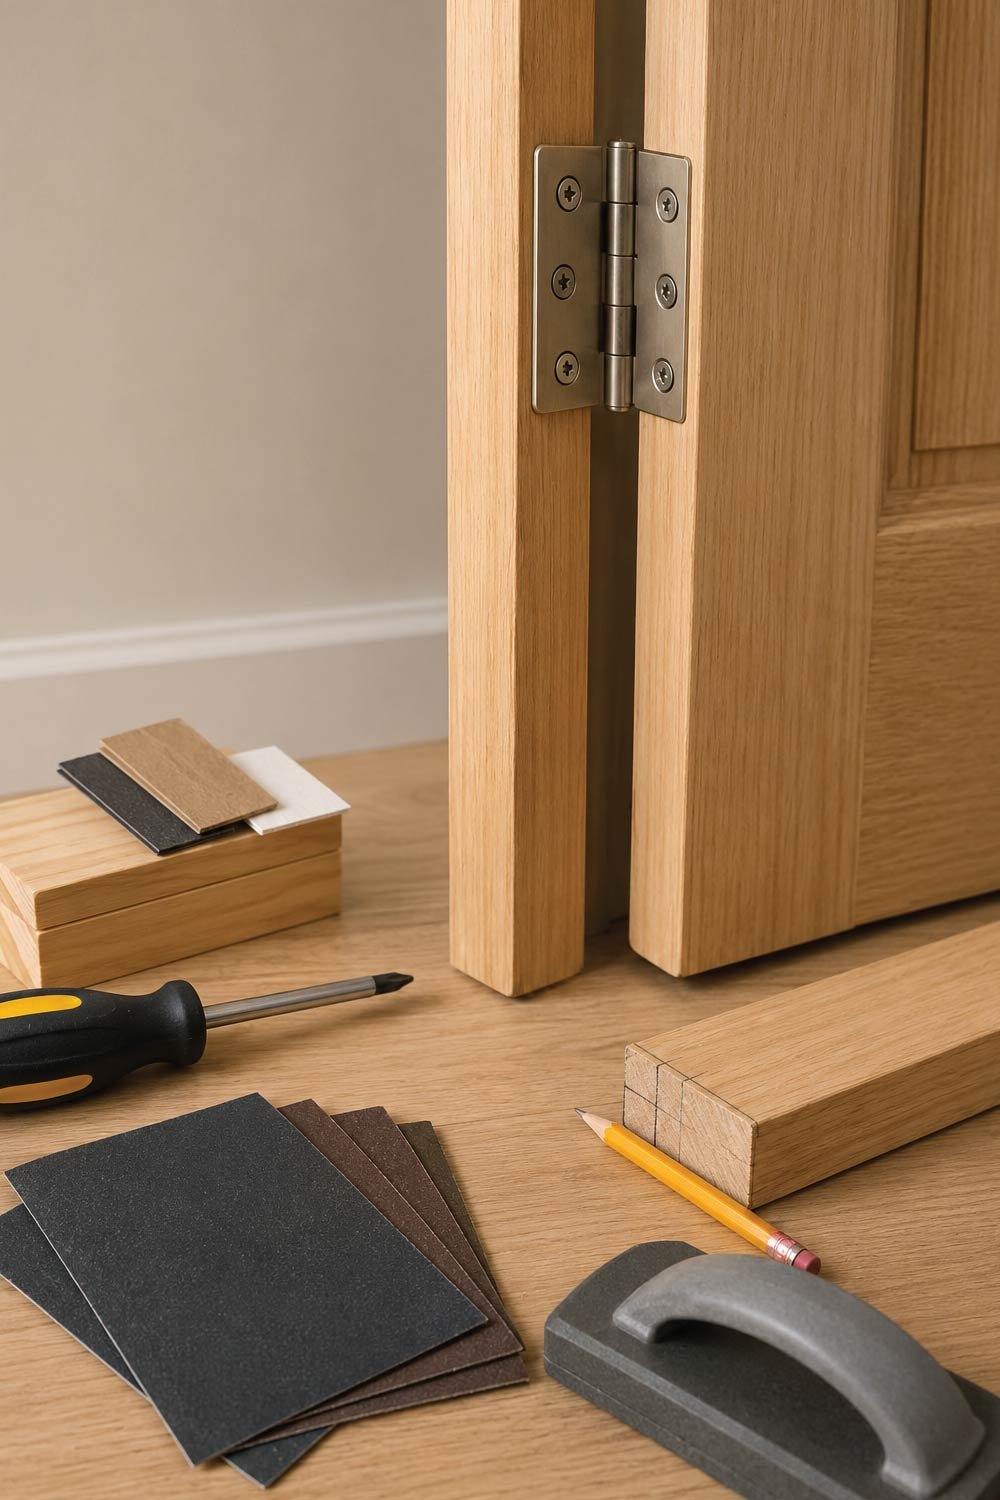
Step 2: Tighten the Hinges (Quick Fix)

Tightening hinges is often the fastest and simplest way to fix a sticking door. In many cases, loose screws cause the door to sag slightly, leading to friction against the frame or floor.

Tools Needed

Having the right tools ready ensures the process goes smoothly without interruptions. A basic screwdriver is usually enough for this fix, making it accessible for almost anyone.

  • Screwdriver (usually Phillips head)

Steps

Follow these steps carefully to ensure all hinge components are properly secured. Even slightly loose screws can affect door alignment, so thorough tightening is essential.

  • Open the door.
  • Tighten all screws on the hinges.
  • Pay special attention to screws attached to both the door and frame.
  • Test the door movement.

If Screws Won’t Tighten

Sometimes screws fail to grip because the holes have become worn or stripped. This section explains a simple and effective method to restore screw hold using common household materials.

Fix Stripped Screw Holes

This method reinforces the screw hole so the screw can grip firmly again. It’s a quick repair technique that often restores hinge stability without needing special tools or replacements.

  • Remove the screw
  • Insert a wooden toothpick or matchstick with wood glue into the hole
  • Reinsert the screw tightly

This simple fix often solves sagging problems immediately.


Step 3: Fix a Sagging Door 

A sagging door usually means the alignment has shifted over time due to weight, loose hinges, or structural settling. Fixing it properly ensures smooth operation and prevents further damage to the frame or floor.

Fix a Sagging Door

Signs of Sagging

Recognizing the symptoms early helps you confirm that sagging is the real issue. These signs typically appear gradually and worsen if left unaddressed.

  • Door drags on the floor
  • Top corner rubs the frame opposite the hinges
  • Door doesn’t close smoothly

Solution: Adjust Hinge Position

Adjusting the hinge position corrects the door’s angle and restores proper alignment. This method is effective when simple tightening doesn’t fully solve the issue.

Option A: Tighten Top Hinge

This approach slightly lifts the door by securing the upper hinge more firmly. It’s a quick adjustment that often improves alignment without additional materials.

  • Tighten the top hinge screws firmly
  • This pulls the door upward slightly

Option B: Add a Shim Behind Hinge

Using a shim helps reposition the hinge outward, correcting the door’s tilt. This method is useful when tightening alone doesn’t provide enough adjustment.

  • Remove the hinge screws on the frame side
  • Insert a thin piece of cardboard or plastic behind the hinge
  • Reattach screws

This changes the angle of the door and lifts it slightly.

Also Read:

Loose Kitchen Drawers? Tighten Them Quickly and Easily


Step 4: Sand Down the Sticking Area

When a door becomes tight due to swelling or paint buildup, sanding is a precise way to remove excess material. It allows gradual correction without affecting the entire door structure.

Tools Needed

Using proper tools ensures controlled sanding and a smoother finish. Even simple tools can deliver good results when used carefully.

  • Sandpaper (medium and fine grit)
  • Sanding block or electric sander (optional)
  • Pencil

Steps

Following a careful sanding process prevents over-removal and ensures the door fits perfectly. Testing frequently is key to achieving the right balance.

  • Mark the sticking area with a pencil.
  • Remove the door if possible (makes sanding easier).
  • Sand only the marked edge gradually.
  • Test frequently to avoid removing too much material.
  • Smooth the edge with fine sandpaper.

Important Tip

Precision is critical during sanding because removing too much material can create gaps. A slow and controlled approach always gives better long-term results.

Do not over-sand. Remove small amounts at a time. It’s easier to remove more later than to fix a door that has too much taken off.


Step 5: Plane the Door (For Severe Sticking)

Planing is a more advanced solution used when sanding is not enough. It removes larger amounts of material and is suitable for doors with significant sticking or warping issues.

Tools Needed

Having the right tools ensures safety and efficiency while planing. A stable setup is especially important for accurate and controlled material removal.

  • Hand plane or electric planer
  • Pencil
  • Sandpaper for finishing

Steps

This process involves shaving thin layers from the door edge. Careful execution is essential to avoid removing too much material at once.

  • Mark the problem edge.
  • Remove the door from hinges.
  • Secure it on a stable surface.
  • Carefully shave thin layers from the edge.
  • Reinstall and test.

Warning

Because planing removes more material than sanding, it must be done with extra caution. Mistakes here are harder to correct and may affect the door permanently.

Planing removes more material than sanding, so use it only when necessary.

Also Read:

Cabinet Doors Misaligned? Get a Perfect Fit Fast


Step 6: Check for Humidity Swelling 

Humidity can cause wooden doors to expand, especially during rainy or monsoon seasons. This natural movement can lead to temporary sticking that varies throughout the year.

Check for Humidity Swelling

Temporary Fixes

These quick solutions help reduce moisture impact and improve door movement without altering the door structure permanently.

  • Use a dehumidifier in the room
  • Improve ventilation
  • Keep windows open when possible

Permanent Fix

If the issue persists, slight material removal ensures the door functions smoothly even during high humidity conditions.

Sand or plane the swollen edge slightly so it fits even when expanded

Wood movement is natural, so you may need a balance between fit and seasonal changes.


Step 7: Fix Paint Build-Up

Repeated painting can create thick layers along the edges of the door, causing friction. Addressing this buildup restores proper clearance and smooth operation.

How to Check

Inspecting the door edges carefully helps confirm whether excess paint is the cause of sticking. Visual and surface irregularities are key indicators.

  • Look for thick, uneven paint along edges
  • See if paint is peeling or rough

Solution

Removing excess paint and refinishing properly ensures long-term smooth performance. Thin, even layers prevent the problem from recurring.

  • Scrape excess paint using a paint scraper
  • Lightly sand edges
  • Repaint with thin, even layers if needed

Avoid heavy repainting in the future to prevent recurrence.

Also Read:

Kitchen Cabinet Gaps? Fix Alignment Easily at Home


Step 8: Repair or Replace Hinges (If Needed)

When hinges are damaged, no amount of tightening will fix the problem. Worn-out or rusted hinges can affect door alignment and smooth movement, making replacement the most reliable long-term solution.

Signs of Bad Hinges

Identifying faulty hinges early helps prevent further structural issues. These signs indicate that the hinges are no longer functioning properly and may need replacement.

  • Door still sags after tightening
  • Visible rust or damage
  • Squeaking even after oiling

Solution

Replacing hinges ensures proper support and restores door stability. Using the correct size and securing them properly is essential for long-lasting performance.

  • Remove old hinges
  • Replace with new ones of the same size
  • Ensure screws are tightly secured into solid wood

This is a more permanent fix for older doors.


Step 9: Lubricate the Hinges

Sometimes the issue is not structural but simply friction within the hinges. Proper lubrication reduces resistance, eliminates noise, and allows the door to move smoothly.

Use

Choosing the right lubricant helps achieve better results and longer-lasting smoothness. Even simple household alternatives can work temporarily.

  • WD-40 or similar lubricant
  • Machine oil
  • Petroleum jelly (temporary fix)

Steps

Applying lubricant correctly ensures it reaches the moving parts inside the hinge. Repeating the motion helps distribute it evenly for effective results.

  • Apply lubricant to hinge pins.
  • Open and close door several times.
  • Wipe off excess oil.

This helps eliminate squeaks and improves smooth movement.


Step 10: Check the Door Frame

If all other fixes fail, the problem may lie in the door frame itself. A misaligned frame can cause multiple contact points, making it difficult for the door to open and close properly.

Signs

Frame issues often show multiple symptoms at once. Observing these carefully can help confirm whether the structure needs adjustment.

  • Door sticks at multiple points
  • Visible gaps between frame and wall
  • Door latch doesn’t align

Solutions

Fixing the frame may require more effort, but it ensures proper alignment and long-term functionality. Some cases may need professional assistance.

  • Tighten frame screws
  • Add shims behind frame
  • In severe cases, consult a carpenter for realignment

Also Read:

Jammed Cabinet Doors? Smooth Fix That Works Instantly


Preventing Future Door Problems

Preventive maintenance plays a key role in keeping your door functioning smoothly over time. Small, regular efforts can help avoid bigger repairs and extend the life of both the door and its hardware.

Maintenance Tips

Following these simple habits ensures your door remains in good condition and reduces the chances of recurring issues.

  • Keep hinges tightened every few months
  • Avoid slamming doors
  • Maintain indoor ventilation to reduce humidity
  • Repaint doors carefully with thin layers
  • Oil hinges occasionally

Preventive maintenance is much easier than major repairs.

Also Read:

Broken Drawer Handle? Replace It Fast (Simple DIY)


Final Thoughts

A sticking door may feel like a small inconvenience, but it usually points to simple mechanical or environmental issues. In most cases, you don’t need professional help—just basic tools, careful observation, and a step-by-step approach.

Start with the easiest fixes like tightening hinges and checking alignment. If that doesn’t work, move gradually toward sanding, planing, or hinge replacement. With the right method, your door can return to smooth, silent operation in less than an hour.

Leave a Comment