
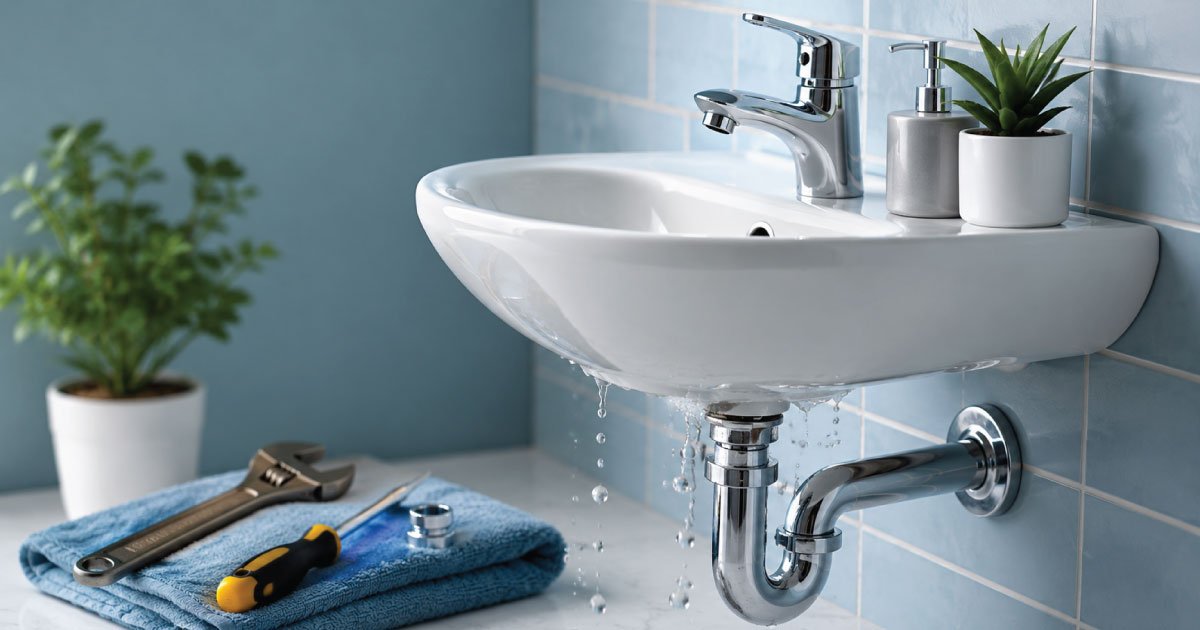
A leaking bathroom sink can waste water, damage cabinets, cause mold growth, and increase your utility bills. The good news is that most bathroom sink leaks are simple to fix with basic tools and a little time. Whether the leak is coming from the faucet, drain, or pipes underneath, this guide will walk you through diagnosing the problem and repairing it correctly.
Common Places a Bathroom Sink Can Leak
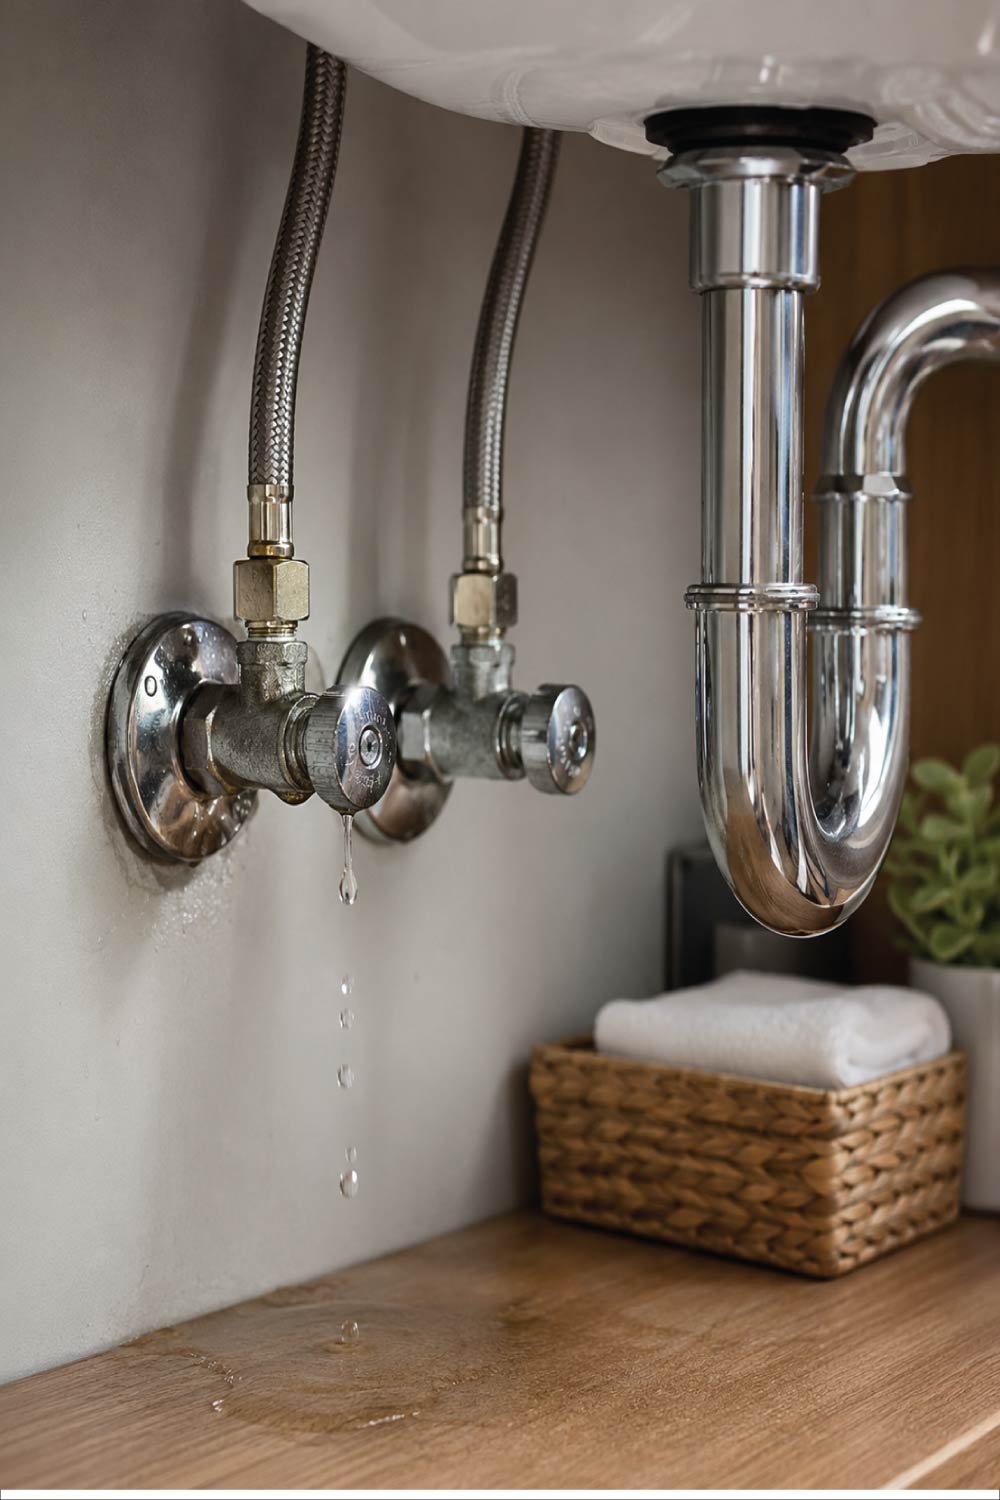
Bathroom sink leaks can appear in several different areas, and the visible water is not always coming from where the actual problem begins. These leaks often develop slowly due to wear, loose fittings, or deteriorating seals. Identifying the correct source early helps you avoid unnecessary disassembly and ensures the repair directly targets the faulty component.
- Faucet base or handles
- Drain flange (where the sink meets the drain)
- P-trap under the sink
- Water supply lines
- Shut-off valves
- Loose or worn washers and seals
Identifying the exact location prevents unnecessary repairs.
Tools and Materials You’ll Need
Having the correct tools ready before starting a bathroom sink repair makes the process faster and reduces the risk of damaging plumbing parts. Most leaks can be fixed with basic tools and inexpensive replacement items, so preparation ensures you can complete the repair efficiently without repeated trips or interruptions.
- Adjustable wrench or pliers
- Screwdrivers (flathead and Phillips)
- Bucket or bowl
- Towels or rags
- Plumber’s tape (Teflon tape)
- Replacement washers or O-rings
- Plumber’s putty or silicone sealant
- Flashlight
Step 1: Turn Off the Water Supply
Shutting off the water supply is the most important safety step before beginning any bathroom sink repair. It prevents accidental flooding and allows you to safely work on pressurized plumbing components. Even small leaks can quickly worsen if water flow is not properly controlled before starting the repair process.
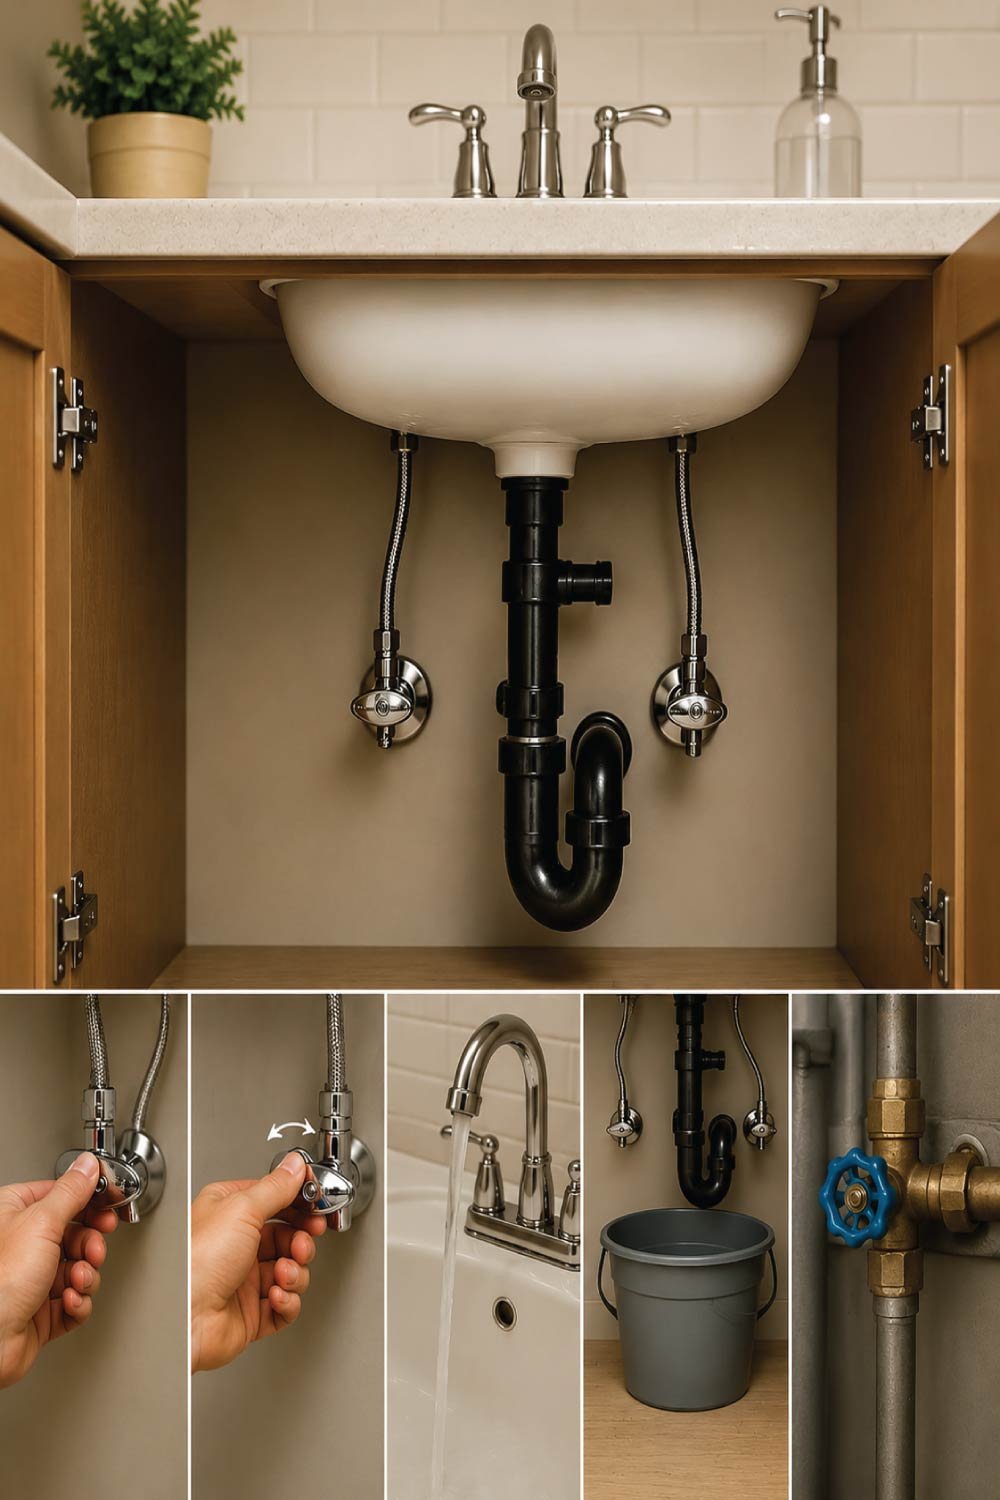
How to Do It
- Locate the hot and cold shut-off valves under the sink.
- Turn them clockwise until fully closed.
- Turn on the faucet to drain remaining water.
- Place a bucket under the sink to catch drips.
If the valves don’t work, turn off the main water supply.
Step 2: Identify the Source of the Leak
Accurately identifying the leak source is essential because bathroom sink systems contain multiple connection points that can all fail in different ways. Drying the area first ensures you can clearly observe new moisture forming, making it easier to trace the exact origin of the leak before beginning repairs.
Dry all surfaces under the sink, then slowly turn the water back on and observe.
What to Look For
- Water dripping from pipe joints → Loose connection or worn washer
- Water pooling at the bottom of the cabinet → Drain or P-trap leak
- Water around the faucet base → Worn seal or loose mounting nut
- Water dripping from supply lines → Loose or damaged hose
Once you identify the source, turn the water back off and begin repairs.
Step 3: Fix a Leaking Faucet
Faucet leaks in a bathroom sink often occur due to worn internal seals or loose mounting components. Over time, constant use and water pressure cause O-rings, cartridges, or washers to degrade, leading to dripping water or leakage around the faucet base even when it is turned off.
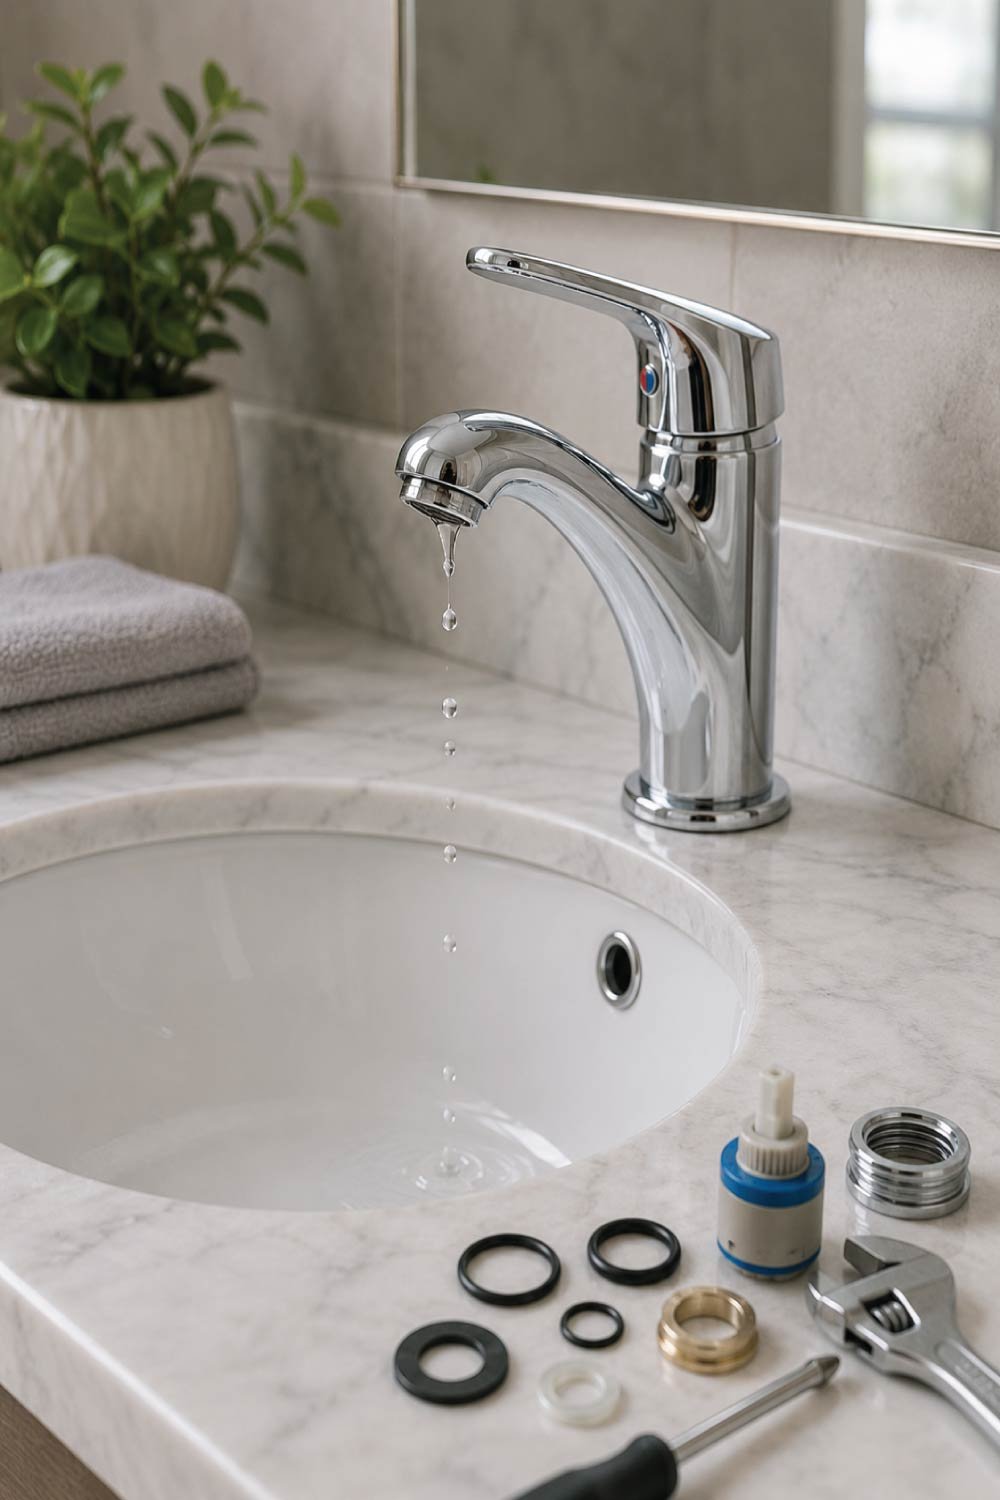
Common Causes
Faucet leaks in a bathroom sink usually come from internal wear or loose mounting components that develop over time with regular use. As water flows through the faucet repeatedly, small rubber parts degrade and mechanical fittings can loosen, leading to dripping or leakage around the spout or base even when the faucet is turned off.
- Worn O-rings or washers
- Faulty cartridge
- Loose faucet mounting nut
How to Fix
Repairing a leaking faucet typically involves checking internal sealing parts and ensuring the faucet is securely mounted. Most issues can be resolved by replacing worn components or tightening loose fittings, restoring proper water control and preventing further dripping.
- Remove the faucet handle(s).
- Inspect and replace worn washers or O-rings.
- If necessary, replace the cartridge with a matching model.
- Tighten the mounting nut under the sink if the faucet is loose.
- Reassemble and test.
Also Read:
Step 4: Fix a Leaking Drain Flange
A leaking drain flange usually results from a failed seal between the sink and drain assembly. Over time, plumber’s putty or sealant can dry out, crack, or loosen, allowing water to seep beneath the sink. Replacing the seal restores a watertight connection and prevents further leakage.
How to Repair
- Loosen the P-trap and move it aside.
- Unscrew the drain flange from the sink.
- Clean old plumber’s putty or sealant.
- Apply fresh plumber’s putty around the drain opening.
- Reinstall and tighten the drain securely.
- Reattach the P-trap and test.
This fix stops leaks caused by dried or cracked seals.
Step 5: Repair the P-Trap Leak
The P-trap is a curved pipe designed to trap debris and prevent sewer gases from entering the home, but it is also a common point for leaks due to its slip-joint connections. These joints can loosen or wear out over time, causing water to drip beneath the sink.
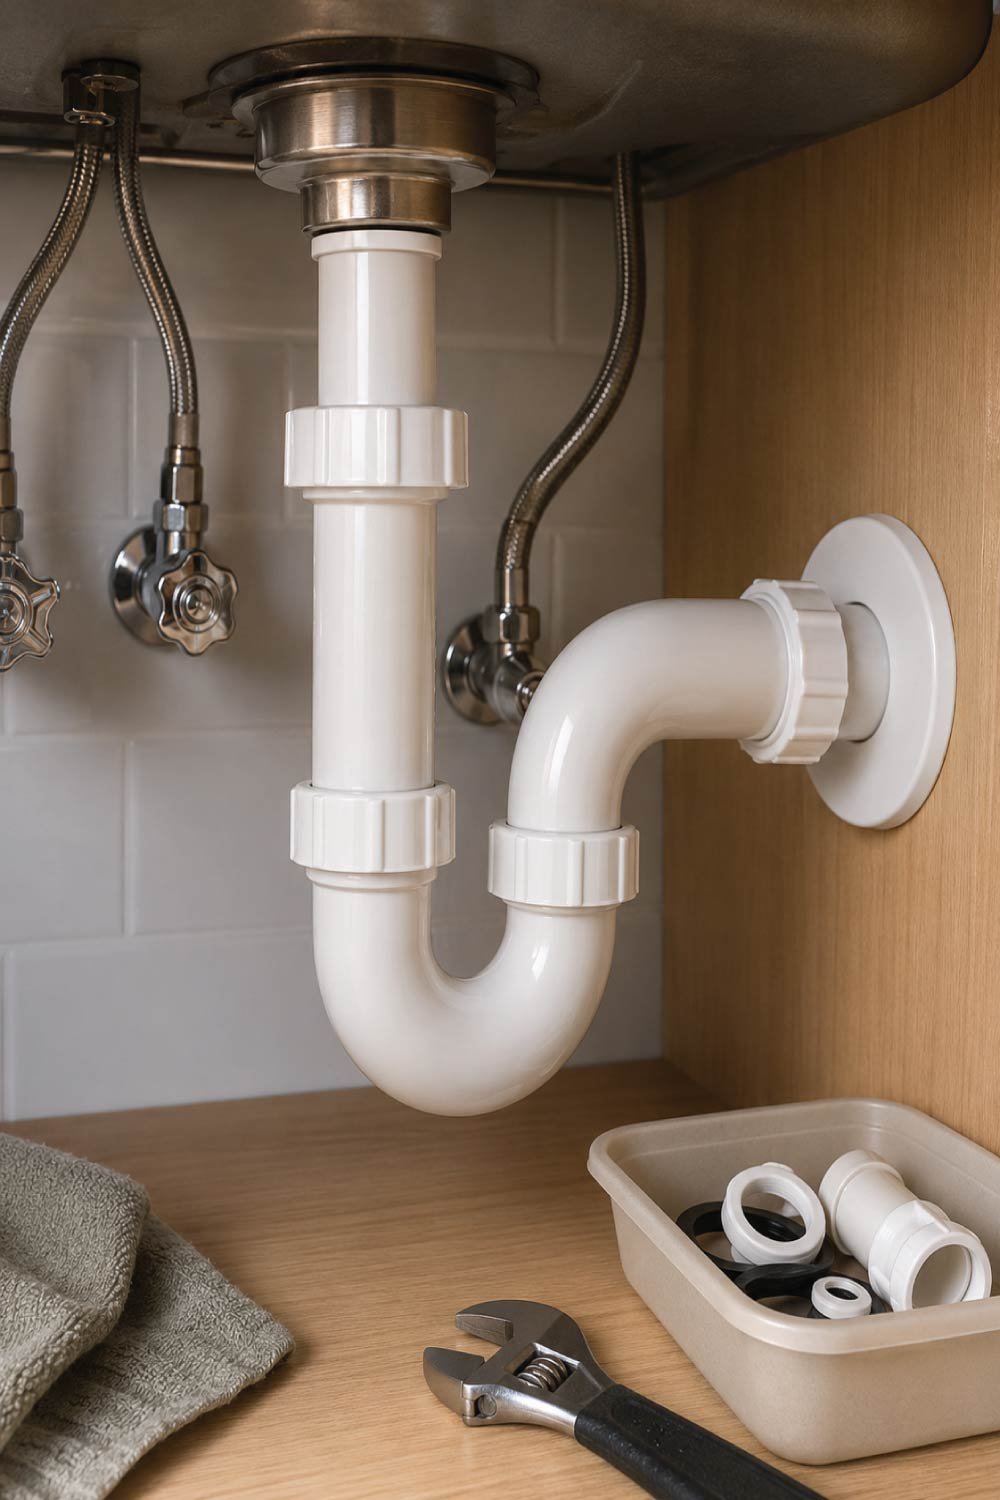
What to Check
P-trap leaks usually develop at connection points where parts join together, rather than from the pipe itself. These joints are designed to be removable, which makes them convenient for repairs, but also more prone to loosening, misalignment, or wear over time. Careful inspection helps you quickly identify the exact issue before disassembly.
- Loose slip-joint nuts
- Worn or cracked washers
- Misaligned pipes
How to Fix
Fixing a P-trap leak is usually straightforward, but it requires careful alignment and correct tightening to ensure a proper seal. The goal is to restore a secure connection without applying excessive force, which can damage plastic fittings or cause new leaks.
- Hand-tighten the slip nuts first.
- If leaking continues, remove the trap and replace the washers.
- Reinstall carefully and align pipes correctly.
- Tighten snugly, but do not overtighten.
Replace the entire P-trap if it’s cracked or corroded.
Also Read:
Step 6: Fix Leaking Supply Lines
Supply lines are an important part of the bathroom sink plumbing system because they carry pressurized water from the shut-off valves to the faucet. Over time, these hoses can loosen, crack, or corrode at the connection points, leading to slow drips or sudden leaks that may damage the cabinet area if not addressed quickly.
Signs of a Leak
Leakage in supply lines often develops slowly and may not be immediately obvious. Because these hoses are under constant water pressure, even small weaknesses at joints or along the hose can gradually worsen over time. Recognizing early warning signs helps prevent water damage to cabinets, flooring, and nearby plumbing components.
- Drips near the valve
- Moisture along the hose
- Corrosion at connections
How to Fix
Most supply line leaks can be resolved by tightening or replacing the connection, depending on the condition of the hose and fittings. It is important to work carefully to avoid damaging the threads or over-tightening, which can create additional leaks or cracks in the plumbing system.
- Tighten the connection nut slightly.
- If leaking continues, replace the supply line.
- Apply plumber’s tape to threaded connections if required.
Replacing supply lines is often safer than repairing damaged ones.
Step 7: Check the Shut-Off Valves
Shut-off valves control the water flow to your sink, and leaks in this area can be more serious because they involve pressurized water supply lines. Even a small leak at the valve can gradually worsen, so identifying issues early is important to prevent water damage inside cabinets or surrounding walls.
What to Look For
- Water dripping from the valve stem
- Moisture around the base of the valve
If tightening the packing nut doesn’t help, replacing the valve may be necessary.
Step 8: Test the Repair
Testing is a crucial final step because some leaks only appear under water pressure or after components settle. A careful inspection after completing all repairs ensures that every connection is secure and no hidden moisture remains, confirming that the issue has been fully resolved.
- Turn the water on slowly.
- Run both hot and cold water.
- Check all connections carefully.
- Dry the area and recheck after 10 15 minutes.
No moisture means the leak is fixed.
Also Read:
When to Call a Plumber
While many bathroom sink leaks can be fixed with basic tools, some situations involve deeper plumbing issues that require professional expertise. Ignoring serious problems or attempting advanced repairs without experience can lead to more damage, especially when pipes or hidden structures are affected.
- Leaks continue after repairs
- Pipes are corroded or damaged
- Water leaks inside walls or flooring
- Shut-off valves won’t close
- Mold or cabinet damage is present
Early professional help can prevent costly repairs later.
How to Prevent Future Bathroom Sink Leaks
Preventing bathroom sink leaks is much easier and more cost-effective than repairing them repeatedly. Regular inspection and simple maintenance habits help keep plumbing components in good condition, reducing the chances of unexpected failures or hidden water damage over time.
Tips
- Inspect under sinks monthly
- Tighten loose fittings early
- Replace aging washers and hoses
- Avoid overtightening plastic parts
- Clean spills immediately
Small checks help prevent major problems.
Also Read:
Final Thoughts
Fixing a bathroom sink leak is usually a straightforward DIY project. In many cases, the solution is as simple as tightening a connection or replacing a worn washer. By identifying the source of the leak and following a step by step approach, you can save water, protect your home, and avoid expensive plumbing repairs.
If the issue turns out to be more complex, calling a professional sooner rather than later is always the safest option.