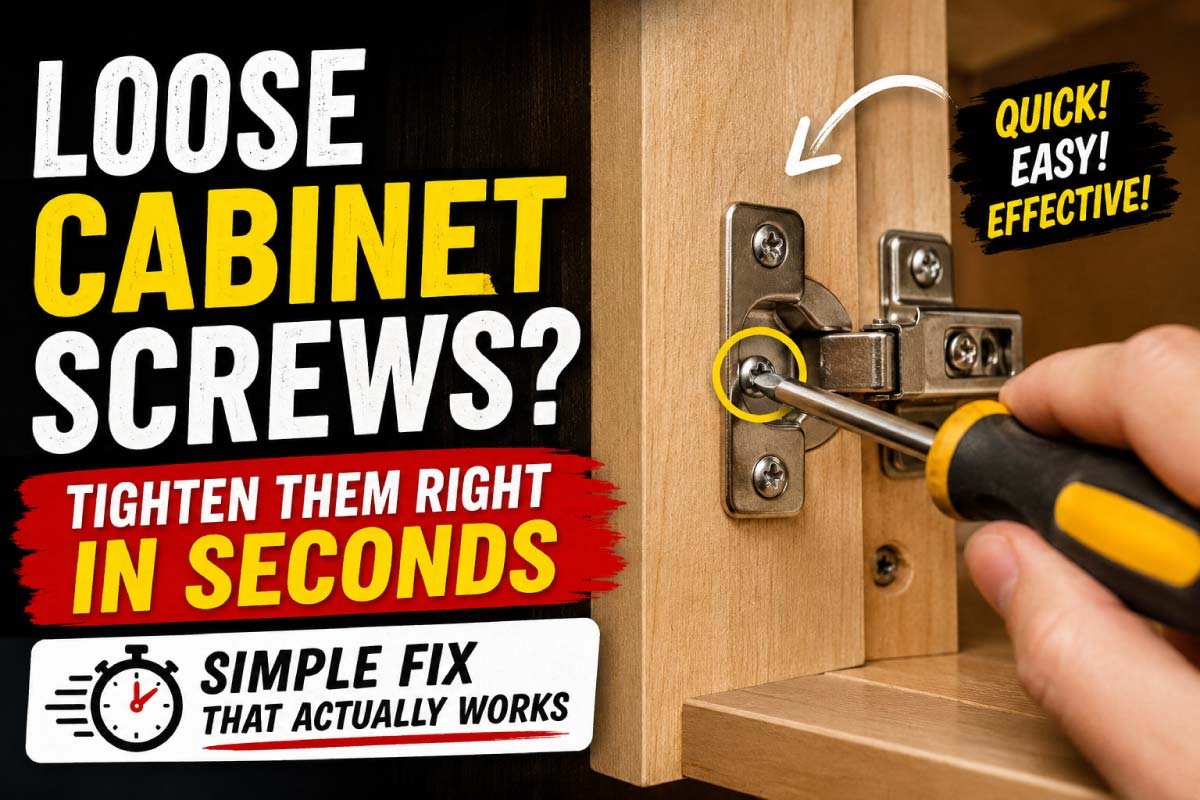
Loose cabinet screws are one of those small household problems that seem harmless at first—but quickly turn into daily frustration. A cabinet door starts sagging, a handle wobbles, or a drawer feels unstable. Suddenly, your kitchen or bathroom doesn’t feel as solid or well-kept as it should.
The good news is that fixing loose cabinet screws is usually fast, inexpensive, and requires only basic tools. In many cases, you don’t need to replace anything at all—you just need the right tightening method and a little know-how.
This guide will walk you through why cabinet screws loosen, how to fix them in seconds, and how to make sure they stay tight for the long term.
Why Cabinet Screws Become Loose in the First Place
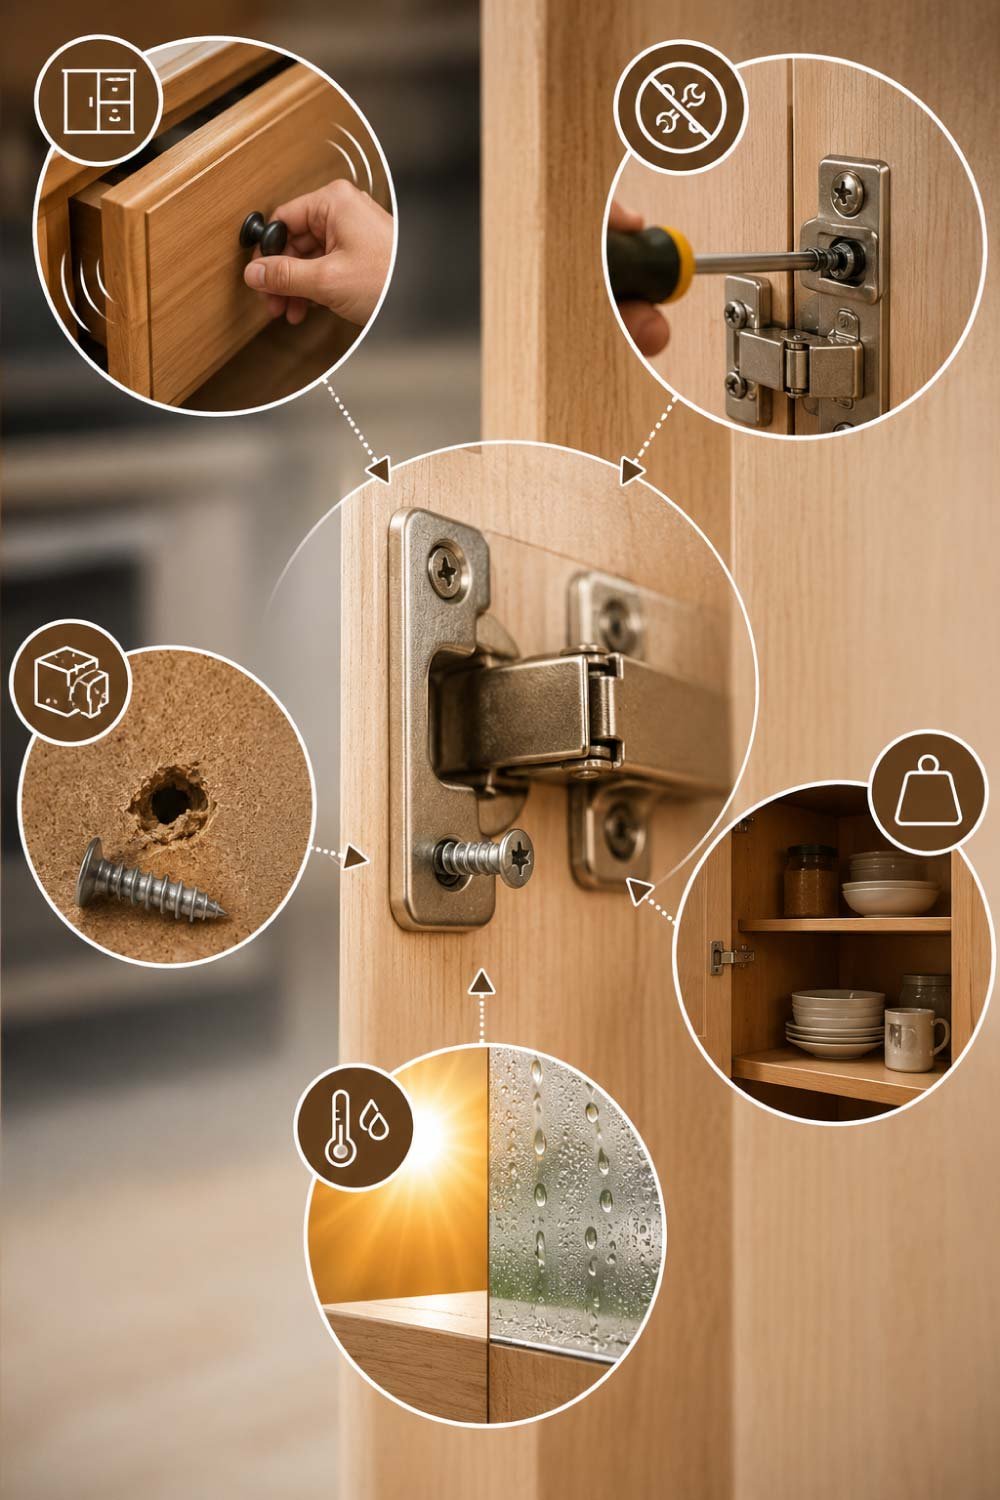
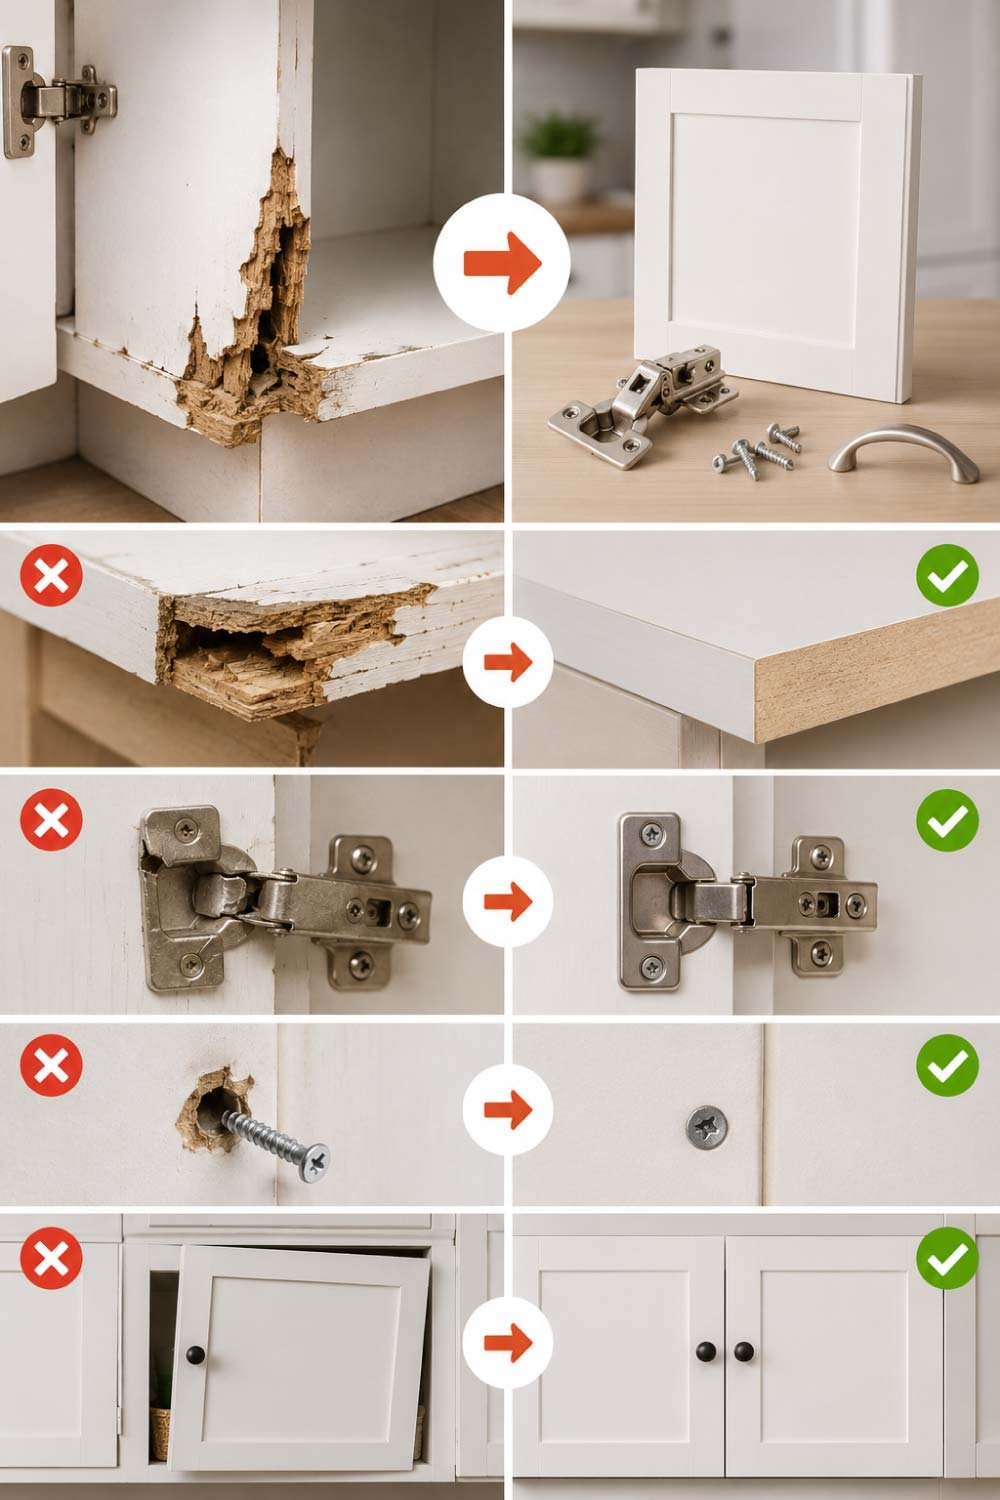
Cabinet screws loosening is a common household issue that develops gradually rather than suddenly. It usually signals underlying wear, material weakness, or environmental changes affecting wood and hardware stability. Understanding these causes helps homeowners apply more effective and longer-lasting repair solutions instead of temporary tightening fixes.
Before jumping into the fix, it helps to understand the root cause. Cabinet screws don’t loosen randomly—there are usually a few predictable reasons behind it.
Daily Use and Vibration
Cabinets and drawers are opened and closed multiple times a day. Over time, this repeated movement creates small vibrations that slowly loosen screws.
Poor Installation
If screws weren’t tightened properly during installation, they’ll start working their way out much sooner than expected.
Soft or Damaged Wood
Many cabinets are made from particle board or MDF, which is softer than solid wood. Screws can lose their grip over time, especially if the hole becomes slightly enlarged.
Heavy Load on Doors or Shelves
Overloaded cabinets put extra pressure on hinges and joints, forcing screws to loosen gradually.
Temperature and Humidity Changes
Wood expands and contracts with moisture and heat. This movement can weaken the grip around screws, especially in kitchens and bathrooms.
Understanding the cause helps you choose the right fix—not just a temporary tightening.
Quick Fix #1: The Simple Tightening Method (Fastest Solution)
Repeated daily use puts constant stress on cabinet screws, especially at hinges and handles. Even small vibrations from opening and closing doors can gradually weaken their grip. Over time, this leads to loosening, which often starts subtly before becoming noticeable or affecting cabinet function significantly.
If the screw is just slightly loose and the hole is still in good shape, this method works instantly.
What You Need:
Screwdriver (Phillips or flathead)
Good lighting
Steps:
Open the cabinet door fully for better access.
Identify the loose screw (hinge, handle, or bracket).
Hold the part steady with one hand.
Turn the screwdriver clockwise until snug.
Important Tip:
Do not overtighten. If you force it too much, you can strip the screw head or damage the wood.
This method alone solves most minor cabinet issues in under a minute.
Quick Fix #2: Toothpick or Matchstick Trick (Stronger Hold)
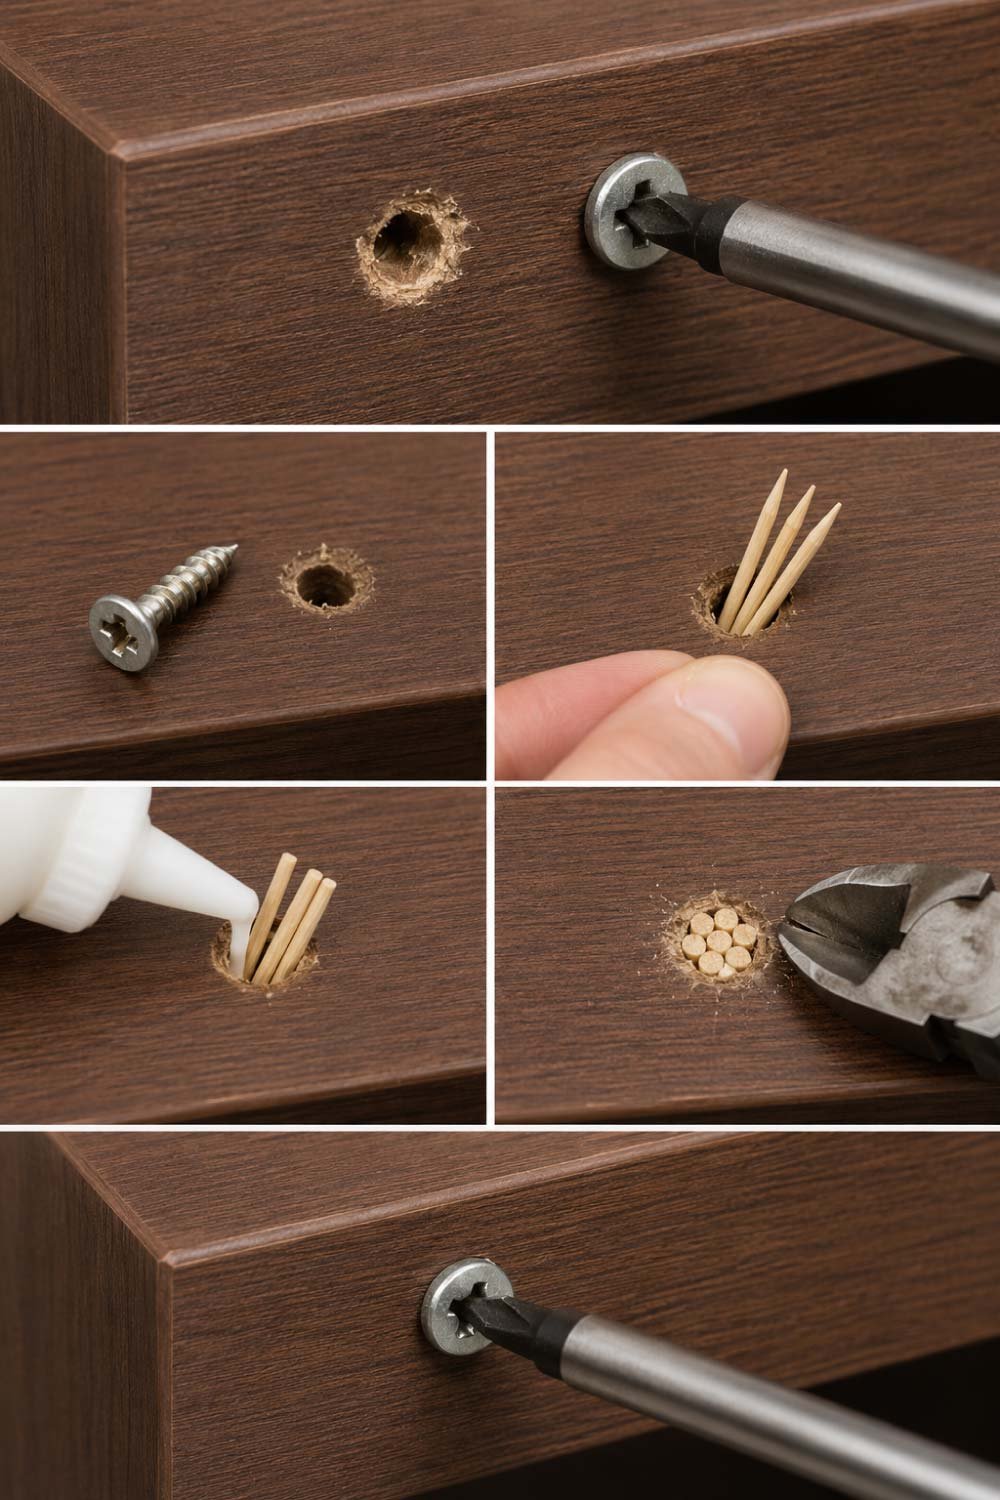
When screw holes become worn, standard tightening fails because the threads no longer grip properly. A simple household trick can rebuild the internal structure of the hole using small wooden pieces, restoring friction and allowing the screw to hold firmly again without needing replacement parts.
If tightening doesn’t work because the screw keeps spinning, the hole is likely worn out. This is where a simple household trick becomes surprisingly effective.
What You Need:
Wooden toothpicks or matchsticks
Wood glue (optional but recommended)
Screwdriver
Steps:
Remove the loose screw completely.
Insert 2–4 toothpicks into the hole.
If using glue, apply a small amount before inserting toothpicks.
Break off excess wood so it sits flush.
Reinsert the screw and tighten firmly.
Why It Works:
The toothpicks fill the empty space, giving the screw new material to grip. It’s like rebuilding the inside of the hole without replacing the entire cabinet part.
This is one of the most effective DIY repairs for stripped cabinet screws.
Quick Fix #3: Use a Larger Screw (Simple Upgrade)
Sometimes screw holes become too enlarged or damaged for fillers alone to work effectively. In such cases, upgrading to a slightly larger screw can provide a quicker, practical solution. It improves grip immediately without requiring additional materials or longer repair processes in most everyday situations.
When to Use This:
The hole is slightly enlarged
The original screw is no longer gripping well
You want a faster alternative to fillers
Steps:
Remove the old screw.
Take it to a hardware store for size comparison.
Buy a screw that is slightly longer or thicker.
Install it carefully without forcing it.
Warning:
Don’t go too large. Oversized screws can split wood or damage cabinet panels.
Also Read:
How to Paint a Damaged Wall: A Complete Step-by-Step Guide
Quick Fix #4: Add Wood Glue for Long-Term Strength
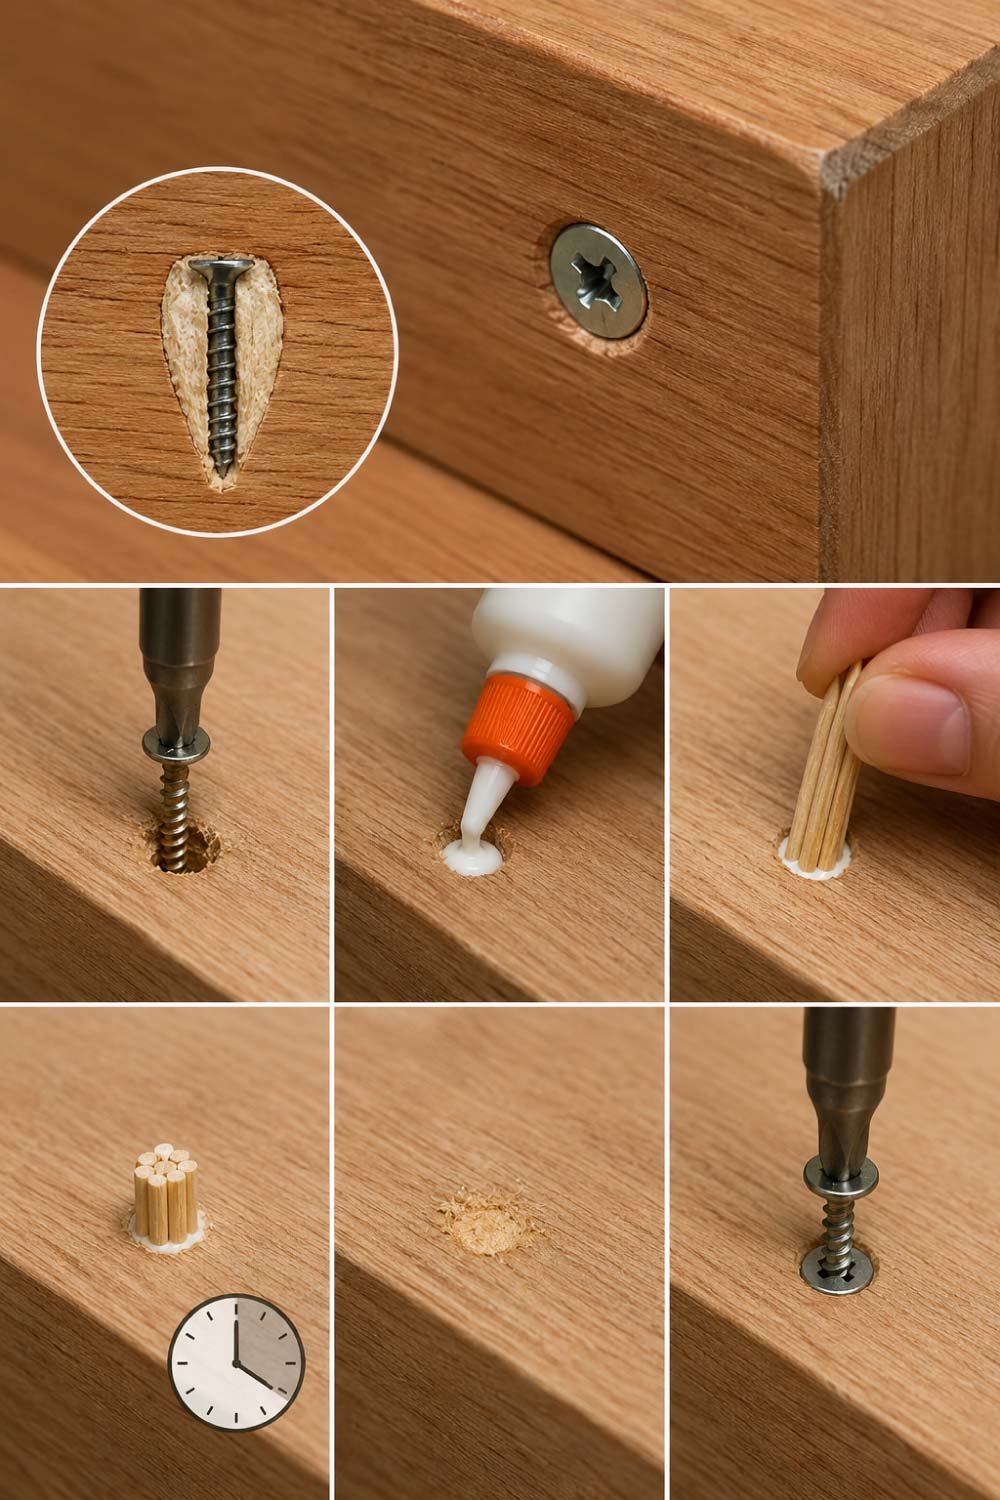
For long-term durability, reinforcing loose screw holes with adhesive materials can significantly improve strength and stability. This method not only fills gaps but also hardens the internal structure of the wood, creating a more secure base for screws and preventing future loosening issues effectively over time.
If you want a more permanent fix, wood glue can help stabilize weak screw holes.
What You Need:
Wood glue
Toothpicks or wooden dowels
Screwdriver
Steps:
Remove the loose screw.
Fill the hole with wood glue.
Insert toothpicks or a small wooden piece.
Let it dry for 4–6 hours (or overnight for best results).
Reinstall the screw.
Why This Works Better:
Glue hardens the interior structure, creating a reinforced grip that lasts much longer than a dry fix.
Quick Fix #5: Metal Anchors for Severely Stripped Holes
When screw holes become extremely damaged, traditional fixes like toothpicks or glue may no longer provide enough strength. In such cases, metal anchors offer a reliable, heavy-duty solution. They are designed to grip inside weakened wood and create a stable base that restores proper screw holding power effectively.
If the screw hole is badly damaged and nothing holds, metal anchors are your best option.
When You Need This:
Screw keeps spinning endlessly
Wood is cracked or heavily worn
Cabinet door feels unstable
Steps:
Drill the hole slightly larger if needed.
Insert a metal anchor (available at hardware stores).
Screw into the anchor tightly.
This creates a solid base that won’t loosen easily, even with heavy use.
Fixing Loose Cabinet Hinges Specifically
Cabinet hinges experience constant movement and stress, making them one of the first areas where screws loosen. When hinge screws fail, doors can sag, misalign, or stop closing properly. Fixing them quickly not only restores function but also prevents further strain on surrounding wood and hardware components.
Steps:
Open the cabinet door fully.
Tighten all hinge screws first.
Check if hinge is misaligned.
If holes are stripped, use toothpick or wood filler method.
Re-align door and test opening/closing.
A properly aligned hinge can instantly improve how your cabinet feels and functions.
Also Read:
How to Fix a Garage Door Sensor: A Complete Step-by-Step Guide
Preventing Cabinet Screws from Loosening Again
Once cabinet screws are repaired, the next important step is prevention. Without proper care, the same issue can return over time due to daily use, humidity, or poor maintenance habits. Simple preventive actions can significantly extend the life of your cabinets and keep them stable for years.
Don’t Overload Cabinets
Avoid stacking too many heavy items inside doors or shelves.
Tighten Screws Periodically
Every few months, check hinges and handles for early loosening.
Use Quality Hardware
Cheap screws wear out faster and strip more easily.
Control Moisture
In kitchens and bathrooms, use ventilation to reduce humidity damage.
Install Soft-Close Hinges (Optional Upgrade)
These reduce impact stress, which helps screws stay tight longer.
Common Mistakes to Avoid
Even simple cabinet repairs can become ineffective or cause further damage if done incorrectly. Many homeowners unintentionally worsen loose screw problems by using too much force or skipping important steps. Avoiding these common mistakes ensures a stronger, longer-lasting repair and prevents repeated issues in the future.
- Over-tightening screws
- This strips the wood and makes the problem worse.
- Ignoring early signs
- A small wobble today becomes a broken hinge tomorrow.
- Using glue only without reinforcement
- Glue alone won’t hold a screw under pressure unless combined with filler material.
- Using wrong screwdriver size
- A poor fit can damage screw heads quickly.
When to Replace Instead of Repair
Not all cabinet issues can be fixed with simple DIY methods. In some cases, the damage is too severe for repairs to hold effectively. Knowing when to replace parts instead of repeatedly fixing them saves time, money, and prevents ongoing frustration with unstable or unsafe cabinets.
Sometimes repair isn’t enough. You may need replacement if:
The wood is completely broken
Hinges are bent or cracked
Screws won’t hold even after multiple fixes
Cabinet door alignment is permanently off
In these cases, replacing hardware is more cost-effective than repeated repairs.
Also Read:
How to Repair a Screen Door: A Complete DIY Guide
Final Thoughts
Loose cabinet screws may seem like a minor annoyance, but they affect the overall feel, function, and durability of your furniture. The good news is that most cases can be fixed in seconds with a screwdriver—or a simple household trick like toothpicks and wood glue.
Whether it’s a kitchen cabinet, bathroom vanity, or storage unit, keeping screws tight ensures smoother operation and longer life for your furniture.
A few minutes of attention now can save you from bigger repairs later—and keep your home feeling solid, stable, and well-maintained.
Also Read:
How to Fix a Broken Window Glass Seal: A Complete DIY Guide
Post Views: 1