
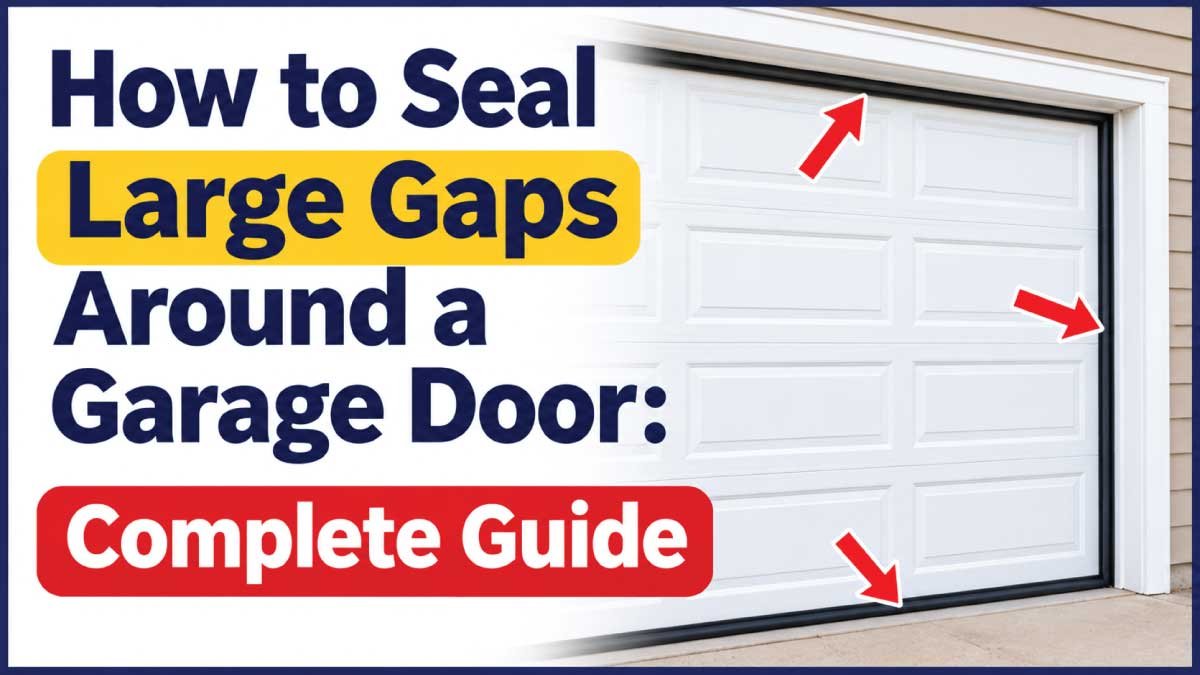
Large gaps around a garage door can allow rainwater, dust, insects, rodents, and outdoor air to enter your garage. This problem commonly develops when weatherstripping wears out, concrete floors become uneven, door panels shift, or the original sealing materials no longer fit properly. Even a small opening can become a bigger concern during heavy rain, strong winds, or seasonal temperature changes.
Learning how to seal large gaps around a garage door helps protect stored belongings, reduce moisture problems, and improve the overall condition of your garage. However, choosing the right repair method depends on where the gap appears and what caused it. Replacing the bottom seal will not solve a problem caused by damaged tracks or an uneven floor.
This guide explains how to identify different types of garage door gaps, select suitable sealing materials, complete practical DIY repairs, and recognize problems that require professional assistance. You will also learn about repair costs, common mistakes, and maintenance practices that help prevent future gaps.
Common Signs and Symptoms
Garage door gaps are not always immediately noticeable. Some openings become visible only when daylight enters around the closed door, while others become apparent during rainfall or windy conditions. Recognizing these warning signs helps homeowners identify the location and severity of a sealing problem before it causes additional damage.
Common symptoms include:
- Visible daylight: Light passing through the bottom corners, sides, or top of the closed door indicates an opening.
- Water entering the garage: Rainwater may collect near the entrance when the bottom seal does not contact the floor.
- Dust accumulation: Dirt and debris entering through gaps can collect along the garage floor.
- Insects and rodents: Openings around the door provide convenient entry points for unwanted pests.
- Temperature changes: Outdoor heat or cold can affect the garage interior through poorly sealed areas.
- Noticeable drafts: Air movement near the closed door may indicate damaged weatherstripping.
- Cracked rubber seals: Brittle, flattened, loose, or missing sealing material can leave sections exposed.
- Uneven door contact: One side of the door may touch the floor while the opposite side leaves a visible opening.
How a Garage Door Sealing System Normally Works
A garage door uses several sealing components to close the openings between its moving panels and the surrounding structure. Each component serves a different purpose, and understanding its position makes selecting replacement materials easier. A properly installed sealing system should provide consistent contact without restricting normal door movement.
The main sealing components include:
- Bottom weather seal: A flexible rubber or vinyl strip attached to the lower edge of the door. It compresses against the floor when the door closes.
- Side weatherstripping: Flexible seals installed along the vertical door frame to reduce openings around the door edges.
- Top weatherstripping: A seal mounted above the opening to close the space between the upper door section and header.
- Garage door threshold: A raised rubber strip attached directly to the concrete floor to improve bottom sealing, particularly where the floor is uneven.
- Panel seals: Some sectional doors have additional seals between individual panels to reduce air and moisture movement.
These components work together, but they cannot compensate for serious structural problems or incorrect door alignment.
Most Common Reasons This Problem Happens
Large garage door gaps usually develop because sealing materials deteriorate, surrounding surfaces become uneven, or the door no longer sits correctly within its opening. Identifying the underlying cause is important because adding thicker weatherstripping may provide only temporary improvement when the actual problem involves the floor, frame, or mechanical system.
1. Worn or Damaged Bottom Seal
The bottom seal constantly contacts the garage floor whenever the door closes. Sunlight, temperature changes, moisture, and friction can gradually make the material brittle, flattened, or cracked.
Symptoms: Water entering underneath the door, visible daylight, and damaged rubber along the bottom edge.
Diagnosis: Inspect the entire seal for missing sections, cracks, and areas that no longer touch the floor.
2. Uneven Garage Floor
Concrete floors can develop cracks, low spots, or uneven sections because of settling and long-term wear. A standard bottom seal may touch certain areas while leaving openings elsewhere.
Symptoms: A gap appears underneath one corner or along a particular section of the closed door.
Diagnosis: Examine the concrete along the door’s closing path and compare its height at different points.
3. Damaged Side Weatherstripping
Side seals can become loose, torn, compressed, or detached from the frame after years of use.
Symptoms: Daylight or drafts appear along one or both vertical edges.
Diagnosis: Check whether the flexible seal makes consistent contact with the closed door.
4. Incorrectly Installed Weatherstripping
Weatherstripping that is too narrow, too short, or poorly positioned may fail to cover the opening.
Symptoms: Gaps remain even after installing replacement material.
Diagnosis: Compare the replacement seal’s dimensions and installation position with the door manufacturer’s specifications.
5. Misaligned Garage Door
A door that sits unevenly within its frame can create different-sized openings along its edges. Damaged rollers, track problems, loose hardware, or structural movement may contribute to this condition.
Symptoms: One side appears higher, the door looks crooked, or the gaps are noticeably different.
Diagnosis: Observe the door’s position without adjusting its mechanical components. Arrange professional inspection if alignment appears incorrect.
6. Bent or Damaged Door Panels
Physical impacts and general wear can bend or warp individual door sections, preventing the door from closing evenly.
Symptoms: Visible panel distortion and persistent gaps that remain despite suitable weatherstripping.
Diagnosis: Inspect the door’s appearance and look for dents or sections that do not sit flat.
7. Poor Installation or Damaged Frame
Incorrect measurements, unsuitable door dimensions, or deteriorating surrounding framing can create excessive clearance.
Symptoms: Large openings around multiple edges, sometimes present since installation.
Diagnosis: Check the stationary frame for cracks, movement, and damaged trim.
Safety Precautions Before Troubleshooting
Garage doors are heavy mechanical systems that operate using high-tension springs, cables, rollers, and tracks. Before inspecting or replacing sealing materials, make sure the door is completely closed and stable. Never assume the system is safe simply because the automatic opener has stopped moving.
Follow these precautions:
- Keep children and pets away from the repair area.
- Disconnect opener power before working near electrical components.
- Never loosen or adjust torsion springs, extension springs, or lifting cables.
- Do not remove bottom brackets or cable-connected hardware.
- Never work underneath a partially open or unsupported door.
- Wear protective gloves and safety glasses when removing old seals.
- Use a stable ladder when inspecting upper weatherstripping.
- Keep water away from electrical outlets and powered equipment.
- Stop using the door if it looks crooked, unstable, or unusually heavy.
Important: Spring, cable, track, and lifting-system repairs should be handled by a qualified garage door technician because these components can cause serious injuries.
Tools and Materials Required
The tools required depend on the location and size of the opening. Most weatherstripping replacements need only basic household equipment, while threshold installation or frame repairs may require additional supplies. Measure the gap before purchasing materials to avoid choosing products that do not fit your garage door.
| Tool or Material | Purpose |
|---|---|
| Tape measure | Measures gap width and door dimensions |
| Utility knife | Cuts rubber and vinyl seals |
| Screwdriver | Removes and installs suitable fasteners |
| Drill | Installs compatible mounting hardware |
| Cleaning brush | Removes dirt and loose debris |
| Mild detergent | Cleans installation surfaces |
| Replacement bottom seal | Closes openings underneath the door |
| Side weatherstripping | Seals vertical door edges |
| Garage door threshold | Covers suitable uneven bottom openings |
| Exterior-grade sealant | Seals stationary cracks around the frame |
| Safety gloves and glasses | Protects hands and eyes |
Step-by-Step Troubleshooting Guide
A successful repair starts with identifying exactly where the air or water enters. Instead of immediately purchasing several sealing products, inspect the entire closed door and compare the openings on both sides. This approach helps determine whether you need replacement weatherstripping, a threshold, or professional alignment work.
Step 1: Close the Garage Door and Inspect the Gaps
Lower the garage door completely using its normal operating controls. Examine the bottom, both vertical sides, and the top edge from inside the garage.
Look for visible daylight, missing rubber, and areas where the door does not meet the frame. Record the location of each opening.
Step 2: Measure the Gap Size
Use a tape measure to determine the approximate width and length of each opening. Check several points because the gap may change along the bottom edge.
Record your measurements before purchasing replacement materials. A small opening may need ordinary weatherstripping, while a larger floor-level gap may require a compatible threshold.
Step 3: Check the Existing Weatherstripping
Examine the bottom and side seals for cracks, flattened sections, loose fasteners, and missing material.
If the rubber has deteriorated, replacement is generally more effective than adding another layer. If the seals look healthy but fail to make contact, investigate the door position and surrounding surfaces.
Step 4: Inspect the Garage Floor
Look along the entire closing path for low spots, cracks, raised concrete, or changes in floor level.
A straightedge can help identify noticeable unevenness. If the opening follows a low section of concrete, a suitable threshold may provide better coverage than a thicker bottom seal.
Step 5: Check Door Alignment Visually
Observe whether the door sits evenly inside its opening. Compare the clearance between the door edges and the frame on both sides.
If one side appears significantly higher or the panels look crooked, stop the DIY repair. Have a technician inspect the tracks, rollers, cables, and lifting system.
Step 6: Select the Correct Sealing Material
Choose a bottom seal, side weatherstripping, or threshold according to your measurements and existing garage door design.
Check compatibility with the manufacturer’s specifications. The replacement should close the opening without creating excessive pressure or preventing normal movement.
Step 7: Install the Replacement Seal
For an ordinary weatherstripping replacement, follow the manufacturer’s installation instructions. Clean the mounting surface, remove deteriorated material where accessible, and attach the replacement using its intended fastening system.
Avoid drilling into structural or mechanical components. Check that the new material sits evenly before completing the installation.
Step 8: Test the Closed Door
Operate the door normally and inspect the repaired areas again. The seals should make consistent contact without bunching, excessive compression, or interfering with movement.
If substantial gaps remain, reassess the measurements and underlying cause rather than adding random layers of sealing material.
Quick Diagnosis Table
Different gap patterns often indicate different underlying problems. Comparing the visible symptoms with their likely causes can help narrow down the repair before purchasing replacement materials. Use this table as an initial troubleshooting reference, but remember that unusual door movement or structural damage requires a more detailed professional inspection.
| Symptom | Possible Cause | Recommended Solution |
|---|---|---|
| Gap across the bottom | Worn bottom seal | Replace bottom weatherstripping |
| Large gap at one bottom corner | Uneven concrete | Consider a compatible threshold |
| Openings along both sides | Damaged side seals | Replace side weatherstripping |
| Gap above the door | Missing top seal | Install suitable top weatherstripping |
| Different gaps on each side | Door misalignment | Arrange professional inspection |
| Gap remains after replacement | Incorrect measurements or floor problems | Reassess the opening |
| Water enters near the frame | Cracked stationary joints | Repair exterior frame sealing |
| Door panels appear bent | Physical panel damage | Seek professional assessment |
How to Fix Each Common Cause
Once you identify the problem, choose a repair that addresses its source. Replacing damaged seals is generally straightforward, but large openings caused by uneven concrete or door alignment require different solutions. The following methods explain which repairs homeowners can usually perform and when additional expertise becomes necessary.
Replace a Worn Bottom Seal
A damaged bottom seal is one of the most common reasons for openings underneath garage doors.
- Purchase a replacement seal compatible with your door’s bottom retainer.
- Keep the door fully closed and follow the manufacturer’s instructions for removing the old seal.
- Clean the retainer and remove dirt or debris.
- Slide or fit the replacement into the appropriate channel.
- Trim excess material according to the manufacturer’s measurements.
- Check that the seal sits evenly across the entire width.
If the bottom retainer is bent or damaged, have it inspected before installing another seal.
Install Side Weatherstripping
Side weatherstripping closes openings between the door edges and the stationary frame.
Remove damaged strips where accessible and clean the mounting surface. Install compatible replacement material using its recommended fastening method. Position the flexible portion so it contacts the closed door without restricting movement.
Install a Garage Door Threshold
A threshold can help when minor floor variations prevent the bottom seal from making continuous contact.
Clean and dry the concrete before installation. Measure the opening, cut the threshold to the required width, and use the manufacturer’s recommended adhesive or fastening method.
Position it so the closed door’s bottom seal contacts it evenly. Avoid creating an obstruction that interferes with the door or creates a tripping hazard.
Seal Stationary Gaps Around the Frame
Sometimes the opening is not between the moving door and its seal but between the stationary frame and surrounding wall.
Remove loose debris and deteriorated caulk from accessible exterior joints. Apply a compatible exterior-grade sealant to suitable stationary cracks, following the product instructions.
Never apply sealant to moving door joints, tracks, rollers, or areas requiring clearance for normal operation.
Address Bent or Misaligned Components
If the door is crooked, has damaged panels, or leaves unusually large gaps despite having suitable weatherstripping, additional sealing material will not correct the problem.
Stop operating the door if its movement appears unsafe. Have a qualified technician inspect the mechanical system and determine whether adjustment or component replacement is necessary.
Also Read:
How to Fix Squeaky Door Hinges: A Complete Step-by-Step Guide
Advanced Troubleshooting
Some garage door gaps continue even after replacing the obvious sealing materials. These situations may involve less visible problems, including structural movement, damaged retainers, incorrectly sized doors, or drainage issues. A more detailed diagnosis can prevent repeated repairs and help determine whether the opening requires mechanical or building-related work.
Consider these less common possibilities:
- Damaged bottom retainer: A bent metal or plastic retainer may prevent replacement weatherstripping from sitting evenly.
- Settling garage foundation: Structural movement can change the relationship between the floor, frame, and door opening.
- Poor exterior drainage: Incorrect ground grading can direct rainwater toward the garage entrance even when the bottom seal works properly.
- Warped framing: Changes in the surrounding structure may create uneven clearance along the sides.
- Incorrect door dimensions: A door that does not properly match the opening may require professional correction or replacement.
A garage door technician can inspect alignment, track positioning, panel condition, and mechanical operation. For persistent water intrusion, a qualified building professional may also need to assess exterior drainage and concrete conditions.
Also Read:
How to Fix a Garage Door That Won’t Open: A Complete DIY Guide
When Repair Is Not Worth It
Not every garage door gap can be corrected by replacing rubber seals or adding a threshold. When the door or surrounding structure has significant damage, repeated small repairs may cost more than addressing the underlying problem. Understanding when replacement becomes reasonable helps homeowners avoid spending money on ineffective temporary solutions.
Consider major repairs or replacement when:
- Multiple door panels are severely bent or damaged.
- Extensive corrosion affects the door’s structural condition.
- The bottom retainer cannot securely hold replacement weatherstripping.
- Door dimensions are unsuitable for the garage opening.
- Structural movement has created substantial gaps around the frame.
- Mechanical components are damaged and replacement parts are unavailable or uneconomical.
Ask a technician to compare the cost of repairing individual components with the cost of installing a properly fitted replacement door.
Preventive Maintenance Tips
Regular inspection helps keep garage door seals flexible and prevents small openings from becoming larger problems. Weatherstripping does not last forever, but proper cleaning and timely replacement can extend its useful life. A simple inspection every few months is usually enough to identify visible deterioration before it affects the entire garage entrance.
Follow these maintenance practices:
- Inspect the bottom seal for cracks, flattening, and missing sections.
- Check side and top weatherstripping for loose fasteners.
- Remove dirt and leaves from the threshold area.
- Keep the concrete floor clean and monitor new cracks or settling.
- Avoid striking the garage door with vehicles or equipment.
- Check exterior drainage to prevent rainwater from collecting near the entrance.
- Replace damaged seals before they deteriorate completely.
- Follow the garage door manufacturer’s maintenance schedule.
- Arrange professional inspections if the door begins moving unevenly.
Also Read:
How to Fix a Garage Door Sensor: A Complete Step-by-Step Guide
Common Mistakes to Avoid
Poor installation techniques can create additional problems even when homeowners purchase suitable weatherstripping. The goal is to close unwanted openings while allowing the garage door to move freely. Avoid shortcuts that place unnecessary pressure on the door, damage its components, or prevent proper operation.
Common mistakes include:
- Using ordinary foam tape for large openings: Thin adhesive foam may compress, detach, or deteriorate quickly.
- Ignoring uneven flooring: Installing a thicker bottom seal without checking the concrete may not solve the problem.
- Choosing incompatible weatherstripping: Different garage doors use different bottom retainers and seal profiles.
- Applying excessive caulk: Sealant should not restrict moving door sections or cover mechanical components.
- Installing overlapping seals incorrectly: Poor positioning can cause bunching and interfere with closure.
- Ignoring misalignment: Adding more rubber cannot correct damaged tracks or mechanical problems.
- Forcing the door closed: A door that encounters resistance needs inspection rather than additional pressure.
- Skipping the final test: Always confirm that the door opens and closes normally after completing a repair.
When to Call a Professional
Some sealing problems are beyond ordinary DIY maintenance because they involve the door’s weight, lifting mechanism, or surrounding structure. If you cannot identify why a large gap exists, professional diagnosis may save time and prevent additional damage. Knowing when to stop troubleshooting is an important part of completing the repair safely.
Contact a qualified garage door technician when:
- The door hangs unevenly or appears crooked.
- Tracks, rollers, cables, or springs show visible damage.
- The door suddenly becomes difficult to open or close.
- A large gap remains despite replacing compatible weatherstripping.
- Door panels are bent or structurally damaged.
- The bottom bracket or retainer appears damaged.
- The door reverses unexpectedly or does not close properly.
For substantial concrete movement, water drainage problems, or damaged garage framing, you may also need a qualified concrete contractor or building professional.
Estimated Repair Costs
Garage door sealing costs depend on the door width, material quality, installation complexity, and local labor rates. Basic weatherstripping replacements are generally less expensive than installing a threshold or correcting structural problems. The following figures are approximate US dollar estimates for general budgeting, not guaranteed contractor quotations.
| Repair | Estimated Cost | DIY or Professional |
|---|---|---|
| Bottom weather seal | $15–$50 | DIY |
| Side weatherstripping | $10–$40 | DIY |
| Top weatherstripping | $10–$35 | DIY |
| Garage door threshold | $25–$100 | DIY |
| Exterior frame sealing | $10–$40 | DIY |
| Professional seal replacement | $75–$200 | Professional |
| Garage door alignment repair | $100–$300 | Professional |
| Minor track or roller repair | $100–$250 | Professional |
| Garage door panel replacement | $150–$500+ | Professional |
Actual costs vary by location, garage door design, and labor charges. Structural repairs, spring replacement, and complete door replacement can cost considerably more.
Frequently Asked Questions
Homeowners often have additional questions about choosing sealing materials, correcting large openings, and preventing water or pests from entering the garage. These answers address common concerns that arise after inspecting a garage door and help you select a suitable repair without overlooking important limitations.
What Is the Best Way to Seal a Large Gap Under a Garage Door?
The best solution depends on the gap’s cause. Replace a worn bottom seal if the existing rubber has deteriorated. If the concrete floor is uneven, a compatible garage door threshold may provide better coverage. For substantial openings caused by door misalignment, have a technician inspect the door before installing additional sealing materials.
Can I Use Expanding Foam to Seal Gaps Around a Garage Door?
Expanding foam is generally unsuitable for sealing the moving edges of a garage door. It can interfere with door movement, become damaged, and make future maintenance difficult. Use purpose-made weatherstripping for moving door edges and appropriate exterior sealant for stationary cracks around the frame. Never allow foam to obstruct tracks or mechanical components.
How Do I Seal a Garage Door With Uneven Concrete?
A compatible garage door threshold is often a practical option when minor floor variations prevent the bottom seal from making continuous contact. Measure the uneven area and choose a threshold designed for your door system. If the concrete has severe settling or structural cracks, have the floor inspected before attempting a sealing repair.
Will a Garage Door Threshold Stop Rainwater?
A properly installed threshold can help prevent ordinary surface water from entering underneath a garage door. However, it cannot correct poor exterior drainage, flooding, or substantial water pressure. Make sure the threshold is compatible with the bottom seal and does not interfere with door operation. Improving the slope of the surrounding ground may also be necessary.
How Often Should Garage Door Weatherstripping Be Replaced?
Garage door weatherstripping does not have one universal replacement schedule because its lifespan depends on sunlight, temperature, moisture, and frequency of use. Inspect the seals every few months. Replace them when they become cracked, brittle, flattened, loose, or unable to close the opening properly.
Can Large Garage Door Gaps Attract Mice and Insects?
Yes, openings around a garage door can provide entry points for mice, insects, and other small pests. Properly fitted bottom and side seals reduce these access points. However, sealing the door alone may not solve an existing pest problem. Inspect other openings around the garage, including wall penetrations, vents, and utility entry points.
Should Garage Door Weatherstripping Touch the Floor?
Yes, the bottom weather seal should make consistent contact with the floor or a properly installed threshold when the door is closed. It should compress enough to close the opening without excessive pressure. If the seal folds, bunches, or prevents proper closure, check its compatibility and installation rather than forcing the door.
Why Is There Still a Gap After Replacing the Bottom Seal?
A replacement bottom seal may not solve the problem if the floor is uneven, the retainer is damaged, or the garage door is misaligned. Check whether the new seal matches the original retainer and makes consistent contact along the closing edge. If the door sits unevenly, arrange a professional mechanical inspection.
Can I Install a Garage Door Seal Myself?
Most homeowners can replace compatible bottom, side, and top weatherstripping using basic tools and following the manufacturer’s instructions. Threshold installation is also manageable when the floor is suitable and the product is correctly fitted. However, repairs involving springs, cables, tracks, lifting brackets, or serious door misalignment should be left to professionals.
Final Thoughts
Learning how to seal large gaps around a garage door starts with identifying where the opening occurs and understanding why it developed. Worn bottom seals, damaged side weatherstripping, uneven concrete, and poor frame sealing are common problems that homeowners can often address with suitable replacement materials.
For straightforward repairs, installing a compatible bottom seal, replacing damaged weatherstripping, or adding a properly fitted threshold can improve protection against rainwater, dust, insects, and outdoor air. Always measure the opening before purchasing materials, follow installation instructions, and test the door after completing the repair.
Remember that additional sealing material cannot correct a bent door, damaged tracks, structural movement, or faulty lifting components. These problems require proper diagnosis rather than temporary DIY solutions.
Inspect your garage door regularly, keep the surrounding floor clean, and replace deteriorated seals before they stop providing adequate protection. If the door looks crooked, moves unevenly, or contains damaged mechanical components, contact a qualified technician. A correctly sealed and properly maintained garage door helps protect your garage while ensuring safe and reliable operation.