
Small nail holes in walls are one of the most common forms of home damage. Whether you’ve removed a picture frame, taken down shelves, or rearranged your décor, those tiny holes can make a freshly painted wall look worn and messy. The good news is that repairing nail holes is one of the easiest DIY home improvement tasks. With a few basic tools and the right technique, you can restore your wall to a smooth, professional finish in no time.This guide will walk you through everything you need to know about fixing nail holes in drywall or plaster walls, from preparation to finishing touches.
Understanding Nail Holes in Walls
Nail holes in walls are one of the most common and easiest types of damage to repair in modern homes. While they may seem minor, leaving them unfilled can affect the overall appearance of your walls, especially after repainting or redecorating.
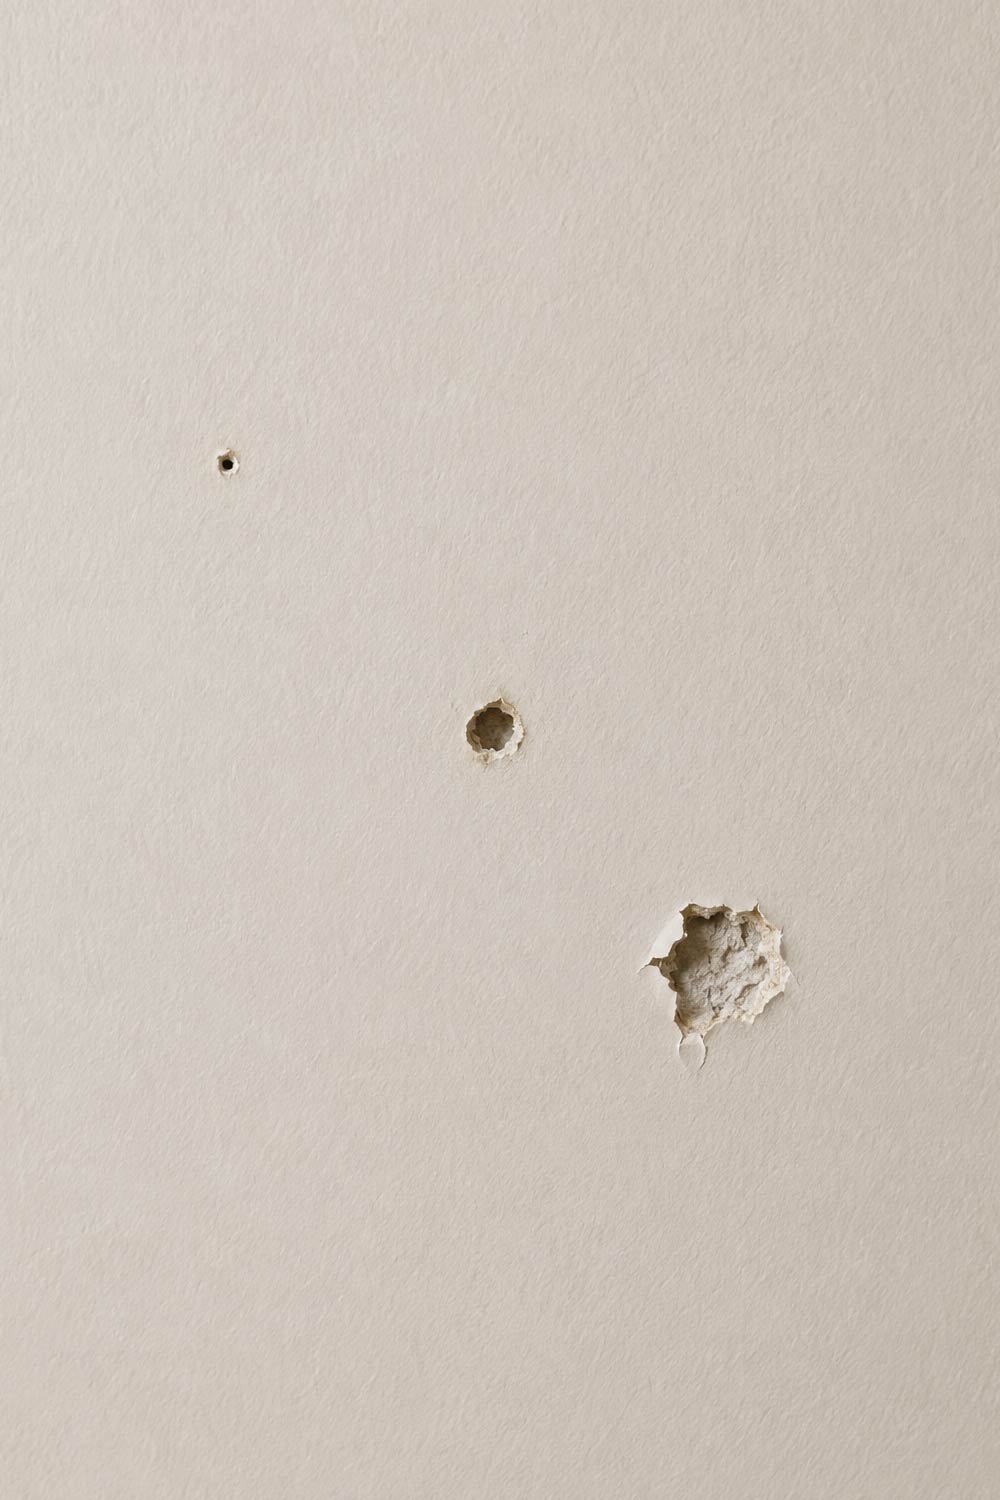
Before jumping into repairs, it helps to understand what you’re dealing with. Most modern homes use drywall (also called gypsum board). When a nail or screw is removed, it leaves a small puncture or crater in the surface paper and gypsum core.
There are generally three types of small wall damage:
- Tiny nail pinholes – from picture frames or lightweight decorations
- Slightly larger holes – from wall anchors or screws
- Torn drywall surface – when paint or paper is pulled with the nail
This guide focuses mainly on small to medium nail holes, which are the easiest to repair without professional help.
Tools and Materials You’ll Need
Having the right tools and materials ready ensures a quick and smooth repair process. Most of these items are affordable and easily available, making this a simple DIY task for any homeowner.
You don’t need expensive tools or professional equipment. Most of these items are available at any hardware store.
Basic materials
These are the essential items required to repair nail holes effectively and achieve a clean finish.
- Spackling paste or lightweight wall filler
- Putty knife (2–4 inches is ideal)
- Fine-grit sandpaper (120–220 grit)
- Clean cloth or sponge
- Primer (optional but recommended)
- Paint that matches your wall color
Optional but helpful
These additional tools can make the repair process easier and improve the final result.
- Small sanding block
- Utility knife (for loose drywall paper)
- Microfiber cloth for dust removal
Having everything ready before you start will make the process faster and cleaner.
Step-by-Step Guide to Fix Nail Holes in Walls
Repairing nail holes is a straightforward process when done correctly. Following each step carefully ensures a smooth, invisible finish that blends perfectly with your wall.
Step 1: Prepare the Area
Proper preparation ensures that the filler adheres well and creates a strong, lasting repair.
Preparation is often overlooked, but it makes a big difference in the final result.
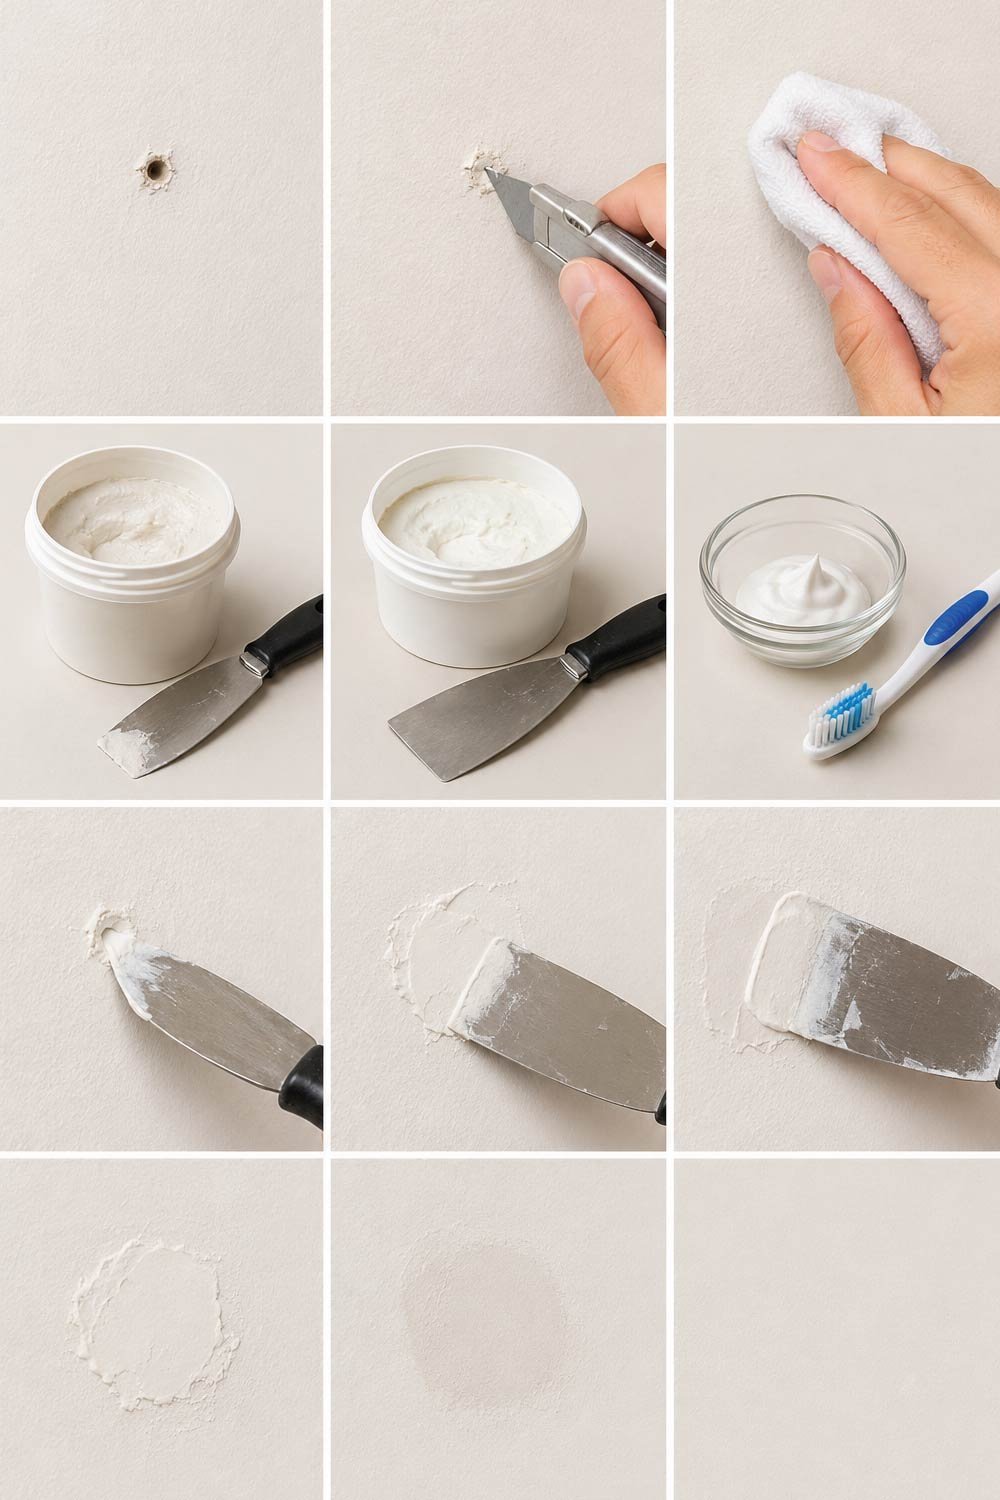
Start by removing anything hanging near the hole. If the hole has rough edges or peeling paint, gently scrape it with a utility knife. Be careful not to make the hole larger—just remove loose debris.
Next, wipe the area with a dry or slightly damp cloth to remove dust. The filler will not stick properly if the wall is dirty or greasy.
If you’re repairing multiple holes, it’s a good idea to mark them all first so you can fix them in one go.
Step 2: Choose the Right Filler
Selecting the correct filler material is important for durability and a smooth finish, especially depending on the size of the hole.
For nail holes, you have a few options:
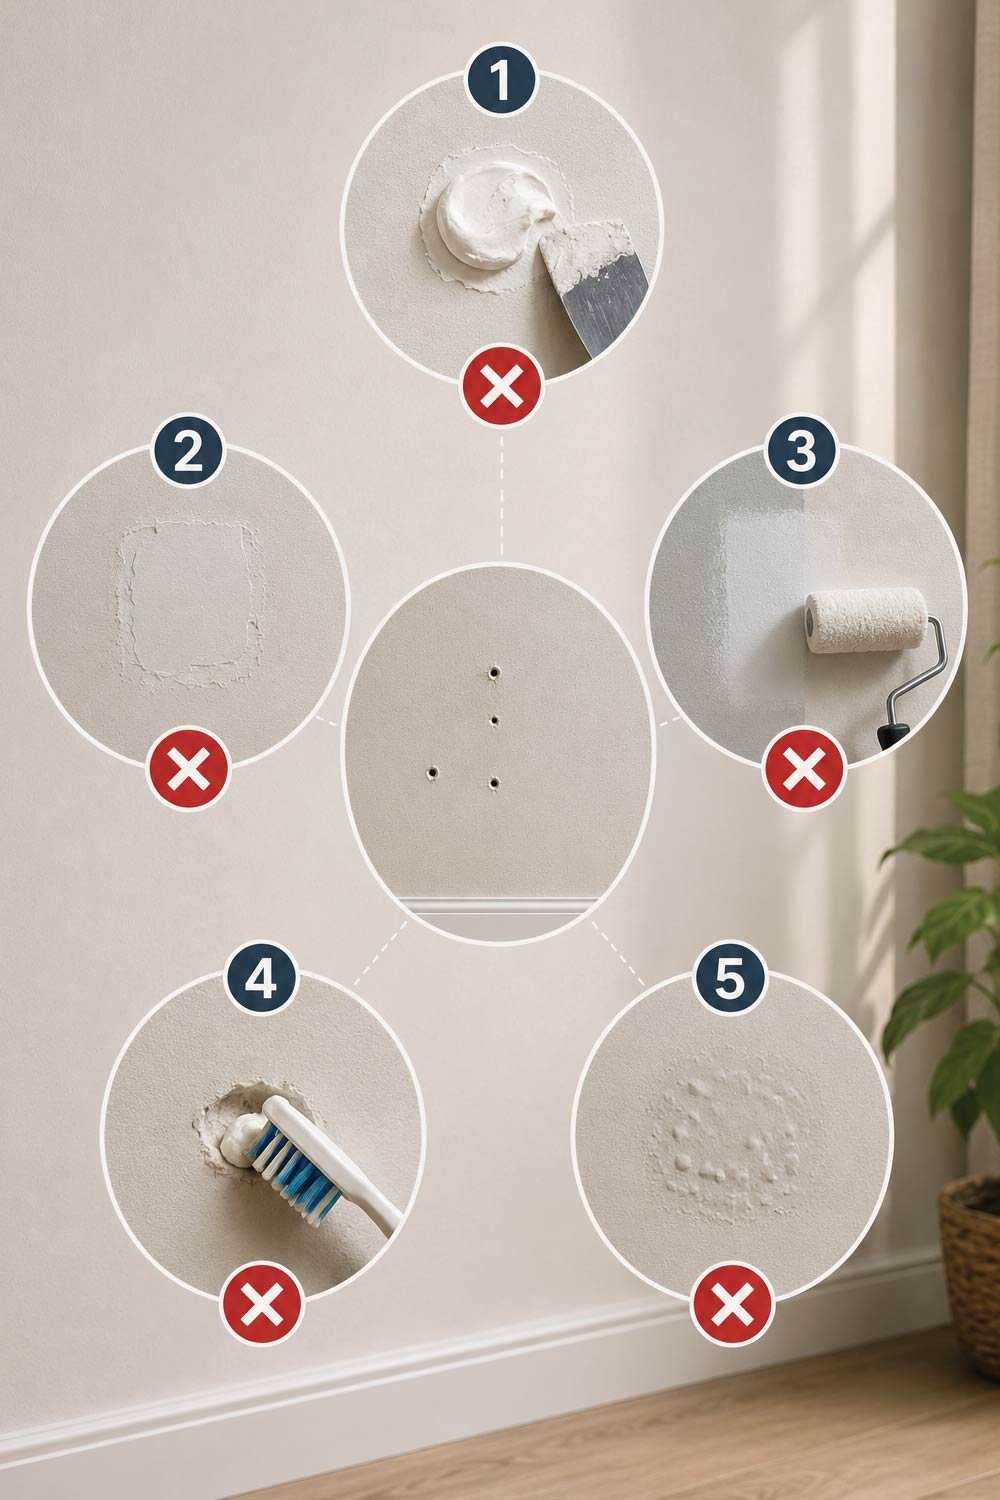
1. Spackling paste (best choice)
This is the most commonly used product for small wall repairs due to its ease of use and quick drying time.
This is the most commonly used product for small wall repairs. It dries quickly, shrinks minimally, and sands easily.
2. Lightweight wall filler
This option works well for slightly larger holes or deeper dents that require additional filling.
Good for slightly larger holes or deeper dents. It may require multiple layers.
3. DIY alternatives
Temporary solutions can work in emergencies but are not suitable for long-term repairs.
Some people use toothpaste or baking soda glue mixtures for very tiny holes in emergencies. However, these are not durable and may crack or discolor over time.
For best long-term results, always use proper spackling compound.
Step 3: Apply the Filler
Applying the filler correctly ensures the hole is completely sealed and blends seamlessly with the wall surface.
Now comes the actual repair work.
Take a small amount of spackling paste on your putty knife. Press it directly into the hole at a slight angle. The goal is to fill the hole completely, not just cover the surface.
Once the hole is filled, drag the putty knife across the wall to remove excess material. Try to make the surface as smooth and flat as possible.
For deeper holes, apply the filler in layers:
- First layer: fill halfway and let it dry
- Second layer: fill completely and smooth
This prevents shrinkage and cracking.
Let the filler dry according to the product instructions—usually between 30 minutes to a few hours depending on thickness.
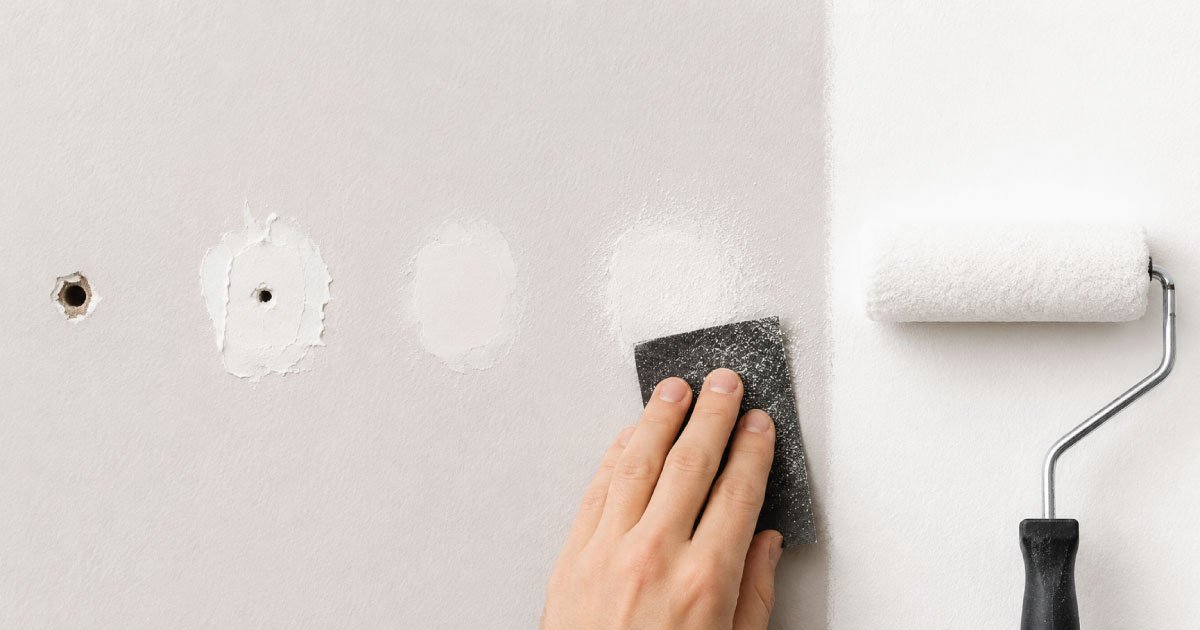
Step 4: Sand the Surface Smooth
Sanding ensures the repaired area is level with the surrounding wall, creating a smooth and professional finish.Once the filler is completely dry, it’s time to sand.
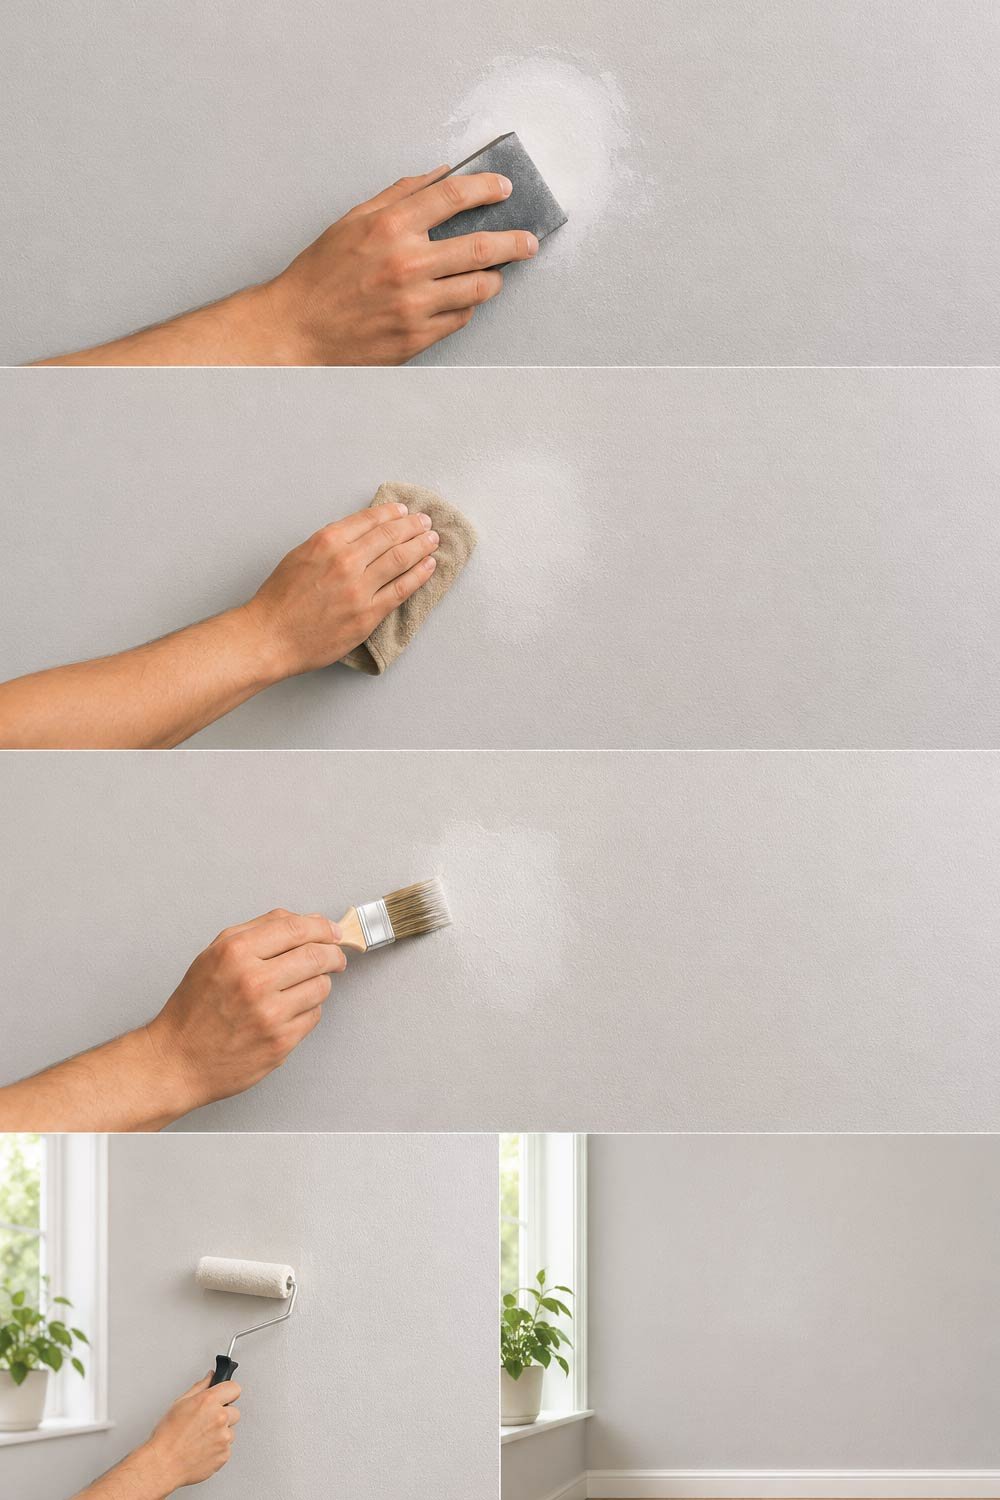
Use fine-grit sandpaper (120–220 grit) and gently sand the patched area. The goal is to make the surface flush with the surrounding wall.
Use light pressure and circular motions. If you press too hard, you might damage the surrounding paint or drywall.
After sanding, run your fingers over the area. It should feel smooth and level with no bumps or ridges.
Wipe away dust using a dry cloth or sponge. This step is important because leftover dust can interfere with paint adhesion.
Step 5: Apply Primer (Optional but Recommended)
Priming helps create an even base for painting and ensures that the repaired area does not stand out after finishing.
Many people skip priming, but it significantly improves the final appearance.
Spackling compound absorbs paint differently than drywall and paint, which can cause uneven patches or “flashing” (visible repaired spots under certain lighting).
Applying a small amount of primer helps:
- Seal the patched area
- Ensure even paint absorption
- Improve color matching
Use a small brush or sponge applicator. Let the primer dry completely before painting.
Also Read:
Step 6: Paint the Repaired Area
Painting is the final step that brings everything together, restoring the wall’s original look and making the repair completely invisible when done correctly.
Once the primer is dry, apply paint that matches your wall color.
If you still have leftover paint from the original job, that’s ideal. Otherwise, try to get a close match from a paint store.
Use a small brush or roller and apply thin coats. One or two coats are usually enough for small patches.
To blend the repair with the rest of the wall:
- Feather the edges of the paint outward
- Avoid thick layers in one spot
- Let each coat dry before applying another
After drying, step back and check under different lighting. If needed, apply an additional coat.
Common Mistakes to Avoid
Even though repairing nail holes is simple, small mistakes can lead to visible patches or uneven finishes. Avoiding these errors ensures a clean and professional result.
Even though fixing nail holes is simple, a few common mistakes can ruin the finish:
1. Overfilling the hole
Applying too much filler can create raised areas that are difficult to sand down smoothly.
Too much filler creates a bump that is hard to sand smoothly.
2. Skipping sanding
Sanding is essential for blending the repair with the wall. Skipping it leaves the patch visible even after painting.
Without sanding, even a well-filled hole will remain visible.
3. Painting without priming
Primer helps ensure even paint coverage and prevents noticeable patches.
This often leads to dull patches that stand out.
4. Using the wrong filler
Temporary solutions may seem convenient but often fail over time and affect durability.
Toothpaste or temporary fillers may crack or fall out over time.
5. Not letting it dry fully
Proper drying is critical for a strong repair and smooth finish.
Painting over damp filler can cause bubbling or peeling.
Also Read:
Special Cases: Larger Nail Holes or Wall Anchors
Some holes may be larger than typical nail holes and require a slightly different repair approach for durability and proper coverage.
If you removed a wall anchor or screw, the hole may be slightly bigger than a simple nail hole.
In this case:
- Use a stronger filler or wall repair compound
- Apply in layers for deep holes
- For very large holes, consider using a patch kit
If the hole is larger than a coin, you may need a drywall patch instead of simple spackling.
Tips for a Professional Finish
Achieving a flawless repair often comes down to small details. These tips can help ensure your work blends perfectly with the rest of the wall.
Here are some extra tips to make your repair completely invisible:
- Use natural daylight to inspect your work
- Lightly texture the area if your wall is not smooth
- Match paint sheen (matte, satin, or gloss matters)
- Always clean tools immediately after use
- Keep leftover filler for future touch-ups
Small attention to detail makes a big difference in the final result.
Also Read:
Preventing Future Nail Holes
While nail holes are sometimes unavoidable, you can reduce their occurrence by planning ahead and using alternative methods for hanging items.
While nail holes are sometimes unavoidable, you can reduce them:
- Use removable adhesive hooks for light items
- Plan wall layouts before hanging décor
- Group frames to reduce number of holes
- Use picture rails if you frequently change wall art
These methods help keep your walls cleaner over time.
Also Read:
Conclusion
Fixing nail holes in walls is a simple, inexpensive DIY skill that anyone can learn. With basic tools like spackling paste, sandpaper, and paint, you can make your walls look as good as new in less than an hour for small repairs.
The key steps are straightforward: clean the area, fill the hole, smooth it out, sand, prime, and paint. By following these steps carefully and avoiding common mistakes, even beginners can achieve professional-looking results.
With a little practice, you’ll be able to repair wall damage quickly and confidently—keeping your home neat, polished, and well-maintained.