
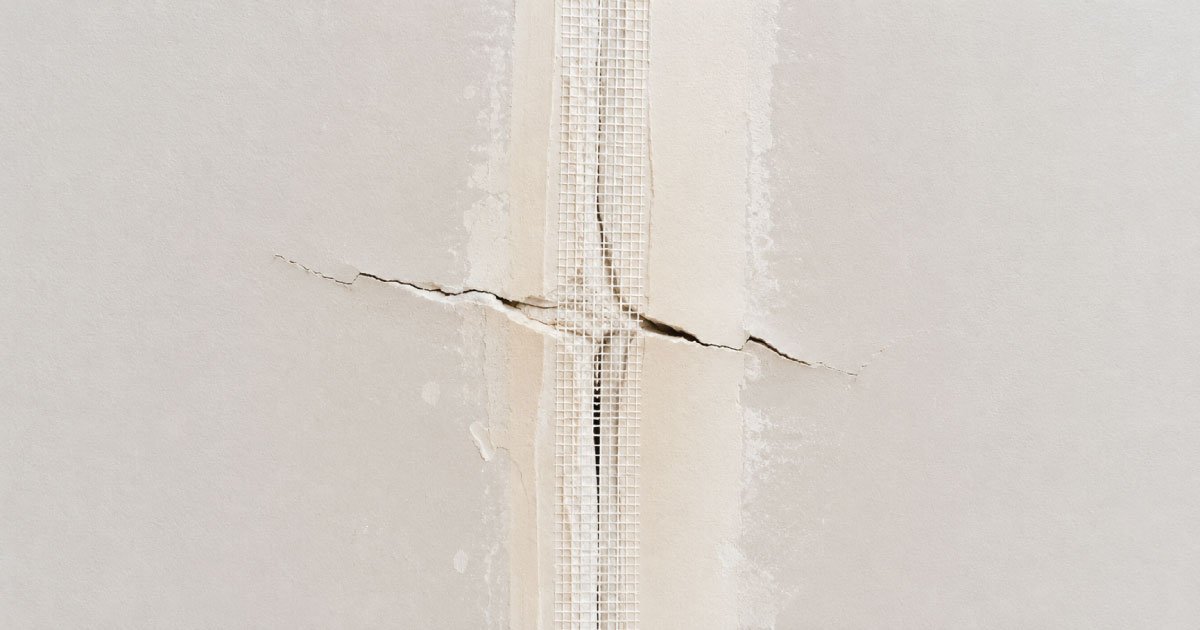
Cracked drywall tape is one of the most common wall problems in homes, especially in areas where walls expand, contract, or experience minor movement over time. While it might look like a serious structural issue, in most cases it’s purely cosmetic and can be repaired without replacing large sections of drywall. With the right tools, preparation, and technique, you can restore a smooth, professional-looking wall finish on your own.
This guide explains everything you need to know about why drywall tape cracks, how to repair it properly, and how to prevent it from happening again.
Understanding Why Drywall Tape Cracks
Drywall tape cracks are a common issue in many homes, often appearing along seams and joints. While they may seem minor at first, they can worsen over time if not properly addressed. Understanding the root causes helps ensure a long-lasting repair.
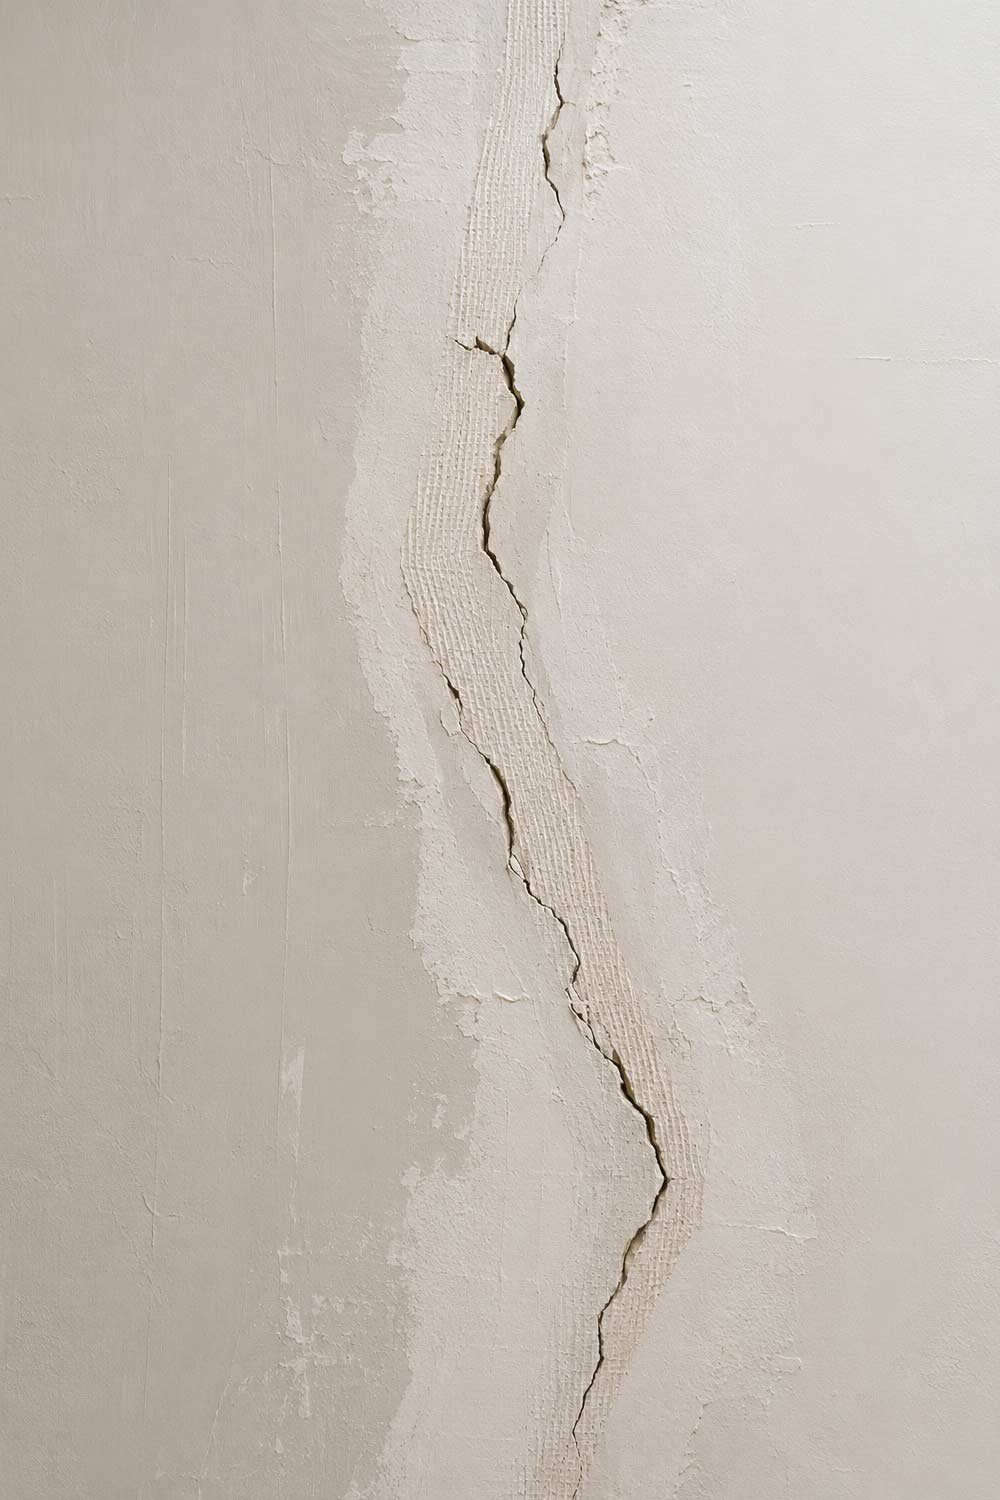
Before jumping into repairs, it helps to understand what causes drywall tape to crack in the first place. Drywall tape is applied over joints between drywall sheets and embedded in joint compound (mud). Its job is to reinforce seams and prevent visible lines.
Cracks usually happen due to one or more of the following reasons:
1. House Settlement
Natural settling is unavoidable in most buildings, and even slight shifts can create stress along drywall seams, leading to visible cracks over time.
All houses settle slightly over time. As the building shifts, even minutely, stress forms along drywall seams. This often leads to hairline cracks in the tape.
2. Temperature and Humidity Changes
Environmental conditions can significantly affect drywall materials, causing expansion and contraction that weakens the bond between tape and compound.
Drywall materials expand and contract depending on moisture and temperature. In hot or humid climates, or in rooms like kitchens and bathrooms, this movement can weaken the bond between tape and compound.
3. Poor Initial Installation
Improper installation can lead to weak adhesion, making the tape more likely to lift, bubble, or crack over time.
If the tape wasn’t properly embedded in joint compound or there were air bubbles underneath, it will eventually lift or crack.
4. Low-Quality Materials
Using low-grade materials can compromise durability and reduce the lifespan of drywall joints.
Cheap joint compound or low-grade tape may not bond strongly enough to withstand long-term stress.
5. Structural Movement or Vibrations
Constant movement or vibrations within a building can gradually weaken drywall seams, causing cracks to develop.
Heavy foot traffic, slamming doors, or vibrations from appliances can slowly weaken seams.
Understanding the cause helps you not only fix the issue but also avoid repeating it.
Tools and Materials You’ll Need
Having the right tools and materials ready ensures a smoother repair process and better results. Preparation helps reduce mess and improves efficiency during the repair.
Before starting the repair, gather everything you’ll need. Having your tools ready makes the process smoother and cleaner.
Basic Tools
These tools are essential for removing damaged material, applying compound, and smoothing the surface.
- Utility knife or drywall knife
- Putty knife (6-inch and 10–12-inch recommended)
- Sanding sponge or sandpaper (120–220 grit)
- Drywall hawk or mud pan (optional but helpful)
- Dust mask
- Drop cloth or plastic sheet
Materials
These materials are required to repair and reinforce the drywall seam effectively.
- Joint compound (pre-mixed is fine for small repairs)
- Drywall tape (paper tape or fiberglass mesh)
- Primer
- Paint matching your wall color
Optional but Useful
These additional items can help improve repair quality and make the process easier.
- Drywall screws (if re-securing loose drywall)
- Stud finder
- Vacuum or dust extractor
Step-by-Step Guide to Fix Cracked Drywall Tape
Repairing cracked drywall tape requires a careful and methodical approach to ensure the problem does not return. Following these steps will help you achieve a smooth and durable finish.

Now let’s go through the actual repair process in a clear and practical way.
Step 1: Inspect the Damage
Proper inspection helps determine whether the tape can be repaired or needs complete replacement for a lasting fix.
Start by carefully examining the cracked area. Not all cracks are the same. Some are small hairline cracks, while others may involve peeling or bubbling tape.
Press lightly around the crack. If the tape feels loose or hollow underneath, it means the bond has failed completely and the tape will need to be replaced. If the crack is minor and the tape is still firmly attached, you may only need a surface repair.
Step 2: Remove Loose Tape and Damaged Compound
Removing damaged material ensures a solid base for the new repair and prevents the issue from reappearing.
Using a utility knife, gently cut away any loose or damaged sections of tape. Don’t just patch over failing tape—this will only cause the problem to return.
Scrape off any crumbling or brittle joint compound around the crack. You want a stable, clean surface before applying new material.
If the tape is badly damaged or lifting, remove it entirely along the affected seam. It’s better to redo a small section properly than to apply a quick fix that won’t last.
Step 3: Sand the Area Smooth
Sanding helps create an even surface that allows new compound to adhere properly and blend seamlessly with the wall.
Once the loose material is removed, lightly sand the area to smooth rough edges. This helps the new compound adhere better.
Wipe away dust using a dry cloth or vacuum. Dust can weaken bonding if left behind.
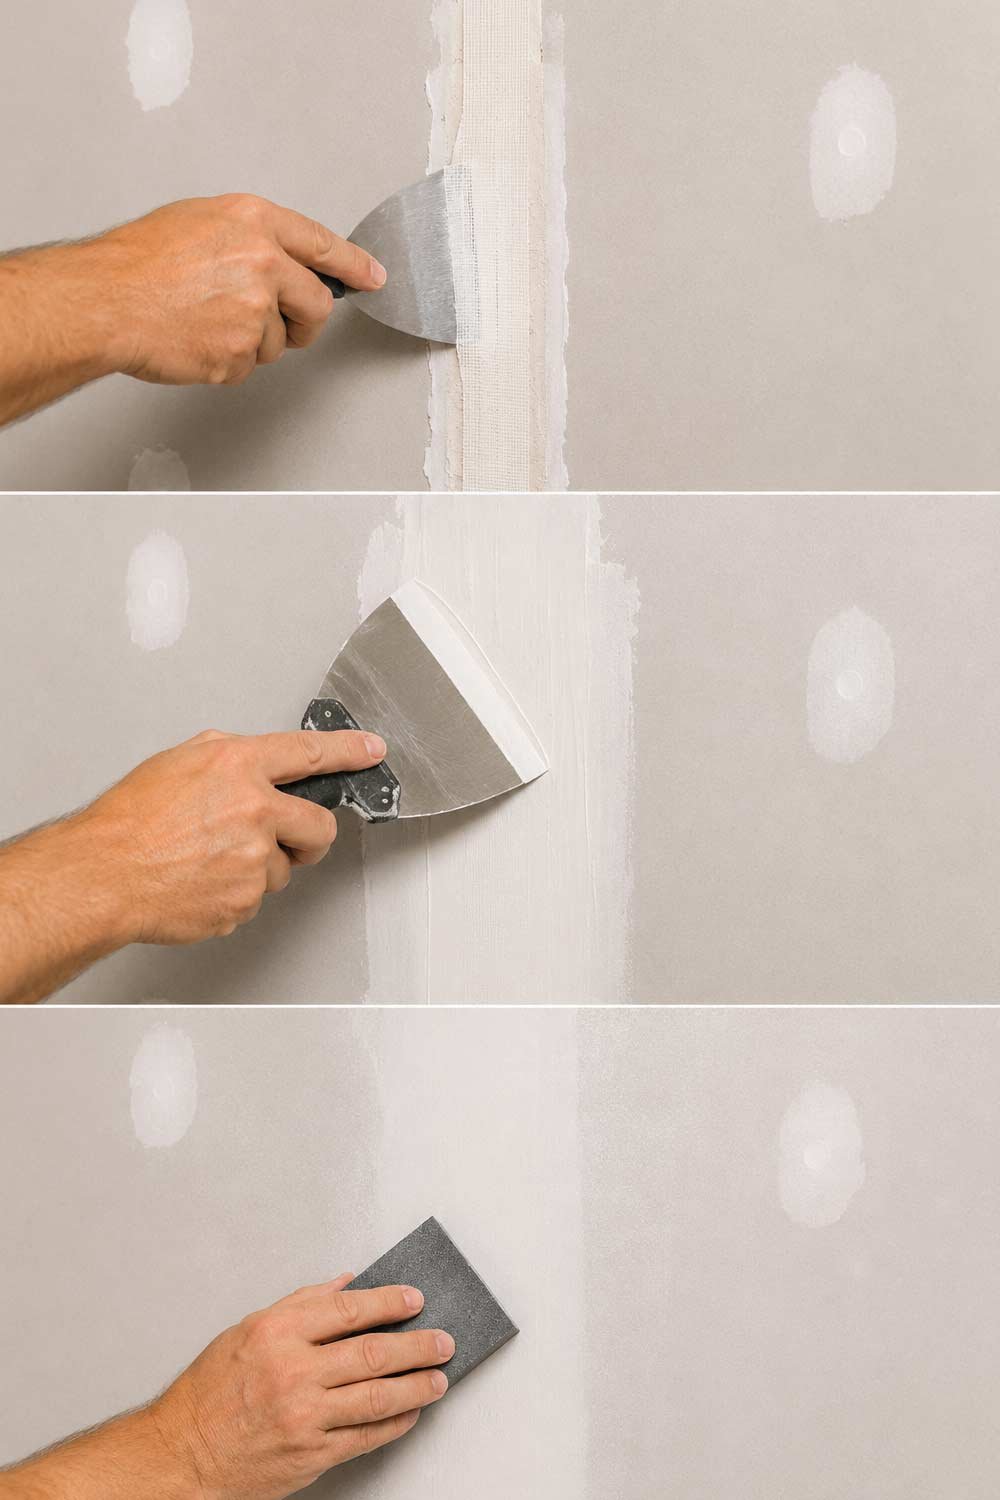
Step 4: Apply a Thin Layer of Joint Compound
Applying a base layer of compound prepares the surface for tape and ensures proper bonding.
Using a putty knife, apply a thin, even layer of joint compound over the crack or exposed seam. The goal here is not to build thickness but to create a smooth bonding surface.
Feather the edges outward so the compound blends into the surrounding wall.
Let this layer sit for a few minutes, but don’t wait for it to fully dry before applying tape if you’re doing a full replacement.
Step 5: Apply Drywall Tape
Applying tape correctly reinforces the seam and prevents future cracking when done properly.Now place the drywall tape over the seam.
If using paper tape
Proper application ensures strong adhesion and eliminates air bubbles that can cause future issues.
Press it gently into the wet compound using your putty knife, smoothing out air bubbles as you go.
If using fiberglass mesh tape
This type of tape is easier to apply but still requires firm pressure to ensure proper bonding.
Simply stick it over the seam—it’s self-adhesive—but still press it down firmly.
Make sure the tape is centered over the crack for full coverage.
Step 6: Cover with Joint Compound
Applying a proper layer of joint compound over the tape is essential to hide the seam and create a smooth, even surface ready for finishing.
Apply a second layer of joint compound over the tape. Use a wider knife for this step to help feather the edges smoothly.
The goal is to fully embed the tape so it becomes invisible under the surface. Don’t apply too much compound at once—thin layers are better because they dry faster and reduce sanding later.
Allow this layer to dry completely. Depending on humidity and thickness, this may take 6–24 hours.
Also Read:
Step 7: Sand Smooth
Sanding ensures that the repaired area blends seamlessly with the surrounding wall and prepares it for additional coats if needed.
Once dry, sand the area lightly using fine-grit sandpaper or a sanding sponge.
Be careful not to oversand, especially on edges, as this can expose the tape again. The surface should feel smooth and level with the rest of the wall.
Wipe away dust again before the next step.
Step 8: Apply a Second (and Possibly Third) Coat
Applying multiple thin layers of compound helps achieve a professional, invisible finish and ensures the repaired seam blends naturally with the wall.
For professional results, one coat is usually not enough.
Apply another thin layer of joint compound, extending slightly wider than the previous coat. This helps blend the repair into the wall so it won’t be visible after painting.
Let it dry and sand again.
If needed, apply a third coat for an even smoother finish. Each layer should be thinner than the last.
Step 9: Final Sanding and Inspection
Final sanding and inspection are crucial for identifying and correcting any imperfections before painting.
After the final coat dries, sand the area until it is completely smooth and flush with the wall.
Run your hand over the surface—if you can feel edges or ridges, continue sanding gently.
Good lighting is important here. Shine a light at an angle across the wall to spot imperfections.
Step 10: Prime the Repaired Area
Priming prepares the repaired surface for paint and ensures consistent color and finish across the wall.
Priming is often skipped, but it is essential.
Joint compound absorbs paint differently than drywall paper. Without primer, the repaired area may look dull or slightly different in color after painting.
Apply a coat of primer and let it dry fully.
Also Read:
How to Fix a Broken Window Frame? Complete Guide About Broken Window Frame Repair
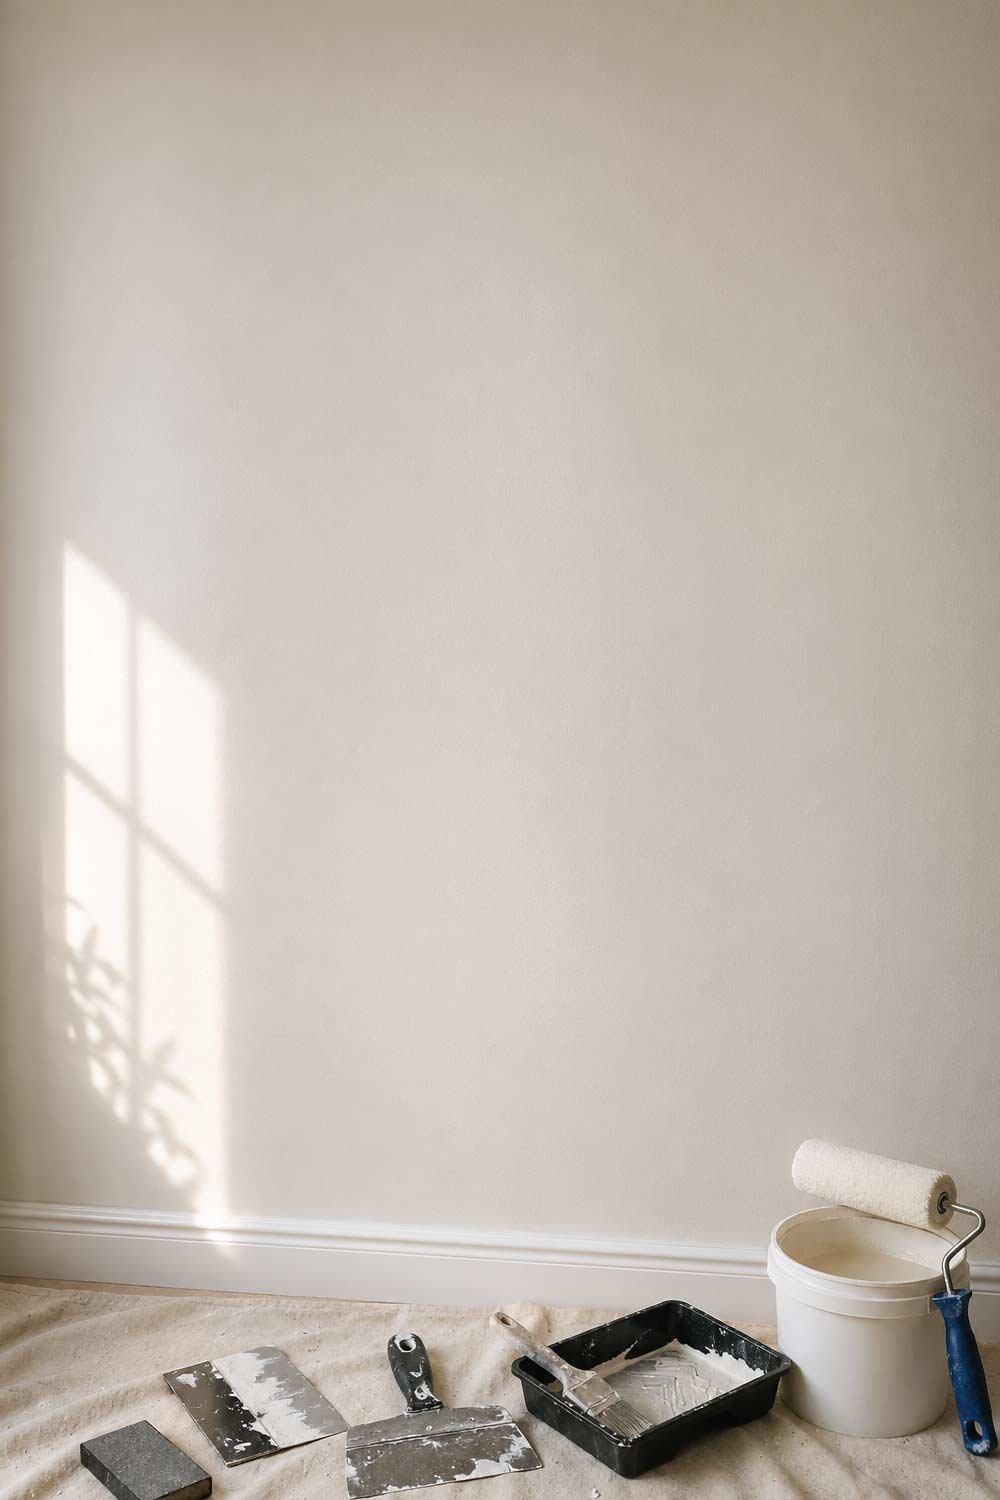
Step 11: Paint the Wall
Painting completes the repair process and restores the wall’s original appearance.
Once primed, repaint the area using matching wall paint.
For best results, paint slightly beyond the repaired section and blend it into the surrounding area. If possible, repaint the entire wall for a uniform finish.
Common Mistakes to Avoid
Avoiding common mistakes ensures your repair lasts longer and maintains a clean, professional appearance.
Even though this repair is simple, a few common mistakes can ruin the result:
1. Patching Over Loose Tape
Always remove damaged tape before repairing to prevent cracks from returning.
Never cover failing tape. It will always crack again.
2. Using Thick Layers of Mud
Thick applications can lead to longer drying times and increased risk of cracking.
Thick compound takes longer to dry and is more likely to crack.
3. Skipping Sanding Between Coats
Sanding between layers ensures a smooth finish and better adhesion for additional coats.
Each layer should be smooth before adding the next.
4. Not Using Primer
Primer is essential for even paint coverage and a consistent finish.
Skipping primer often leads to visible patch marks.
5. Rushing the Process
Patience is key for durable drywall repairs.
Drywall repair requires drying time. Rushing leads to weak repairs.
Also Read:
How to Fix Cracks in Ceiling? Complete Guide About Ceiling Cracks Repair
How to Prevent Drywall Tape from Cracking Again
Preventing future cracks is just as important as fixing the current issue. Proper maintenance and techniques can significantly extend the life of your drywall.
Fixing the crack is only part of the solution. Preventing future issues is just as important.
1. Control Indoor Humidity
Maintaining stable humidity levels reduces expansion and contraction in drywall materials.
Use ventilation or a dehumidifier in moisture-prone rooms.
2. Use High-Quality Materials
Better materials provide stronger bonding and improved long-term durability.
Good joint compound and tape make a big difference in long-term durability.
3. Allow Proper Drying Time During Installation
Proper drying ensures strong adhesion and prevents weak joints.
If you’re doing new drywall work, never rush drying between coats.
4. Reinforce High-Stress Areas
Certain areas of the home experience more movement and require additional reinforcement.
Corners, door frames, and ceiling joints often need extra care.
5. Avoid Excessive Structural Stress
Reducing vibrations and impacts helps maintain the integrity of drywall seams.
Repeated vibration or impact near walls can weaken seams over time.
Also Read:
Squeaky Door Hinges? Make Them Silent Instantly (Easy Fix Guide)
When to Call a Professional
While many drywall repairs are manageable as DIY projects, some situations require expert evaluation and tools to ensure proper and lasting results.
While most cracked drywall tape repairs are DIY-friendly, there are situations where you should consider professional help:
- Cracks keep reappearing in the same spot
- Large sections of wall are affected
- You notice wall bulging or sagging
- There may be underlying structural issues
In these cases, the problem may go beyond surface-level drywall damage.
Final Thoughts
Fixing cracked drywall tape is a manageable home repair project that doesn’t require advanced skills or expensive tools. The key to success is patience: properly removing damaged material, applying thin layers of compound, and allowing enough drying time between steps.
Once completed correctly, the repair should be virtually invisible and long-lasting. With proper preparation and care, your walls can look smooth and seamless again—just like new.