
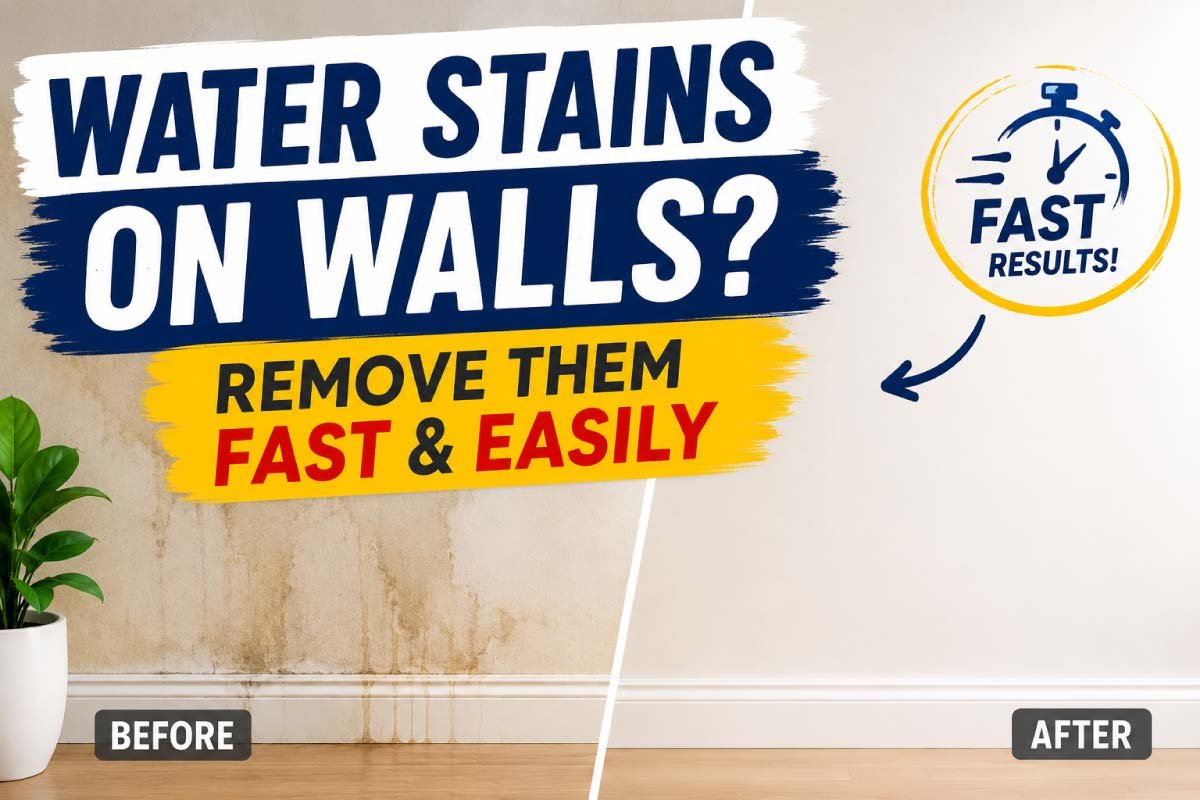
Water stains on walls are one of those household problems that appear quietly but instantly make a room look old, damp, and poorly maintained. Whether it’s a brownish ceiling patch, yellow marks near a window, or dark streaks running down a painted wall, these stains are usually a sign of hidden moisture issues. The good news is that in many cases, you can remove them quickly and restore your walls without expensive repairs.
This guide explains why water stains happen, how to remove them step by step, and how to stop them from coming back.
Why Water Stains Appear on Walls
Water stains on walls are a very common household issue that often indicates an underlying moisture problem. These stains may look minor at first, but they usually signal hidden damage inside walls, ceilings, or plumbing systems. Understanding why they appear helps in applying the right and permanent solution.
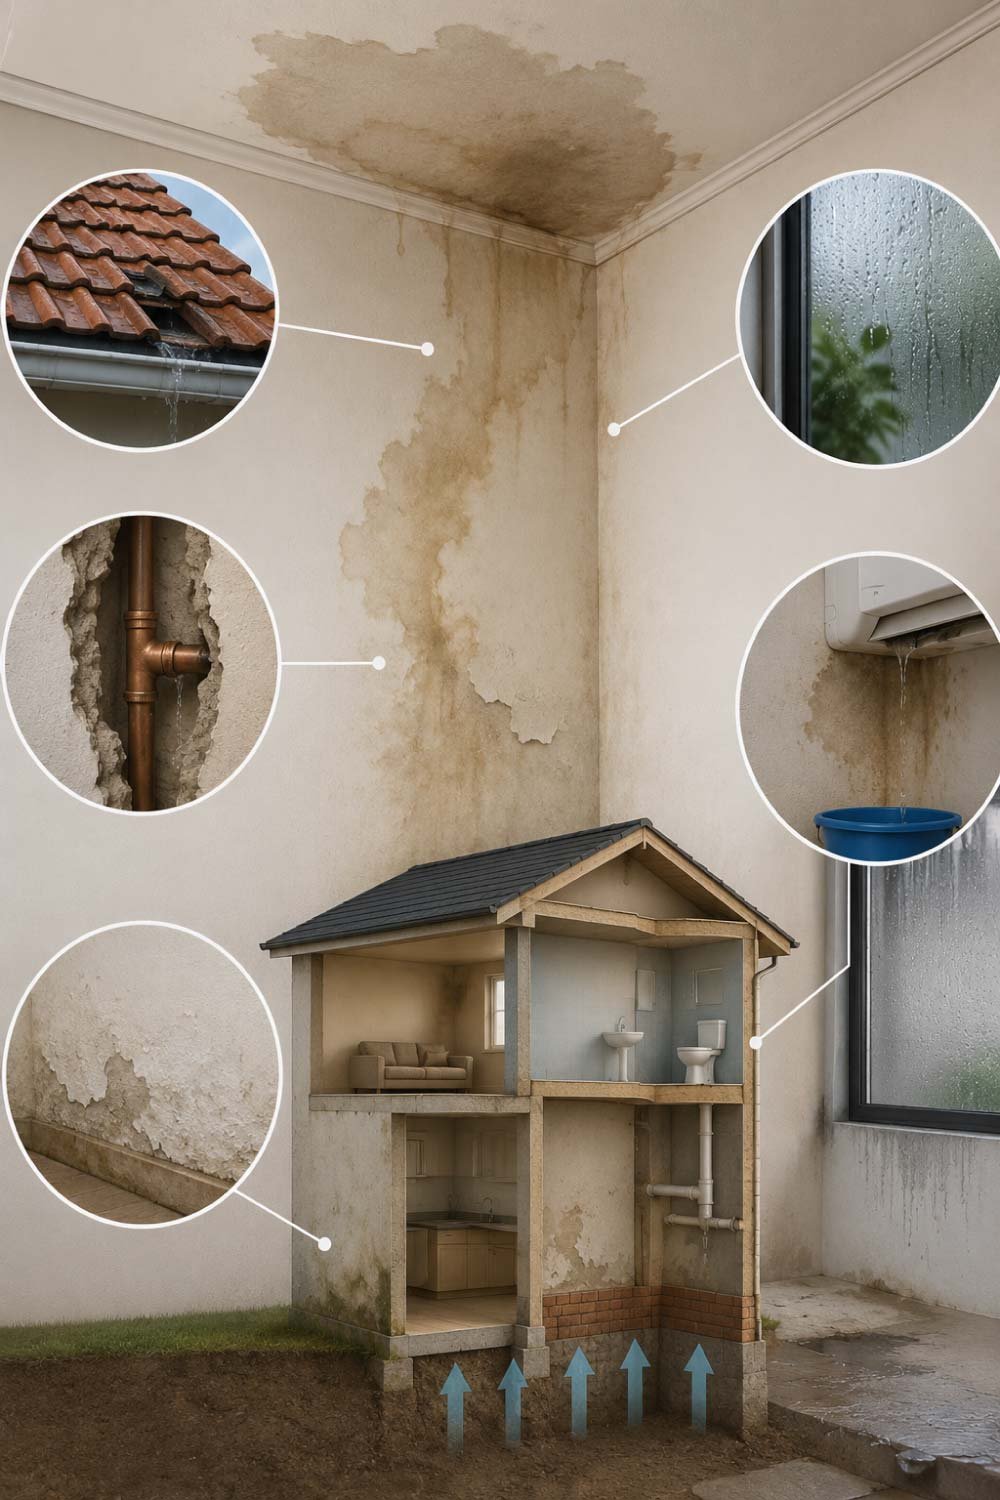
Before fixing the problem, it’s important to understand its cause. Water stains don’t just appear randomly—they are usually a symptom of moisture intrusion.
1. Roof Leaks
One of the most common causes is a leaking roof. Rainwater slowly seeps through cracks, weak shingles, or damaged flashing, leaving brown or yellow patches on ceilings and upper walls. Over time, these stains can spread and weaken wall paint and plaster if not repaired quickly.
2. Plumbing Leaks
Hidden pipes inside walls can leak over time. Even a small drip from a pipe joint can create a large stain if ignored. These leaks are often hard to detect because they happen behind walls, but they continuously spread moisture and damage paint layers.
3. Condensation
Rooms with poor ventilation, like bathrooms and kitchens, often develop moisture buildup. This leads to damp patches and discoloration. When warm air meets cold surfaces, water droplets form and slowly damage the wall surface over time.
4. Overflow or Spills
Sometimes water from overflowing tanks, AC units, or even accidental spills can soak into walls and leave marks. If not dried quickly, the moisture penetrates deep into paint layers, leaving visible stains and sometimes peeling surfaces.
5. Rising Damp
In older buildings, moisture from the ground can travel upward through walls, causing long-term staining and paint damage. This usually happens when there is no proper damp-proofing layer in the structure, allowing water to rise through capillary action.
Understanding the cause is important because removing the stain without fixing the source means it will come back again.
Types of Water Stains on Walls
Water stains can appear in different forms depending on the source and duration of moisture exposure. Some are fresh and light, while others are deep-set and indicate long-term damage. Identifying the type correctly helps you choose the most effective cleaning and repair method.
Not all water stains look the same. Identifying the type helps you choose the right cleaning method.
- Yellow or Brown Stains: Usually from roof leaks or aged water damage. These stains develop slowly and become darker over time if moisture continues.
- Dark Grey or Black Marks: Often caused by mold or long-term dampness. These may also indicate poor ventilation and require deeper cleaning.
- Light Rings or Spots: Fresh leaks or condensation. These are usually easier to clean if treated quickly before they spread.
- Peeling Paint with Stains: Severe moisture exposure behind the wall. This indicates serious water damage that may require repainting and repair.
Tools and Materials You’ll Need
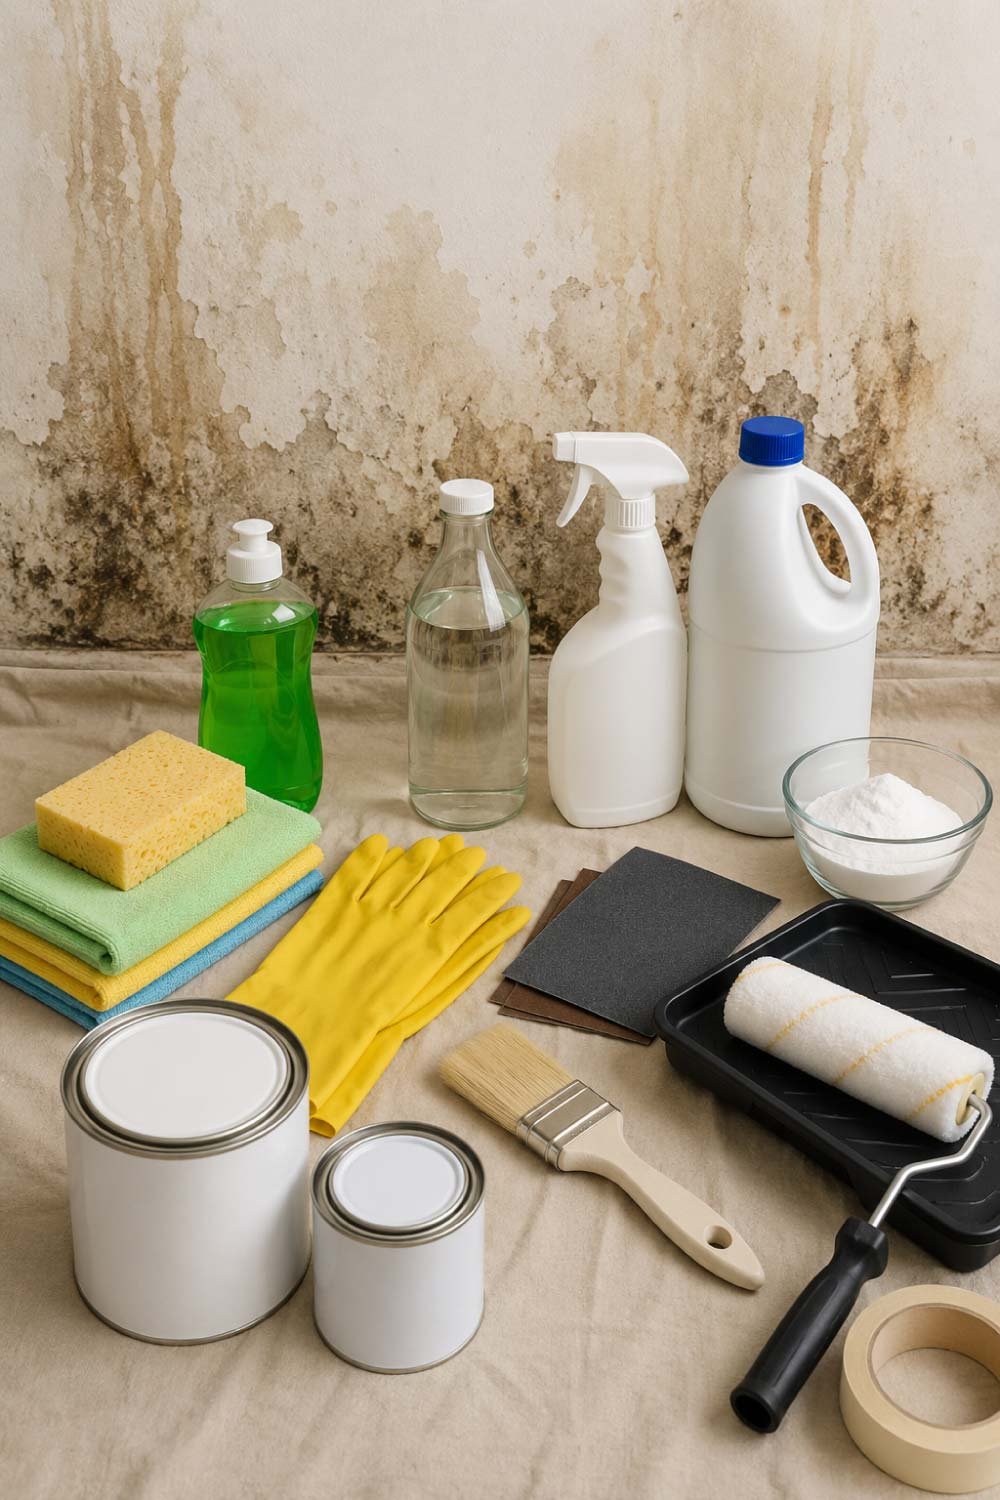
Before starting any repair or cleaning work, it is important to gather all necessary tools and materials. Having everything ready saves time and ensures a smooth, uninterrupted cleaning process. Proper preparation also helps you handle both light stains and more stubborn water damage effectively.
Before starting the cleaning process, gather the following:
- Clean cloth or sponge – used for wiping and initial cleaning of stains
- Mild detergent or dish soap – helps remove surface dirt and light marks
- White vinegar – natural cleaner for stubborn stains and mineral deposits
- Baking soda (optional) – useful for deep cleaning and tough stains
- Spray bottle – for easy and even application of cleaning solutions
- Bleach – effective for mold and severe discoloration (use carefully)
- Sandpaper (fine grit) – smooths rough or damaged wall areas
- Primer – prepares the wall before repainting and improves paint adhesion
- Paint (matching your wall color) – restores the original wall appearance
- Paintbrush or roller – for applying paint evenly
- Protective gloves – ensures safety while handling chemicals
Also Read:
Step-by-Step Guide to Remove Water Stains
Removing water stains requires a proper step-by-step approach. Rushing the process or skipping important stages can lead to recurring stains. Following the correct method ensures long-lasting results and restores the wall’s original clean appearance.
Step 1: Fix the Source First
This is the most important step. If you skip it, the stain will return no matter how well you clean it.
- Check for roof leaks – inspect shingles, flashing, and ceiling corners
- Inspect plumbing lines – look for hidden pipe leaks inside walls
- Look for cracks or damp spots – identify any structural moisture entry points
- Repair the source of moisture – fix leaks permanently before cleaning
Only move to cleaning after the area is completely dry.
Step 2: Dry the Affected Area
Proper drying is essential before any cleaning or repair work begins. Moisture left in the wall can reduce the effectiveness of cleaning agents and cause stains to reappear. Drying also ensures better paint adhesion and prevents future damage.
Why this matters:
- Wet walls make cleaning less effective
- Paint or primer won’t stick properly
- Moisture can spread the stain further
Make sure the wall feels completely dry before continuing.
Step 3: Clean Light Stains with Soap Solution
Mild water stains can often be removed with simple household cleaning solutions. This step is ideal for early-stage stains that have not deeply penetrated the wall surface. Gentle cleaning helps restore the wall without damaging paint or texture.
How to do it:
- Mix warm water with a few drops of mild detergent
- Dip a sponge into the solution
- Gently scrub the stained area
- Wipe with a clean damp cloth
This removes surface dirt and light discoloration.
Step 4: Use Vinegar for Stubborn Marks
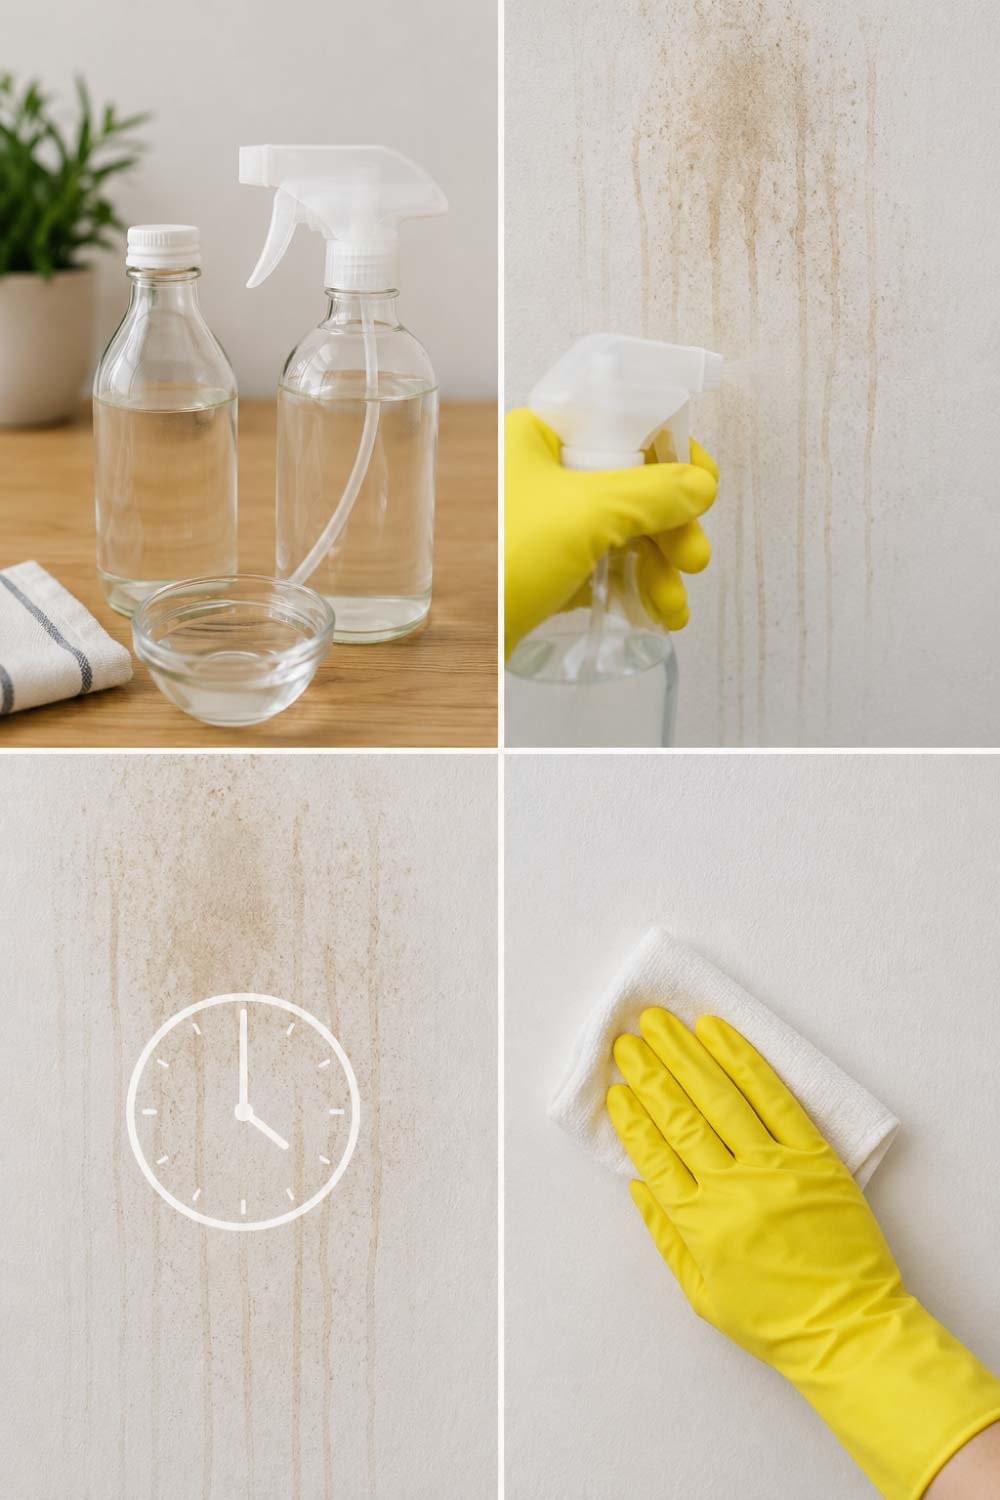
White vinegar is a powerful natural cleaner that helps break down mineral deposits and mild mold stains. It is safe for most painted surfaces and works effectively without harsh chemicals, making it a great option for deeper cleaning.
Steps:
- Mix equal parts vinegar and water in a spray bottle
- Spray directly on the stain
- Let it sit for 10–15 minutes
- Wipe with a clean cloth
Vinegar helps break down stubborn water marks without damaging paint.
Step 5: Apply Baking Soda Paste (For Tough Stains)
When stains are more stubborn, baking soda provides a slightly abrasive cleaning action that helps lift deep marks. It is especially useful for older stains that have settled into the wall surface but should be used gently to avoid paint damage.
How to prepare:
- Mix baking soda with a small amount of water
- Create a thick paste
Application:
- Apply paste on the stain
- Gently scrub using a sponge or soft brush
- Leave for 10 minutes
- Wipe clean with water
This method is slightly abrasive, so be gentle to avoid damaging paint.
Step 6: Use Bleach for Mold-Related Stains
Mold-related water stains are more serious than regular discoloration because they can affect both wall appearance and indoor air quality. These stains usually appear dark, black, or patchy and may produce a musty smell. In such cases, bleach becomes an effective solution to disinfect and restore the surface safely.
If the water stain is dark, black, or has a musty smell, mold may be present.
Important safety note: Wear gloves and ensure proper ventilation.
Steps:
- Mix 1 part bleach with 3 parts water
- Apply using a sponge
- Let it sit for 5–10 minutes
- Wipe clean thoroughly
Bleach kills mold spores and removes discoloration effectively.
Also Read:
Step 7: Sand the Surface (If Needed)
Sometimes water damage affects not just the stain but also the paint and wall texture. In such cases, simple cleaning is not enough. Light sanding helps remove damaged paint layers and prepares the surface for smooth refinishing, ensuring a clean and even base for the next steps.
If the stain has damaged the paint layer:
- Use fine-grit sandpaper
- Lightly sand the stained area
- Remove loose or flaking paint
- Wipe off dust with a dry cloth
This creates a smooth surface for repainting.
Step 8: Apply Primer
Primer plays a critical role in permanently covering water stains and preventing them from reappearing through fresh paint. It acts as a sealing layer between the wall and paint, ensuring better adhesion and long-lasting results, especially in areas previously affected by moisture damage.
Why primer is important:
- Blocks stains from bleeding through
- Improves paint adhesion
- Creates a uniform surface
How to apply:
- Use a brush or roller
- Apply a thin, even coat
- Let it dry completely
For heavy stains, a second coat may be necessary.
Step 9: Repaint the Wall
Repainting is the final step in restoring the wall’s original look after cleaning and priming. It not only covers repaired areas but also blends everything seamlessly with the surrounding surface. Proper painting techniques ensure a smooth, fresh, and visually consistent finish.
Once the primer is dry, repaint the area using matching wall color.
Tips for best results:
- Use high-quality paint
- Apply 2 coats if needed
- Blend edges carefully to match surrounding area
After painting, the wall should look as good as new.
Natural DIY Remedies (Quick Fix Options)
Before using strong cleaning chemicals, many homeowners prefer simple natural remedies. These quick fixes are helpful for minor stains and early-stage discoloration. While not permanent solutions, they are safe, affordable, and effective for light maintenance and temporary improvement.
If you want simple home solutions before using chemicals:
- Lemon Juice – Works like vinegar for light stains and leaves a fresh smell.
- Toothpaste – Non-gel white toothpaste can lighten small spots when rubbed gently.
- Salt Paste – Salt mixed with water can help absorb minor moisture stains.
These are temporary fixes but useful for small stains.
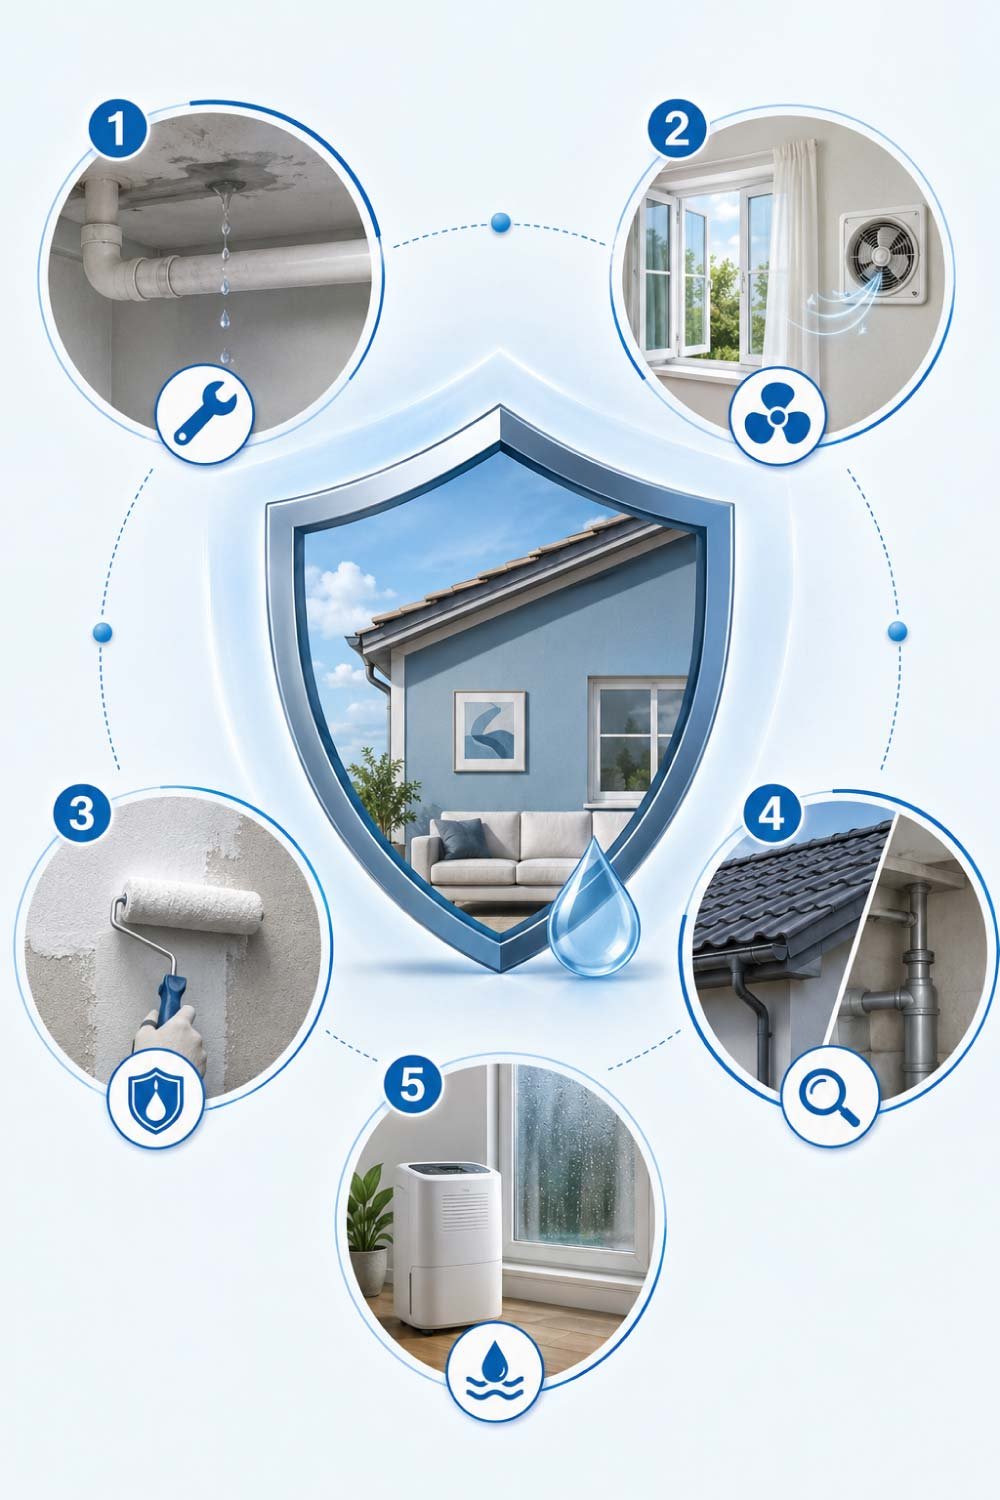
How to Prevent Water Stains in the Future
Preventing water stains is just as important as removing them. Without proper maintenance, stains can reappear and cause repeated damage. By taking preventive measures, you can protect your walls from moisture issues and avoid costly repairs in the long run.
1. Fix Leaks Immediately
Even small leaks should never be ignored. Timely repair of roofs and pipes prevents moisture from spreading and forming stains on walls and ceilings.
2. Improve Ventilation
- Open windows regularly
- Use exhaust fans in bathrooms and kitchens
Good airflow reduces humidity buildup and prevents condensation on walls.
3. Waterproof Your Walls
Apply waterproof coatings or sealants in moisture-prone areas. This creates a protective barrier that stops water from penetrating the wall surface.
4. Inspect Roof and Pipes Regularly
Routine checks can prevent hidden damage. Early detection of cracks or leaks helps avoid major water-related issues later.
5. Control Indoor Humidity
Use dehumidifiers if necessary, especially in rainy seasons. Maintaining balanced humidity levels reduces the risk of damp patches and mold growth.
Common Mistakes to Avoid
Many people try to fix water stains quickly but make mistakes that worsen the problem or cause it to return. Understanding these errors helps ensure a proper and long-lasting repair without damaging the wall further.
- Painting over stains without cleaning
- Ignoring the root cause of moisture
- Using too much bleach (can damage paint)
- Skipping primer before repainting
- Scrubbing too hard and damaging wall texture
Avoiding these mistakes ensures a long-lasting repair.
Also Read:
When to Call a Professional
Some water stain problems are too complex for simple DIY fixes and may indicate serious structural or plumbing issues. In such cases, professional help is necessary to prevent further damage and ensure safe, effective repair work.
Sometimes water stains indicate serious structural issues. You should call an expert if:
- Stains keep returning after cleaning
- Large areas of the wall are affected
- There is visible mold growth
- You suspect hidden plumbing leaks
Professionals can identify and fix deeper problems safely.
Final Thoughts
Water stains on walls may look worrying, but they are completely manageable if handled properly. The key is to act quickly, identify the cause, and use the right cleaning method. From simple vinegar solutions to full repainting with primer, there are multiple ways to restore your walls without spending too much money.
More importantly, preventing moisture buildup is the real long-term solution. With proper care and regular maintenance, you can keep your walls clean, fresh, and stain-free for years.
If you follow the steps above carefully, even stubborn stains can be removed fast—and your home will look bright and well-maintained again.