
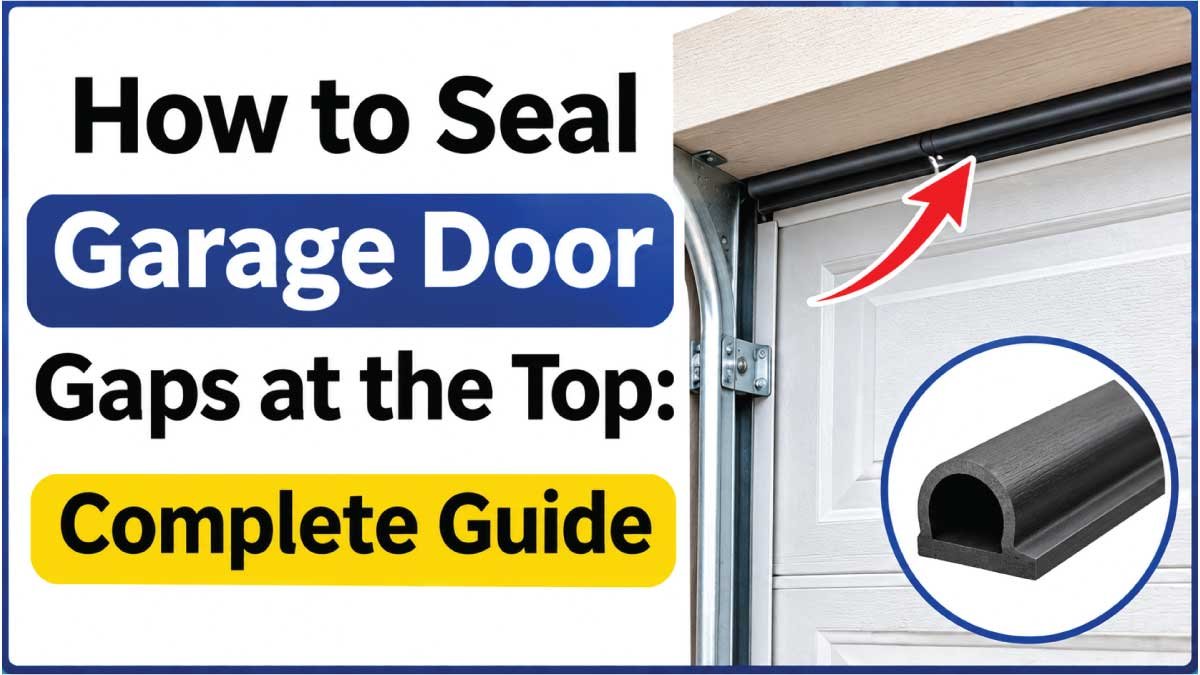
A gap along the top of a garage door can allow rainwater, dust, insects, cold air, and outdoor debris to enter the garage. Even a small opening can become frustrating during heavy rain or windy weather. The problem may be caused by worn weatherstripping, an uneven door, loose hardware, or an incorrectly adjusted opener.
Sealing the gap properly starts with identifying why it exists. Replacing the top weather seal may solve a simple problem, but gaps caused by door alignment or damaged components require a different approach. Using the wrong sealing method can prevent the door from closing correctly or interfere with its operation.
This guide explains how to inspect a garage door’s top edge, identify common causes of gaps, choose suitable sealing materials, and install a replacement top seal. It also covers practical ways to address uneven openings, prevent water intrusion, and maintain a consistent seal without damaging the door.
Why Is There a Gap at the Top of a Garage Door?
A gap at the top of a garage door usually develops when the door does not meet the header evenly or the weatherstripping can no longer fill the space. Inspecting the entire top edge helps determine whether the problem is related to the seal, door alignment, or hardware.
1. Worn or Damaged Top Weatherstripping
The top weatherstrip is designed to close the space between the garage door and the frame. Over time, rubber or vinyl can become brittle, flattened, cracked, or torn. When this happens, it may no longer make consistent contact with the door.
Sunlight, temperature changes, moisture, and repeated door movement can accelerate wear. If the seal looks damaged or leaves visible openings along the top edge, replacing it is usually the most straightforward solution.
2. Incorrectly Installed Top Seal
A top weatherstrip that was installed too high, too low, or unevenly may fail to cover the opening. The seal might also have been cut too short, leaving uncovered spaces near the corners.
This problem can occur after replacing a garage door seal or installing a new door. Check whether the weatherstrip sits evenly across the header and extends far enough to cover the full width of the door.
3. Uneven Garage Door Alignment
Sometimes the weatherstrip is in good condition, but the door does not close evenly against the opening. One side may sit closer to the header while the opposite side leaves a noticeable gap.
Possible causes include an uneven door, damaged panels, loose track supports, or problems with the door’s installation. Alignment issues should be inspected carefully because garage doors are heavy and operate under spring tension.
4. Incorrect Garage Door Opener Settings
A garage door opener controls how far the door travels when opening and closing. If its closing travel is incorrectly set, the door may stop before reaching its intended closed position.
This can leave a gap at the top or prevent the door from making proper contact with the weather seal. However, do not change opener settings simply to force a door against the header. First confirm that the door moves freely and that the opening and hardware are in good condition.
5. Damaged or Bent Garage Door Panels
A bent or damaged top panel may not sit evenly against the header. Even a small deformation can create an opening that a standard weatherstrip cannot completely cover.
Look for dents, creases, separated panel sections, or visible damage around the top edge. A damaged panel may need professional repair or replacement rather than additional sealing material.
6. Uneven or Damaged Garage Door Frame
The top frame, also called the header, provides the surface where the top weatherstrip is attached. If the wood is warped, damaged, or uneven, the seal may not sit correctly.
Check for soft wood, cracks, loose trim, and signs of water damage. If the header itself is deteriorating, repair the underlying surface before installing new weatherstripping.
Tools and Materials Needed to Seal a Top Garage Door Gap
Having the correct materials makes the repair easier and helps produce a consistent seal. The exact supplies depend on the size of the opening and the type of weatherstrip already installed.
| Tool or Material | Purpose |
|---|---|
| Replacement top weatherstrip | Closes the gap along the top edge |
| Measuring tape | Measures the garage door width |
| Utility knife or scissors | Cuts weatherstripping to length |
| Drill or screwdriver | Installs compatible fasteners |
| Exterior-grade screws | Secures the weatherstrip or retainer |
| Cleaning cloth | Removes dirt from the installation surface |
| Mild detergent | Cleans the header and door edge |
| Ladder | Provides access to the top frame |
| Safety glasses | Protects eyes during installation |
Choose a weatherstrip designed for your garage door type. Some products use a flexible rubber flap, while others have a vinyl or foam profile that attaches to a retainer. Check the manufacturer’s installation instructions before purchasing replacement material.
How to Seal Garage Door Gaps at the Top
The best method depends on whether the gap comes from worn weatherstripping or a problem with the door itself. Follow these steps to inspect the opening and install a suitable seal.
Step 1: Close the Garage Door and Inspect the Gap
Begin by closing the garage door completely. Stand inside the garage and examine the space between the top edge of the door and the header.
Look across the full width rather than focusing on only the most visible opening. Notice whether the gap is uniform or larger on one side. Also check whether the existing weatherstrip touches the door when it is closed.
A consistent opening along the entire top edge often points to a missing, worn, or incorrectly positioned seal. A gap that changes significantly from one side to the other may indicate an alignment issue.
Keep your hands away from hinges, rollers, cables, springs, and other moving components.
Step 2: Measure the Width of the Garage Door
Use a measuring tape to determine the width of the top edge where the weatherstrip will be installed.
Measure from one side of the opening to the other. If the existing retainer is shorter than the door, measure the required replacement length separately.
Write down the measurement before purchasing the seal. A weatherstrip that is too short can leave exposed corners, while one that is excessively long may bunch up or interfere with the installation.
It is generally better to purchase a product that can be trimmed to the exact required length.
Step 3: Remove the Old Weatherstripping
If the existing top seal is cracked, flattened, or detached, remove it carefully.
Depending on the design, the weatherstrip may be held by screws, clips, adhesive, or a retaining channel. Remove the fasteners or release the material according to the product’s installation method.
Avoid pulling aggressively if the seal is attached to a metal retainer or painted wood. Excessive force can damage the mounting surface.
If the retainer is bent, loose, or badly corroded, it may also need repair or replacement before installing a new seal.
Step 4: Clean the Header and Installation Surface
After removing the old seal, clean the area where the replacement will be installed.
Use a cloth and mild detergent to remove dust, grease, loose dirt, and old adhesive residue. Allow the surface to dry completely before proceeding.
A clean mounting surface helps adhesive-backed products attach properly and makes it easier to position screw-mounted retainers.
Inspect the wood or metal underneath the old weatherstrip. If you find rot, corrosion, or significant damage, address it before continuing.
Step 5: Choose the Correct Top Weatherstrip
Select a weatherstrip that matches the size of the opening and the garage door’s installation requirements.
Common options include:
- Vinyl top seal: A flexible option that helps close small and moderate openings.
- Rubber top seal: Provides flexibility and can maintain contact as the door moves.
- Foam weatherstripping: Useful for certain small gaps, depending on the product’s intended application.
- Adjustable top seal: Allows the seal position to be changed to improve contact with the closed door.
- Retainer-style weatherstrip: Uses a mounting channel to hold replaceable sealing material.
For larger or uneven openings, an adjustable top seal may be more appropriate than a thin adhesive strip. Check the product’s recommended gap range before installation.
Step 6: Position the New Weatherstrip
Hold the replacement seal against the header or existing retainer, following the manufacturer’s instructions.
The flexible sealing edge should meet the closed garage door evenly. It should not be positioned so tightly that it bends the top panel or prevents the door from closing.
If the product uses a retainer, position the retainer straight across the opening. Check that it covers the full width and that its mounting points align with suitable support.
Do not attach the seal to moving door components or place fasteners where they could interfere with the door’s operation.
Step 7: Secure the Weatherstrip
Once the seal is correctly positioned, secure it using the fasteners or adhesive recommended by the manufacturer.
For screw-mounted retainers, use compatible screws and tighten them evenly. Avoid overtightening, which can distort the retainer or damage the mounting surface.
If the product is adhesive-backed, apply it only to a clean, dry surface and follow the recommended temperature and curing instructions.
Work gradually from one end to the other. This helps prevent wrinkles, uneven positioning, and uncovered sections.
Step 8: Trim Excess Material
After securing the weatherstrip, check both ends for excess material.
Use a suitable utility knife or scissors to trim the seal according to the product instructions. Keep the cut straight and avoid removing too much material.
The weatherstrip should cover the entire width of the opening without bunching at either end. Make sure the corners are also protected against drafts and water entry.
Step 9: Test the Garage Door
Stand clear of the door’s moving parts and operate it using the normal controls. Watch the top edge as the door closes.
The new seal should make consistent contact without preventing the door from reaching its normal closed position. Listen for unusual noises and watch for any signs that the seal is catching or interfering with movement.
If the door reverses, struggles, or does not close correctly, stop using it and investigate the cause. Do not disable the opener’s safety features or force the door closed.
Step 10: Check for Remaining Gaps
After the door is fully closed, inspect the top edge again.
Look for small openings near the corners, uneven contact, or sections where the seal has folded away from the door. If the gap remains, check whether the weatherstrip needs repositioning or whether the door or header is uneven.
A properly installed seal should reduce unwanted air and water entry without putting excessive pressure on the garage door.
Also Read:
How to Fix Squeaky Door Hinges: A Complete Step-by-Step Guide
How to Fix Different Types of Gaps at the Top
Not every top gap requires the same repair. Identifying the shape and location of the opening helps you choose the right solution.
Gap Across the Entire Top Edge
If the opening runs across almost the entire width of the garage door, the existing weatherstrip may be missing, worn, or incorrectly installed.
Inspect the full seal and replace it with a compatible top weatherstrip. An adjustable retainer may help when the opening is slightly larger than a standard flexible seal can cover.
If the door itself is consistently stopping short of the header, have the door and opener operation inspected before changing the seal position.
Gap at One Top Corner
A gap at only one corner may indicate uneven contact between the door and the frame. Check the weatherstrip at that location for damage, incorrect positioning, or a missing section.
Also inspect the top panel and header for visible distortion. If the door appears crooked or one side sits noticeably lower, the issue may involve the tracks, rollers, or door alignment.
Do not attempt to adjust cables, springs, or loaded brackets yourself. These components can cause serious injuries.
Small Gap Between the Seal and Door
If the weatherstrip is in good condition but does not quite touch the closed door, it may need repositioning.
Some top seal systems allow the retainer to be adjusted slightly. Follow the manufacturer’s instructions and make sure the seal does not press excessively against the panel.
For a small opening, a compatible flexible rubber or vinyl profile may provide better contact than a thick, rigid material.
Large Gap Above the Garage Door
A large opening may be caused by an incorrectly sized door, a damaged header, an installation problem, or significant misalignment.
A thin adhesive weatherstrip is unlikely to provide a durable repair. First determine whether the opening is caused by the frame, door panels, or operating hardware.
A professional garage door technician can assess whether the door needs realignment, structural repair, or replacement components.
Gap That Appears Only During Wind or Rain
If water or dust enters only during strong weather, inspect the seal for loose sections and gaps near the corners.
Wind can push rain through openings that may not be obvious during dry conditions. Check the exterior trim, top seal, and surrounding frame for cracks or missing material.
Replace damaged weatherstripping and repair any deteriorated exterior trim. If water continues to enter, investigate the source rather than covering the opening with additional layers of sealant.
Also Read:
How to Fix a Garage Door That Won’t Open: A Complete DIY Guide
Can You Use Foam or Caulk to Seal a Garage Door Gap at the Top?
Foam and caulk can be useful in certain situations, but they are not always suitable for sealing the space between a moving garage door and its frame.
Using Foam Weatherstripping
Foam weatherstripping can help close small openings around stationary parts of the garage door frame. Some products are designed for compression and can provide a flexible barrier.
However, ordinary foam strips may flatten, peel away, or deteriorate with repeated contact. Choose a product specifically intended for garage door or exterior weather-sealing applications.
Avoid installing thick foam that prevents the door from closing properly.
Using Exterior Caulk
Exterior-grade caulk is useful for sealing stationary cracks between the header and surrounding trim or between fixed frame components.
It should not be applied across the moving gap between the garage door and the header. Caulk can restrict door movement, crack as the door operates, or interfere with the weatherstrip.
Use it only on fixed joints where the product is appropriate.
Using Expanding Spray Foam
Expanding spray foam can fill certain stationary construction gaps around the garage opening. However, it is generally not a suitable replacement for a flexible top weatherstrip.
Excess foam can expand into unwanted areas, interfere with door components, or make future repairs difficult.
If the gap is between the moving door and the header, use a compatible weather seal instead.
Also Read:
How to Fix a Garage Door Sensor: A Complete Step-by-Step Guide
Common Mistakes to Avoid When Sealing Garage Door Gaps
A repair can fail if the wrong materials are used or the underlying problem is ignored. Avoid these common mistakes.
1. Using a Seal That Is Too Thick
An excessively thick weatherstrip can prevent the door from closing normally. It may also place unnecessary pressure on the top panel and opener.
Choose a seal designed for the actual gap size. The material should compress enough to provide contact without obstructing normal operation.
2. Ignoring Door Alignment Problems
Replacing the weatherstrip will not correct a crooked door or damaged track system.
If the gap is significantly larger on one side, investigate the alignment before installing another seal. A technician should inspect problems involving cables, springs, rollers, or track supports.
3. Covering the Gap With Multiple Layers
Adding several strips of foam or rubber may seem like an easy solution, but it can create uneven pressure and interfere with closing.
Use one suitable weatherstrip whenever possible. If the opening is too large for standard products, identify the underlying cause and choose an appropriate repair.
4. Installing Weatherstripping on a Dirty Surface
Dust, grease, moisture, and loose paint can prevent adhesive-backed seals from attaching properly.
Clean and dry the installation surface before applying the new material. For screw-mounted products, check that the mounting surface is strong enough to hold the fasteners.
5. Adjusting Garage Door Springs Without Experience
Garage door springs and cables operate under high tension. Incorrect adjustments can cause serious injury or allow the door to fall unexpectedly.
Never loosen spring hardware, bottom brackets, or cable connections to correct a top gap. Have a qualified technician inspect these components when alignment or balance problems are suspected.
How Much Does It Cost to Seal a Garage Door Gap at the Top?
The cost depends on the type of weatherstrip, the width of the opening, and whether the repair involves only a seal or more extensive door work.
| Repair Type | Approximate Cost in USD |
|---|---|
| Basic foam weatherstripping | $5–$15 |
| Vinyl or rubber top seal | $10–$35 |
| Adjustable top seal kit | $20–$60 |
| Replacement retainer | $15–$50 |
| DIY cleaning and installation supplies | $5–$20 |
| Professional weatherstrip installation | $75–$200 |
| Minor professional adjustment or repair | $75–$250 |
| Larger panel or structural repair | $150–$500+ |
These are general estimates, not fixed prices. Actual costs vary by door size, product quality, labor rates, and local availability. A damaged panel, warped header, or track problem can make the repair more expensive than simply replacing the weatherstrip.
How to Prevent Gaps From Returning
Regular inspection helps keep the top weatherstrip in good condition and makes it easier to identify problems before they become expensive.
Inspect the Weatherstrip Regularly
Check the top seal every few months for cracks, flattening, loose sections, and missing material. Replace it when it no longer makes consistent contact with the closed door.
Keep the Header Clean
Remove dirt, cobwebs, and debris from the header and surrounding trim. A clean surface helps weatherstripping remain properly attached and makes damage easier to notice.
Check the Door’s Closing Position
Observe the door as it closes. It should move smoothly and reach its normal closed position without unusual resistance, reversing, or leaving an unexplained opening.
If the door begins behaving differently, arrange an inspection instead of trying to compensate by adding thicker weatherstripping.
Protect the Exterior Frame
Inspect the exterior trim and header for peeling paint, cracks, moisture damage, or deteriorating wood. Repair these areas before water reaches the underlying structure.
Replace Damaged Seals Promptly
A small tear in the weatherstrip can gradually become a larger opening. Replacing damaged material early helps prevent drafts, dust, insects, and rainwater from entering the garage.
When Should You Call a Professional?
Some top-gap problems are simple weatherstripping repairs, but others involve components that should only be handled by an experienced technician.
Contact a garage door professional if:
- The door looks crooked or sits unevenly in the opening.
- The gap remains large after replacing the weatherstrip.
- The top panel is bent, cracked, or separating.
- The tracks or rollers appear damaged or out of position.
- The door reverses, struggles, or makes unusual noises.
- The opener cannot close the door normally.
- You notice loose cables, damaged springs, or unusual movement.
- The header or surrounding frame has significant structural damage.
Garage doors are heavy, and their spring systems store considerable energy. A technician can inspect the door’s alignment, balance, tracks, and operating hardware without exposing you to unnecessary risk.
Conclusion
Sealing garage door gaps at the top helps reduce drafts, dust, insects, and rainwater entering the garage. In many cases, the solution is to remove worn weatherstripping, clean the mounting surface, and install a suitable replacement seal. Measuring carefully and positioning the new material evenly are important for achieving a consistent result.
However, not every opening is caused by damaged weatherstripping. A crooked door, bent panel, uneven header, or opener problem may require a different repair. Adding thicker foam or multiple layers of sealing material will not necessarily solve these issues and may interfere with normal door operation.
Inspect the full top edge before choosing a repair method. Use flexible weatherstripping for the moving gap and reserve caulk or expanding foam for appropriate stationary openings. If the door is misaligned or its springs, cables, or tracks appear damaged, contact a qualified technician. A correctly sealed and properly operating garage door provides better protection while maintaining safe, reliable movement.
Frequently Asked Questions
1. What Is the Best Way to Seal a Gap at the Top of a Garage Door?
The best solution for most small or moderate top gaps is a compatible rubber or vinyl garage door weatherstrip. It should be installed evenly across the header so its flexible edge meets the closed door. If the opening is caused by misalignment or a damaged panel, correct that problem before replacing the seal.
2. Why Is There a Gap Between My Garage Door and the Header?
A gap can develop because the top weatherstrip is worn, the door is incorrectly aligned, the header is uneven, or the opener is not allowing the door to reach its normal closed position. Inspect the seal and door first. If the gap is uneven or unusually large, professional inspection may be necessary.
3. Can I Use Foam Tape to Seal the Top of a Garage Door?
Foam tape can work for certain small openings if it is designed for exterior use and repeated compression. However, ordinary foam tape may flatten or detach over time. A garage door-specific rubber or vinyl seal is usually a better choice for the moving gap between the door and the header.
4. Should a Garage Door Top Seal Touch the Door?
Yes. A properly installed top weatherstrip should make light, consistent contact with the closed garage door. It should close the opening without putting excessive pressure on the panel. If the seal is too tight, it may interfere with closing or cause the door to reverse.
5. Can I Use Caulk to Fill a Gap Above My Garage Door?
Caulk can seal stationary cracks between the header and fixed exterior trim, but it should not be used across the moving gap between the garage door and its frame. The door needs a flexible weatherstrip that allows normal movement. Applying caulk in the moving area can cause damage or prevent proper operation.
6. How Do I Seal a Large Gap at the Top of a Garage Door?
First determine why the opening is large. A missing or incorrectly positioned retainer may require an adjustable top seal, while a warped header or misaligned door needs a different repair. Avoid stacking foam strips or forcing the door closed. Have a technician inspect large or uneven openings.
7. How Often Should Garage Door Top Weatherstripping Be Replaced?
There is no fixed replacement schedule because weatherstripping wears at different rates depending on sunlight, moisture, temperature, and usage. Inspect it every few months and replace it when it becomes cracked, brittle, flattened, detached, or unable to maintain contact with the closed door.
8. Will Sealing the Top Garage Door Gap Stop Rainwater?
A properly installed top weatherstrip can reduce rainwater entering through the opening between the door and header. However, water may also enter through damaged exterior trim, roof drainage problems, or gaps around the frame. Inspect the surrounding structure if water continues to appear after replacing the seal.
9. Can a Garage Door Opener Cause a Gap at the Top?
Yes. Incorrect closing travel settings can sometimes prevent the door from reaching its intended closed position. However, the opener should not be adjusted simply to force the door against the header. Check for obstructions and visible damage first, and have the door inspected if it does not close normally.
10. Is It Safe to Adjust a Garage Door to Remove a Top Gap?
Simple weatherstrip replacement is generally manageable when performed according to the manufacturer’s instructions. However, adjusting springs, cables, bottom brackets, or loaded track components is dangerous because these parts can be under high tension. If the gap is caused by door alignment or hardware problems, use a qualified garage door technician.