
A broken door handle is one of those household problems that seems small but quickly becomes frustrating. Whether it’s a loose knob, a handle that spins without opening the door, or one that has completely fallen off, it can disrupt your daily routine. The good news is that most door handle problems are easy to fix with basic tools and a little patience.In this guide, you’ll learn how to identify the issue, repair common problems, and replace a door handle if needed. You don’t need to be a professional handyman just follow the steps carefully.
Table of Contents
ToggleUnderstanding the Problem First
Before attempting any repair, it is essential to clearly understand what is wrong with your door handle. Proper diagnosis ensures you apply the correct fix, avoiding unnecessary work and preventing further damage to the handle mechanism.
A door handle can fail in several ways:
- It feels loose or wobbly
- It spins but doesn’t open the latch
- It has completely fallen off
- The latch does not retract
- The internal mechanism is stuck or broken
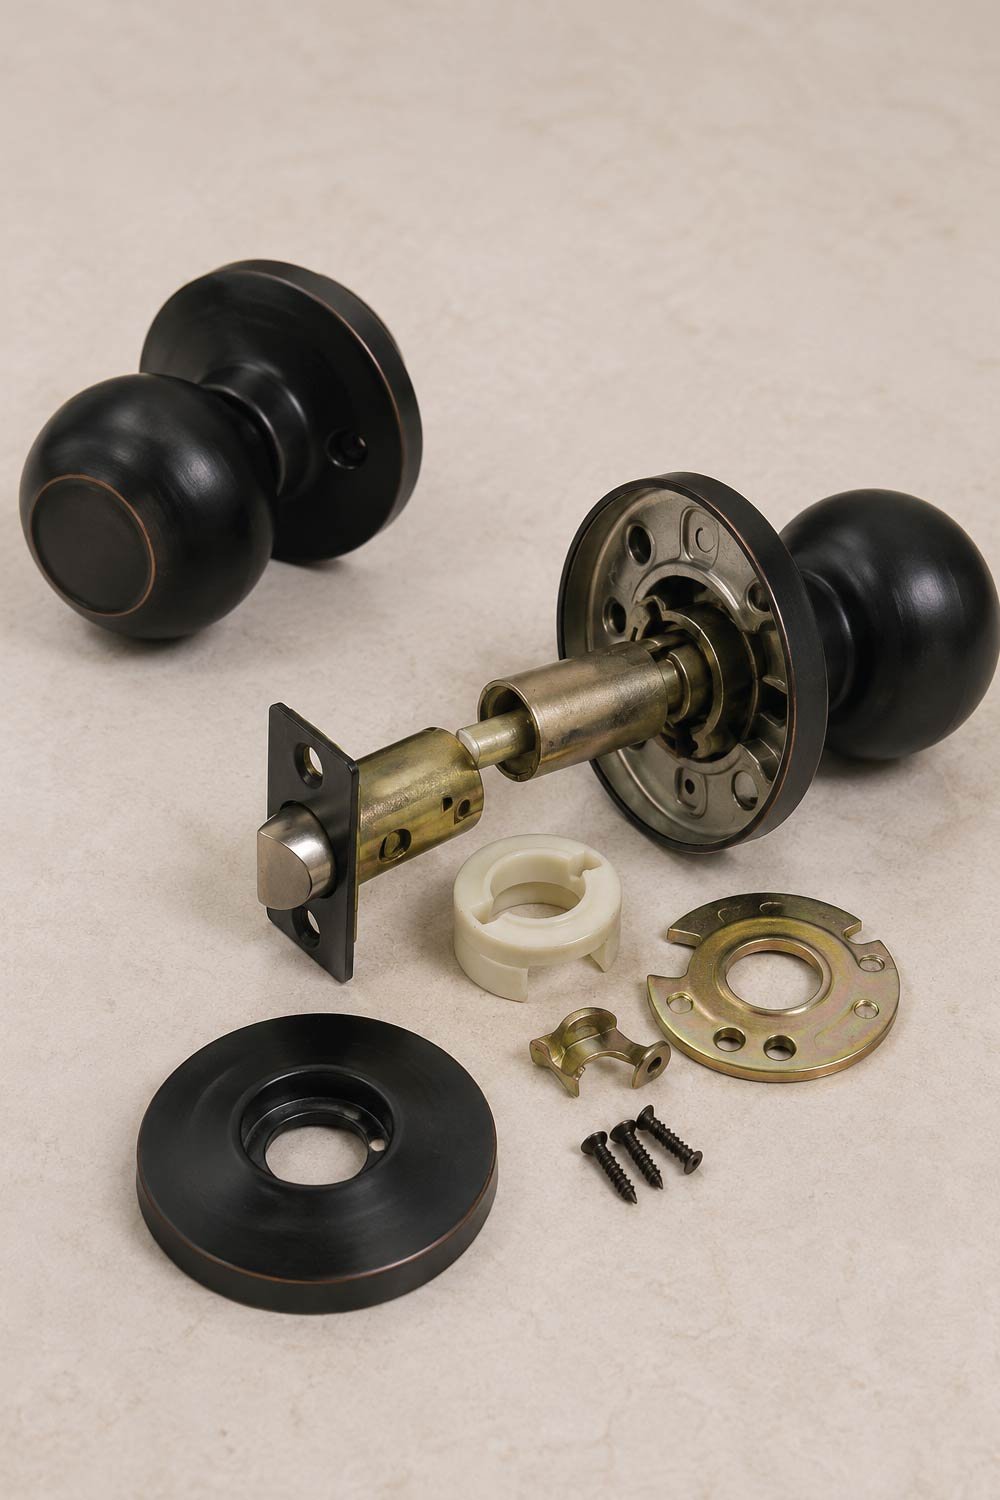
Each of these issues usually points to a different cause inside the handle mechanism. Most modern door handles are either knob-style or lever-style, but internally they work similarly using screws, a spindle (metal rod), and a latch mechanism.
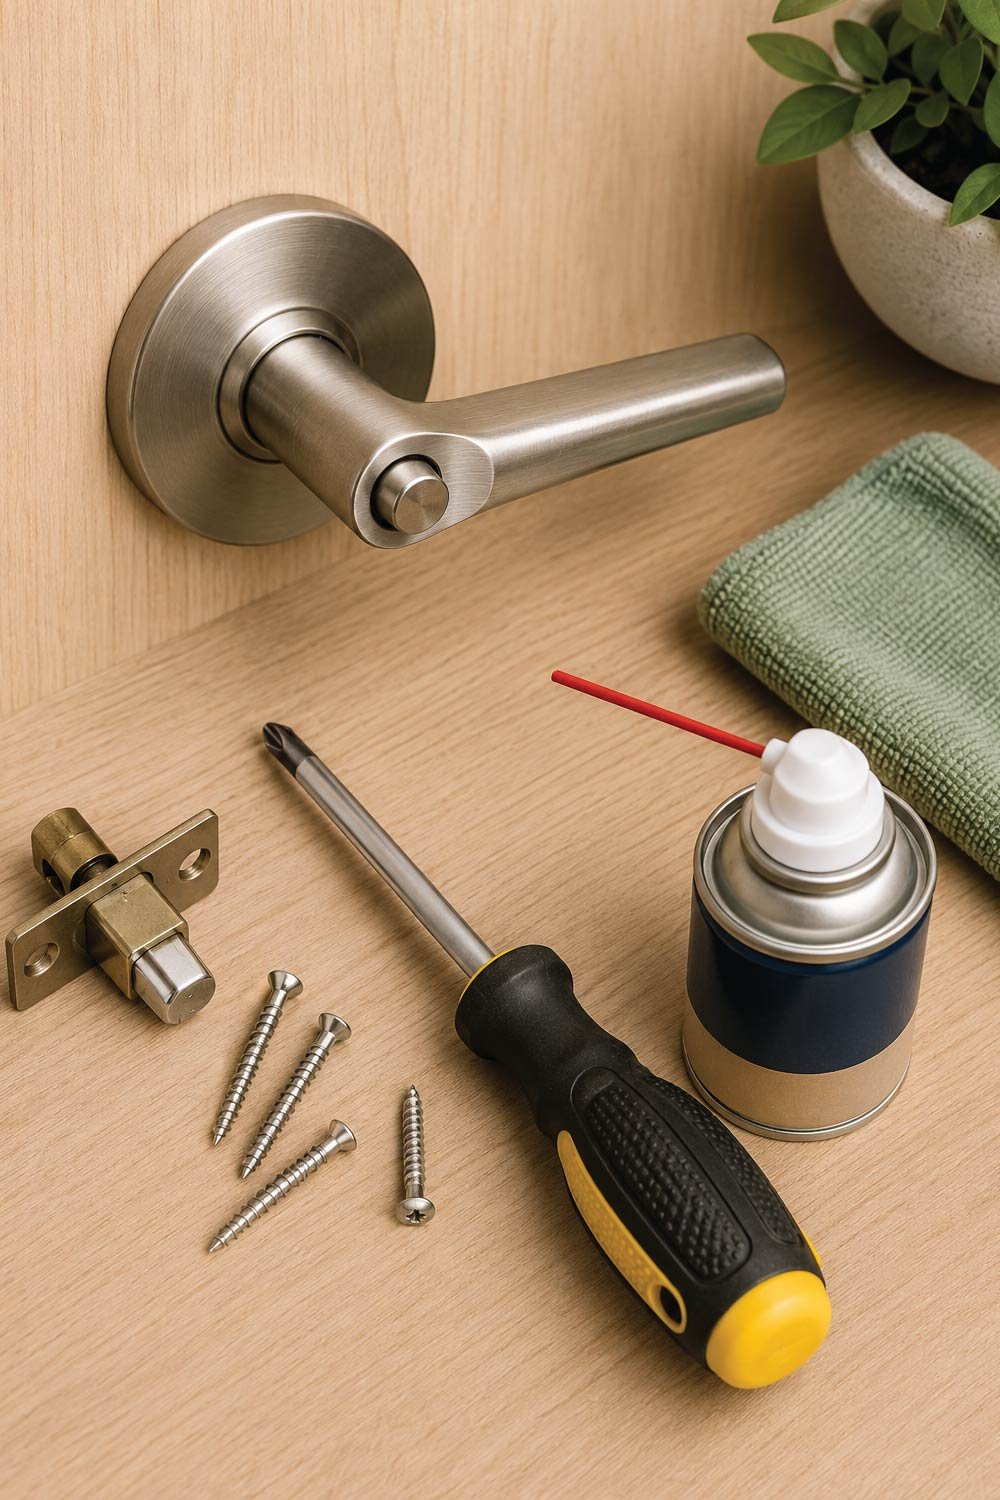
Tools You May Need
Having the right tools prepared in advance makes the repair process smoother and more efficient. Most door handle issues can be fixed using basic household tools without requiring professional equipment.
- Screwdriver set (Phillips and flathead)
- Allen key (for some modern handles)
- Replacement screws (if old ones are stripped)
- Lubricant spray (like WD-40 or silicone spray)
- Pliers
- Replacement door handle set (if needed)
- Small container for screws
Having everything ready will save time and prevent frustration halfway through the repair.
Step 1: Inspect the Door Handle
The first step is to carefully examine how the handle behaves. This helps identify whether the issue is minor, such as loose screws, or more serious, like internal damage requiring replacement.
What to Check
Observing movement and response gives you a clear idea of the underlying problem. Each symptom points toward a specific part of the mechanism.
- Does the handle move but not open the door?
- Does it feel loose on both sides?
- Is the handle completely detached?
- Does the latch inside the door not move?
This inspection helps you decide whether you need a simple tightening or a full replacement.
If the handle is loose, the problem is usually just screws that have worked themselves out over time. If the handle spins freely, the internal spindle is likely disconnected or broken.
Step 2: Tighten Loose Screws
Loose screws are the most common cause of a faulty door handle. Tightening them properly can often restore stability and normal function within minutes.
How to Fix
Following a simple tightening process ensures that all parts are properly secured. Balanced alignment is important for smooth operation.
- Locate the screws on the handle base or plate.
- Use a screwdriver or Allen key to tighten them.
- Make sure both sides of the handle are aligned properly.
- Test the handle to see if it feels stable.
If the screws keep loosening, you may need to apply a small amount of thread-locking adhesive or replace the screws entirely.
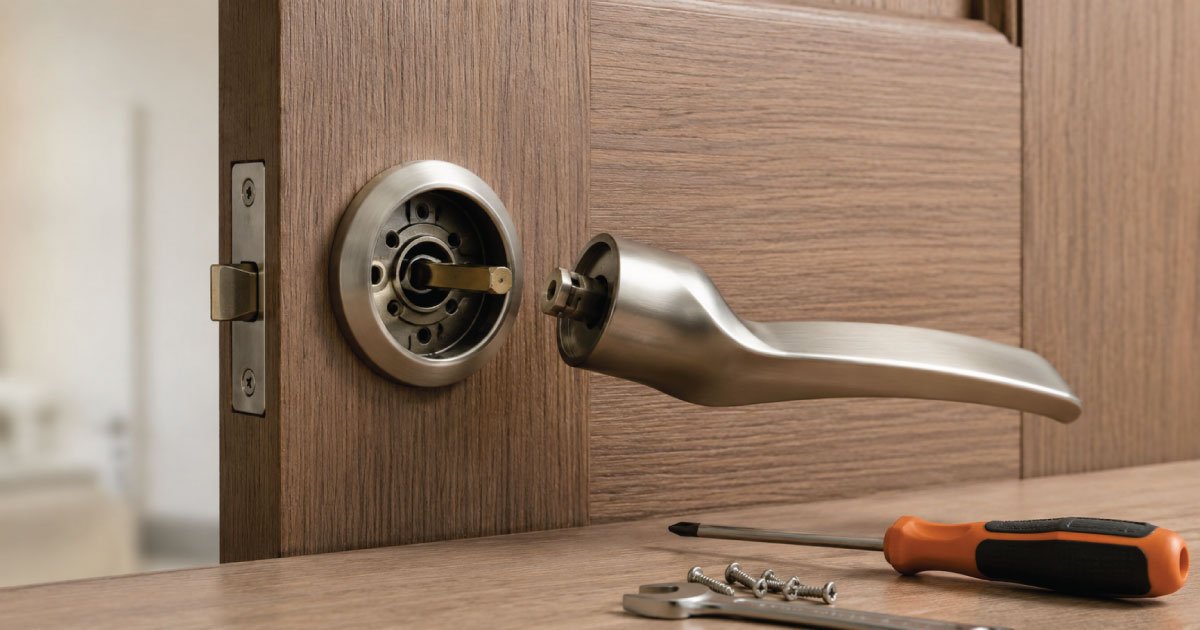
Step 3: Fix a Spinning Handle (Broken Spindle Issue)
When a handle spins freely without operating the latch, the spindle is usually the cause. This component connects both sides of the handle and transfers motion to the latch.
How to Fix It
Carefully accessing and inspecting the spindle allows you to either reposition or replace it. Proper alignment is key for restoring functionality.
- Remove the screws holding the handle plate.
- Pull both sides of the handle away from the door.
- Check the spindle for wear, bending, or disconnection.
- Reinsert or replace the spindle if needed.
- Align both handles properly and reattach them.
Make sure the spindle fits securely into both handle mechanisms. If it’s worn out, replacing it is usually the best solution.
Step 4: Fix a Stuck Latch
In some cases, the handle works fine but the latch inside the door fails to move. This is often caused by dirt, rust, or lack of lubrication.
Repair Process
Cleaning and lubricating the latch can restore smooth movement. Manual testing helps ensure the mechanism is functioning properly before reassembly.
- Remove the handle to expose the latch mechanism.
- Check if the latch is stuck or dirty.
- Spray a small amount of lubricant into the latch area.
- Move the latch manually to loosen it.
- Reattach the handle and test it.
If the latch is broken or bent, you may need to replace the entire latch assembly, which is usually inexpensive and widely available.
Step 5: Repairing or Replacing Internal Mechanism
When basic fixes do not resolve the issue, the internal components may be damaged. At this stage, replacement is often more practical than repair.
Signs of Internal Damage
These indicators suggest that the mechanism inside the handle is no longer functioning correctly and needs attention.
- Grinding noise when turning the handle
- Handle feels completely disconnected inside
- Latch does not respond at all
In this case, repair is often not practical. Instead, replacement is recommended.
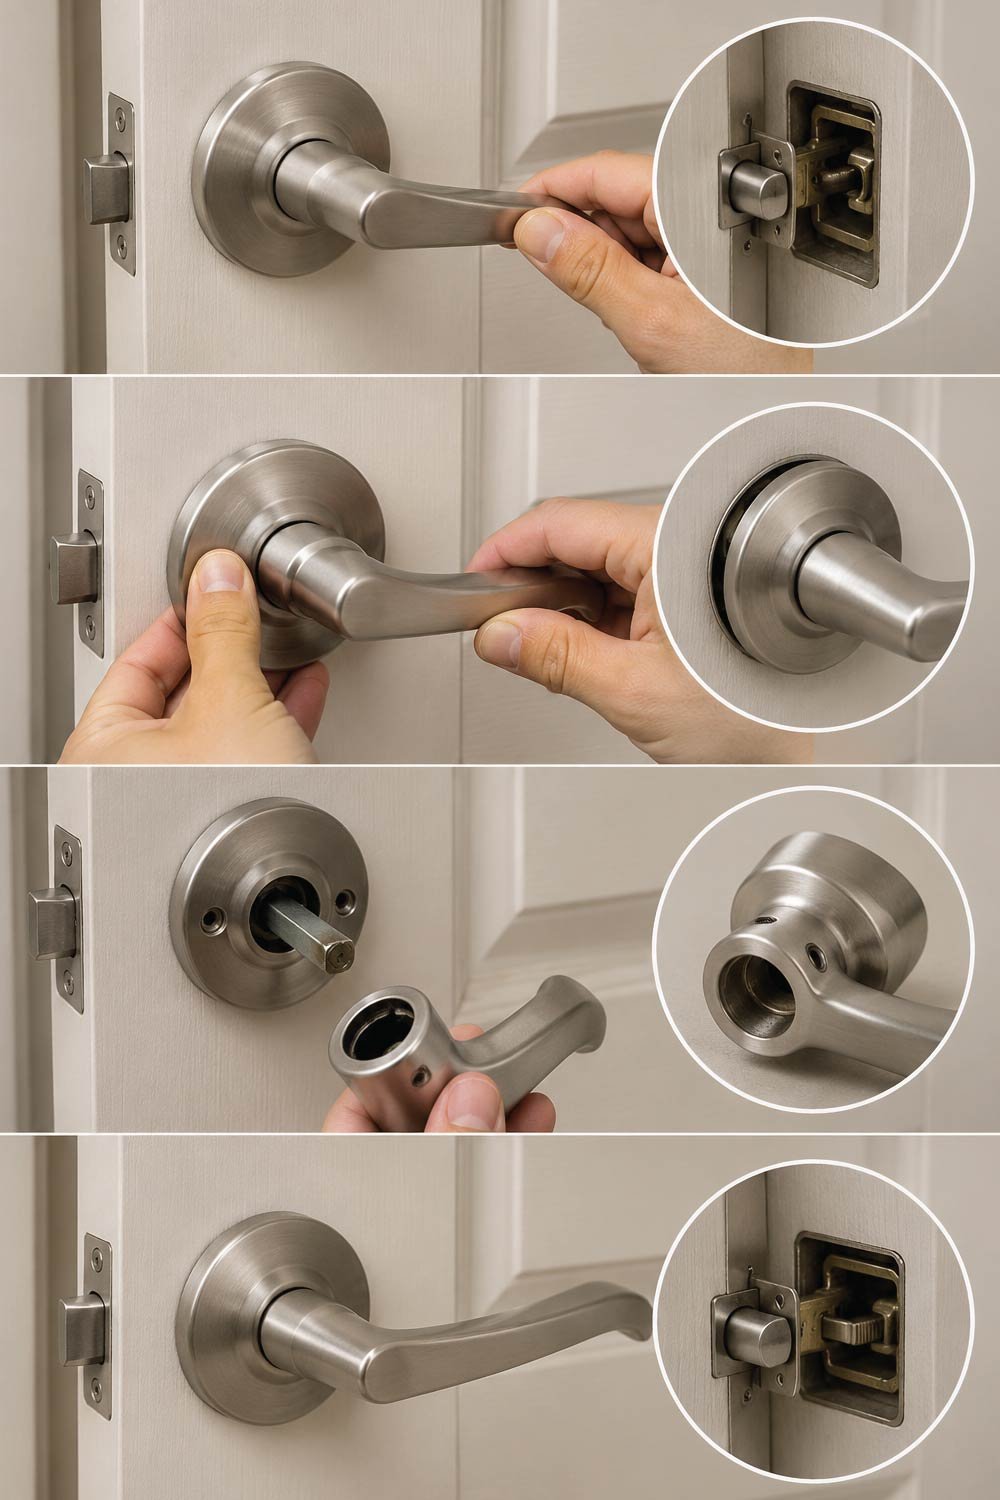
Step 6: Removing the Old Door Handle
If replacement is necessary, removing the old handle correctly ensures a smooth installation process for the new one. Keeping parts organized is also important.
Removal Steps
Careful disassembly prevents damage to the door and allows you to reuse components if needed.
- Unscrew all visible screws on the handle.
- Remove both sides of the handle carefully.
- Pull out the spindle from the door.
- Unscrew the latch plate on the edge of the door.
- Remove the latch mechanism.
Keep all screws in a safe place in case you need them later.
Also Read:
Step 7: Installing a New Door Handle
Installing a new handle properly ensures smooth operation and long-term durability. Correct alignment and balanced tightening are essential for best results.
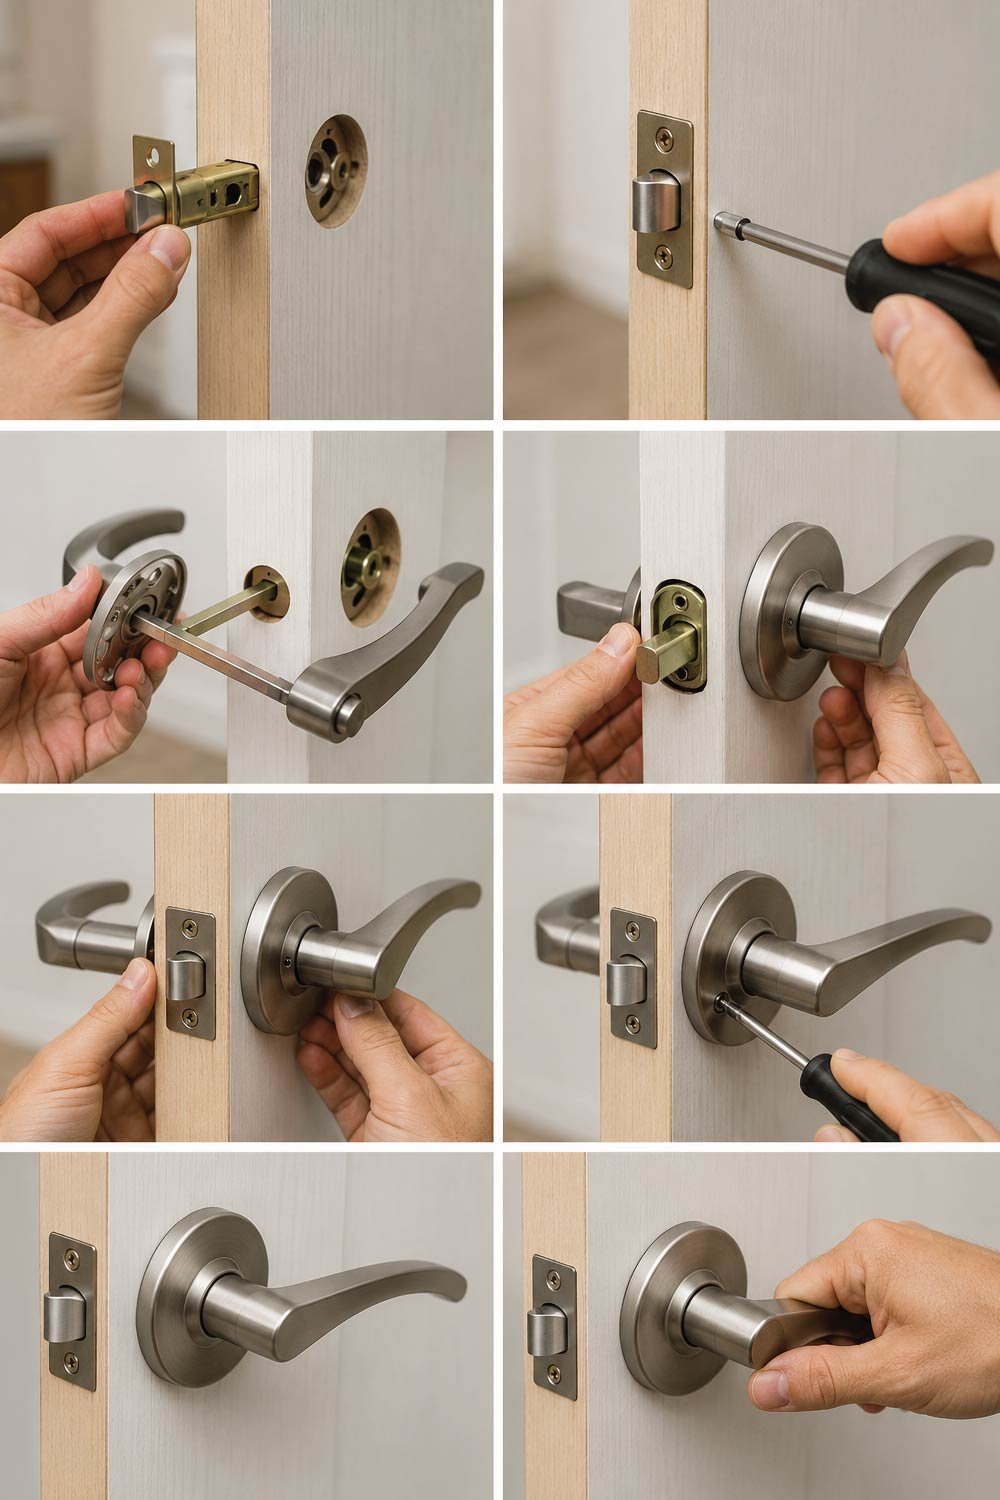
Installation Steps
Following a step-by-step approach helps avoid misalignment and ensures all parts function together correctly.
- Insert the new latch mechanism into the door edge.
- Secure it with screws.
- Slide the spindle through the latch hole.
- Attach both sides of the new handle.
- Align everything properly.
- Tighten all screws evenly.
- Test the handle several times.
Make sure the handle is not too tight or too loose. A properly installed handle should move smoothly and return to its original position after use.
Step 8: Common Mistakes to Avoid
While fixing a door handle may seem simple, small mistakes can lead to bigger issues or even permanent damage. Being aware of these common errors helps you complete the repair correctly and avoid repeating the problem later.
Mistakes to Watch Out For
Careful handling and proper technique are essential during repairs. Avoiding these mistakes ensures the handle functions smoothly and lasts longer.
- Over-tightening screws, which can strip the threads
- Ignoring alignment between handle and latch
- Using the wrong size screwdriver
- Reusing worn-out screws
- Forcing a stuck handle instead of inspecting it
Taking your time is key. Most damage happens when people rush.
Also Read:
How to Replace a Faucet Washer: Simple Step-by-Step DIY Guide
Step 9: Maintenance Tips to Prevent Future Problems
Regular maintenance is the best way to keep your door handle working properly over time. Simple habits can prevent wear and tear, reducing the need for frequent repairs or replacements.
Maintenance Tips
Consistent care helps extend the lifespan of your door handle and ensures smooth operation. These small steps can make a big difference in long-term performance.
- Tighten screws every few months
- Lubricate the latch once or twice a year
- Avoid hanging heavy objects on lever handles
- Don’t slam doors forcefully
- Replace worn parts early before they fail completely
Regular maintenance can prevent most common door handle issues.
When to Call a Professional
Although many door handle problems can be fixed at home, some situations require expert assistance. Knowing when to seek professional help can save time and prevent further damage.
Situations That Need Expert Help
Certain complex or structural issues go beyond basic DIY repairs. In these cases, a professional has the tools and expertise to handle the job safely and effectively.
- The door frame is damaged
- The locking system is complex or electronic
- Internal parts are inaccessible or sealed
- You have tried multiple fixes without success
A professional can save time and prevent accidental damage to the door.
Also Read:
Plumbing Repair at Home DIY: A Practical Guide for Homeowners
Final Thoughts
Fixing a broken door handle is usually simpler than it looks. In most cases, the issue comes down to loose screws, a misaligned spindle, or a stuck latch. With basic tools and a careful approach, you can restore your door handle in under an hour.
The key is to diagnose the problem correctly before attempting repairs. Once you understand what’s wrong, the solution often becomes straightforward.
A working door handle may seem like a small thing, but it plays an important role in everyday comfort and security. Keeping it in good condition ensures smooth operation and avoids unnecessary stress in the future.