
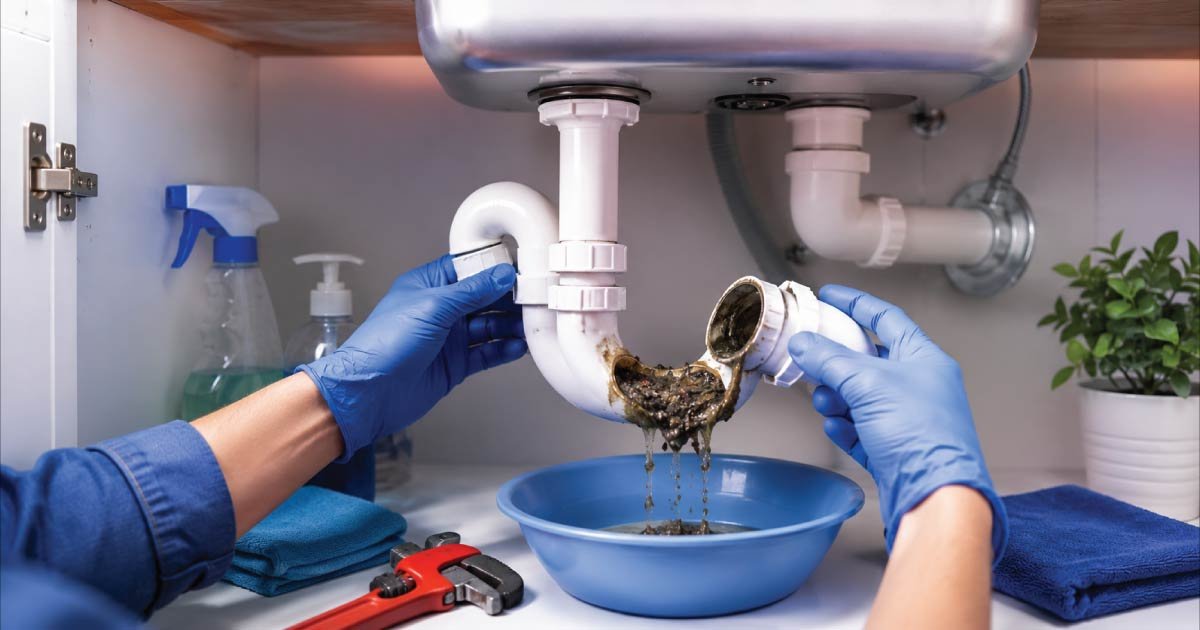
A slow or smelly sink drain is one of the most common household plumbing problems and in many cases, the cause is a dirty sink trap. The sink trap, often called the P-trap, is designed to catch debris and block sewer gases from entering your home. Over time, however, it can fill with grease, hair, soap residue, and food particles.
The good news is that cleaning a sink trap is one of the simplest plumbing maintenance tasks a homeowner can do. With basic tools and a little care, you can restore proper drainage, eliminate odors, and avoid unnecessary plumbing calls.This guide explains what a sink trap does, when it needs cleaning, and how to clean it safely step by step.
What Is a Sink Trap and Why It Matters
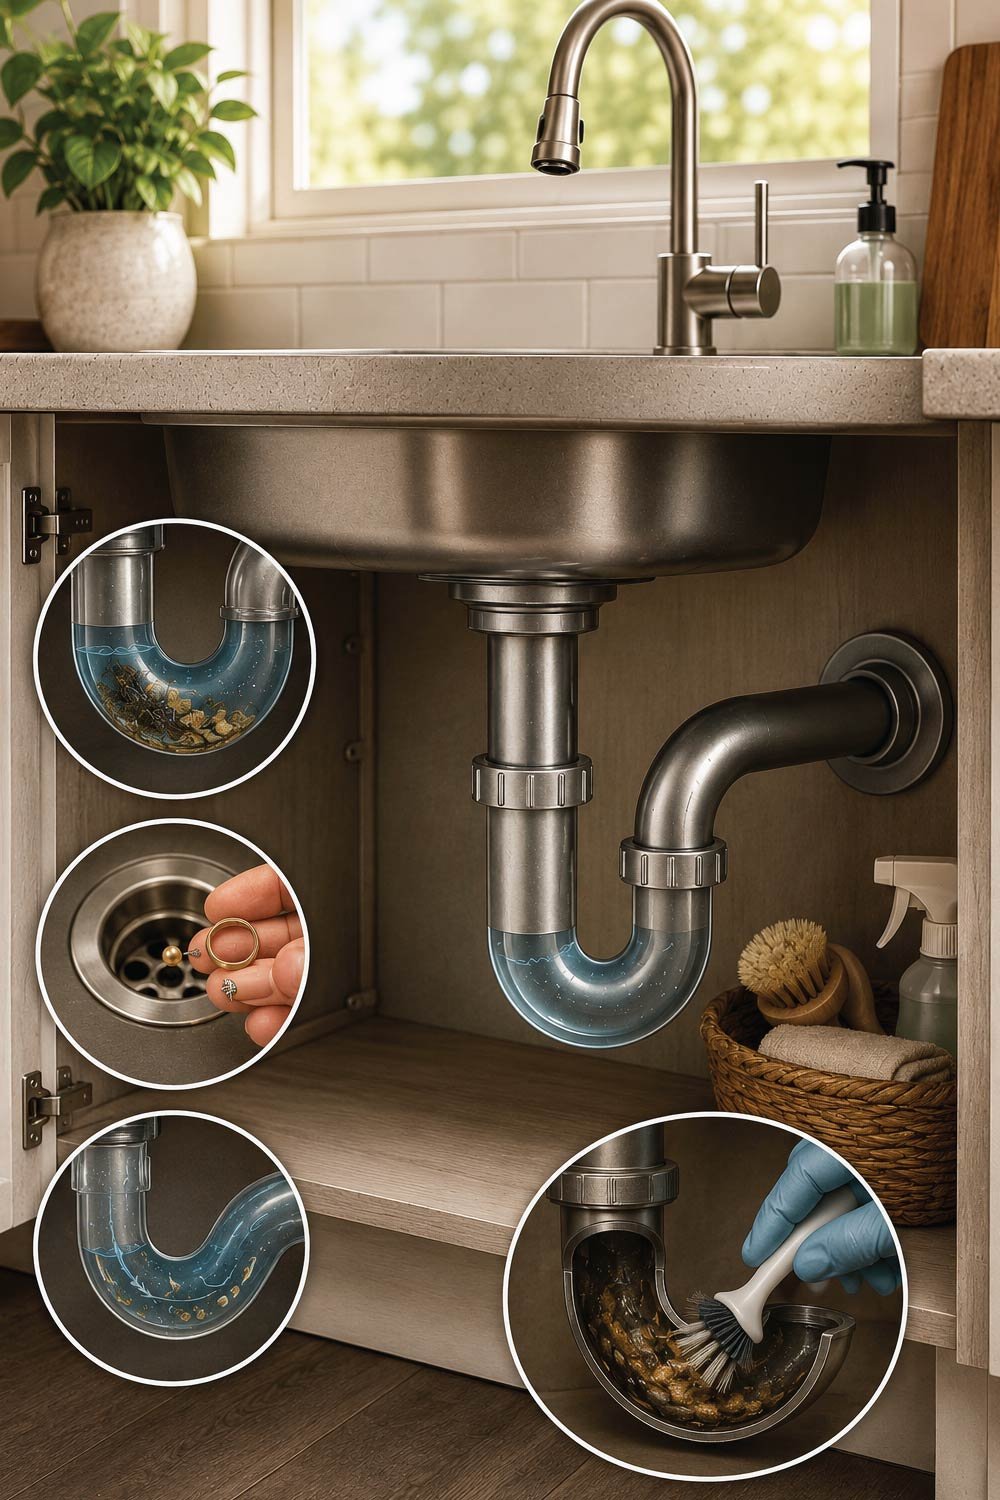
A sink trap is an essential plumbing component located beneath the sink that helps maintain hygiene and proper drainage in the home. Its curved design holds a small amount of water, creating a seal that blocks sewer gases from entering living spaces while also helping control debris flow through the plumbing system.
In addition to blocking odors, the trap also:
- Catches debris before it enters deeper plumbing
- Prevents small objects from being lost down the drain
- Helps protect larger drain lines from clogs
Because it traps debris by design, it also needs periodic cleaning.
Signs Your Sink Trap Needs Cleaning
Signs your sink trap needs cleaning usually appear gradually as debris builds up inside the curved pipe. These symptoms often indicate restricted water flow or blockages that require maintenance to restore proper drainage.
- Slow or sluggish drainage
- Gurgling sounds when water drains
- Foul or musty odors from the sink
- Water backing up into the basin
- Frequent clogs despite plunging
If plunging doesn’t solve the problem or the issue keeps returning, the trap is likely the source.
Tools and Supplies You’ll Need
Tools and supplies needed for cleaning a sink trap are simple household items that make the process easier and safer. Having everything ready beforehand helps ensure a smooth and mess-free repair experience.
You’ll need:
- A bucket or shallow container
- Adjustable wrench or pliers
- Old towels or rags
- Rubber gloves
- A small brush or old toothbrush
- Mild dish soap
- Optional: baking soda and vinegar
Avoid chemical drain cleaners, as they can damage pipes and make trap removal hazardous.
Safety and Preparation Tips
Safety and preparation tips are important before starting any sink trap cleaning to prevent spills, injuries, or plumbing damage. Proper setup ensures a cleaner and more controlled maintenance process.
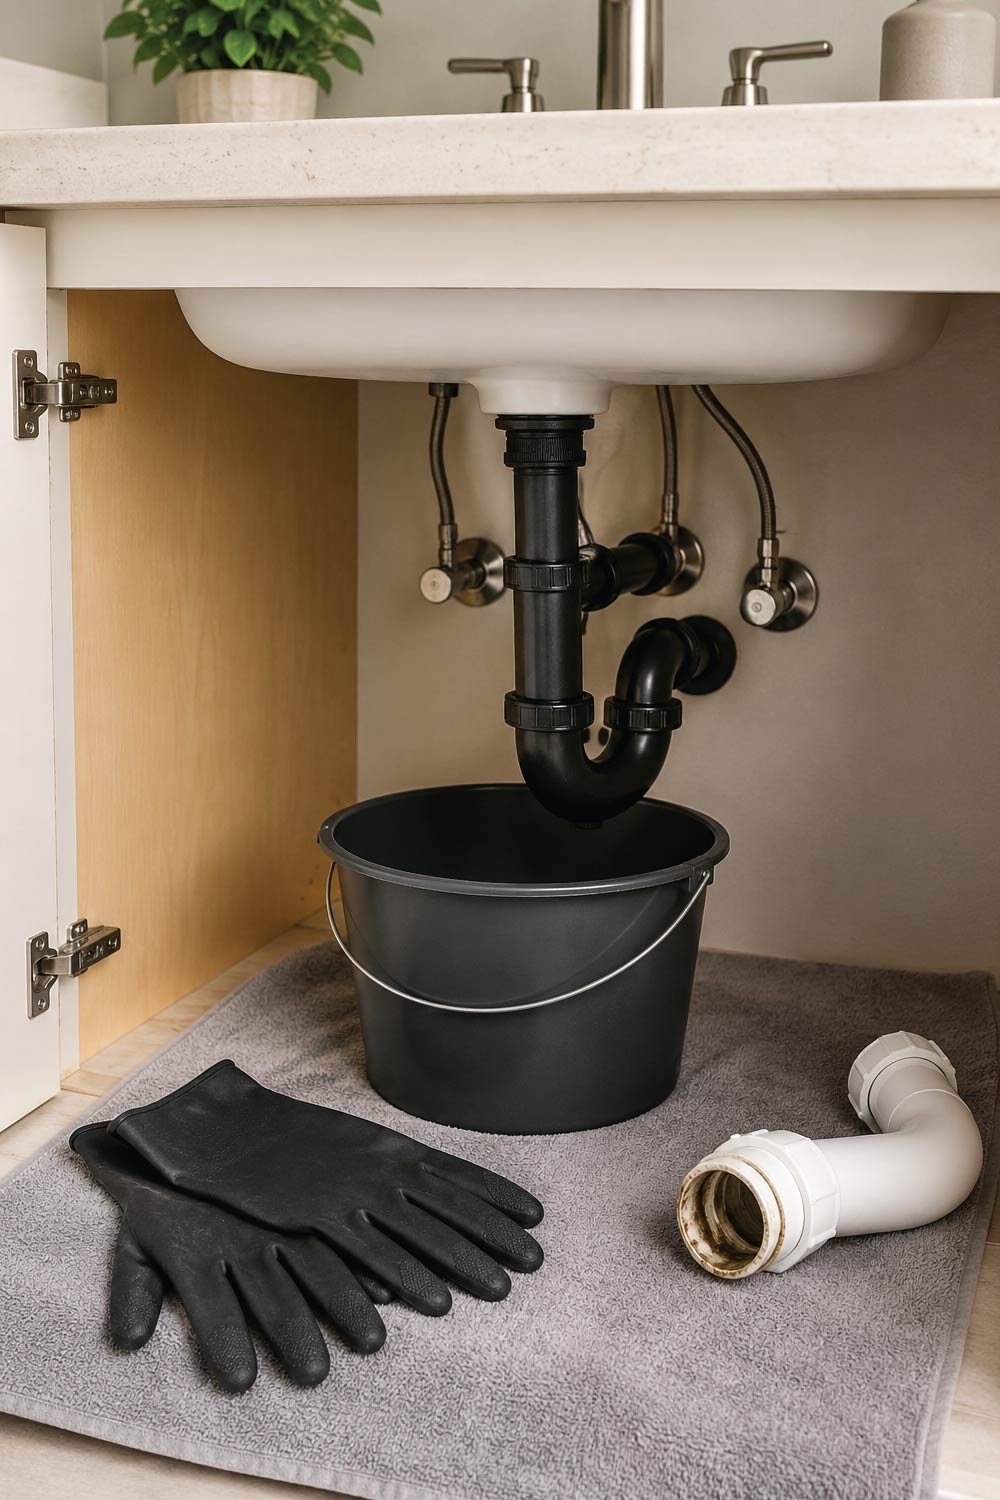
- Clear out items stored under the sink
- Place a bucket directly beneath the trap
- Turn off the water at the faucet (no need to shut off main supply)
- Wear gloves to protect your hands
Expect some water and debris to spill when the trap is removed.
Step-by-Step Sink Trap Cleaning Instructions
Step 1: Locate the Sink Trap
Locate the sink trap by identifying the curved pipe under the sink shaped like a “U” or “P.” It connects the sink drain to the wall pipe and allows wastewater to flow out while holding a water seal that blocks odors.Most modern traps are made of PVC and have slip nuts that can be loosened by hand or with pliers.
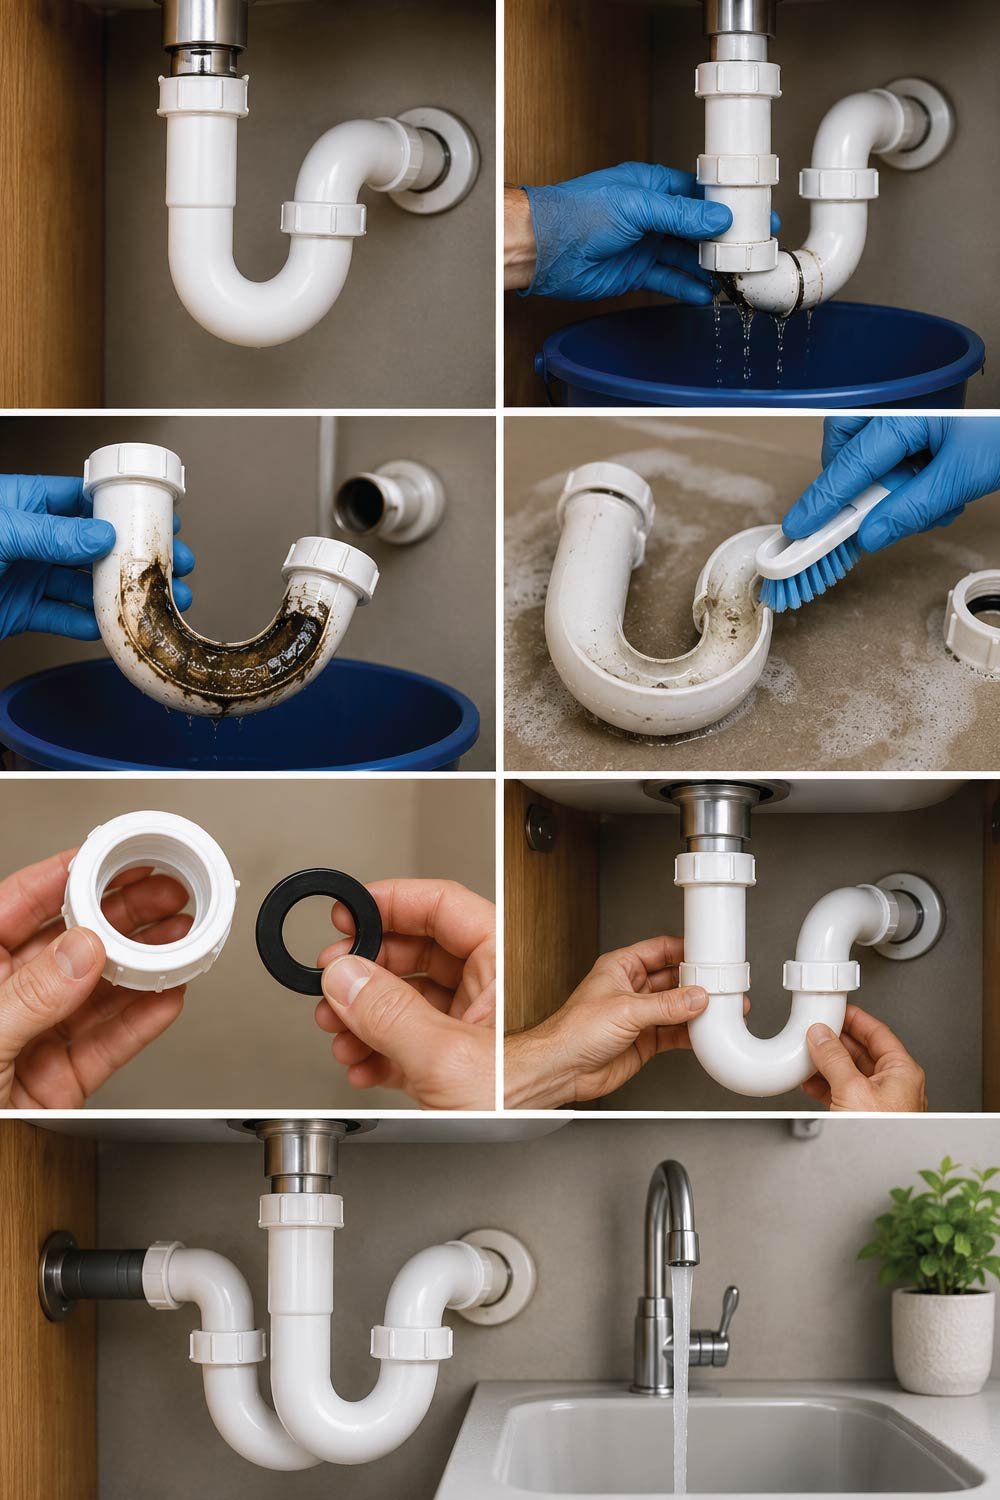
Step 2: Place the Bucket and Loosen the Trap
Place the bucket and loosen the trap carefully to prevent spills and collect dirty water or debris during removal. This step ensures a cleaner workspace and avoids water damage under the sink. Position the bucket directly under the trap to catch water and debris.
Loosen the slip nuts on both ends of the trap:
- Turn them counterclockwise
- Use pliers if they’re tight, but avoid excessive force
Once loose, carefully lower the trap and allow water to drain into the bucket.
Step 3: Inspect the Trap for Debris
Inspect the trap for debris to identify what is causing the blockage or slow drainage. This helps determine whether cleaning alone is sufficient or if deeper plumbing issues exist.
Look inside the trap. You may find:
- Hair
- Food scraps
- Grease buildup
- Soap scum
- Small objects like rings or bottle caps
Remove large debris by hand (with gloves on).
Step 4: Clean the Trap Thoroughly
Clean the trap thoroughly using household cleaning tools to remove buildup and restore proper water flow. Proper cleaning helps eliminate odors and prevents future clogs.
Wash the trap using:
- Warm water
- Dish soap
- A small brush or toothbrush
Scrub the inside walls until all residue is removed. For stubborn grease or odors, soak the trap briefly in warm, soapy water.You can also pour baking soda followed by vinegar through the trap for odor removal, then rinse thoroughly.
Step 5: Check the Trap Washers
Check the trap washers carefully because worn or damaged seals can cause leaks after reinstallation. Replacing faulty washers ensures a watertight connection and prevents future dripping issues.Inspect the rubber washers inside the slip nuts. If they are cracked, flattened, or brittle, replace them. Worn washers can cause leaks after reassembly.
Step 6: Reinstall the Sink Trap
Reinstall the sink trap by properly aligning all parts before tightening to avoid leaks or misalignment. Correct installation ensures smooth drainage and prevents structural stress on pipes.Reattach the trap by aligning it with the drainpipe and wall pipe.
- Hand-tighten the slip nuts first
- Ensure proper alignment to avoid cross-threading
- Tighten gently with pliers if needed
Do not overtighten, especially with plastic pipes.
Step 7: Test for Leaks
Test for leaks by running water through the sink and carefully inspecting all connection points. This ensures the trap is properly sealed and functioning correctly.Turn on the faucet and let water run for a minute.
Check for:
- Drips around the slip nuts
- Proper drainage
- Any unusual odors
If you see leaks, slightly tighten the connections until they stop.
Also Read:
How to Fix a Leaking Tap: A Complete Step-by-Step Guide (DIY)
Cleaning Different Types of Sink Traps
Cleaning different types of sink traps is important because each location collects different kinds of debris and buildup. Understanding the differences helps homeowners choose the right cleaning frequency and method to maintain proper drainage and prevent recurring blockages in bathroom and kitchen plumbing systems.
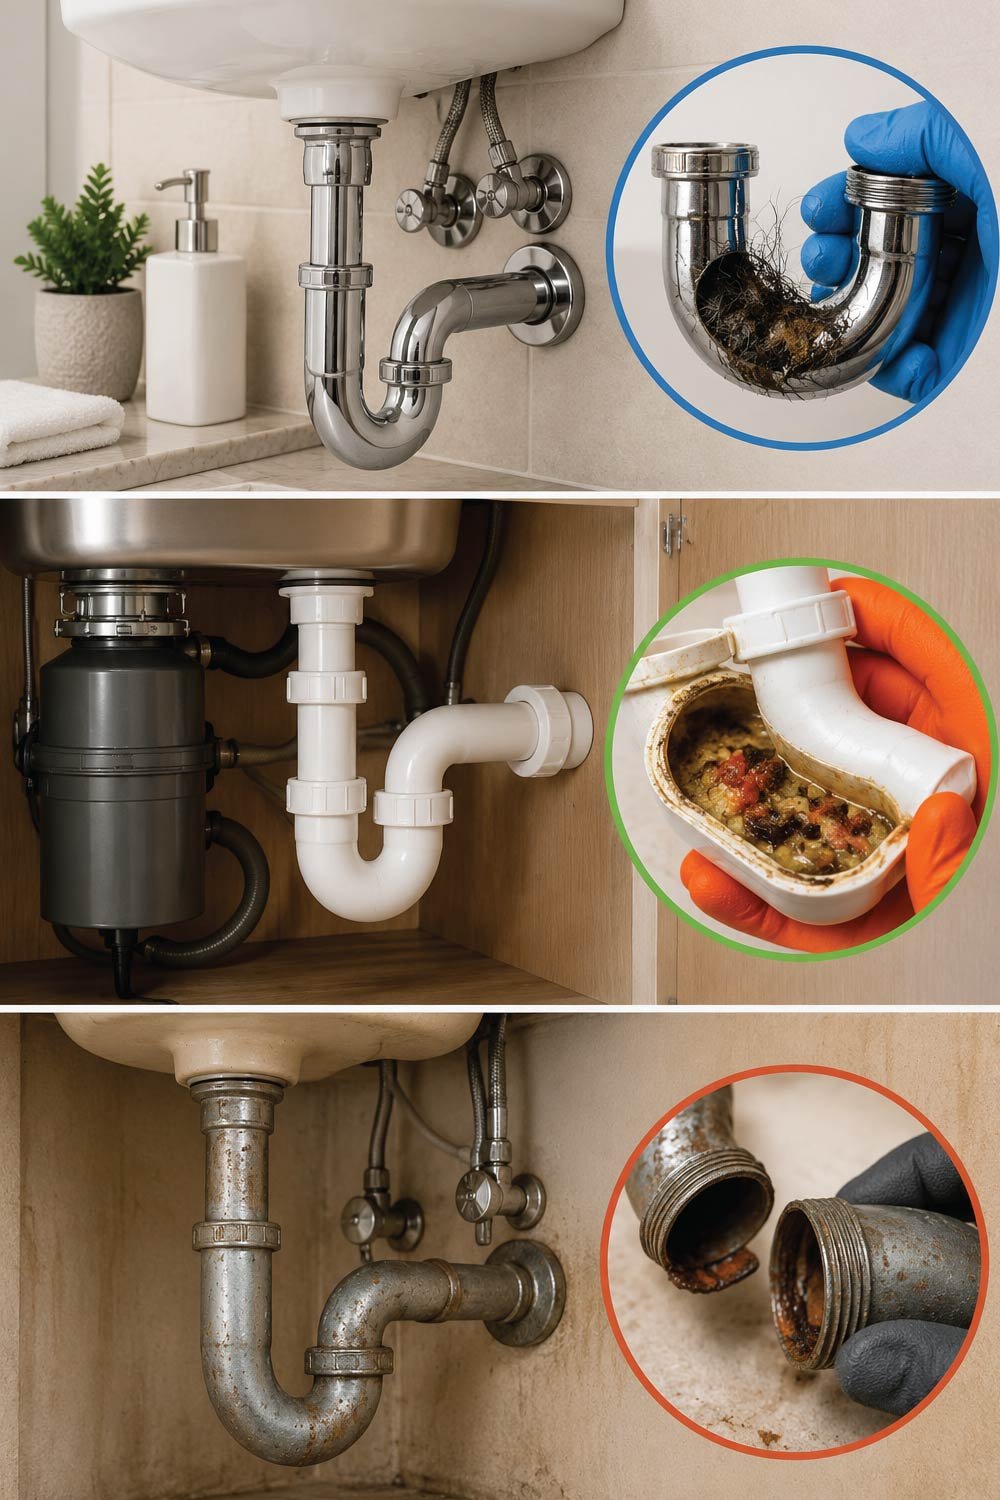
Bathroom Sink Traps
Bathroom sink traps are commonly affected by hygiene-related debris such as hair and soap residue. These materials gradually build up inside the trap, reducing water flow and requiring periodic cleaning to maintain smooth drainage performance over time.Bathroom traps often collect hair, toothpaste residue, and soap scum. They usually need cleaning every 6–12 months.
Kitchen Sink Traps
Kitchen sink traps experience heavier usage and are more prone to greasy buildup and food particles. This makes them more likely to clog compared to bathroom sinks, requiring more frequent maintenance to ensure proper drainage and prevent blockages.Kitchen traps clog more frequently due to grease and food debris. Regular cleaning every 3–6 months can prevent major blockages.
Older Metal Traps
Older metal traps are more vulnerable to corrosion and structural weakness over time. Extra caution is needed during cleaning or removal, as worn metal components can break easily and may require replacement instead of repeated repairs.Metal traps may be corroded or fragile. Use extra care when loosening connections, and consider replacement if corrosion is severe.
Common Mistakes to Avoid
Common mistakes during sink trap cleaning can lead to leaks, damage, or recurring plumbing issues. Avoiding these errors ensures safer maintenance and helps prevent unnecessary repairs or repeat work.
Many sink trap problems happen because of avoidable errors. Avoid the following:
- Using chemical drain cleaners before removal
- Forcing stuck fittings too aggressively
- Reinstalling the trap misaligned
- Forgetting to check washers
- Ignoring small leaks after reassembly
Taking your time prevents damage and repeat work.
Also Read:
How to Repair a Leaking Pipe Under the Sink (DIY Homeowner Guide)
How Often Should You Clean a Sink Trap?
How often you should clean a sink trap depends on how frequently the sink is used and the type of debris it handles. Regular maintenance schedules help prevent buildup and keep drainage systems functioning efficiently.
Cleaning frequency depends on sink usage:
- Light-use bathroom sinks: once per year
- Heavily used bathroom sinks: every 6 months
- Kitchen sinks: every 3–6 months
If you notice slow drainage or odors, clean the trap sooner.
Preventing Future Sink Trap Clogs
Preventing future sink trap clogs involves simple daily habits that reduce debris buildup and keep plumbing systems clear. Consistent preventive care minimizes the need for frequent deep cleaning or repairs.Good habits can reduce how often you need to clean your trap.
Prevention tips:
- Use drain strainers
- Avoid pouring grease down kitchen sinks
- Flush drains weekly with hot water
- Clean hair from bathroom drains regularly
- Do not rinse food scraps into the sink
Small preventive steps save time and frustration.
Also Read:
How to Repair a Leaking Pipe Under the Sink (DIY Homeowner Guide)
When Sink Trap Cleaning Is Not Enough
When sink trap cleaning is not enough, it may indicate deeper plumbing issues beyond simple blockages. In such cases, professional inspection is necessary to identify hidden problems within the drainage or venting system.
Sometimes, cleaning the trap doesn’t fix the problem. Call a professional plumber if:
- Drain remains slow after cleaning
- Multiple sinks are clogged
- Gurgling sounds persist
- Sewer odors continue
- Leaks return repeatedly
These may indicate deeper drain or venting issues.
Benefits of Regular Sink Trap Maintenance
Benefits of regular sink trap maintenance include improved plumbing performance and reduced risk of costly repairs. Consistent care helps maintain hygiene, prevents blockages, and extends the lifespan of household drainage systems.
Routine sink trap cleaning offers several benefits:
- Faster drainage
- Odor-free sinks
- Reduced risk of major clogs
- Longer pipe lifespan
- Fewer emergency plumbing calls
It’s one of the easiest ways to maintain your plumbing system.
Also Read:
How to Fix a Running Toilet: A Complete DIY Guide for Homeowners
Final Thoughts
Cleaning a sink trap is a simple but powerful maintenance task that every homeowner should know. With minimal tools and a short amount of time, you can eliminate clogs, stop odors, and keep your sinks draining properly.
By understanding how the sink trap works and cleaning it regularly, you prevent small plumbing problems from turning into costly repairs. A clean trap means a healthier, more efficient home plumbing system.