
A leaking pipe joint is one of the most common plumbing problems in homes. Unlike a cracked pipe, a joint leak usually happens where two pipes connect—often due to loose fittings, worn seals, corrosion, or poor installation. While a leaking joint can look minor at first, even slow drips can cause water damage, mold growth, and higher utility bills if ignored.
The good news is that many pipe joint leaks can be fixed with basic tools and a careful approach. This guide explains how to identify the type of pipe joint you have, why it’s leaking, and how to fix it properly—whether it’s a quick tightening job or a seal replacement.
Step 1: Identify the Pipe Joint That’s Leaking
Identify the pipe joint that’s leaking by carefully inspecting where water is escaping. Different pipe materials and connection types require different repair approaches, so accurate identification is essential before attempting any fixes to avoid worsening the problem or causing additional damage.

Common Pipe Joint Types
- Slip-joint connections (usually under sinks, made of plastic or chrome)
- Threaded joints (metal or plastic pipes screwed together)
- Compression fittings (used on supply lines)
- Soldered joints (copper pipes)
- Glued joints (PVC pipes)
Look closely at where the water is coming from. Dry the area with a towel and watch for fresh moisture to pinpoint the exact joint.
Step 2: Shut Off the Water Supply
Shut off the water supply before starting any repair work to prevent further leakage and water damage. This step ensures a safe working environment and allows you to inspect and fix the joint without continuous water pressure interfering.
- For sink or toilet leaks, shut off the local shut-off valve
- For larger or unknown leaks, shut off the main water supply
Open a nearby faucet to relieve pressure and drain remaining water from the line.
Step 3: Determine Why the Joint Is Leaking
Step 3: Determine why the joint is leaking by identifying the underlying cause of failure. Understanding the root issue helps ensure the correct repair method is used instead of temporary fixes that may fail again in the future.
- Loose connection
- Worn washer or seal
- Cracked or corroded fitting
- Poorly sealed threads
- Damaged pipe section
Understanding the cause helps you choose the correct fix instead of applying a temporary patch that fails later.
Fix 1: Tightening a Loose Pipe Joint
Tightening a loose pipe joint is the simplest and most common repair method for minor leaks. It is effective when connections have slightly loosened over time but are otherwise in good condition, restoring a watertight seal without replacing parts.
Best for:
- Slip-joint connections
- Compression fittings
- Threaded joints that are slightly loose
How to Do It:
- Place a bucket under the joint
- Use an adjustable wrench or pliers
- Turn the nut clockwise slightly (about ¼ turn)
- Do not overtighten
Turn the water back on and check for leaks. If dripping continues, stop tightening—overtightening can crack fittings.
Fix 2: Replacing a Washer or Rubber Seal
Replacing a washer or rubber seal is necessary when internal sealing components wear out and fail to maintain a proper watertight connection. This repair restores the joint’s ability to block leaks effectively.
Best for:
- Sink traps
- Compression fittings
- Faucet supply lines
How to Do It:
- Disassemble the joint
- Remove the old washer
- Take it to a hardware store to match the size
- Install the new washer
- Reassemble and hand-tighten first
This fix often completely solves slow joint leaks.
Fix 3: Resealing a Threaded Pipe Joint
Resealing a threaded pipe joint is required when leaks occur due to poor sealing between screw-threaded connections. Proper sealing material ensures a tight, leak-free fit between pipe threads.
Best for:
- Metal or PVC threaded pipes
- Leaks at screw-together joints
Materials Needed:
- Plumber’s tape (PTFE tape) or
- Pipe joint compound (pipe dope)
How to Do It:
- Unscrew the joint completely
- Clean old tape or compound from threads
- Wrap plumber’s tape clockwise 3–5 times
- Reassemble and tighten snugly
Turn water back on and inspect carefully.
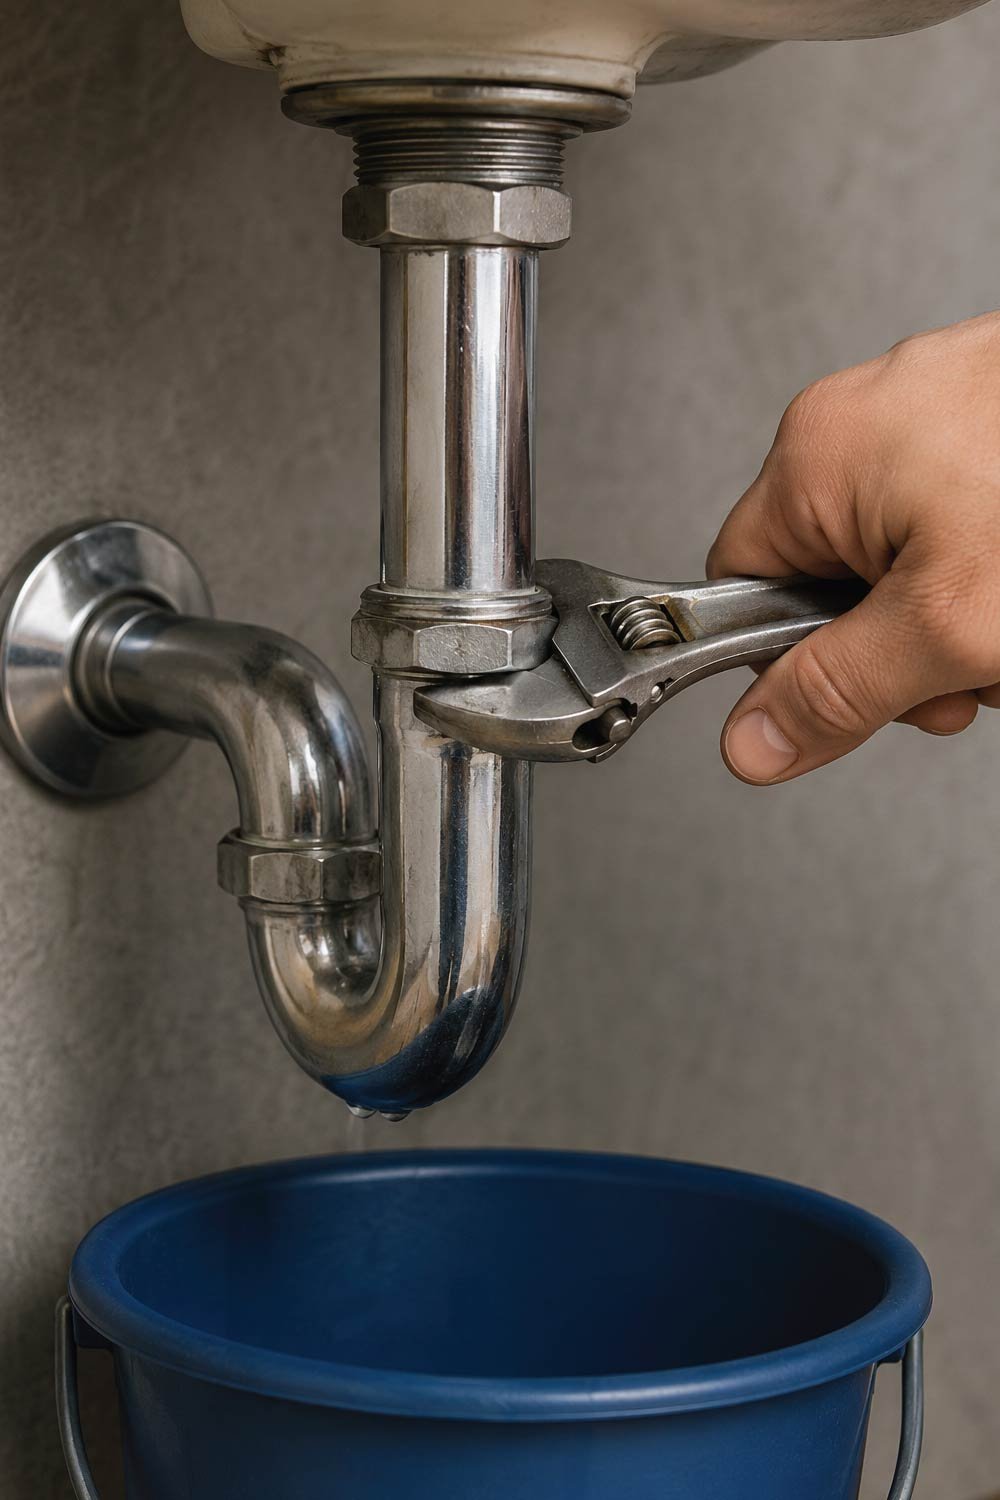
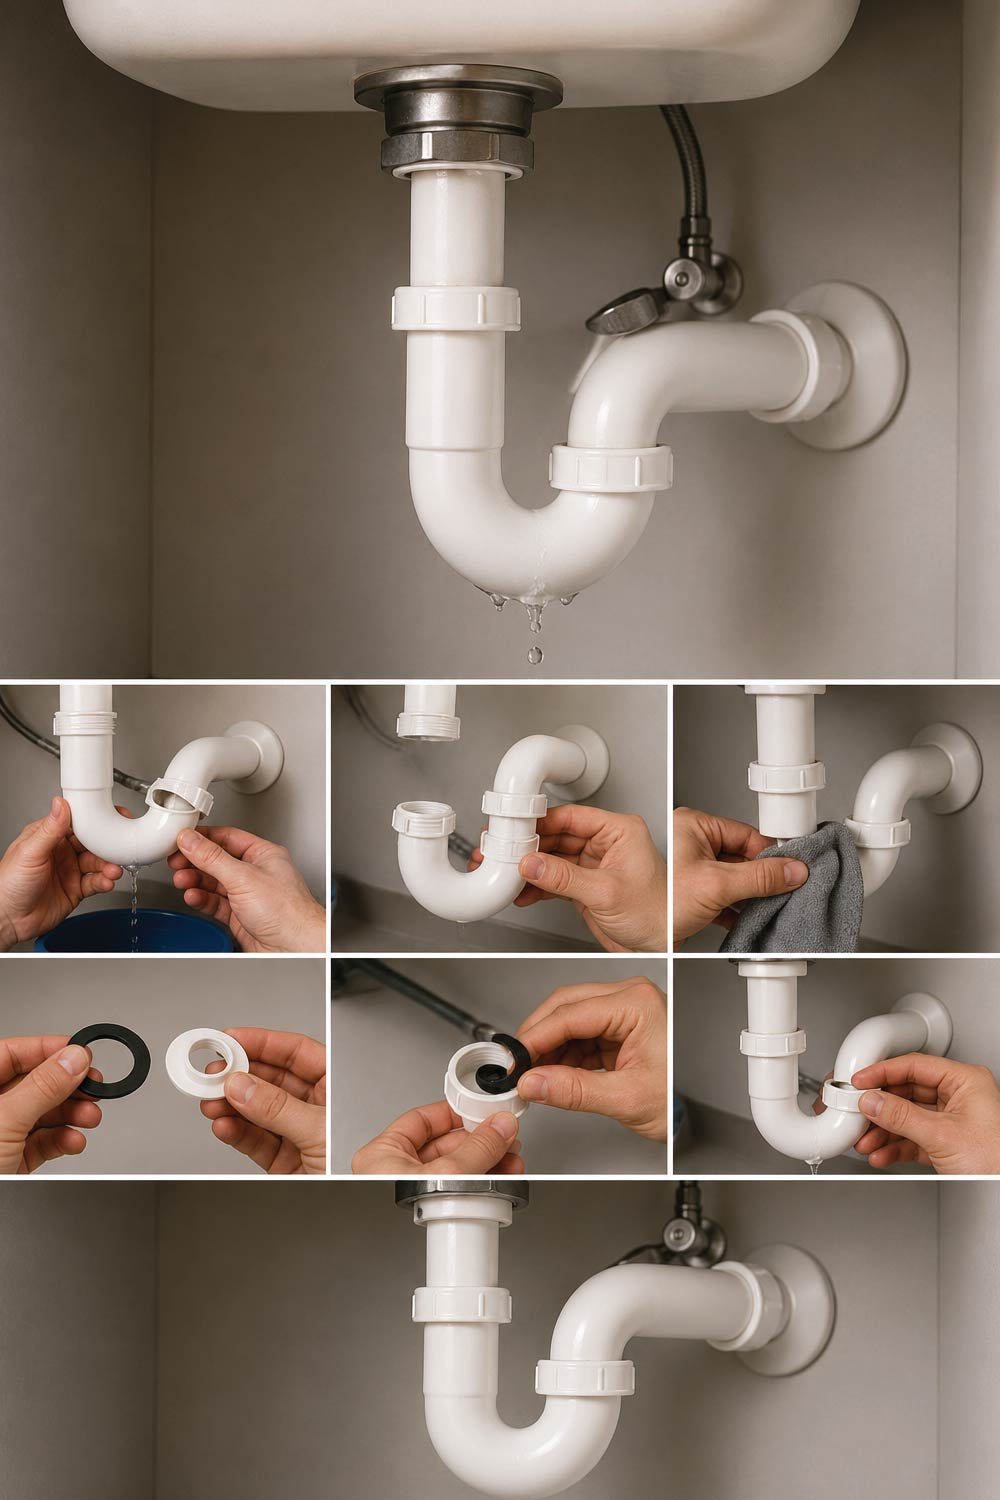
Fix 4: Fixing a Leaking Sink Trap Joint
Fixing a leaking sink trap joint involves correcting alignment issues or worn sealing components that commonly cause leaks under sinks. Proper reassembly ensures smooth drainage and prevents recurring drips.
Common Causes:
- Misaligned pipes
- Worn slip-joint washers
- Overtightened plastic fittings
Steps:
- Remove the trap
- Clean all connections
- Replace washers if needed
- Reinstall, ensuring proper alignment
- Hand-tighten, then test
If the trap is cracked or warped, replacement is the best option.
Fix 5: Repairing a PVC Pipe Joint Leak
Repairing a PVC pipe joint leak requires replacing or properly resealing the joint because PVC connections are typically solvent-welded. If the bond fails, tightening is ineffective and a proper rebuild of the joint is usually necessary for a permanent solution.
Best Options:
- Cut and replace the joint (permanent fix)
- Temporary patch (short-term only)
Permanent Fix:
- Cut out the leaking joint
- Clean and dry pipe ends
- Apply PVC primer
- Apply PVC cement
- Install new fitting
This requires precision and curing time but provides a long-lasting repair.
Also Read:
How to Fix a Kitchen Sink Leak: A Complete Step-by-Step Guide
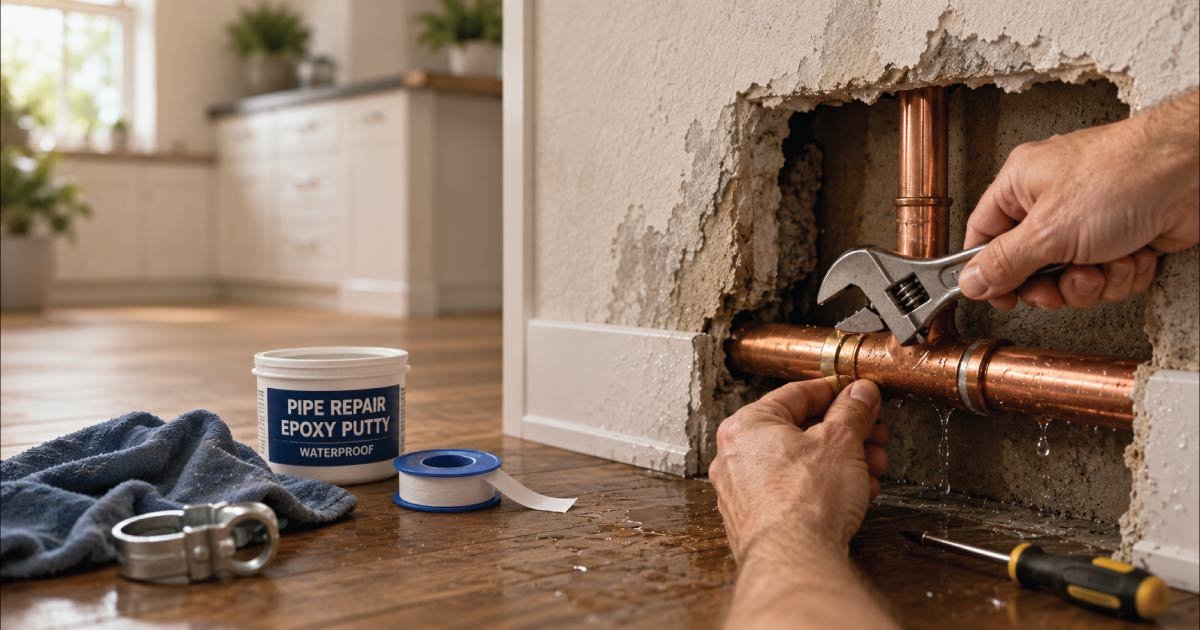
Temporary Emergency Fixes (Short-Term Only)
Temporary emergency fixes are useful when a permanent repair cannot be completed immediately. These methods help reduce water leakage and prevent further damage until proper plumbing repairs can be made.
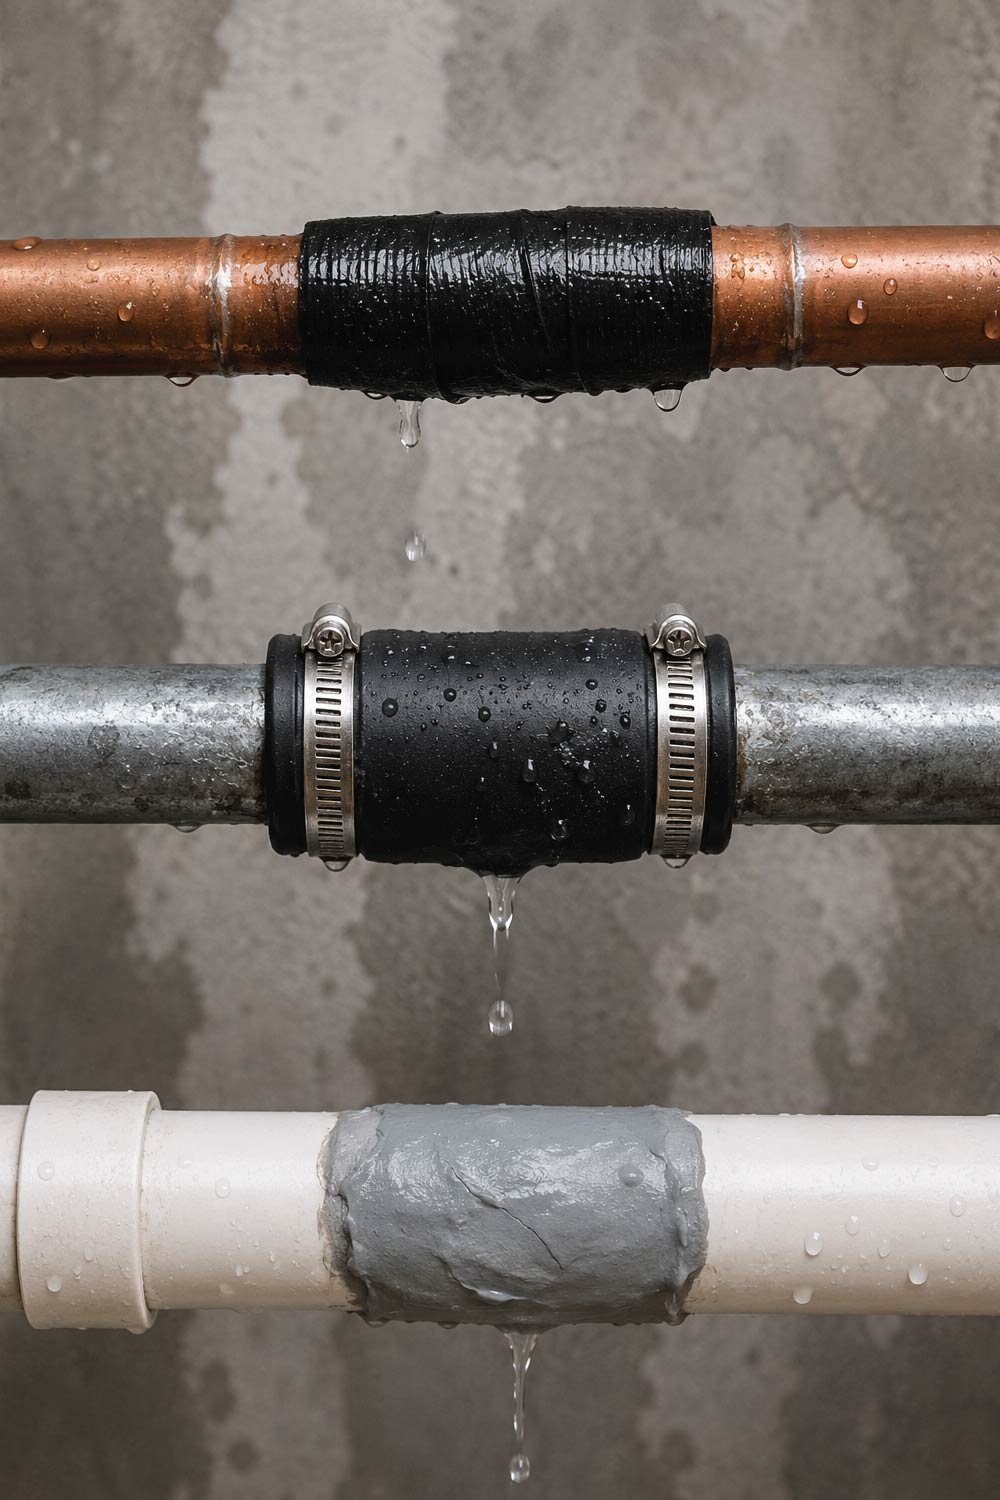
Temporary Options:
- Pipe repair tape
- Rubber patch with hose clamps
- Epoxy putty
These methods are not permanent and should only be used until proper repairs are made.
Fix 6: Addressing Corroded or Damaged Joints
Addressing corroded or damaged joints is necessary when deterioration prevents reliable sealing or repair. In such cases, replacement is often the safest and most effective solution to avoid repeated leaks and potential plumbing failure.
Signs Replacement Is Needed:
- Visible corrosion
- Repeated leaks after tightening
- Cracks or deformities
In these cases, replacing the fitting or pipe section is safer than patching.
Testing After the Repair
Testing after the repair ensures that the fixed joint is fully sealed and functioning properly under normal water pressure. Careful monitoring helps detect any remaining issues before they worsen.
- Slowly turn the water back on
- Watch the joint closely for several minutes
- Dry the area and recheck after 10–15 minutes
- Check again after a few hours
Even small drips should be addressed immediately.
Also Read:
Common Mistakes to Avoid
Common mistakes to avoid when fixing pipe joint leaks can lead to repeated failures or further damage. Following correct procedures ensures safer, longer-lasting plumbing repairs.
- Overtightening fittings
- Mixing incompatible pipe materials
- Using chemical sealants not designed for plumbing
- Ignoring alignment issues
- Applying temporary fixes permanently
Careful, correct repairs last longer and prevent repeat problems.
When to Call a Professional Plumber
When to call a professional plumber is important to recognize because some plumbing issues go beyond basic DIY repair and require specialized tools and expertise. Knowing when to stop attempting fixes helps prevent further damage, hidden leaks, and costly long-term repairs to your plumbing system.
- Leaks persist after multiple attempts
- Pipes are inside walls or ceilings
- The joint is part of a main water line
- Corrosion is widespread
- You’re unsure of pipe type or connection
Professional repairs prevent hidden water damage and costly future failures.
Also Read:
Preventing Future Pipe Joint Leaks
Preventing future pipe joint leaks involves regular maintenance and careful monitoring of your plumbing system. Simple preventive habits can significantly reduce the risk of leaks, extend pipe lifespan, and help maintain consistent water flow throughout your home.
Helpful tips:
- Inspect visible joints periodically
- Avoid hanging items on pipes
- Replace aging washers and supply lines
- Maintain proper water pressure
- Fix small leaks immediately
Routine checks help catch issues before they escalate.
Also Read:
How to Fix a Leaky Faucet: A Complete Step-by-Step Guide for Homeowners
Final Thoughts
Fixing a pipe joint leak is often easier than it looks, especially when the problem is a loose fitting or worn washer. By identifying the joint type, shutting off the water, and using the correct repair method, many homeowners can safely stop leaks and protect their homes.
The key is knowing when a repair is appropriate—and when replacement or professional help is the smarter choice. Addressing leaks promptly keeps your plumbing system reliable, efficient, and damage-free.