
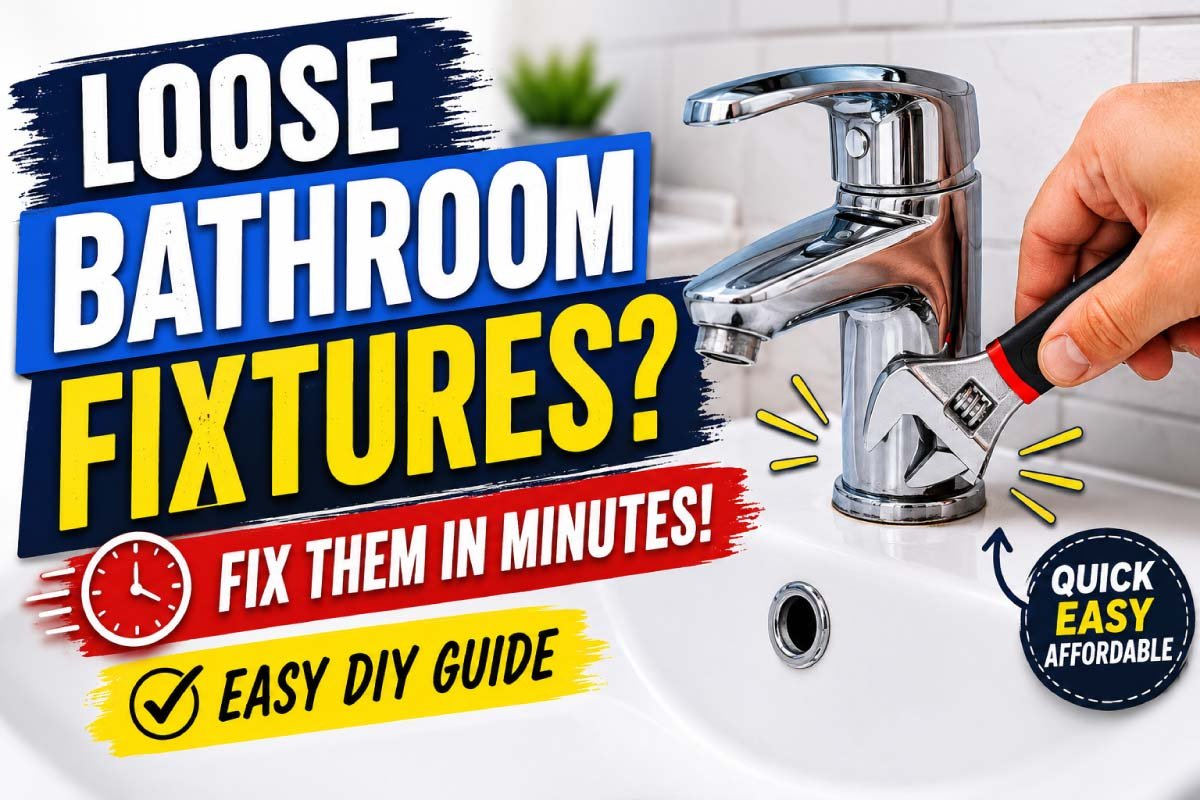
Loose bathroom fixtures are one of those small household problems that can quickly become annoying if ignored. A wobbling towel rack, a shaky toilet seat, or a moving faucet handle may seem harmless at first, but over time they can lead to damage, leaks, or even expensive repairs.
The good news is that most of these issues don’t require a plumber or special tools. With a few basic items and a little time, you can fix loose bathroom fixtures in minutes and restore stability to your space.
In this detailed DIY guide, you’ll learn why fixtures become loose, how to fix the most common bathroom fittings, and simple tips to prevent the problem from coming back.
Table of Contents
ToggleWhy Bathroom Fixtures Become Loose
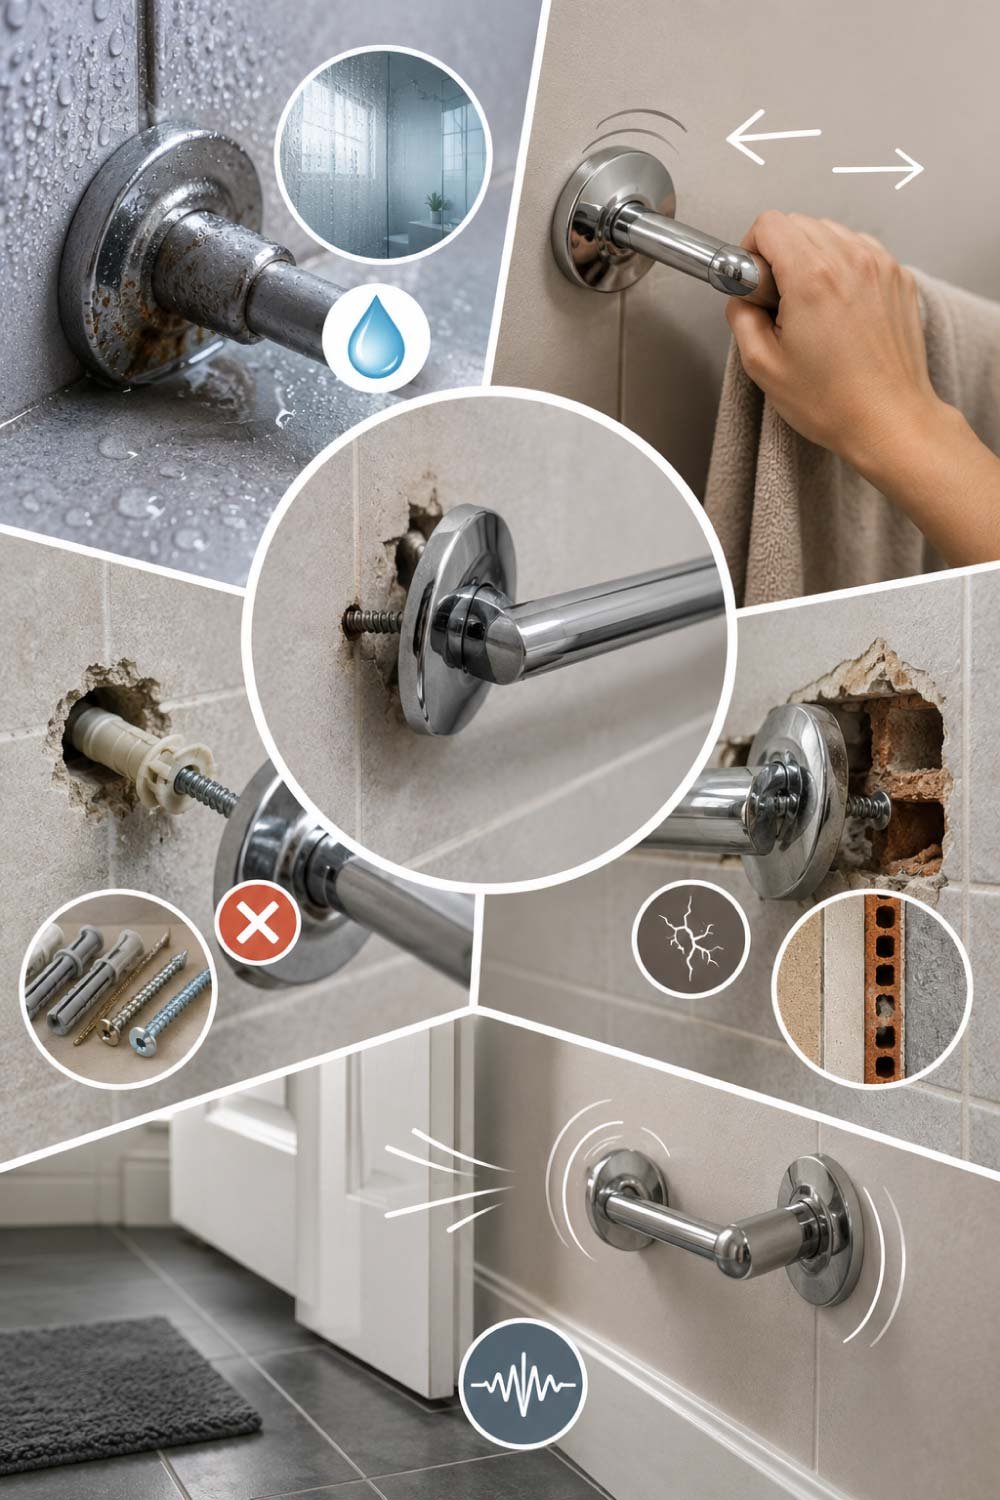
Bathroom fixtures often loosen over time due to a combination of environmental conditions and daily usage. Since bathrooms are constantly exposed to moisture, steam, and temperature changes, even well-installed fittings can gradually weaken. Understanding the root causes helps you prevent recurring issues and apply the right repair method effectively.
1. Moisture and Humidity
Constant exposure to steam, splashes, and high humidity slowly breaks down screws, wall anchors, and adhesives. Metal parts may rust, while plastic anchors lose grip. Over time, this weakens the fixture’s hold on the wall and causes gradual movement or complete loosening.
2. Frequent Use
Bathroom fixtures like towel racks, faucets, and toilet seats are handled multiple times every day. This repeated pressure creates small movements in screws and joints. Over weeks and months, these tiny shifts add up, eventually causing fittings to become unstable or wobbly.
3. Poor Installation
If fixtures were not installed correctly from the beginning, they are more likely to loosen quickly. Using the wrong type of screws, weak wall plugs, or skipping proper anchoring methods can reduce long-term stability, causing early failure even with light use.
4. Wall Material Issues
Different wall types react differently to fixtures. Drywall, hollow bricks, or poorly finished tile surfaces may not hold screws firmly without proper anchors. When the base material is weak, fixtures cannot stay tight and often start wobbling or pulling away.
5. Vibration and Movement
Small but repeated vibrations from slamming doors, stepping near walls, or general household activity can slowly loosen fittings. Even if the movement is not noticeable daily, it gradually affects screws and joints, reducing their grip over time.
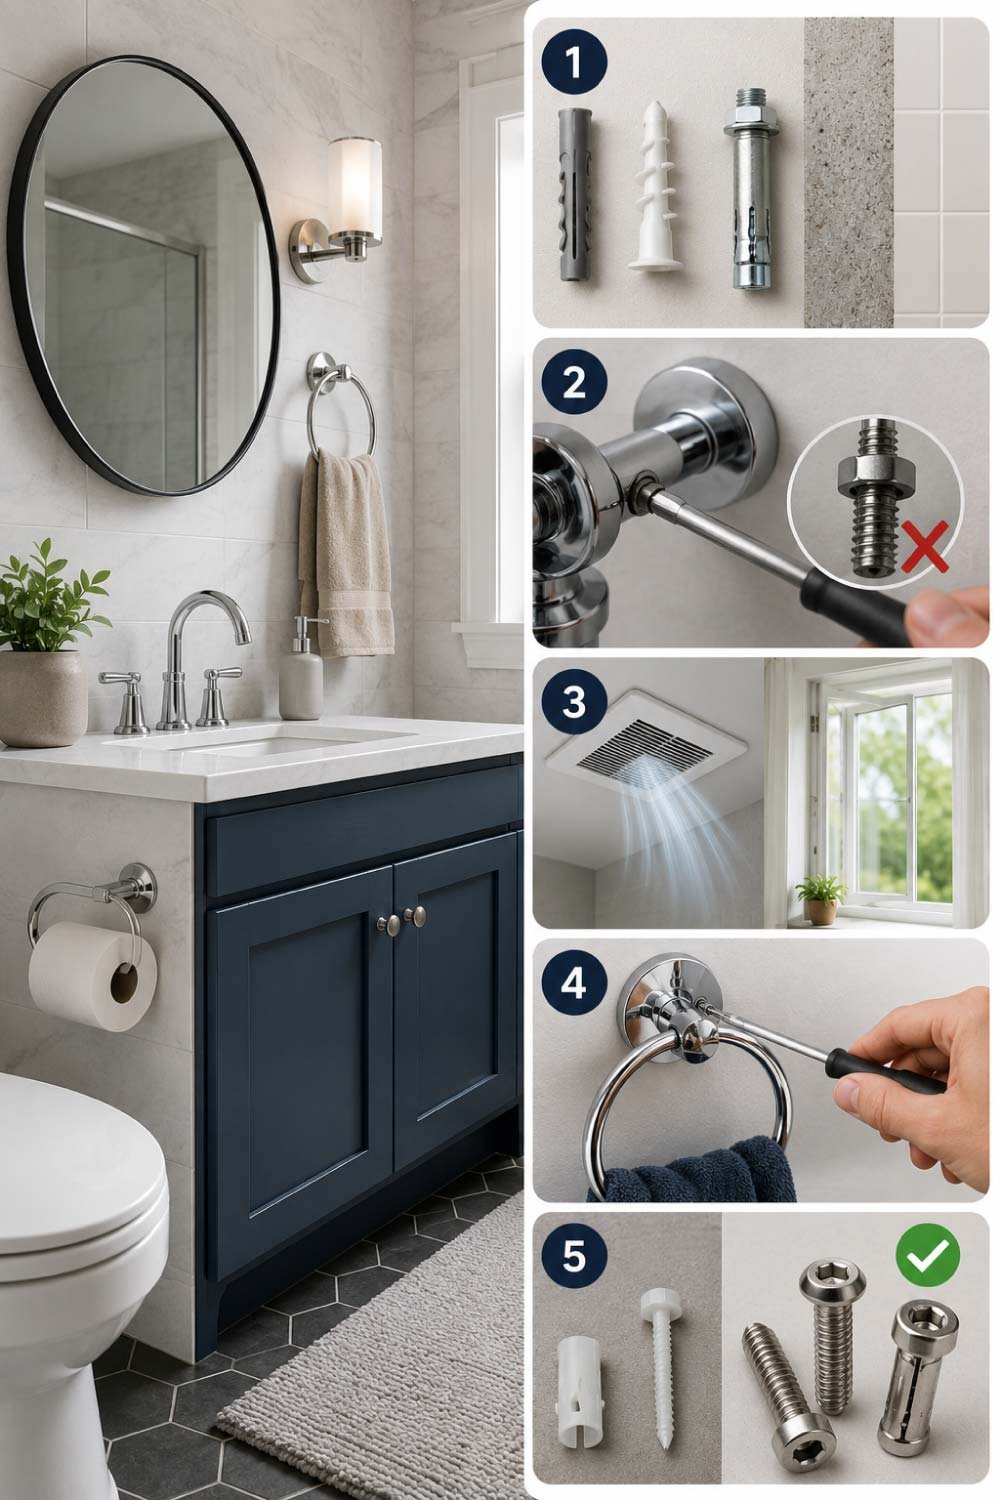
Tools You’ll Need for Quick Fixes
Most bathroom fixture repairs can be done easily at home without professional help. Having the right tools ready before starting saves time and prevents frustration during the repair process. These basic items are commonly available and suitable for most small to medium bathroom fixing tasks.
- Screwdriver set (flathead and Phillips)
A screwdriver set is essential for almost every bathroom repair. Different fixtures use different screw types, so having both flathead and Phillips screwdrivers ensures you can tighten or remove screws without damaging them. It is the most frequently used tool in quick DIY fixes. - Adjustable wrench
An adjustable wrench helps you grip and tighten nuts of different sizes, especially in faucet or toilet seat repairs. It provides strong turning power and allows better control when dealing with metal fittings that require firm tightening to prevent loosening. - Drill (optional for anchors)
A drill is useful when you need to create new holes for wall anchors or replace damaged fittings. It ensures precise and secure installation, especially for towel racks or mirrors. While optional, it becomes very helpful for stronger and longer-lasting repairs. - Wall plugs or anchors
Wall plugs and anchors provide extra grip inside walls, especially in drywall or hollow surfaces. They prevent screws from slipping out and distribute weight evenly. Choosing the right type based on your wall material ensures long-term fixture stability. - Super glue or epoxy (for minor fixes)
Super glue or epoxy is useful for small cracks or loose fittings that don’t require full replacement. These adhesives help reinforce weak areas and provide temporary or semi-permanent support for minor bathroom fixture issues. - Plumber’s tape (for faucet parts)
Plumber’s tape helps seal threaded connections in faucets and prevents water leakage. It also improves grip between fittings, reducing movement and ensuring a tighter, more secure connection in plumbing-related repairs. - Rubber washers
Rubber washers are small but important components that help absorb pressure and prevent loosening. They are commonly used in toilet seats and faucets to maintain stability and reduce friction between metal parts. - Cleaning cloth
A cleaning cloth is needed to wipe surfaces before and after repairs. Clean surfaces ensure better grip for screws, adhesives, and fittings, improving the overall quality and durability of the repair work. - Flashlight (for tight areas)
A flashlight helps you clearly see hidden or poorly lit areas behind toilets, sinks, or under fixtures. Proper visibility ensures accurate tightening and reduces the chances of missing loose parts during repair work.
Fixing a Loose Towel Rack
A loose towel rack is a common bathroom issue that usually starts with slight movement and becomes worse over time. Since towel racks carry daily weight and are frequently pulled, their screws and anchors gradually weaken. Fixing them early prevents complete detachment and wall damage.
Step-by-Step Fix:
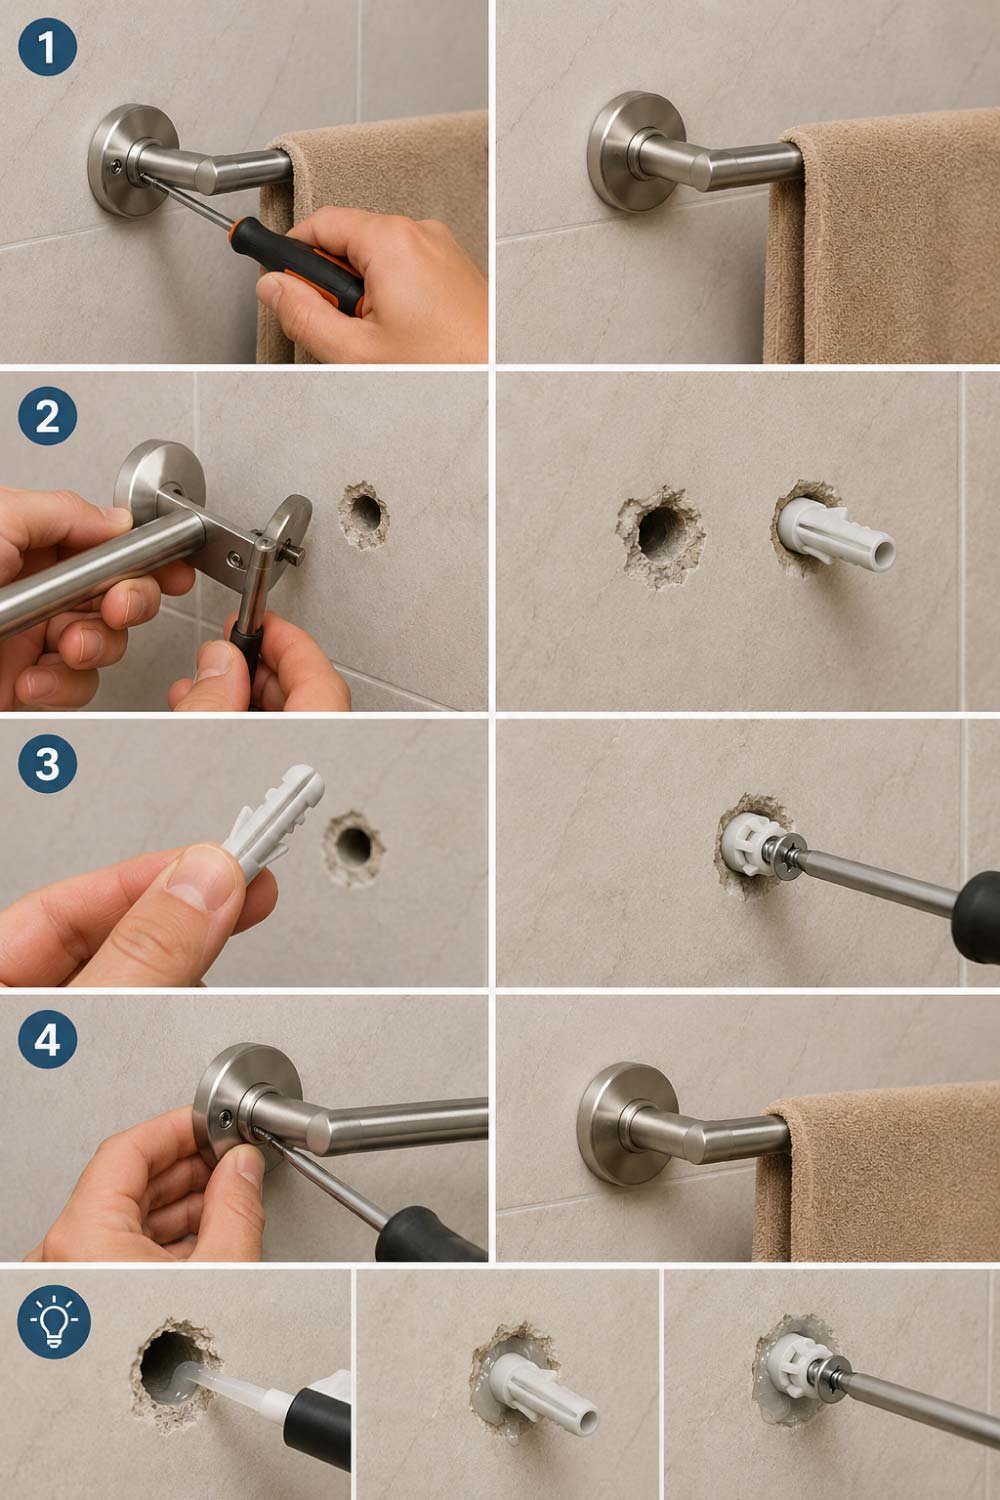
- Check the Screws
Begin by carefully inspecting both ends of the towel rack. In many cases, the issue is simply loose screws that have come undone due to repeated use. Tightening them with a screwdriver may immediately stabilize the rack without needing further repair. - Remove the Rack if Needed
If tightening does not solve the problem, gently remove the towel rack from the wall. This allows you to inspect the internal anchors and check whether the wall holes are damaged or widened, which is often the main cause of instability. - Replace Wall Anchors
Damaged or loose wall plugs should be replaced with stronger ones suitable for your wall type. Using the correct anchors ensures the screws grip properly inside the wall, providing long-term stability and preventing the rack from loosening again. - Reinstall Securely
If necessary, drill new holes slightly away from damaged areas and reinstall the rack. Hold it firmly in place while tightening screws to ensure a strong and even fit against the wall surface.
Extra Tip:
If the wall is crumbling or weak, apply a small amount of epoxy inside the hole before inserting anchors for a stronger grip.
Fixing a Loose Toilet Seat
A loose toilet seat is not only uncomfortable but also unhygienic and irritating during daily use. The constant movement puts stress on the hinges, causing bolts and washers to loosen over time. Fortunately, this is one of the easiest bathroom fixes you can handle at home.
Step-by-Step Fix:
- Locate the Hinges
Lift the toilet seat cover and carefully inspect the hinge area at the back of the bowl. These hinges hold the seat in place and are usually secured with bolts and nuts underneath the toilet rim. - Tighten the Nuts
Using a wrench or screwdriver, tighten the nuts located beneath the toilet bowl. Make sure both sides are tightened evenly to prevent uneven seating or further wobbling during use. - Replace Rubber Washers
If tightening does not solve the issue, the rubber washers may be worn out. Replacing them restores grip and prevents metal parts from slipping, ensuring a more stable and secure toilet seat. - Check Alignment
Before fully tightening everything, ensure the seat is properly aligned with the bowl. Correct alignment prevents future imbalance and ensures comfortable, stable usage.
Extra Tip:
Plastic toilet seat bolts wear out quickly. Consider upgrading to stainless steel bolts for longer durability.
Also Read:
Fixing a Loose Faucet Handle
A loose faucet handle can make daily use difficult and may eventually lead to leaks if ignored. Over time, constant turning weakens internal screws and fittings. Fixing it early ensures smooth operation and prevents unnecessary water wastage or damage.
Step-by-Step Fix:
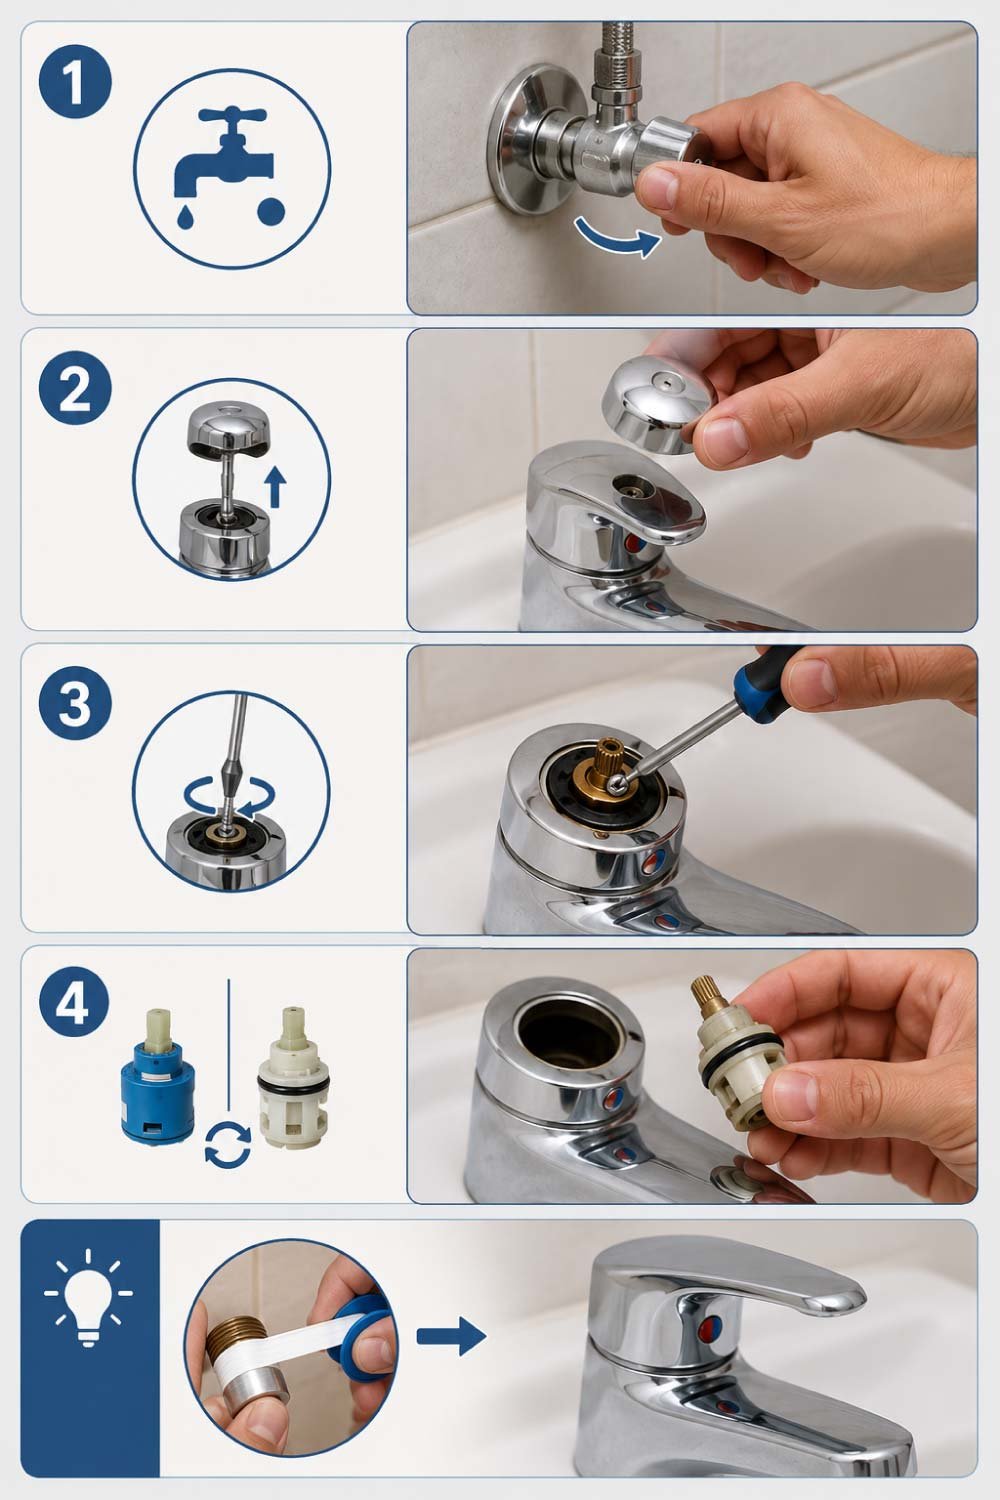
Turn Off Water Supply
Always shut off the water supply before starting any faucet repair. This prevents accidental leaks or water pressure issues while working on the internal components.
Remove the Handle Cover
Carefully remove the decorative cap or cover on the faucet handle. This exposes the internal screw or fastening mechanism that holds the handle securely in place.
Tighten the Screw
Use a screwdriver or Allen key to tighten the internal screw. This step usually resolves most handle looseness by securing the grip between the handle and valve stem.
Check Cartridge or Valve
If the handle still feels loose after tightening, the internal cartridge or valve may be worn out and require replacement for proper functionality.
Extra Tip:
Wrap plumber’s tape around threads before reassembling to improve sealing and stability.
Also Read:
How to Fix Squeaky Door Hinges: A Complete Step-by-Step Guide
Fixing a Loose Bathroom Mirror
A loose or shaking bathroom mirror can be both unsafe and frustrating, especially if mounted on tiles or drywall. Over time, screws, brackets, or adhesives may weaken due to humidity and vibration. Fixing it properly ensures safety and prevents accidental falling or cracking.
Step-by-Step Fix:
Inspect Mounting Brackets
Begin by checking all brackets, screws, and clips holding the mirror in place. Loose or missing hardware is often the main reason behind instability.
Tighten Screws Carefully
Use a screwdriver to tighten all mounting screws evenly. Be gentle to avoid cracking tiles or damaging the mirror frame during the tightening process.
Reinforce with Wall Anchors
If the mirror still feels unstable, install stronger wall anchors to improve grip. This helps distribute weight more effectively across the wall surface.
Use Adhesive Support (Optional)
For extra safety, apply mirror adhesive behind the frame to provide additional support and reduce movement.
Extra Tip:
Always support the mirror with both hands while tightening to prevent cracks.
Fixing Loose Shower Heads
A loose shower head can cause uneven water flow and leaks.
Step-by-Step Fix:
Unscrew the Shower Head
Remove it gently from the pipe.
Clean the Threads
Remove mineral buildup using a brush or vinegar solution.
Apply Plumber’s Tape
Wrap the threads with Teflon tape to improve grip and sealing.
Reattach and Tighten
Screw it back in firmly but avoid overtightening.
Extra Tip:
If the shower arm itself is loose, tighten it at the wall connection point as well.
Fixing Loose Bathroom Cabinets
Bathroom cabinets often loosen due to moisture and heavy usage.
Step-by-Step Fix:
Empty the Cabinet
Remove all items for safety.
Check Hinges
Tighten hinge screws on both door and frame.
Replace Damaged Screws
If screws won’t hold, replace them with slightly longer ones.
Reinforce Wall Mounts
For wall-mounted cabinets, add stronger anchors or brackets.
Extra Tip:
Apply a thin layer of sealant around wall contact points to reduce moisture damage.
Preventing Bathroom Fixtures from Loosening Again
Fixing loose fixtures is only half the job. Preventing them from loosening again saves time and effort in the long run.
1. Use High-Quality Anchors
Always choose anchors suitable for your wall type—drywall, concrete, or tile.
2. Avoid Over-Tightening
Over-tightening can damage threads and weaken grip over time.
3. Control Bathroom Moisture
Use exhaust fans or open windows to reduce humidity levels.
4. Inspect Fixtures Regularly
Check screws and fittings every few months.
5. Upgrade Weak Hardware
Replace plastic or low-quality parts with stainless steel or rust-resistant materials.
When to Call a Professional
While most loose fixture issues are easy to fix, there are times when professional help is necessary:
- Wall damage is extensive
- Water leakage is involved
- Fixtures keep loosening repeatedly
- Electrical components are near bathroom fittings
A professional plumber or handyman can ensure long-term safety and proper installation.
Final Thoughts
Loose bathroom fixtures may seem like minor inconveniences, but they can lead to bigger problems if ignored. The good news is that most of them can be fixed in just a few minutes using basic tools and simple techniques.
Whether it’s a shaky towel rack, a wobbly toilet seat, or a loose faucet handle, a little DIY effort can restore stability and keep your bathroom safe and functional.
By tightening, reinforcing, and maintaining your fixtures regularly, you can avoid unnecessary repairs and enjoy a more secure and comfortable bathroom space.
Small fixes today can prevent big problems tomorrow.
Also Read: