
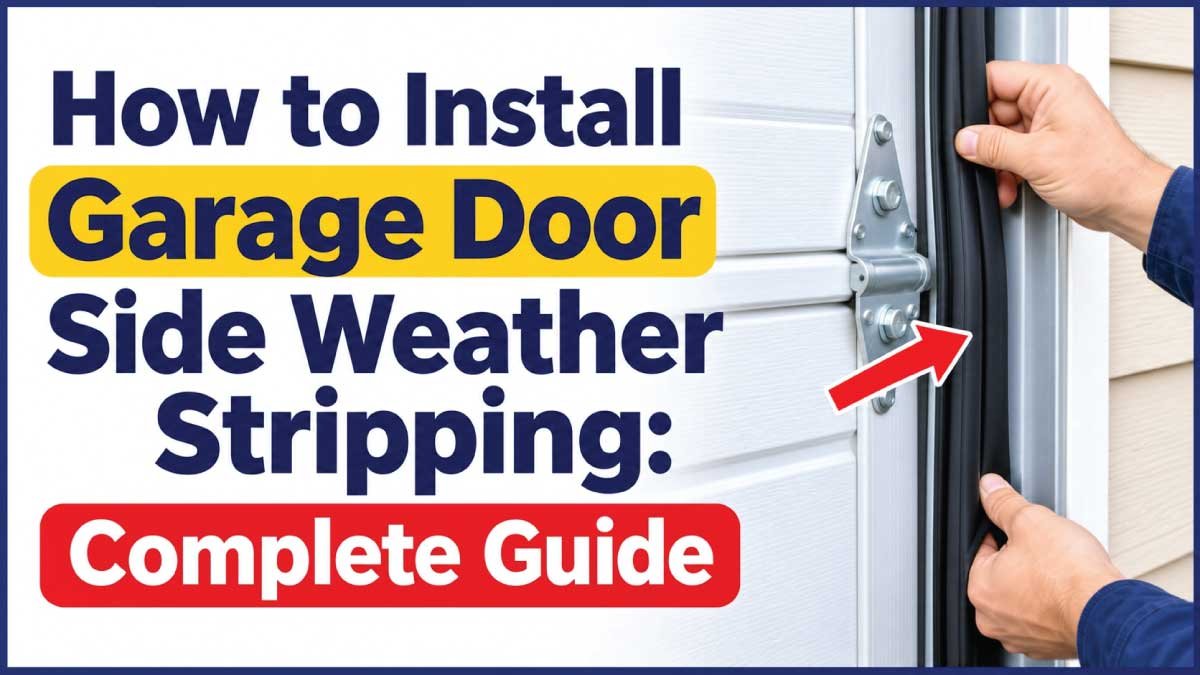
Installing garage door side weather stripping is a practical way to reduce drafts, dust, insects, and moisture entering through the gaps around a garage door. The vertical seals along both sides help close the space between the moving door and the stationary frame. When these seals become cracked, loose, or flattened, outside air can easily enter the garage.
Replacing side weatherstripping is usually a manageable DIY project when the door and frame are in good condition. However, choosing the correct seal and positioning it properly are important. A seal that is too thick can interfere with closing, while one that is too narrow may leave gaps along the edges.
This guide explains how to measure, remove, and install garage door side weather stripping. It also covers different seal types, common installation mistakes, troubleshooting tips, maintenance, and situations where professional assistance is recommended.
What Is Garage Door Side Weather Stripping?
Garage door side weather stripping is a flexible sealing material installed along the vertical edges of the garage door opening. It helps close the gap between the door and the side jambs when the door is fully closed.
Unlike the bottom weatherstrip, which contacts the garage floor, side weatherstripping is normally attached to the stationary frame or stop molding. Its flexible edge makes contact with the door as it closes.
Why Is Side Weatherstripping Important?
Side weatherstripping helps protect the garage from several common problems:
- Cold air: Reduces drafts entering through the vertical edges.
- Dust and dirt: Limits outdoor debris entering the garage.
- Rainwater: Helps reduce water entry through side gaps.
- Insects: Closes openings that pests may use to enter.
- Outdoor noise: Can reduce some noise passing through small gaps.
- Temperature changes: Helps maintain a more comfortable garage environment.
Side seals are especially useful when the garage is attached to the house or used as a workshop, storage area, or frequently occupied space.
Types of Garage Door Side Weather Stripping
Before starting the installation, identify which type of weatherstripping is suitable for your garage door. Different products use different mounting methods and sealing profiles.
1. Vinyl Side Weatherstripping
<AsyncImage query=”vinyl garage door side weather stripping flexible flap stop molding” aspectRatio=”16:9″ width=”100%”/>
Vinyl weatherstripping is a common option for residential garage doors. It usually consists of a mounting strip with a flexible vinyl flap that touches the closed door.
Advantages:
- Widely available in different lengths and profiles.
- Relatively easy to install.
- Helps reduce drafts and moisture entry.
- Suitable for many standard residential openings.
Limitations:
- Some products become less flexible in very cold weather.
- Low-quality vinyl may crack or deteriorate with prolonged sunlight.
- Incorrect positioning can leave gaps.
2. Rubber Side Weatherstripping
<AsyncImage query=”rubber garage door side weather stripping seal profile” aspectRatio=”16:9″ width=”100%”/>
Rubber side seals are designed to remain flexible and maintain contact with the garage door. Depending on the profile, they may be suitable for small variations in the gap.
Advantages:
- Flexible sealing material.
- Available in different profiles and thicknesses.
- Can provide consistent contact when correctly sized.
- Some rubber formulations perform well in changing temperatures.
Limitations:
- Product quality varies.
- Some profiles require compatible mounting channels.
- Oversized seals may create excessive pressure against the door.
3. Adjustable Garage Door Side Seals
<AsyncImage query=”adjustable garage door side weatherstrip retainer installation” aspectRatio=”16:9″ width=”100%”/>
Adjustable side weatherstripping uses a mounting system that allows the sealing flap to be positioned closer to or farther from the door.
It can be useful when the frame has minor irregularities or the gap changes slightly along its height.
Advantages:
- Allows positioning adjustments.
- Can accommodate minor variations in spacing.
- Available in different materials and profiles.
Limitations:
- Requires careful positioning.
- May not correct severe frame or door alignment problems.
- Must be compatible with the garage door opening.
4. Brush Garage Door Side Seals
<AsyncImage query=”garage door vertical brush weather seal mounted on frame” aspectRatio=”16:9″ width=”100%”/>
Brush seals use flexible bristles attached to a mounting base. They can follow irregular surfaces and help reduce dust and debris entering through certain openings.
However, brush seals generally do not provide the same airtight contact as a suitable rubber compression seal. They are more specialized and should be selected according to the intended application.
Tools and Materials Needed
Gather the necessary tools and materials before removing the existing weatherstripping. Having everything ready makes the installation easier and reduces the chance of leaving the garage door partially sealed.
| Tool or Material | Purpose |
|---|---|
| Replacement side weatherstripping | Creates a new sealing barrier |
| Measuring tape | Measures the height and gap size |
| Utility knife or scissors | Cuts the seal to the required length |
| Screwdriver | Removes and installs fasteners |
| Drill | Installs compatible screws when needed |
| Exterior-grade screws | Secures mounting strips |
| Cleaning cloth | Removes dust and dirt |
| Mild detergent | Cleans the frame |
| Putty knife | Helps remove old adhesive or residue |
| Safety glasses | Protects eyes during installation |
The exact supplies depend on the weatherstrip design. Some products use screws, while others attach with adhesive or fit into an existing retainer. Follow the manufacturer’s instructions for the specific product.
How to Install Garage Door Side Weather Stripping
The following steps explain how to replace common surface-mounted side weatherstripping. If your garage door uses a different mounting system, follow its product-specific installation instructions.
Step 1: Close the Garage Door and Inspect the Existing Seal
Start by closing the garage door completely. Stand inside the garage and examine both vertical edges.
Look for cracks, tears, flattened sections, loose fasteners, and areas where the seal no longer touches the door.
Check the entire height of each side, including the upper and lower corners. A seal may appear fine in the middle but leave an opening near the floor.
Also observe whether the gap is similar on both sides. If the door looks crooked or the gap changes significantly, the issue may involve door alignment rather than weatherstripping.
Step 2: Measure the Garage Door Sides
Use a measuring tape to determine the height of both vertical sides of the opening.
Measure each side separately because older garage openings may not have identical dimensions.
Next, inspect the gap between the closed door and the frame at several points. This helps determine the appropriate seal profile and thickness.
Record the measurements before purchasing replacement material. A seal that is too short may leave exposed areas, while one that is too thick may prevent proper closing.
Step 3: Purchase Compatible Weatherstripping
Choose a replacement product that matches the garage door’s mounting arrangement and gap size.
For most standard residential doors, vinyl or rubber side weatherstripping is a practical choice. An adjustable system may be useful when the frame has minor variations.
Before purchasing, check:
- Required length for both sides.
- Width and shape of the mounting base.
- Material and flexibility.
- Compatibility with the existing retainer, if one is being reused.
- Manufacturer’s recommended installation method.
Avoid choosing a product based only on appearance. Its mounting system and dimensions must match the opening.
Step 4: Remove the Old Weatherstripping
If the existing weatherstrip is damaged, remove it carefully.
For screw-mounted products, use a screwdriver or drill to remove the fasteners. If the material is attached with adhesive, follow the manufacturer’s removal recommendations.
Some systems have a separate retainer that holds a replaceable insert. In that case, you may only need to remove the old insert rather than the entire mounting strip.
Work carefully to avoid damaging the wooden frame, metal trim, or surrounding paint. If the retainer is bent or deteriorated, replace it before installing the new seal.
Step 5: Clean the Side Frame
After removing the old material, clean the vertical mounting surface.
Use a cloth and mild detergent to remove dirt, grease, dust, and loose debris. Remove old adhesive residue using a method suitable for the frame material.
Allow the surface to dry completely before installing the replacement.
Inspect the frame for cracks, rot, corrosion, or loose trim. Repair damaged mounting areas first because new weatherstripping will not remain secure on a weak surface.
Step 6: Position the New Weatherstripping
Hold the new weatherstrip against the side frame according to the product instructions.
The flexible sealing edge should meet the closed garage door evenly. It should not be positioned so tightly that it pushes against the door or interferes with its movement.
For adjustable products, position the mounting base so the flap makes light contact along the full vertical edge.
Check the top, middle, and bottom before securing the material. This helps prevent uneven contact and uncovered sections.
Step 7: Secure the Mounting Strip
Once the position is correct, attach the mounting strip using the recommended screws, clips, or adhesive.
For screw-mounted products, install compatible fasteners at the recommended spacing. Tighten them evenly without overtightening.
If the product has an adjustable base, follow the instructions for positioning and tightening it. Some systems require the seal to be tested before the fasteners are fully secured.
Keep screws and other fasteners away from moving door components, tracks, rollers, and hinges.
Step 8: Trim Excess Weatherstripping
After securing the seal, inspect the upper and lower ends.
If the weatherstripping is longer than required, trim the excess using a utility knife or scissors as recommended by the manufacturer.
Make clean cuts and avoid removing too much material. The seal should cover the full intended area without bunching or interfering with the bottom weatherstrip.
Check both sides to make sure the finished lengths are appropriate for their respective openings.
Step 9: Check the Top and Bottom Corners
The points where side weatherstripping meets the top and bottom seals can leave small openings.
Inspect these areas carefully. Make sure the side material is positioned correctly and does not overlap in a way that prevents the door from closing.
Use compatible corner pieces or manufacturer-approved accessories if the sealing system provides them.
Do not fill moving gaps with rigid caulk or expanding foam.
Step 10: Test the Garage Door
Stand clear of the door and operate it using the normal controls.
Watch the side seals as the door opens and closes. They should remain in position without catching, folding, or creating excessive friction.
After the door closes, inspect both vertical edges. The weatherstripping should make consistent contact without preventing the door from reaching its normal closed position.
If the door reverses, struggles, or makes unusual noises, stop operating it and arrange an inspection. Never disable the opener’s safety features to compensate for a poorly fitted seal.
Also Read:
How to Install Side Weatherstripping on an Uneven Garage Door Frame
An uneven frame requires extra attention because the gap may change from top to bottom. A standard fixed seal may not provide consistent contact along the entire side.
1. Measure the Gap at Several Locations
Measure the opening at the top, middle, and bottom of each side. Record the results separately.
This shows whether the gap is consistently narrow or changes significantly along the frame.
2. Check the Frame Before Installing the Seal
Look for warped wood, loose trim, damaged mounting surfaces, or visible movement around the opening.
If the frame is severely damaged, repair it before installing new weatherstripping. A flexible seal cannot correct a structurally weak frame.
3. Consider an Adjustable Weatherstrip
An adjustable side seal may help when the frame has small variations but remains in good condition.
Position the mounting base so the flexible flap makes light contact with the closed door. Follow the product’s adjustment instructions rather than forcing the material into place.
4. Avoid Oversized Seals
A thicker weatherstrip may appear to cover a larger opening, but excessive pressure can interfere with door movement.
Choose a seal that matches the manufacturer’s recommended gap range. If the opening is too large, investigate the frame or door alignment instead of adding multiple layers.
Also Read:
How to Fix Uneven Gaps Between Garage Door and Frame: Complete Guide
Common Installation Mistakes to Avoid
Even a good weatherstrip may fail if it is installed incorrectly. Avoid these mistakes to improve the quality and durability of the repair.
1. Choosing the Wrong Weatherstripping Size
A seal that is too narrow may leave gaps, while one that is too thick may prevent normal closing.
Measure the opening at several points and compare the measurements with the product specifications before purchasing.
2. Installing Weatherstripping on a Dirty Surface
Dust, grease, moisture, and loose paint can weaken adhesive attachment and affect the position of the seal.
Clean and dry the frame before installation. Make sure the mounting surface is stable enough to hold the fasteners.
3. Securing the Seal Unevenly
If one section is pulled tighter than another, the weatherstrip may twist or leave gaps.
Position the material carefully and secure it gradually along the full length. Check contact before tightening the fasteners completely.
4. Using Ordinary Indoor Foam Tape
Indoor foam tape may deteriorate quickly when exposed to outdoor temperatures, sunlight, moisture, and repeated contact.
Use a garage door-specific weatherstrip designed for the intended installation.
5. Ignoring the Bottom Corners
A properly installed side seal may still leave drafts if the bottom corners are open.
Inspect the bottom weatherstrip and the points where the vertical and horizontal seals meet.
6. Adjusting Springs or Cables to Fix a Gap
Garage door springs and cables can be under significant tension. Incorrect adjustments can cause serious injuries.
Never loosen springs, cables, bottom brackets, or loaded track components to improve the fit of side weatherstripping. Contact a qualified technician if the door is misaligned.
Also Read:
How Much Does It Cost to Install Garage Door Side Weather Stripping?
The cost depends on the type of weatherstripping, garage door dimensions, mounting system, and whether you install it yourself or hire a professional.
| Item or Service | Approximate Cost in USD |
|---|---|
| Basic vinyl side weatherstripping | $10–$30 |
| Rubber side weatherstripping | $15–$40 |
| Adjustable side seal kit | $20–$60 |
| Brush side seal | $20–$70 |
| Replacement mounting retainer | $15–$50 |
| DIY installation supplies | $5–$20 |
| Professional side seal installation | $75–$200 |
| Minor frame or trim repair | $50–$200 |
These are general estimates and vary by product quality, door size, location, and labor rates. Significant frame damage or garage door alignment problems can increase the total cost.
How to Maintain Garage Door Side Weatherstripping
Regular maintenance helps keep the seals flexible and reduces the likelihood of drafts returning.
Inspect the Seals Regularly
Check both sides every few months for cracks, tears, flattened areas, and loose fasteners. Pay attention to sections that no longer touch the closed door.
Clean the Weatherstripping
Remove dirt and debris with a soft cloth. Use only cleaning products recommended by the manufacturer because some chemicals can damage rubber or vinyl.
Check the Mounting Points
Look for loose screws, separated adhesive, or bent retainers. Secure or replace damaged mounting components using compatible hardware.
Inspect the Entire Door Perimeter
Check the side seals together with the top weatherstrip and bottom seal. Air and water can enter through any poorly sealed edge.
Replace Worn Seals Promptly
If the material becomes brittle, cracked, or permanently flattened, replace it rather than relying on temporary patches. A properly fitted replacement helps maintain consistent contact with the door.
When Should You Call a Professional?
Side weatherstripping replacement is often a straightforward maintenance task, but some problems require professional attention.
Contact a garage door technician if:
- The door appears crooked or sits unevenly in the opening.
- One side has a much larger gap than the other.
- The tracks or rollers look bent or damaged.
- The door reverses or struggles while closing.
- The side seals cannot maintain contact after replacement.
- The frame is severely warped or structurally damaged.
- You notice loose cables, damaged springs, or unusual movement.
A professional can determine whether the problem comes from the weatherstripping, frame, door alignment, or operating hardware. This prevents repeated seal replacements when the underlying issue has not been corrected.
Conclusion
Installing garage door side weather stripping helps reduce drafts, dust, insects, and moisture entering through the vertical edges of the garage door. For many residential doors, replacing worn vinyl or rubber seals is a manageable DIY project. Accurate measurements, a clean mounting surface, and careful positioning are essential for a reliable result.
Before starting, inspect both sides and confirm that the existing frame and door are in good condition. Select a compatible weatherstrip that makes light, consistent contact with the closed door. Avoid using oversized seals or multiple layers of foam because they can interfere with normal operation.
After installation, test the door and inspect the top and bottom corners for remaining gaps. If the door is crooked, moves unevenly, or has damaged springs, cables, or tracks, contact a qualified technician. Proper installation and regular maintenance help keep the garage better protected while allowing the door to operate safely.
Frequently Asked Questions
1. Which Side of Garage Door Weatherstripping Faces the Door?
The flexible sealing edge should face the garage door so it can make contact when the door is closed. The mounting base is attached to the stationary frame according to the product instructions. Because profiles differ, check the manufacturer’s diagram before installing the weatherstrip.
2. Can I Install Garage Door Side Weatherstripping Myself?
Yes. Many surface-mounted side weatherstripping products can be installed using basic tools such as a measuring tape, screwdriver, drill, and utility knife. The important steps are measuring correctly, preparing the frame, securing the seal evenly, and testing the door afterward. Leave alignment and spring-related repairs to a professional.
3. How Long Does It Take to Install Garage Door Side Weatherstripping?
For a straightforward replacement on a standard residential door, installation may take approximately one to two hours, depending on the mounting system and condition of the frame. Removing old adhesive, repairing damaged trim, or fitting an adjustable retainer can increase the time required.
4. Should Garage Door Side Weatherstripping Touch the Door?
Yes. The flexible edge should make light, consistent contact with the closed door. It should close the gap without creating excessive pressure or preventing normal movement. If the seal pushes too tightly against the door, it may wear prematurely or interfere with closing.
5. Can I Reuse the Existing Garage Door Side Seal Retainer?
You can often reuse an existing retainer if it is straight, secure, undamaged, and compatible with the replacement insert. Inspect its shape and mounting points before purchasing the new material. Replace a bent, corroded, or loose retainer when it cannot hold the weatherstrip securely.
6. What Is the Best Material for Garage Door Side Weatherstripping?
Vinyl and rubber are common choices for residential garage door side seals. Rubber can provide flexible contact, while vinyl is widely available in different profiles. The best option depends on the gap size, mounting arrangement, local climate, and the manufacturer’s specifications.
7. How Do I Install Side Weatherstripping on an Uneven Frame?
Measure the gap at several points and choose a compatible adjustable or flexible seal. Position it to maintain light contact along the closed door. If the frame is severely warped or the door sits crooked, repair the underlying problem instead of forcing an oversized weatherstrip into place.
8. Why Is My Garage Door Hard to Close After Installing Weatherstripping?
The new seal may be too thick, positioned too tightly, or incompatible with the opening. It could also be catching on the door during movement. Stop operating the door if it struggles or reverses. Check the product installation instructions and have the door inspected if the problem continues.
9. Do I Need to Replace Both Garage Door Side Seals?
Replace both sides when both seals are similarly aged, cracked, or flattened. This can provide consistent sealing along the opening. If only one side is damaged and the other remains flexible and secure, replacing only the affected seal may be sufficient.
10. How Often Should Garage Door Side Weatherstripping Be Replaced?
There is no fixed replacement interval because weatherstripping wears differently depending on sunlight, moisture, temperature, and door usage. Inspect it every few months and replace it when it becomes brittle, cracked, detached, or unable to maintain contact with the closed door.