How to Tighten a Door Hinge: A Complete DIY Guide for Homeowners

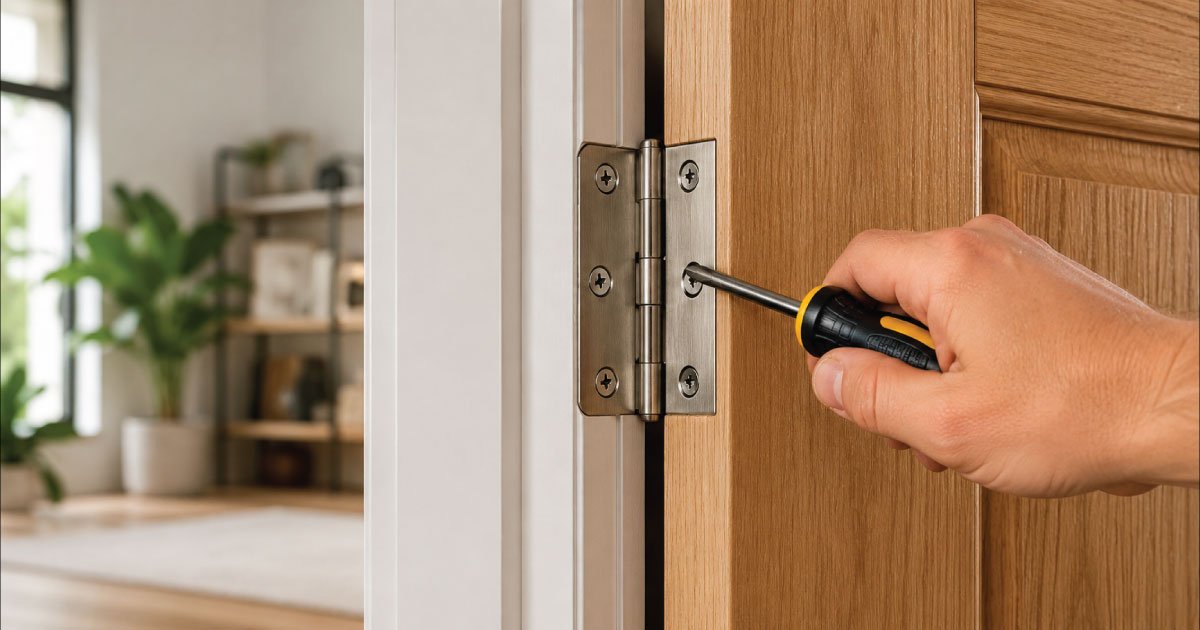
A loose door hinge might seem like a minor inconvenience, but over time it can lead to bigger problems misaligned doors, annoying squeaks, scraping floors, or even damage to the door frame. Whether it’s a bedroom door that won’t close properly or a front door that feels unstable, tightening door hinges is a simple and effective fix you can do yourself without calling a professional.

In this guide, we’ll walk you through everything you need to know about tightening door hinges, from identifying the problem to fixing it step by step. Even if you have no prior DIY experience, this blog will help you handle the task with confidence.


Why Door Hinges Become Loose 

Door hinges are an essential part of everyday functionality, yet they often go unnoticed until problems arise. Over time, even the strongest hinges can become loose due to constant use and environmental factors. Understanding the root causes helps you fix the issue effectively and prevent it from happening again in the future.

Why Door Hinges Become Loose

1. Frequent Use

Doors that are used many times a day naturally experience wear on their hinges. Continuous opening and closing puts pressure on screws, gradually weakening their grip and causing looseness over time if not maintained properly.

How Constant Movement Affects Hinges

Frequent motion creates small vibrations that slowly shift screws out of place. Over time, this repeated stress reduces the tightness of the hinge, leading to instability and misalignment.

  • Doors that are used regularly—like main entrances or bathroom doors—experience constant movement. This repeated motion gradually loosens the screws holding the hinges in place.

2. Wood Wear and Tear

The wooden surface where hinges are attached can degrade with age and use. As the material weakens, it loses its ability to hold screws firmly, making the hinges feel loose and unstable.

Why Wood Loses Its Grip

Wood fibers can break down or become stripped due to repeated screw adjustments. This reduces friction, making it difficult for screws to stay tightly secured within the hinge area.

  • Over time, the wood around the hinge screws may wear out or become stripped. When this happens, screws can no longer grip tightly.

3. Temperature and Humidity Changes

Environmental conditions play a significant role in how materials behave. Changes in temperature and humidity can cause wood to expand and contract, which directly affects the tightness of hinge screws.

Impact of Weather on Hinges

As wood expands in moisture and shrinks in dry conditions, screws may loosen slightly with each cycle. Over time, this repeated movement leads to noticeable hinge instability.

  • Wood expands and contracts due to weather changes. This movement can slowly loosen screws and affect hinge alignment.

4. Poor Installation

Improper installation is another major reason hinges become loose quickly. If screws are not secured correctly from the start, the hinges will not have a strong foundation to hold onto.

Installation Mistakes That Cause Looseness

Using incorrect screw sizes or misaligning hinges during installation weakens their hold. This results in faster wear and frequent need for repairs.

  • If hinges were not installed correctly in the first place, they may loosen much faster.

Signs Your Door Hinges Need Tightening 

Recognizing early warning signs can save you from bigger repair issues later. Loose hinges often show clear symptoms that affect door movement and alignment. Paying attention to these indicators ensures timely maintenance and smoother door operation.

Signs Your Door Hinges Need Tightening

Common Warning Indicators

Several noticeable changes in your door’s behavior can signal loose hinges. Identifying these signs early helps you address the problem before it worsens or damages the door frame.

What to Look For

These symptoms are easy to spot and usually appear gradually. Regular inspection can help you catch them before they become serious problems.

  • The door makes squeaking or creaking noises
  • The door doesn’t close properly
  • The door rubs against the floor or frame
  • Visible gaps between hinge and door/frame
  • Screws appear loose or stick out

If you notice any of these, it’s time to tighten your door hinges.


Tools You’ll Need

Before starting the repair process, gathering the right tools is important for efficiency. Fortunately, tightening door hinges doesn’t require advanced equipment—just a few basic tools that are commonly available at home.

Essential Equipment

Having the proper tools ready ensures a smoother workflow and prevents interruptions. Each tool plays a specific role in fixing and securing the hinges properly.

Basic Tools Overview

These tools are simple yet effective for handling most hinge-related issues. Keeping them nearby will make the repair process quick and hassle-free.

  • Screwdriver (Phillips or flathead, depending on screws)
  • Drill (optional but helpful)
  • Wood glue
  • Toothpicks or wooden matchsticks
  • Hammer
  • Replacement screws (if needed)

Having these tools ready will make the process smooth and efficient.


Step-by-Step Guide to Tighten Door Hinges

Fixing loose door hinges is a straightforward task when approached step by step. By carefully inspecting and adjusting each component, you can restore the door’s stability and ensure long-lasting performance without needing professional help.

Step-by-Step Guide to Tighten Door Hinges

Step 1: Inspect the Hinges

The first step is to closely examine all hinges attached to the door. A thorough inspection helps identify the exact cause of looseness and ensures no problem areas are overlooked.

What to Check During Inspection

Carefully look at each hinge and its screws to determine their condition. This step is crucial for deciding whether tightening or replacement is needed.

  • Screws are loose
  • Screws are missing
  • The hinge plate is misaligned

Tightening just one hinge may not solve the problem, so inspect all of them carefully.

m, so inspect all of them carefully.


Step-by-Step Guide to Tighten Door Hinges 

Fixing loose door hinges becomes much easier when you follow a structured process. Each step targets a specific issue, from loose screws to alignment problems. By carefully applying these methods, you can restore stability, improve door function, and prevent future hinge-related issues effectively.

Step 2: Tighten Loose Screws

This is usually the quickest and simplest fix for loose hinges. Tightening screws properly can immediately improve door stability and eliminate minor movement issues without requiring additional repairs or replacements.

Proper Way to Tighten Screws

Using the correct technique ensures screws are secured without causing damage. Gentle handling is key to maintaining the strength of both the screw and the surrounding wood.

  • Using a screwdriver, try tightening each screw.
  • Turn clockwise to tighten
  • Apply firm but gentle pressure
  • Avoid over-tightening, as it can strip the screw hole

If the screws tighten properly and feel secure, your job may already be done.


Step 3: Fix Stripped Screw Holes

When screws fail to tighten, the problem often lies in stripped holes. This issue is very common but can be fixed بسهولة using simple household materials without needing professional repair.

Method 1: Toothpick Fix

This is an easy and effective method to restore grip inside a stripped hole. It works by filling empty space and giving the screw a tighter hold.

  • Remove the loose screw
  • Insert several toothpicks or matchsticks into the hole
  • Add a bit of wood glue
  • Break off excess sticks so they’re flush with the surface
  • Reinsert and tighten the screw

This fills the hole and gives the screw something to grip.


Step 4: Use Longer Screws

Sometimes the original screws are simply too short to provide a strong hold. Replacing them with longer screws can significantly improve hinge stability and prevent future loosening issues.

Choosing the Right Screws

Selecting the correct screw length ensures deeper anchoring into the door frame, providing better support especially for heavier doors.

  • Choose screws about 2–3 inches long
  • Drive them through the hinge into the door frame stud
  • This provides a much stronger hold

This method is especially useful for heavy doors like main entrances.


Step 5: Align the Door Properly

Loose hinges can sometimes cause the door to shift out of alignment. Adjusting the door position ensures smooth opening and closing while preventing friction against the frame or floor.

Steps to Correct Alignment

Careful adjustment helps reposition the door without damaging hinges or screws. A steady approach ensures proper balance and alignment.

  • Slightly loosen the hinge screws
  • Adjust the door position
  • Hold it in place and retighten screws

You may need a helper to hold the door steady during this step.

Also Read:

How to Warm a Cold Room? Fix Cold Room Fast and Stay Warm


Step 6: Tighten the Hinge Pins

If the hinge itself feels unstable, the pin connecting the hinge parts might be loose. Fixing the hinge pin can restore firmness and improve the overall performance of the hinge.

How to Secure the Hinge Pin

This step focuses on adjusting or reseating the pin to ensure a tighter fit within the hinge structure.

  • Tap the hinge pin upward using a hammer and nail
  • Remove it and check for wear
  • Reinsert it firmly

You can also lightly tap the hinge knuckles closer together for a tighter fit.


Step 7: Lubricate the Hinges

After tightening and adjusting, lubrication is essential for smooth operation. It reduces friction, prevents noise, and extends the lifespan of the hinges over time.

Best Way to Apply Lubrication

Proper lubrication ensures even distribution and long-lasting results. It also helps eliminate squeaking sounds effectively.

  • Use oil, petroleum jelly, or a silicone spray
  • Apply directly to the hinge joints
  • Open and close the door a few times to spread it evenly

Common Mistakes to Avoid

Even though tightening door hinges is a simple task, small mistakes can lead to bigger problems. Being aware of these common errors helps you avoid damage and ensures a more effective and long-lasting repair.

Errors That Can Worsen the Problem

Understanding these mistakes allows you to take preventive measures and handle the repair process more carefully and efficiently.

Things You Should Not Do

Avoiding these actions will help maintain the condition of your door and hinges while ensuring proper functionality.

  • Over-tightening screws
    This can strip the holes and damage the wood.
  • Ignoring other hinges
    Fixing only one hinge may not solve alignment issues.
  • Using the wrong tools
    A mismatched screwdriver can damage screw heads.
  • Skipping lubrication
    Even tight hinges can squeak if not properly lubricated.

Also Read:

How to Fix a Broken Window Frame? Complete Guide About Broken Window Frame Repair


When to Replace Door Hinges 

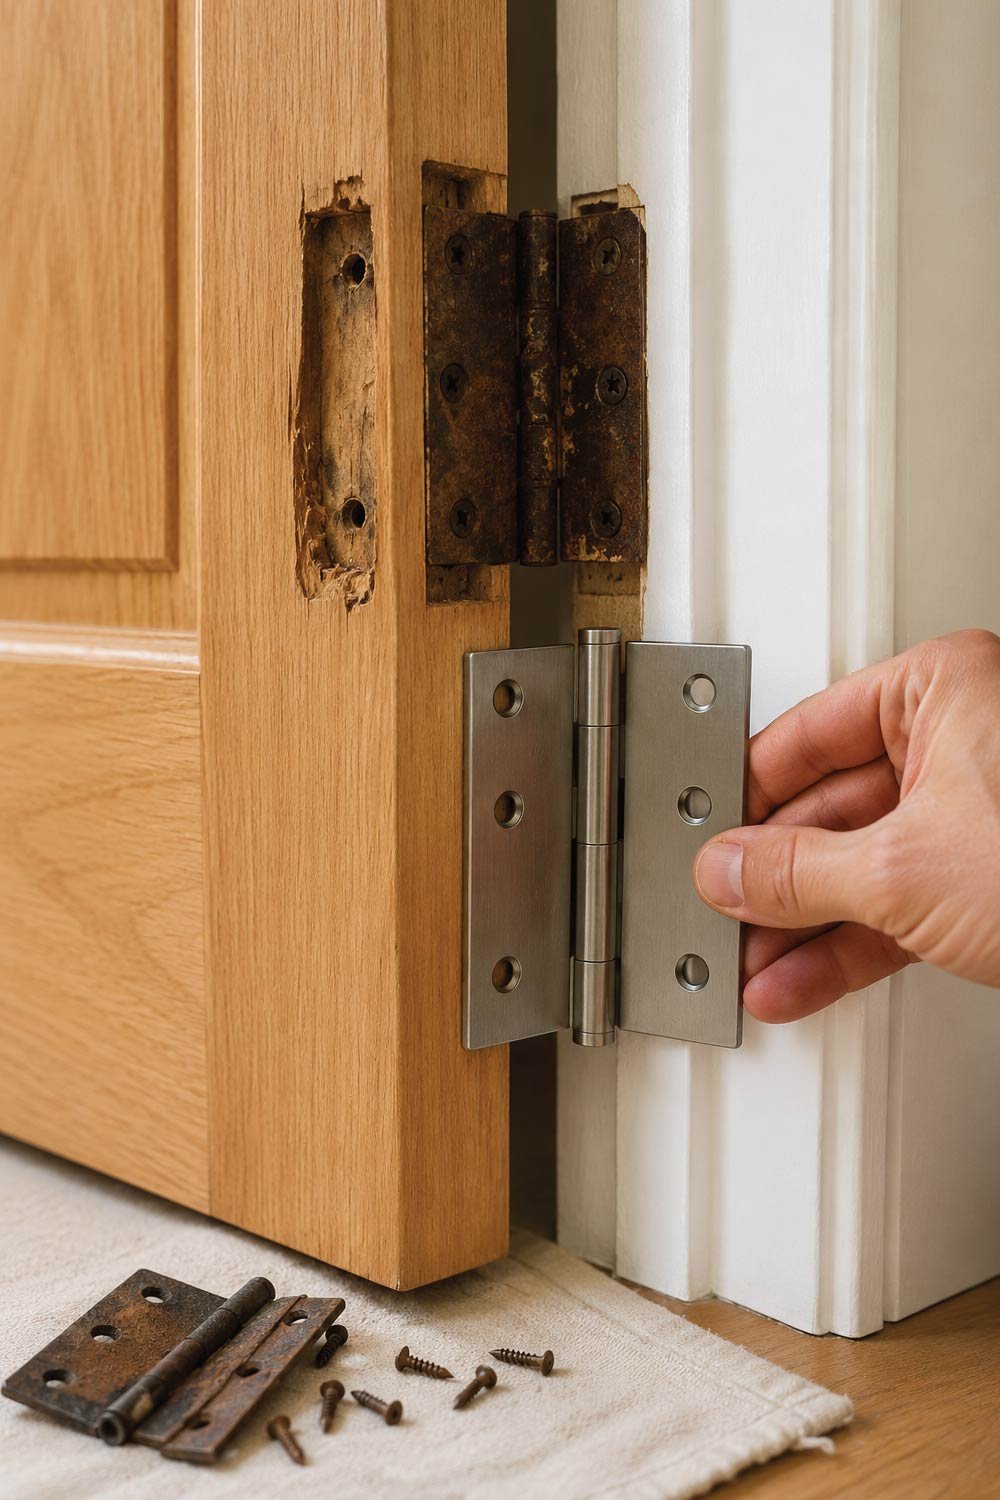
While tightening and minor repairs can solve most hinge issues, there are situations where replacement becomes necessary. Damaged or worn-out hinges can affect door performance and safety. Knowing when to replace them ensures your door remains functional, stable, and long-lasting without recurring problems.

When to Replace Door Hinges

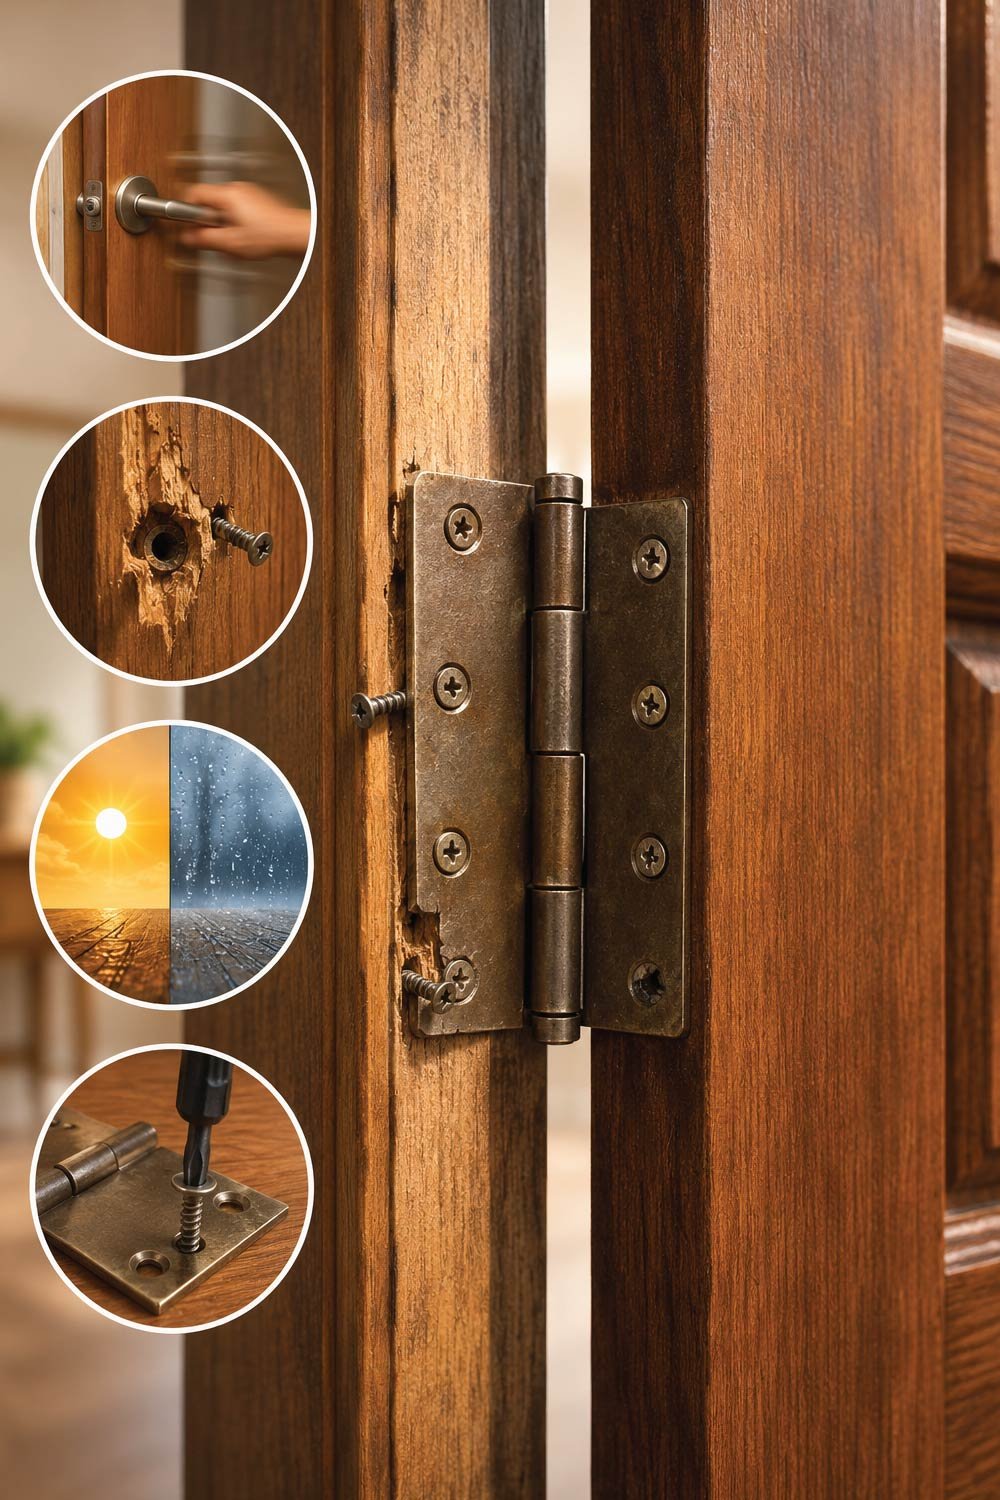
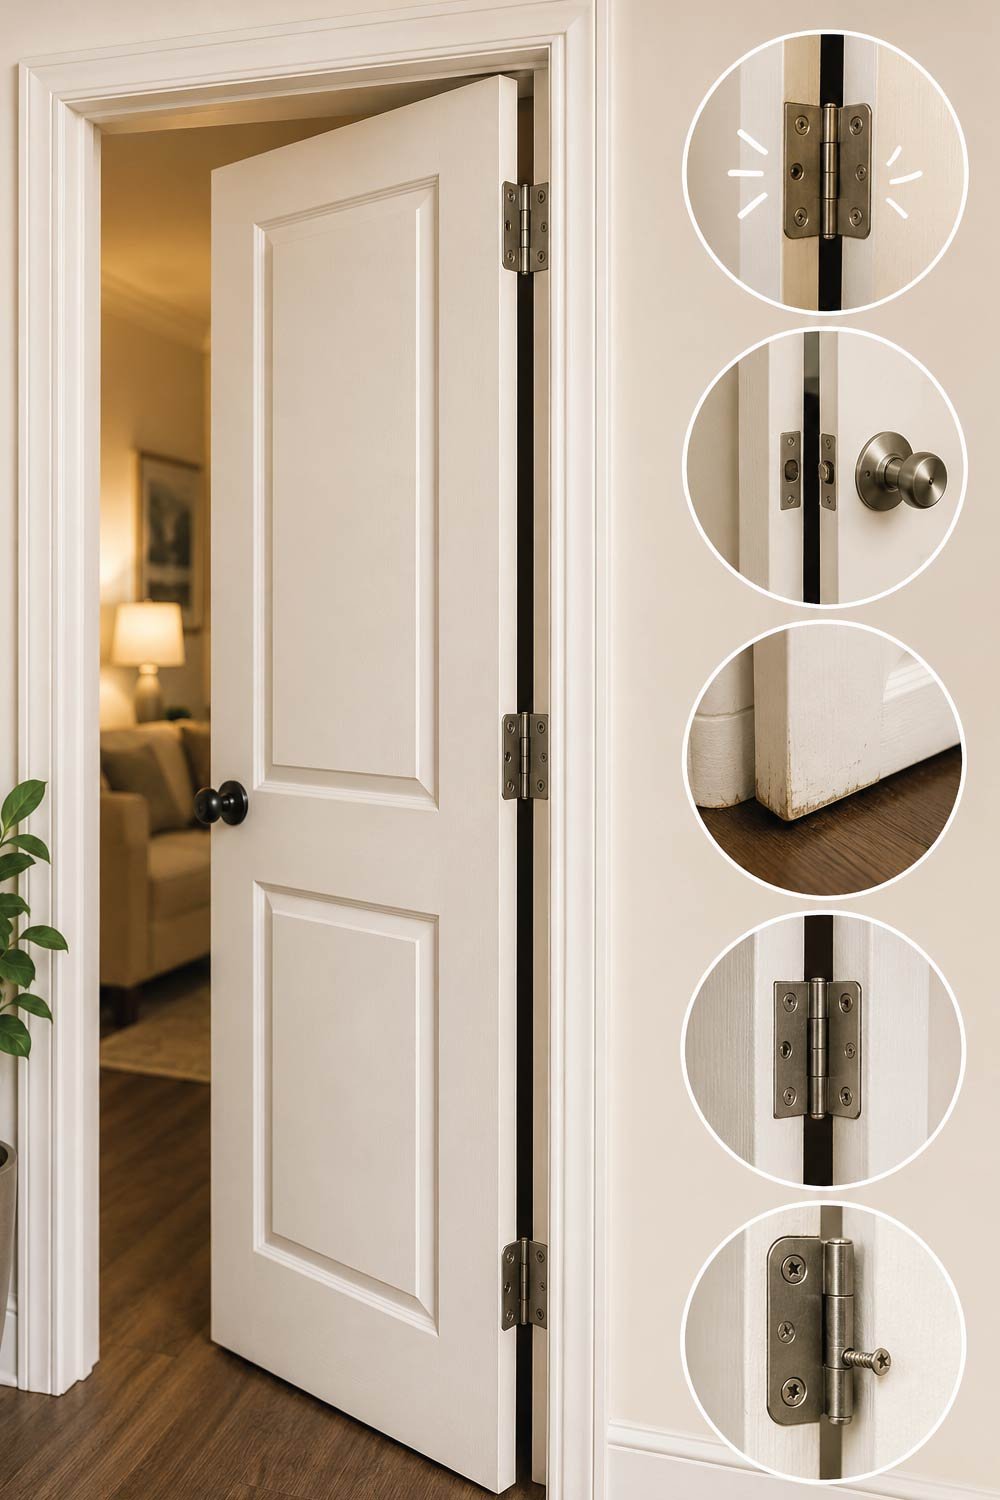
Clear Signs You Need Replacement

Certain conditions indicate that hinges can no longer be fixed with simple adjustments. Recognizing these signs early helps you avoid further damage to the door or frame.

Irreparable Hinge Issues

These problems usually mean the hinge has reached the end of its lifespan and should be replaced for better performance and reliability.

  • Hinges are bent or damaged
  • Rust is affecting movement
  • Screws no longer hold even after repairs

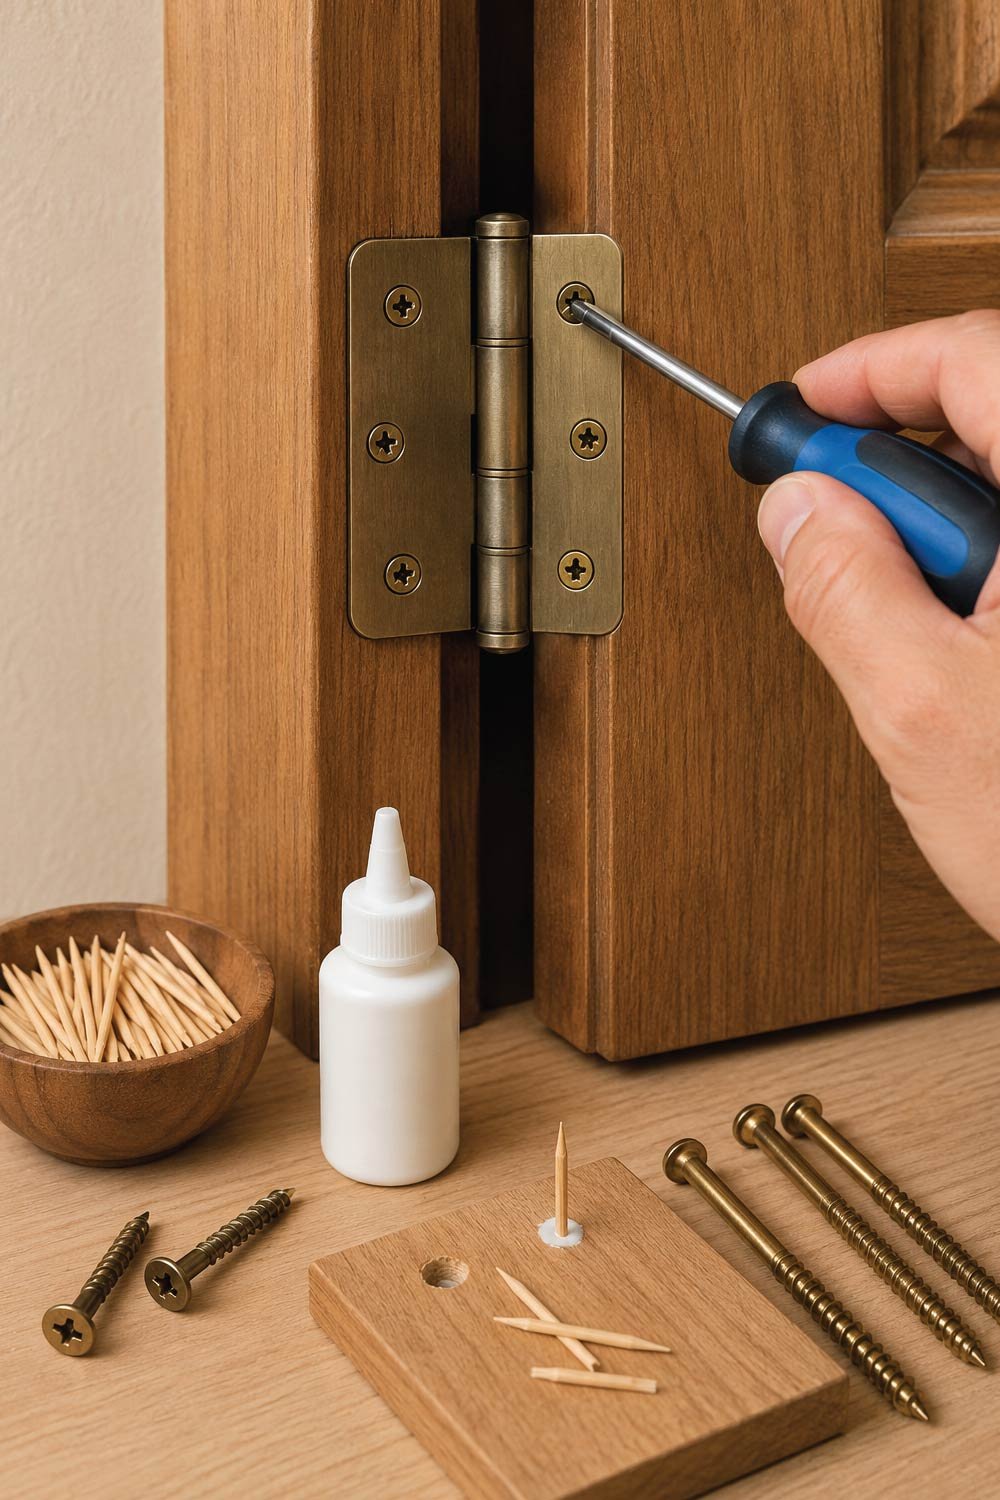
Replacing hinges is still a manageable DIY task and often improves door performance significantly.


Tips for Long-Term Maintenance

Proper maintenance is essential to keep door hinges working smoothly over time. With a few simple habits, you can prevent loosening, reduce wear and tear, and extend the life of your hinges without frequent repairs or replacements.

Simple Maintenance Practices

Regular care and attention can make a big difference in hinge performance. Following these easy practices helps maintain stability and ensures your door operates quietly and efficiently.

Habits for Lasting Performance

Incorporating these small actions into your routine can save time, effort, and money by avoiding major hinge problems in the future.

  • Check hinges every few months
  • Tighten screws as soon as they loosen
  • Keep hinges clean and lubricated
  • Avoid slamming doors
  • Use high-quality screws and hardware

A little maintenance goes a long way in preventing bigger problems.

Also Read:

How to Fix Cracks in Ceiling? Complete Guide About Ceiling Cracks Repair


Final Thoughts

Tightening a door hinge is one of those simple home repairs that can make a big difference. It improves functionality, eliminates noise, and prevents long-term damage to your doors and frames. Best of all, it’s a quick DIY task that requires minimal tools and effort.

By following the steps in this guide, you can confidently fix loose hinges and keep your doors working smoothly. Whether you’re a homeowner, renter, or DIY enthusiast, this is a handy skill worth mastering.

So the next time your door starts sagging or squeaking, don’t ignore it—grab a screwdriver and fix it in minutes.

Leave a Comment