
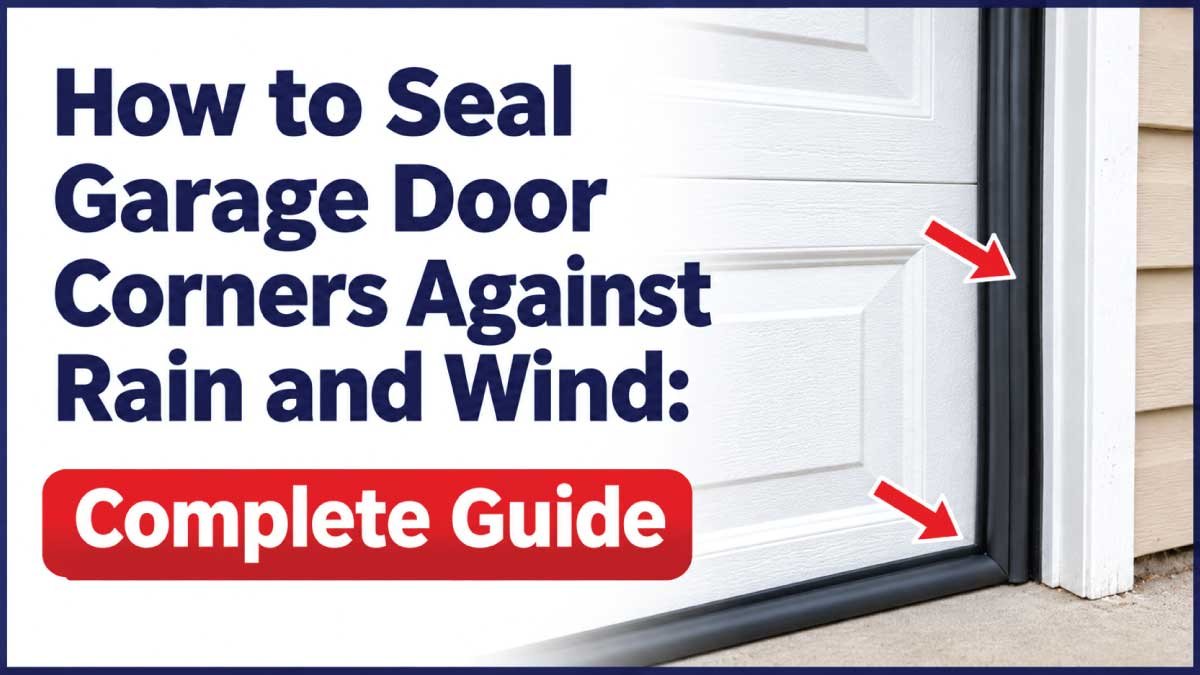
Garage door corners are common areas where rainwater, cold air, dust, and strong wind enter a garage. Even when the side weather stripping and bottom seal appear to be in good condition, small openings where these seals meet can leave the garage exposed to the weather. These gaps are especially noticeable during heavy rainfall, storms, and windy conditions.
The lower corners are often the most vulnerable because the vertical side seals must meet the bottom edge of the garage door. If the seals are too short, worn, incorrectly positioned, or poorly connected, water can pass through the opening and collect on the garage floor. Upper corners can also develop leaks when the top weather stripping does not connect properly with the side seals.
Fortunately, many garage door corner leaks can be corrected by replacing damaged weather stripping, installing compatible corner seals, securing loose retainers, and repairing gaps in the stationary frame. This guide explains how to seal garage door corners against rain and wind, identify the source of leaks, choose suitable materials, and avoid common installation mistakes.
Why Garage Door Corners Leak Rain and Wind
Garage door corners involve several sealing surfaces that must work together. If even one section is damaged or incorrectly installed, the corner may allow water and air to pass through.
Worn Side Weather Stripping
Side weather stripping runs along the vertical edges of the garage door frame. Its flexible edge presses against the closed door to create a barrier against rain, wind, and dust.
Over time, the material can become brittle, cracked, flattened, or detached. When the side seal no longer makes consistent contact, air and water can enter near the corners.
Gaps Between Side and Bottom Seals
The lower corners are particularly vulnerable because the vertical side weather stripping meets the bottom garage door seal at the floor.
If these components do not overlap or connect properly, a small opening may remain. Rainwater can enter through this opening, especially when water collects outside the garage.
Damaged Bottom Weather Seal
The bottom seal helps close the gap between the lower edge of the garage door and the floor. If it becomes torn, permanently flattened, or uneven, water and wind can pass beneath the door.
A damaged bottom seal can also create openings near the corners even when the side weather stripping is in good condition.
Poorly Installed Top Weather Stripping
The upper corners can leak when the top weather stripping stops short of the side seals or does not make proper contact with the closed door.
Wind-driven rain may enter through these small openings during storms. Incorrectly positioned top seals can also allow cold air and dust into the garage.
Uneven Garage Door Alignment
A garage door that closes at an angle may leave one corner tightly sealed while the opposite corner remains open.
This problem can result from damaged rollers, worn hinges, loose hardware, or track-related issues. Installing thicker weather stripping may hide the gap temporarily, but it will not correct the underlying mechanical problem.
Uneven Garage Floor
If the concrete floor is lower near one corner, the bottom seal may not touch the surface evenly.
This can create a visible opening beneath the door. In such cases, a suitable bottom seal or threshold system may help, but severe floor unevenness may require a separate correction.
Damaged Door Frame Corners
Cracked, rotting, or deteriorated frame material can create openings behind the weather stripping.
Water may enter through these joints and travel behind the trim, making it appear as though the garage door seal itself is leaking.
Signs Your Garage Door Corners Need Sealing
Inspect the garage door after rainfall or during windy weather to identify areas where the existing seals are failing.
Water Puddles Near the Corners
Standing water near either lower corner is a common indication of a sealing or drainage problem. Check whether the water enters beneath the door, through the side seal, or through a gap where the seals meet.
Visible Daylight Around the Corners
With the garage door closed, look for daylight around the upper and lower corners. Visible openings often indicate missing, incorrectly positioned, or deteriorated weather stripping.
Cold Air Entering Near the Edges
If you feel a draft near the corners, the weather seals may not be making consistent contact with the door.
Dirt and Leaves Inside the Garage
Wind can push dust, leaves, and small debris through corner openings. Dirt collecting in the same area repeatedly may help identify the source of the leak.
Wet or Damaged Frame Material
Peeling paint, swollen wood, dark stains, or soft frame sections may indicate repeated water exposure. Inspect the frame carefully before installing new sealing materials.
Types of Materials Used to Seal Garage Door Corners
The correct material depends on the size and location of the gap. A small opening between two seals requires a different solution from a damaged frame joint or an uneven bottom edge.
| Material | Common Use | Main Benefit |
|---|---|---|
| Vinyl weather stripping | Side and top edges | Flexible contact with the door |
| Rubber corner seals | Lower or upper corners, depending on design | Helps close corner openings |
| Bottom garage door seal | Lower door edge | Blocks water, wind, and debris |
| Garage door threshold seal | Garage floor | Reduces water entry beneath the door |
| Exterior-grade sealant | Stationary frame joints | Seals suitable cracks |
| Weather-resistant retainer | Side or top seal mounting | Holds weather stripping securely |
Rubber Corner Seals
Some garage door systems use specially designed corner pieces to connect the side and bottom sealing areas. These products may be suitable for doors with compatible seal profiles.
Check the manufacturer’s instructions before purchasing them because not every corner seal fits every garage door design.
Vinyl Side and Top Seals
Vinyl weather stripping is commonly installed along the vertical sides and upper frame. It creates a flexible contact surface when the garage door closes.
Choose a product designed for outdoor exposure and compatible with the existing mounting system.
Exterior-Grade Sealant
Exterior sealant can close appropriate stationary cracks in the wooden or other fixed garage door frame. It should not be used to fill gaps between moving door components or replace flexible weather stripping.
Garage Door Threshold Seals
A threshold seal attaches to the garage floor beneath the closed door. It helps reduce water entry along the bottom edge and can be useful when the floor is slightly uneven.
A threshold does not replace damaged side seals, but it can provide additional protection when the lower corners are vulnerable.
Tools and Materials Needed
Gather the necessary supplies before starting the repair. Most basic corner-sealing jobs require common household tools and compatible replacement materials.
| Tool or Material | Purpose |
|---|---|
| Replacement side weather stripping | Closes gaps along vertical edges |
| Compatible corner seal | Helps connect corner sealing areas |
| Bottom garage door seal | Blocks openings beneath the door |
| Measuring tape | Measures gaps and seal lengths |
| Utility knife | Cuts compatible seal material |
| Screwdriver or drill | Removes and installs suitable fasteners |
| Cleaning cloth | Removes dirt and residue |
| Mild detergent | Cleans mounting surfaces |
| Exterior-grade sealant | Repairs stationary frame cracks |
| Caulking gun | Applies sealant |
| Safety glasses and gloves | Protects hands and eyes |
Choose materials that match the garage door’s existing sealing system. Avoid buying oversized seals without checking whether they will allow the door to close normally.
Safety Precautions Before Sealing Garage Door Corners
Weather-stripping repairs are generally straightforward, but garage doors contain heavy moving sections and high-tension components.
Follow these safety precautions:
- Keep children and pets away from the work area.
- Keep your fingers away from the space between the door and frame.
- Do not loosen torsion springs, extension springs, cables, or bottom brackets.
- Never remove track brackets or hardware that supports the garage door.
- Do not work beneath an unsupported or unstable door.
- Use a stable ladder when accessing upper corners.
- Wear gloves when handling damaged seals or sharp fasteners.
- Follow the garage door manufacturer’s instructions before disconnecting or operating the opener.
If the door is crooked, off its tracks, or moving unevenly, stop and contact a qualified garage door technician. Do not attempt to correct alignment by adjusting springs or cables.
How to Seal Garage Door Corners Against Rain and Wind
The best approach is to inspect the entire corner, identify the source of the opening, and repair the damaged sealing components. Do not simply cover the visible gap without checking what caused it.
Step 1: Inspect the Upper and Lower Corners
Close the garage door and examine all four corners.
Start with the lower corners, where the side weather stripping meets the bottom seal. Look for gaps, missing material, torn rubber, and sections that have pulled away from the frame.
Then inspect the upper corners, where the top weather stripping meets the side seals.
Check for:
- Visible openings between the door and weather stripping.
- Side seals that stop short of the bottom edge.
- A bottom seal that does not reach the floor.
- Loose retainers or mounting screws.
- Cracked or deteriorated frame joints.
- Uneven contact between the door and seals.
If the leak is difficult to locate, gently spray water along one corner using a garden hose while someone observes the inside of the garage. Start with a low flow and test one area at a time. Avoid high-pressure spraying, which can force water through otherwise serviceable seals.
Step 2: Identify Which Seal Is Causing the Gap
Determine whether the problem comes from the side seal, top seal, bottom seal, or stationary frame.
If the lower corner has an opening beneath the door, inspect the bottom seal and floor contact.
If the opening is between the vertical weather stripping and the door, inspect the side seal.
If water enters behind the frame, look for cracks or deteriorated material around the stationary trim.
This step prevents unnecessary repairs and helps you purchase the correct replacement components.
Step 3: Remove Damaged Weather Stripping
If the existing seal is cracked, brittle, or detached, remove it according to its mounting system.
Some weather stripping is attached with screws, while other types slide into a retainer channel.
For a typical screw-mounted system:
- Identify the fasteners holding the weather stripping.
- Remove only the fasteners intended for the seal assembly.
- Carefully detach the damaged material.
- Check whether the retainer is bent or loose.
- Remove dirt and old residue from the mounting area.
Do not remove structural track hardware, bottom brackets, cables, or other components that support the garage door. If the mounting arrangement is unclear, ask a technician to handle the removal.
Step 4: Clean the Corner and Frame Surface
Clean the stationary frame where the replacement seal will be installed.
Use a damp cloth and mild detergent to remove dirt, dust, grease, and loose residue. Allow the area to dry completely.
Inspect the frame for cracks, soft wood, peeling paint, and signs of water damage.
If the frame is deteriorated, repair or replace the damaged section before installing new weather stripping. A seal attached to loose or rotten material may quickly become detached again.
Also Read:
How to Replace Old Garage Door Perimeter Seals: Complete Guide
Step 5: Install or Replace the Side Weather Stripping
If the vertical side seal is damaged, install a compatible replacement.
Measure the required length and cut the material according to the manufacturer’s instructions.
Position the seal so its flexible edge makes gentle contact with the closed garage door. Keep it straight and secure it using the correct fasteners or retainer system.
Repeat the process on the opposite side if necessary.
The seal should close the gap without creating excessive pressure against the door. If the gap remains unusually large, check the door alignment rather than forcing the seal into position.
Step 6: Repair the Lower Corners
The lower corners often need the most attention because the side and bottom seals must work together.
Inspect where the vertical side seal meets the bottom edge of the closed door.
If the side seal is too short or has pulled away from the frame, replace or reposition it using a compatible system. If the bottom seal is damaged or uneven, replace it with a profile designed for the existing retainer.
Some garage door systems use dedicated corner pieces that help connect the side and bottom sealing areas. Install these only when they are compatible with the door and seal design.
Avoid stuffing the opening with foam, cloth, or other loose materials. These can absorb water, deteriorate, or interfere with the door’s movement.
Step 7: Seal Appropriate Cracks in the Stationary Frame
If water is entering through cracks in the fixed frame, use a suitable exterior-grade sealant.
The general process is:
- Remove loose dirt and deteriorated material.
- Make sure the crack and surrounding surface are dry.
- Apply sealant according to the product instructions.
- Smooth the material if required.
- Allow it to cure for the recommended time.
Apply sealant only to stationary joints and cracks. Do not seal moving door sections, roller paths, hinges, or areas that need to remain flexible.
Also, do not block drainage openings designed to release water.
Also Read:
How to Stop Water Coming Through Garage Door Side Gaps: Complete Guide
Step 8: Inspect and Repair the Upper Corners
Check the connection between the top weather stripping and the vertical side seals.
If the top seal stops short or has pulled away from the frame, reposition or replace it using a compatible mounting system.
The flexible edge should contact the upper surface of the closed garage door without preventing normal operation.
If the corner opening is caused by a damaged frame or uneven door alignment, address that issue separately. A new top seal cannot correct a structural or mechanical problem.
Step 9: Check the Bottom Seal and Floor Contact
Close the garage door and inspect the bottom edge from inside the garage.
The bottom seal should make reasonably consistent contact with the floor. If one corner remains raised, check whether the seal is incorrectly installed, damaged, or incompatible with the retainer.
A threshold seal may help when the floor has minor variations, provided it is suitable for the door and floor arrangement.
If the floor is significantly uneven, consider a separate floor or drainage correction rather than relying on an oversized rubber seal.
Also Read:
How to Fix a Garage Door That Does not Sit Flush: Complete Guide
Step 10: Test the Repaired Corners
After completing the repairs, close the garage door and inspect all four corners.
Check for visible openings, loose material, and uneven contact. Operate the door to confirm it opens and closes smoothly.
If conditions allow, perform a gentle water test. Apply water gradually to the repaired corner and observe the inside of the garage.
If water continues to enter, check whether it is coming through another section of the perimeter or traveling behind the frame from outside.
Additional Ways to Protect Garage Door Corners From Rain and Wind
Sealing the corners is important, but other improvements can help prevent water and air from entering the garage.
Install a Garage Door Threshold Seal
A threshold seal can reduce water entering beneath the door. It is particularly useful when rainwater flows toward the garage entrance or the floor has minor uneven areas.
Choose a threshold compatible with the bottom seal and garage door operation. Make sure it does not interfere with closing or create an unnecessary trip hazard.
Improve Exterior Drainage
Water collecting outside the garage can overwhelm even a properly maintained weather seal.
Keep drainage channels clear, remove leaves and debris, and make sure downspouts direct water away from the garage entrance.
If the driveway slopes toward the garage, a suitable drainage channel or professional grading correction may be necessary.
Also Read:
Why Is There a Gap Between Garage Door and Floor: Complete Guide
Replace Damaged Frame Material
Rotten or cracked frame material can allow water to travel behind the weather stripping. Repairing or replacing damaged sections provides a more reliable mounting surface.
Use Wind-Resistant Weather Stripping
Choose flexible, weather-resistant seals that remain suitable for the expected temperature and outdoor conditions. Make sure the product matches the mounting system and the size of the opening.
Maintain the Garage Door Alignment
A properly aligned door helps maintain consistent contact with the side and top seals. If the door closes unevenly, have the mechanical system inspected rather than trying to compensate with thicker weather stripping.
Common Mistakes to Avoid When Sealing Garage Door Corners
Small installation mistakes can reduce the effectiveness of a corner repair.
Using Too Much Silicone or Caulk
Applying large amounts of sealant may temporarily cover a visible opening, but it can interfere with moving parts or prevent flexible seals from working correctly.
Use exterior-grade sealant only on suitable stationary joints and cracks.
Ignoring the Bottom Seal
Replacing the side weather stripping will not solve a lower-corner leak if the bottom seal is damaged or does not touch the floor.
Inspect the side and bottom components together.
Using the Wrong Corner Seal
Not all corner pieces fit every garage door. Check the seal profile and manufacturer’s compatibility information before installation.
Installing Seals Too Tightly
Weather stripping should make contact with the door without creating excessive resistance. An oversized or incorrectly positioned seal may prevent the door from closing properly.
Ignoring Water Drainage Outside
If rainwater collects against the garage entrance, it may continue entering through small openings. Check the driveway, nearby drains, and downspouts as part of the repair.
Attempting to Adjust Springs or Cables
Do not loosen springs, cables, or bottom brackets to correct a corner gap. These parts are under significant tension and require professional handling.
When to Call a Professional Garage Door Technician
Some corner-sealing problems are caused by mechanical or structural damage rather than worn weather stripping.
Contact a qualified technician if:
- The garage door closes at an angle.
- The door has come off its tracks.
- Rollers, hinges, or tracks appear damaged.
- The gap changes significantly as the door moves.
- A panel is bent or warped near a corner.
- The bottom seal retainer is badly damaged.
- The door becomes difficult to operate after sealing.
- Water continues entering despite correctly installed seals.
A technician can inspect the door’s alignment, supporting hardware, and sealing system. If the surrounding frame or concrete floor is damaged, a suitable contractor may also be needed.
Estimated Cost to Seal Garage Door Corners
The cost depends on the number of damaged sections, the type of weather stripping, and whether the repair requires professional labor.
| Repair or Material | General Estimated Cost (USD) |
|---|---|
| Basic side weather stripping | $15–$40 |
| Top weather stripping | $10–$30 |
| Rubber corner seal components | $10–$35 |
| Replacement bottom seal | $15–$45 |
| Garage door threshold seal | $25–$80 |
| Exterior-grade sealant | $5–$20 |
| Minor professional weather-seal repair | $75–$150 |
| Professional alignment or hardware repair | $100–$250 or more |
These are broad illustrative estimates rather than fixed quotations. Actual prices vary by location, product quality, garage door size, and labor rates. Extensive frame, drainage, or mechanical repairs may cost more.
How to Maintain Garage Door Corner Seals
Regular inspection helps prevent small openings from becoming larger leaks.
Inspect All Four Corners Every Few Months
Check the upper and lower corners for cracks, missing material, loose seals, and visible daylight. Pay particular attention to the areas where separate weather-stripping sections meet.
Clean the Sealing Surfaces
Remove dirt and debris from the weather stripping and stationary frame. Use a mild cleaning solution and avoid harsh chemicals that could damage the seal material.
Check the Bottom Seal After Heavy Rain
Look for water marks or puddles near the garage entrance. If moisture repeatedly appears in one corner, investigate the source before the damage spreads.
Keep Retainers and Fasteners Secure
Inspect the mounting channels for loose screws, bent sections, and detached areas. Repair minor problems before the weather stripping pulls away completely.
Maintain Exterior Drainage
Keep drains clear and direct roof runoff away from the garage. Reducing the amount of water around the opening makes the sealing system more effective.
Replace Damaged Seals Promptly
Do not wait until the entire perimeter seal has deteriorated. Replacing a damaged section early can help maintain protection and reduce the chance of water entering the garage.
Frequently Asked Questions
1. How Do I Seal the Bottom Corners of a Garage Door?
Inspect where the vertical side seals meet the bottom garage door seal. Replace damaged or incorrectly positioned weather stripping with compatible materials, and check that the bottom seal makes contact with the floor. Some systems also use dedicated corner components. Avoid filling the gap with loose foam or excessive caulk.
2. What Is the Best Sealant for Garage Door Corners?
The best sealant depends on the material and location of the crack. An exterior-grade sealant suitable for the frame material can close stationary joints and small cracks. However, flexible weather stripping or compatible corner seals should be used where the garage door moves or contacts the frame. Sealant should never interfere with moving parts.
3. Why Does Rainwater Enter Through Garage Door Corners?
Rainwater commonly enters because side and bottom seals do not connect properly, the weather stripping has deteriorated, or the door closes unevenly. Water collecting outside the garage can make the problem worse. Inspect the lower corners, bottom seal, frame, and driveway drainage to identify the actual cause.
4. Can I Use Foam to Fill Garage Door Corner Gaps?
Loose household foam is generally not a reliable permanent solution for garage door corners. It can absorb moisture, become damaged, and interfere with door movement. Use weather stripping or a corner seal designed for garage door applications. If the opening is in the stationary frame, repair it with a suitable exterior-grade material.
5. How Do I Stop Wind From Coming Through Garage Door Corners?
Replace cracked or flattened weather stripping and make sure the side, top, and bottom seals connect properly. Check that the closed door makes consistent contact with the seals. If the gap remains because the door is crooked or damaged, have the alignment and hardware inspected by a qualified technician.
6. Do Garage Door Corner Seals Prevent Water Leaks?
Compatible corner seals can help close openings where side and bottom weather stripping meet. They are useful when the leak is caused by an incomplete connection between sealing components. However, they cannot correct damaged frames, uneven floors, or poor exterior drainage. Inspect the entire garage door opening before choosing a repair.
7. Why Does One Garage Door Corner Have a Bigger Gap Than the Other?
A larger gap on one side may indicate uneven door alignment, a damaged seal, an uneven floor, or a problem with the mounting frame. Compare the contact along both sides with the door closed. If the door sits at an angle or moves unevenly, arrange a professional inspection rather than adjusting the tracks or springs yourself.
8. Should I Replace Side and Bottom Seals Together?
It is often useful to replace both when they are old, cracked, or similarly deteriorated because the seals work together to protect the garage opening. However, if the bottom seal is still flexible and the side weather stripping is damaged, replacing only the affected components may be sufficient. Check that the replacement profiles are compatible.
9. Can a Garage Door Threshold Seal Help With Corner Leaks?
A threshold seal can reduce water entering beneath the bottom edge, especially when rainwater collects outside or the floor has minor uneven areas. It may also help protect the lower corners, but it does not replace vertical side weather stripping. Use it together with properly fitted side and bottom seals when appropriate.
10. When Should I Replace Garage Door Corner Seals?
Replace corner seals when they become cracked, brittle, detached, permanently flattened, or unable to close the gap. You should also replace them if water or wind continues entering through the connection between the side and bottom weather stripping. Choose compatible replacement materials rather than relying on temporary fillers.
Final Thoughts
Sealing garage door corners against rain and wind helps protect the garage from water damage, cold air, dust, and outdoor debris. The most important step is identifying exactly where the opening occurs. Lower corners often leak because the side and bottom seals do not connect properly, while upper corners may have gaps between the top and side weather stripping.
Replace deteriorated materials, secure loose retainers, and repair suitable cracks in the stationary frame. Make sure every replacement component is compatible with the garage door and does not prevent normal operation. If the door closes unevenly, address the alignment problem instead of forcing the weather stripping to compensate.
Remember that exterior drainage also plays an important role. Keep water from collecting against the garage entrance, and inspect the seals regularly after heavy rainfall. With proper materials, careful installation, and routine maintenance, you can create a more effective barrier against rain and wind while helping keep your garage cleaner and drier.