
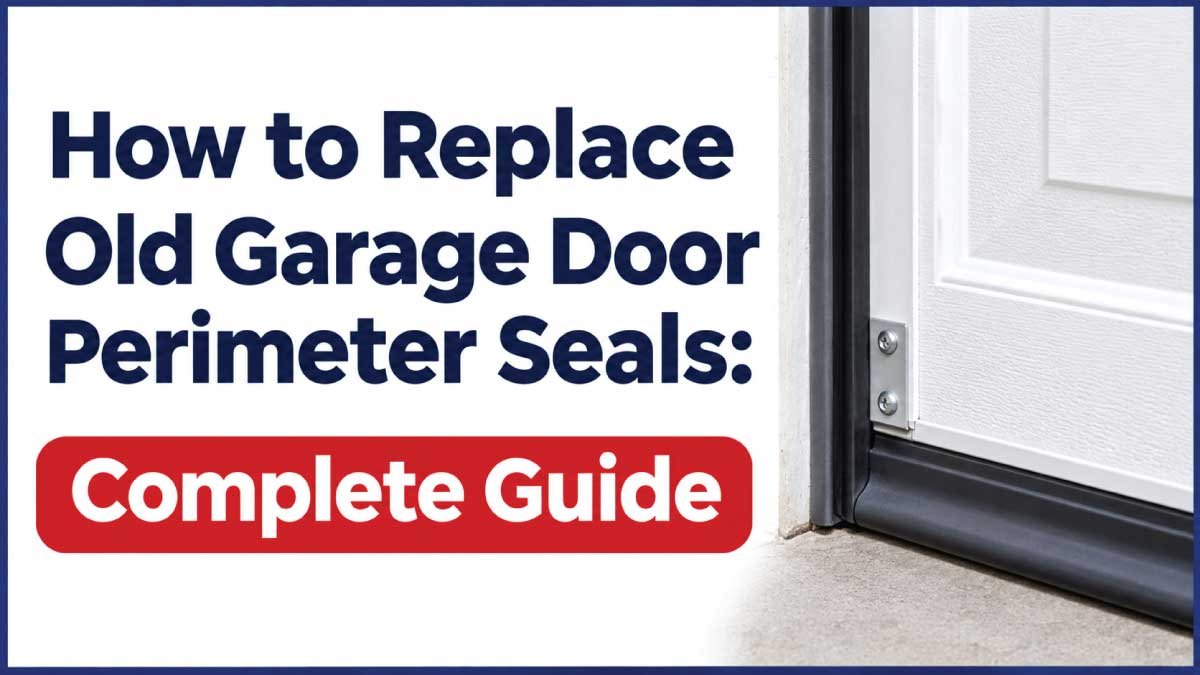
Old garage door perimeter seals can allow rainwater, cold air, dust, insects, and outdoor debris to enter your garage. These seals are designed to close the small spaces around the garage door when it is shut. Over time, however, rubber and vinyl materials can become brittle, cracked, flattened, or loose. Once the seals lose their flexibility, they may no longer provide a tight barrier against the weather.
Replacing worn garage door perimeter seals is one of the most effective ways to improve the protection around your garage opening. The process usually involves removing the old material, inspecting the mounting surfaces, measuring the door opening, and installing compatible replacement seals. Depending on the garage door design, you may need separate side and top weather stripping, a bottom seal, or a complete perimeter sealing system.
This guide explains how to replace old garage door perimeter seals step by step. It also covers the tools required, different seal types, common installation mistakes, maintenance advice, estimated costs, and situations where professional assistance may be necessary.
What Are Garage Door Perimeter Seals?
Garage door perimeter seals are flexible weather-resistant materials installed around the edges of the garage door opening. Their purpose is to close the gaps between the closed door and the surrounding frame or floor.
A typical perimeter sealing system includes three main sections:
Side Weather Stripping
Side seals are installed along the left and right vertical sides of the garage door frame. They make contact with the door when it closes and help prevent wind, rain, dust, and insects from entering through the side gaps.
Top Weather Stripping
The top seal is installed across the upper section of the garage door frame. It closes the space between the top edge of the closed door and the header.
A damaged top seal can allow rainwater, leaves, and cold air to enter, particularly during windy weather.
Bottom Garage Door Seal
The bottom seal is attached to the lower edge of the garage door. It compresses against the floor when the door closes, helping block water, debris, and outdoor air.
Bottom seals come in different profiles, including T-style, bulb-style, and U-shaped designs. The correct type depends on the bottom retainer or channel installed on the garage door.
Signs Your Garage Door Perimeter Seals Need Replacement
Before purchasing replacement materials, inspect the existing seals. Some problems can be corrected by securing a loose section, but severely deteriorated seals usually need to be replaced.
Cracked or Brittle Rubber
Rubber and vinyl seals become less flexible as they age. If the material has visible cracks, splits, or hard sections, it may no longer close gaps effectively.
Visible Gaps Around the Closed Door
Close the garage door and inspect the entire perimeter. If you can see daylight between the door and the frame, the weather stripping may be worn, incorrectly positioned, or unsuitable for the existing gap.
Water Entering the Garage
Rainwater entering near the side edges, upper corners, or bottom of the door can indicate damaged perimeter seals. However, also check the driveway slope and exterior drainage before assuming the seals are the only problem.
Cold Air and Dust Coming Inside
Worn seals allow outdoor air and fine dust to pass through the garage door opening. You may notice drafts near the edges or dust collecting along the floor after windy weather.
Loose or Detached Weather Stripping
If the seal has pulled away from the frame, its mounting channel or fasteners may be loose. A detached section can leave an opening even when the remaining material is in good condition.
Flattened Bottom Seal
A bottom seal should compress against the floor when the door closes. If it has become permanently flattened, torn, or uneven, it may no longer block water and debris properly.
Types of Garage Door Perimeter Seals
Choosing the right replacement material is important because different garage doors use different mounting systems.
| Seal Type | Location | Main Purpose |
|---|---|---|
| Vinyl side seal | Left and right sides | Blocks drafts, rain, and dust |
| Top weather seal | Upper frame | Closes the gap above the door |
| Bottom rubber seal | Lower door edge | Blocks water and debris |
| Bulb seal | Side, top, or bottom depending on design | Compresses to close gaps |
| Brush seal | Around compatible openings | Reduces dust and debris entry |
| Retainer-mounted seal | Side, top, or bottom | Fits into a dedicated mounting channel |
Vinyl Perimeter Seals
Vinyl weather stripping is commonly used around residential garage doors. It is flexible, relatively easy to install, and available in different shapes and sizes.
It is important to select material intended for exterior exposure so it can withstand changing temperatures and weather conditions.
Rubber Perimeter Seals
Rubber seals are designed to remain flexible and create contact between the door and surrounding surfaces. They are available in several profiles and may be used for side, top, or bottom sealing systems.
Bulb-Style Seals
Bulb seals have a rounded or hollow section that compresses when the garage door closes. They can help accommodate small variations in the gap, provided the seal is correctly sized and installed.
Brush Seals
Brush seals use flexible bristles to reduce the movement of dust and light debris through certain openings. They may be suitable for specific garage door applications, but they do not necessarily provide the same water protection as a continuous rubber or vinyl seal.
Tools and Materials Needed
Gather the required tools before removing the old perimeter seals. The exact equipment depends on the existing mounting system and whether you are replacing only the side and top seals or the complete perimeter.
| Tool or Material | Purpose |
|---|---|
| Replacement weather stripping | Creates a new perimeter barrier |
| Measuring tape | Measures the garage door opening |
| Utility knife | Cuts compatible seal material |
| Screwdriver | Removes or installs fasteners |
| Drill or driver | Installs suitable mounting screws |
| Cleaning cloth | Removes dirt and residue |
| Mild detergent | Cleans the frame and mounting surfaces |
| Pliers | Helps remove suitable old fasteners |
| Exterior-grade sealant | Seals appropriate stationary frame joints |
| Safety glasses and gloves | Protects hands and eyes |
| Ladder | Provides access to the upper frame |
Use the correct replacement fasteners for the frame and retainer. Avoid using screws that are too long or that could interfere with the garage door, tracks, or other moving components.
Safety Precautions Before Replacing Garage Door Seals
Replacing perimeter weather stripping is generally a manageable maintenance task, but some garage door components can be dangerous.
Follow these safety precautions:
- Keep children and pets away from the work area.
- Keep your hands away from the space between the door and frame.
- Do not loosen torsion springs, extension springs, cables, or bottom brackets.
- Do not remove track brackets or hardware supporting the door.
- Never work underneath an unsupported garage door.
- Use a stable ladder when reaching the upper frame.
- Wear gloves when removing old material with sharp edges or damaged fasteners.
- Follow the manufacturer’s instructions for disconnecting or operating the garage door opener.
If the garage door is crooked, unstable, off its tracks, or difficult to move, stop and contact a qualified technician before continuing.
How to Replace Old Garage Door Perimeter Seals
Replacing the perimeter seals requires careful measurement and proper installation. Work on one section at a time so you can compare the old mounting arrangement with the replacement system.
Step 1: Inspect the Entire Garage Door Perimeter
Close the garage door and examine the side, top, and bottom edges.
Look for cracked rubber, missing sections, loose fasteners, gaps, and damaged retainers. Pay particular attention to the upper corners and lower side sections because these areas often develop openings as the seals deteriorate.
Check whether the garage door closes evenly against the frame. If one side has a much larger gap than the other, the problem may involve door alignment rather than the weather stripping alone.
Make a note of the sections that need replacement before purchasing materials.
Step 2: Measure the Garage Door Opening
Measure the height of both vertical sides and the width of the upper frame. If you are replacing the bottom seal, measure the full width of the lower door edge.
Record each measurement separately rather than assuming both sides are identical.
For example, your measurements may include:
- Left side: full vertical distance from the bottom corner to the upper frame.
- Right side: full vertical distance from the bottom corner to the upper frame.
- Top section: distance across the opening.
- Bottom seal: width of the garage door itself.
Purchase enough material to cover each section, allowing for the cutting and fitting requirements specified by the manufacturer.
Step 3: Purchase Compatible Replacement Seals
Choose replacement seals based on the existing mounting arrangement and the size of the gaps.
Check the following details before purchasing:
- Material type and flexibility.
- Seal profile and dimensions.
- Retainer or mounting-channel compatibility.
- Weather resistance.
- Required fasteners.
- Compatibility with your garage door model.
For the bottom seal, inspect the existing retainer carefully. T-style, bulb-style, and U-shaped seals are not automatically interchangeable.
If you cannot identify the correct profile, take a sample of the old seal or a clear photograph of its cross-section to a garage door parts supplier.
Step 4: Remove the Old Side Weather Stripping
Begin with one vertical side of the garage door frame.
Some side seals are attached directly with screws, while others slide into a retainer or mounting channel. Follow the removal method appropriate for your system.
For a screw-mounted seal:
- Access the seal without placing yourself beneath an unsupported door.
- Locate the fasteners holding the weather stripping or its retainer.
- Remove only the fasteners intended for the seal assembly.
- Carefully detach the old material.
- Collect loose screws and damaged pieces.
If the retainer is damaged, determine whether it needs replacement before installing the new seal.
Do not remove structural track hardware, bottom brackets, or other components that support the door.
Step 5: Remove the Old Top Weather Seal
After removing the side seal, inspect the upper section of the frame.
The top seal may be secured with screws, a dedicated retainer, or another mounting arrangement. Remove the old material carefully, following the manufacturer’s instructions.
Check the upper frame for:
- Loose fasteners.
- Cracked or deteriorated wood.
- Old sealant.
- Rust or corrosion on metal mounting components.
- Uneven surfaces that could prevent proper contact.
Repair damaged stationary frame material before fitting the replacement seal. If the header or surrounding structure is significantly deteriorated, professional repair may be necessary.
Step 6: Remove and Inspect the Bottom Seal
The bottom seal is attached to the lower edge of the garage door. Many systems use a retainer channel that holds the seal in place.
If the seal slides into a channel, inspect how its edges or T-shaped ends fit into the retainer. Some designs may require access to an end of the channel for removal.
Remove the old material according to the manufacturer’s instructions. Clean the channel and check for bent sections, corrosion, dirt, and damage.
Do not loosen the bottom brackets or cables. These components can be under high tension and should only be serviced by a trained garage door technician.
Step 7: Clean the Mounting Surfaces
Before installing replacement material, clean the side and top frame surfaces.
Use a damp cloth and mild detergent to remove dirt, dust, and loose residue. Allow the surfaces to dry completely.
If you find cracks or gaps in stationary frame joints, repair them using an appropriate exterior-grade material. Do not apply sealant where it could interfere with moving sections or block drainage paths.
A clean and stable mounting surface helps the new seals remain secure.
Step 8: Install the New Side Seals
Start with one vertical side.
Position the replacement seal according to the manufacturer’s instructions. Make sure its flexible edge is oriented toward the garage door so it can contact the door when closed.
For a typical screw-mounted system:
- Align the seal along the vertical frame.
- Position the flexible edge to make gentle contact with the closed door.
- Secure it using the specified fasteners.
- Keep the material straight and free from twists.
- Check that it does not create excessive pressure against the door.
Repeat the process on the opposite side.
The seal should make consistent contact without preventing the garage door from operating normally.
Step 9: Install the New Top Seal
Position the replacement top weather stripping across the upper frame.
Make sure the flexible section faces the correct direction and will contact the upper edge of the closed garage door.
Secure the seal using the appropriate fasteners or retainer system. Keep the material straight and avoid stretching it excessively during installation.
Close the door and inspect the upper edge. The seal should close the gap without pushing the door out of its normal position.
Also Read:
How to Install Garage Door Side Weather Stripping: Complete Guide
Step 10: Replace the Bottom Garage Door Seal
The bottom seal often requires more attention because it must fit the existing retainer and make contact with the garage floor.
For a compatible slide-in system:
- Confirm the replacement profile matches the retainer.
- Remove dirt and debris from the channel.
- Prepare the replacement seal according to the manufacturer’s instructions.
- Feed the seal into the retainer without twisting it.
- Position both ends correctly.
- Check that the seal is straight across the bottom edge.
Some bottom seal systems are easier to install with the door partially open or with special tools. Follow the manufacturer’s procedure and never work beneath an unsupported door.
If the retainer is badly bent or the installation requires removing loaded hardware, have a technician complete the job.
Step 11: Check the Corners and Connections
After installing all replacement sections, inspect the areas where the side, top, and bottom seals meet.
Look for gaps, overlapping material, loose ends, and sections that have pulled away from their mounting points.
The corners should provide a reasonably continuous weather barrier without obstructing the door’s movement.
Use only compatible corner components or manufacturer-approved sealing methods. Do not fill moving gaps with rigid materials or excessive sealant.
Step 12: Test the Garage Door
Operate the garage door and check that it opens and closes smoothly.
With the door closed, inspect the entire perimeter for visible gaps and uneven contact.
Look for:
- Side seals touching the door consistently.
- A top seal that closes the upper gap.
- A bottom seal that contacts the floor.
- Secure retainers and fasteners.
- No excessive resistance during operation.
If the door reverses unexpectedly, struggles to close, or appears to be pressing too firmly against the seals, stop using it and check the installation. Have a technician inspect the system if the problem continues.
Also Read:
Best Garage Door Side Seals for Uneven Door Frames: Complete Guide
How to Choose the Right Replacement Perimeter Seals
Selecting the correct material is just as important as installing it properly.
Match the Existing Seal Profile
Before buying a replacement, compare its shape with the original material. This is especially important for bottom seals that fit into specific retainer channels.
Choose Weather-Resistant Materials
Look for seals designed for outdoor use. They should remain flexible under the temperature and weather conditions expected around your garage.
Consider the Size of the Gap
Small gaps may require a standard flexible seal, while larger uneven spaces may need a suitable wider-profile product or a separate frame repair.
Do not assume that a thicker seal is always better. An oversized seal can prevent the door from closing properly.
Check the Mounting System
Some perimeter seals attach directly to the frame, while others require a separate retainer. Confirm whether the replacement material includes the required mounting components.
Also Read:
How to Stop Cold Air Coming Through Garage Door Sides: Complete Guide
Common Mistakes to Avoid When Replacing Garage Door Perimeter Seals
Even a good replacement seal can perform poorly if it is installed incorrectly.
Buying the Wrong Bottom Seal
Bottom seals have different profiles and mounting requirements. A replacement that looks similar may not fit the existing retainer. Check the shape and measurements before purchasing.
Stretching the Weather Stripping
Pulling the material too tightly during installation can cause it to shrink back or leave gaps later. Position it naturally and follow the manufacturer’s fitting instructions.
Leaving Old Dirt in the Retainer
Dust, hardened residue, and damaged material can prevent a new seal from fitting securely. Clean the mounting area before installing the replacement.
Using Excessive Sealant
Sealant should be used only where appropriate, such as stationary cracks in the frame. Applying it to moving sections can interfere with the garage door and create additional maintenance problems.
Ignoring Door Alignment
A crooked garage door can leave uneven gaps even with brand-new weather stripping. Correct the underlying mechanical problem instead of forcing the seals to compensate.
Using Incompatible Fasteners
Incorrect screws can damage the frame, interfere with nearby components, or fail to hold the retainer securely. Use fasteners recommended for the particular installation.
When to Call a Professional Garage Door Technician
Many perimeter seal replacements can be completed as routine maintenance. However, some conditions require professional inspection.
Contact a qualified technician if:
- The garage door is crooked or does not close evenly.
- The door has come off its tracks.
- Rollers, hinges, tracks, or panels are damaged.
- The bottom retainer is bent or severely corroded.
- Cables or springs appear loose or damaged.
- The door becomes difficult to operate after seal replacement.
- The weather stripping cannot be fitted without removing structural hardware.
- Large gaps remain despite installing compatible seals.
Never adjust torsion springs, extension springs, cables, or bottom brackets to improve perimeter sealing. These components can cause serious injuries if handled incorrectly.
Estimated Cost to Replace Garage Door Perimeter Seals
The total cost depends on the garage door size, seal material, mounting system, and whether you complete the work yourself or hire a professional.
| Replacement or Repair | General Estimated Cost (USD) |
|---|---|
| Basic side weather stripping | $15–$40 |
| Top weather stripping | $10–$30 |
| Replacement bottom seal | $15–$45 |
| Higher-quality perimeter seal kit | $30–$100 |
| Bottom seal retainer | $20–$60 |
| Small frame repair supplies | $10–$40 |
| Professional weather-stripping installation | $75–$200 |
| More extensive frame or hardware repair | Varies by damage |
These are broad illustrative estimates rather than fixed prices. Actual costs vary by location, garage door dimensions, material quality, and labor rates. Extensive frame repairs or mechanical adjustments can increase the total cost.
How to Maintain Garage Door Perimeter Seals
Regular maintenance helps replacement seals last longer and reduces the risk of water and air leaks.
Inspect the Seals Every Few Months
Check the side, top, and bottom sections for cracks, loose fasteners, flattened areas, and missing pieces. Pay attention to the corners where different seals meet.
Clean Dirt and Debris
Wipe the weather stripping with a soft cloth and mild cleaning solution when needed. Avoid harsh chemicals that could damage the material.
Check Seal Contact
Close the garage door and inspect the perimeter. If daylight becomes visible or the seal no longer touches the door evenly, investigate the cause.
Keep the Retainers Secure
Look for loose screws, bent channels, and sections that have started pulling away from the frame. Repair minor mounting problems before the seal becomes detached.
Keep the Garage Entrance Drained
Remove leaves and debris from nearby drains. Direct downspouts away from the garage and address water that collects near the entrance.
Replace Damaged Sections Promptly
Small cracks can gradually become larger openings. Replacing deteriorated sections early helps maintain protection around the garage door.
Frequently Asked Questions
1. How Often Should Garage Door Perimeter Seals Be Replaced?
There is no fixed replacement interval because seal life depends on material quality, sunlight, temperature, moisture, and frequency of use. Inspect the perimeter every few months and replace seals when they become cracked, brittle, flattened, or detached. A well-maintained seal may last several years, but visible deterioration is a more useful replacement indicator than age alone.
2. Can I Replace Garage Door Weather Stripping Myself?
Yes. Many homeowners can replace screw-mounted side and top weather stripping using basic tools and compatible materials. Bottom seals can also be replaced on some systems, although certain retainers require special installation methods. Avoid working with springs, cables, bottom brackets, or unsupported doors. Hire a technician if the job involves loaded hardware or mechanical adjustments.
3. Should I Replace All Garage Door Perimeter Seals at Once?
Replacing all perimeter seals together can provide consistent protection when the existing material is old or deteriorating in several places. However, it is not always necessary. If only one section is damaged and the remaining seals are flexible and secure, replacing the affected section may be sufficient, provided the replacement matches the existing system.
4. What Is the Best Material for Garage Door Perimeter Seals?
Vinyl and rubber are common choices because they are flexible and available in different profiles. The best material depends on the location, weather conditions, and mounting system. Choose a product designed for garage door use and outdoor exposure. Correct sizing and compatibility are more important than selecting the thickest or most expensive material.
5. How Do I Know Which Bottom Garage Door Seal to Buy?
Check the shape of the existing bottom seal and the channel that holds it. Common designs include T-style, bulb-style, and U-shaped profiles. Measure the door width and compare the replacement dimensions with the manufacturer’s specifications. If the profile is difficult to identify, show a sample or photograph to a garage door parts supplier.
6. Why Does My Garage Door Still Have Gaps After Replacing the Seals?
Remaining gaps may be caused by incorrect seal positioning, an incompatible replacement profile, uneven flooring, a damaged frame, or poor garage door alignment. Inspect the contact along the entire perimeter. If the door closes at an angle or the gap changes significantly from top to bottom, have the mechanical system checked by a technician.
7. Can New Perimeter Seals Stop Water From Entering My Garage?
New seals can reduce water entry when the leak is caused by deteriorated weather stripping around the door. However, they cannot correct every drainage problem. Water may still enter if the driveway slopes toward the garage, exterior drains are blocked, or the floor and frame have structural openings. Inspect the surrounding area as well as the seals.
8. Do Garage Door Perimeter Seals Help Keep Cold Air Out?
Yes. Properly installed perimeter seals reduce the gaps through which outdoor air can enter. They can help limit drafts and make the garage more comfortable, particularly when the garage shares walls with living spaces. However, they do not replace proper wall, ceiling, or door insulation where additional thermal protection is needed.
9. Can I Use Regular Foam Weather Stripping Around a Garage Door?
Regular household foam weather stripping is not always suitable for garage doors. It may compress permanently, detach, or deteriorate under repeated contact and outdoor exposure. Choose a garage door weather seal designed for the specific location and mounting arrangement. A compatible vinyl or rubber product is generally a better choice.
10. What Should I Do If the New Seals Make My Garage Door Hard to Close?
Stop operating the door if it struggles, reverses unexpectedly, or appears to press excessively against the new seals. Check whether the material is oversized, twisted, or incorrectly positioned, but do not adjust the springs, cables, tracks, or opener force settings to compensate. If the problem remains, have a qualified technician inspect the installation and door operation.
Final Thoughts
Replacing old garage door perimeter seals is an effective way to reduce drafts, rainwater, dust, and debris entering through the garage door opening. The most important steps are identifying the correct seal type, measuring each section accurately, preparing the mounting surfaces, and installing the replacement material without stretching or twisting it.
Inspect the side and top weather stripping as well as the bottom seal. These sections work together to create a more complete barrier around the closed garage door. If one section is damaged, replace it with a compatible product. If several sections have deteriorated, replacing the complete perimeter system may provide more consistent results.
Remember that new seals cannot correct a crooked door, damaged frame, or poor exterior drainage. Address those problems separately, and never adjust high-tension garage door components yourself. With suitable materials, careful installation, and regular inspections, you can keep the garage door perimeter better protected and reduce the need for repeated repairs.