
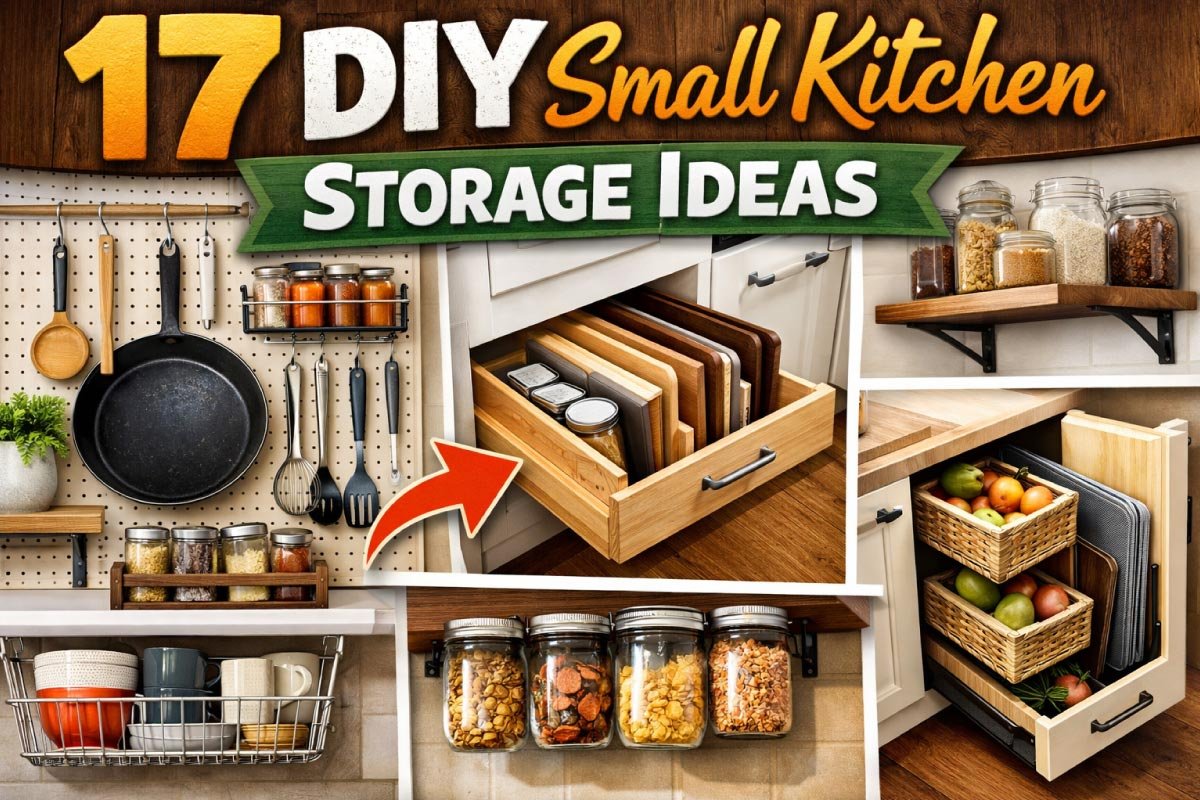
A small kitchen can feel overwhelming when there’s not enough space to store everything neatly. I’ve personally struggled with cluttered countertops, overfilled cabinets, and that constant feeling of “where do I put this?”
The good news is—you don’t need a big budget or a complete renovation to fix it. With a little creativity, you can transform even the tiniest kitchen into a well-organized, functional space.
Here are 17 DIY small kitchen storage ideas, along with my personal experiences using many of them.
Table of Contents
Toggle1. Use Tension Rods for Organization
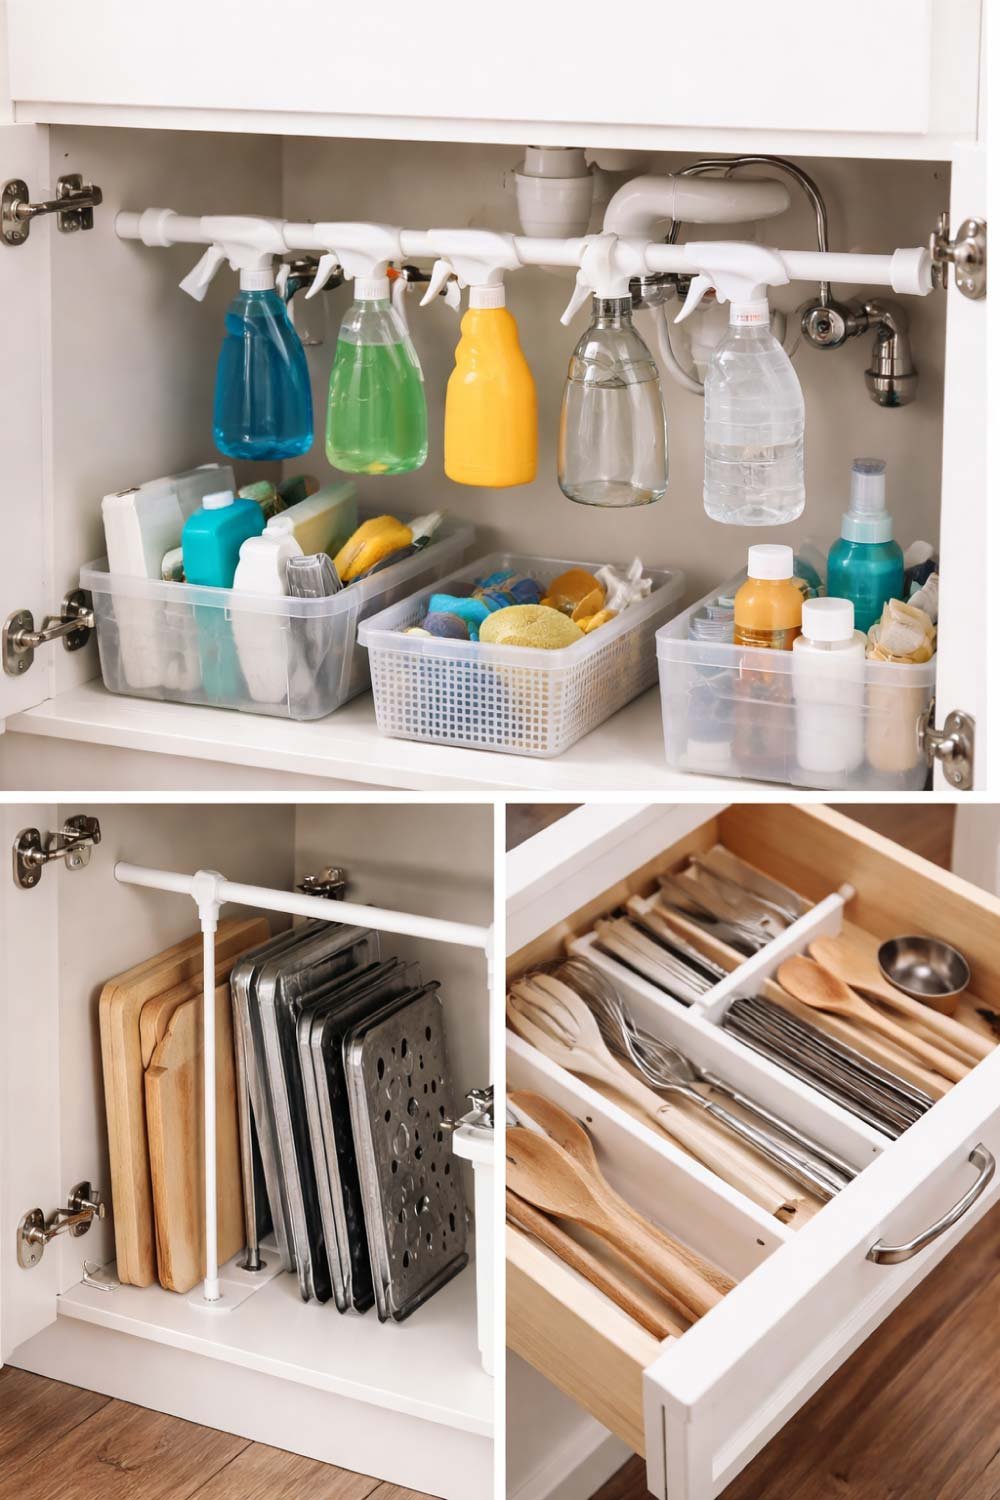
Tension rods are one of the most underrated tools when it comes to kitchen organization. These simple, adjustable rods can transform unused or chaotic spaces into neat, functional storage areas without requiring drilling or permanent installation. Whether you live in a small apartment or just want to maximize your kitchen efficiency, tension rods can provide a quick and affordable solution.
One of the best places to use tension rods is under the sink. This area often becomes a cluttered mess filled with cleaning products, sponges, and random items. By installing a tension rod horizontally, you can hang spray bottles by their triggers.
This not only frees up valuable floor space but also keeps everything visible and easy to access. Instead of digging through a pile of bottles, you can instantly grab what you need.
Another great use is inside cabinets. You can place a rod vertically to create dividers for cutting boards, baking trays, and lids. This prevents items from stacking on top of each other, making it easier to grab one without disturbing the rest. It also helps protect fragile items from scratches or damage.
Tension rods can also be used in drawers to create custom compartments. If your drawers are too large and items slide around, placing a small rod inside can help section off areas for different tools. This keeps everything organized and prevents clutter from building up over time.
My experience: I remember struggling with the mess under my sink. Every time I needed a cleaner, I had to move several bottles around. It was frustrating and time-consuming. After installing a simple tension rod, everything changed. I hung all my spray bottles neatly, and suddenly I had extra space below for other items. It felt like I had doubled my storage without spending much money.
What I love most about tension rods is their flexibility. You can easily adjust or move them as your needs change. Unlike permanent shelves, they don’t lock you into one setup. This makes them perfect for people who like to experiment with different organization styles.
2. DIY Magnetic Spice Rack
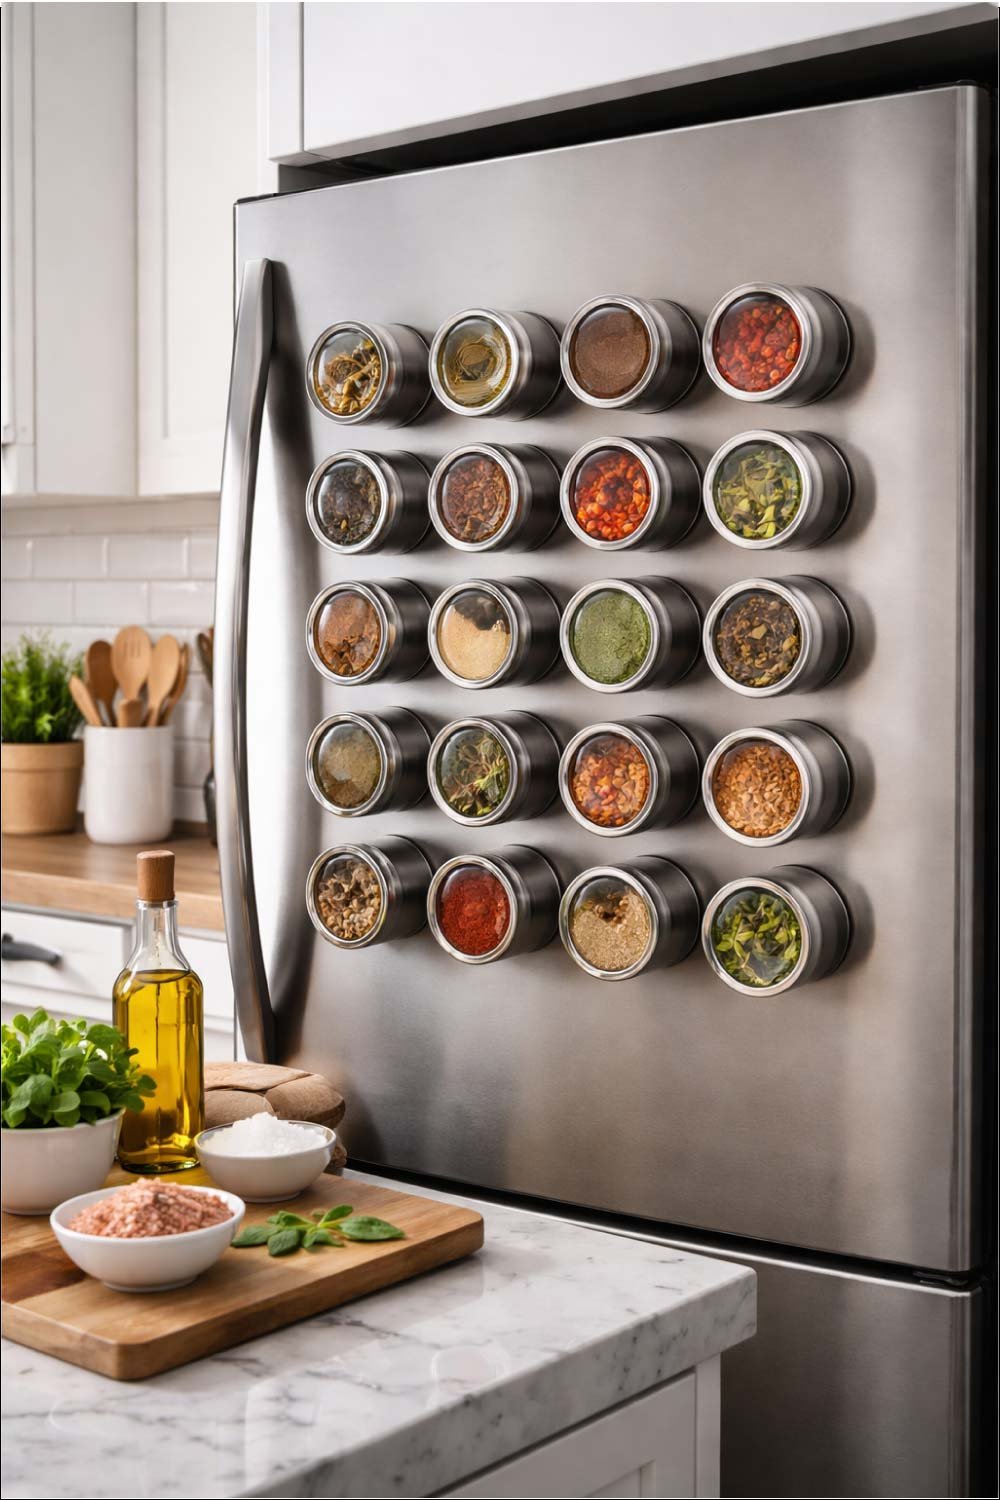
A DIY magnetic spice rack is both a space-saving solution and a stylish addition to your kitchen. Spices are essential in cooking, but they often take up valuable cabinet space or get lost in cluttered drawers. By using magnets, you can turn an unused surface into a functional spice storage area.
The concept is simple: attach small magnets to the lids or backs of spice jars and place them on a metal surface like a refrigerator or a mounted metal board. This keeps your spices visible, accessible, and neatly arranged.
One major advantage of a magnetic spice rack is visibility. When spices are stored in cabinets, you often forget what you have, leading to duplicate purchases or expired items. With a magnetic setup, everything is right in front of you, making cooking more efficient.
You can also customize the design to match your kitchen aesthetic. Use uniform jars for a clean, modern look, or label each container for easy identification. You can even arrange spices alphabetically or by frequency of use.
My experience: Before switching to a magnetic spice rack, my cabinet was always a mess. Small spice containers would get pushed to the back, and I often had to take everything out just to find one item. After installing magnets and placing them on my fridge, it completely changed my cooking routine. Not only did I save space, but my kitchen also looked more organized and stylish.
Another benefit is flexibility. You can expand your spice collection without worrying about space. Simply add more magnetic jars as needed. It’s also easy to clean and rearrange whenever you want.
3. Install Floating Shelves
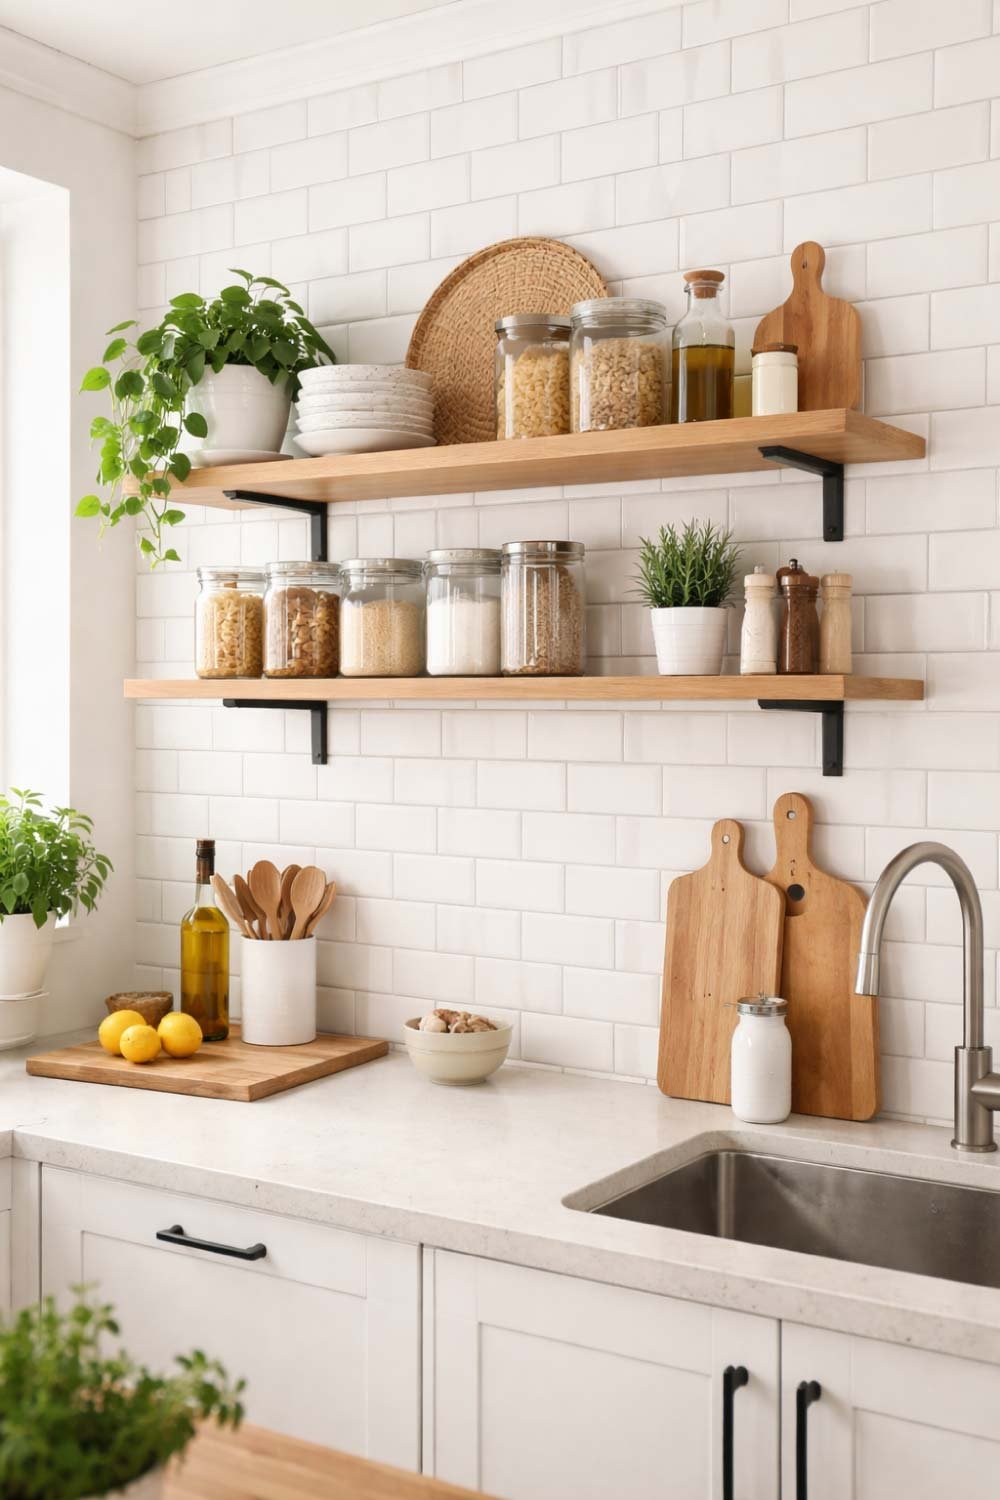
Floating shelves are a fantastic way to add storage without taking up floor space. They are especially useful in small kitchens where every inch matters. By utilizing vertical space, you can store essential items while keeping your countertops clear.
Floating shelves can be installed above counters, sinks, or even in empty wall spaces. They are perfect for storing dishes, jars, cookbooks, or decorative items. Unlike bulky cabinets, they create an open and airy feel, making your kitchen look larger and more inviting.
One key advantage is accessibility. Items placed on open shelves are easier to reach compared to those stored in cabinets. This makes them ideal for everyday essentials like plates, cups, or frequently used ingredients.
You can also use floating shelves to display decorative items such as plants, framed prints, or stylish containers. This adds personality to your kitchen and makes it feel more like a lived-in space rather than just a functional area.
My experience: I installed two small floating shelves above my counter, and it made a huge difference. Before that, my counter was always cluttered with jars and utensils. After adding the shelves, I moved those items up, freeing up space below. It not only improved organization but also made my kitchen look cleaner and more modern.
Floating shelves are also highly customizable. You can choose different materials, colors, and sizes to match your kitchen style. Whether you prefer a rustic wooden look or a sleek modern design, there’s an option for everyone.
4. Use Mason Jars for Storage
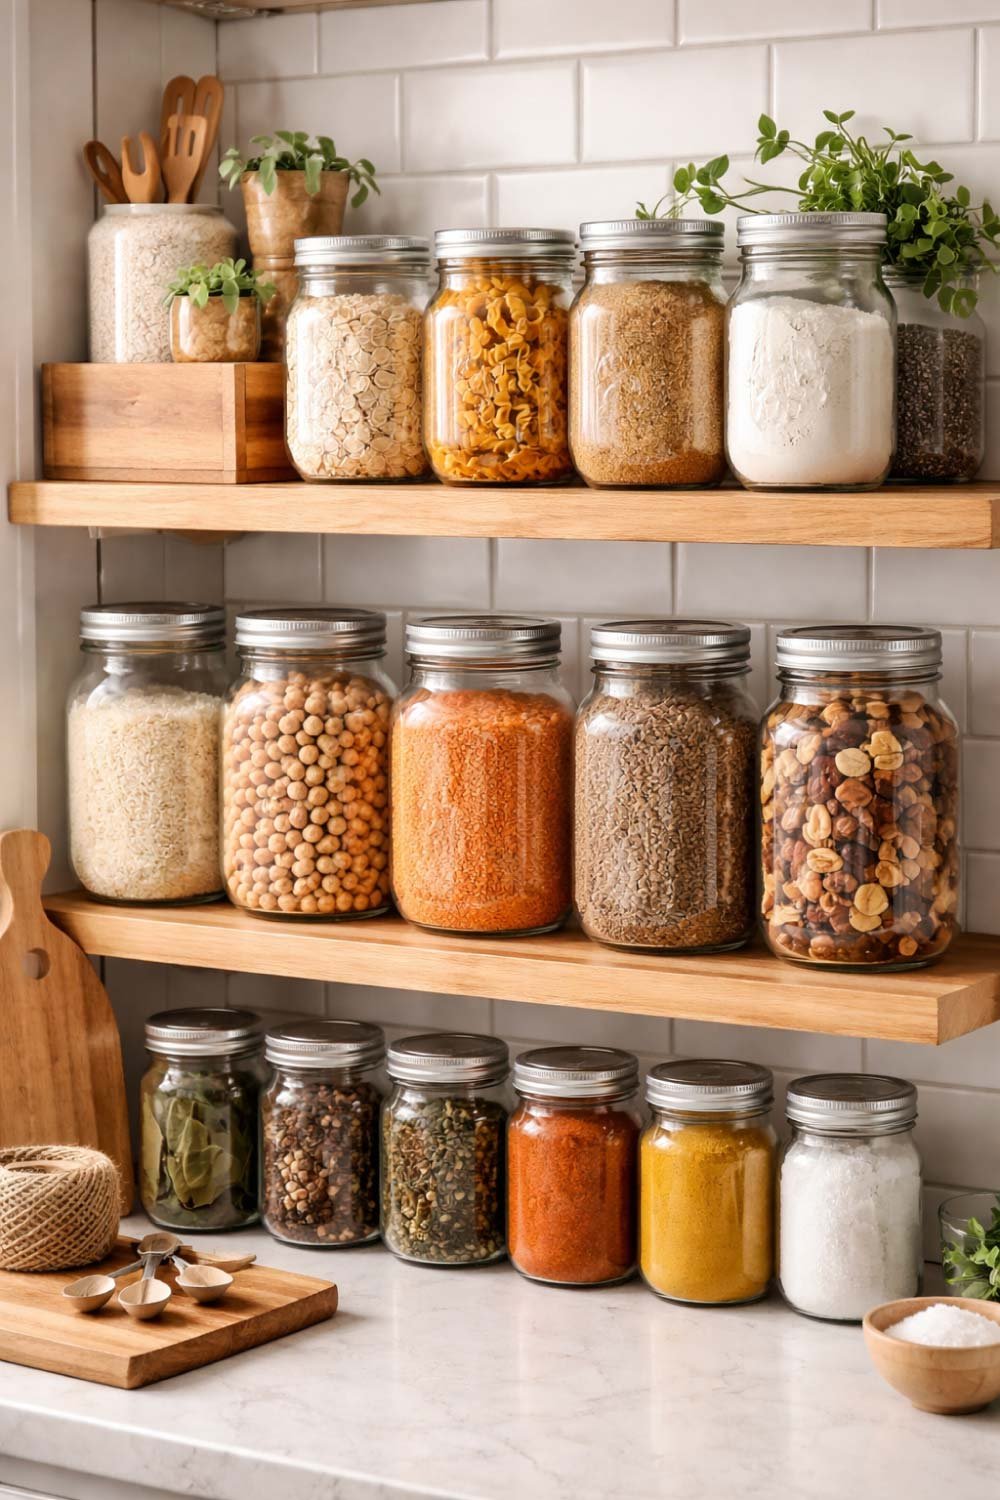
Mason jars are a simple yet highly effective storage solution for kitchens. They are versatile, affordable, and visually appealing. Using mason jars to store dry ingredients can instantly make your kitchen look organized and tidy.
These jars are perfect for storing items like rice, lentils, pasta, sugar, flour, and spices. Since they are transparent, you can easily see what’s inside, eliminating the need to open multiple containers to find what you need.
Another advantage is freshness. Mason jars provide an airtight seal, which helps keep food fresh for longer. This is especially useful for items that can lose quality over time when exposed to air.
You can also label each jar for better organization. This not only helps you quickly identify contents but also adds a decorative touch to your kitchen.
My experience: Switching to mason jars was one of the best decisions I made for my kitchen. Before, I had different types of containers that didn’t match, making everything look messy. After organizing my pantry with mason jars, it felt like a completely new space. Everything was easy to find, and the overall look was much cleaner and more aesthetic.
Mason jars are also eco-friendly. Instead of using plastic containers, you can rely on reusable glass jars, reducing waste and promoting sustainability.
Also Read:
5. Hang Utensils on a Wall Rack
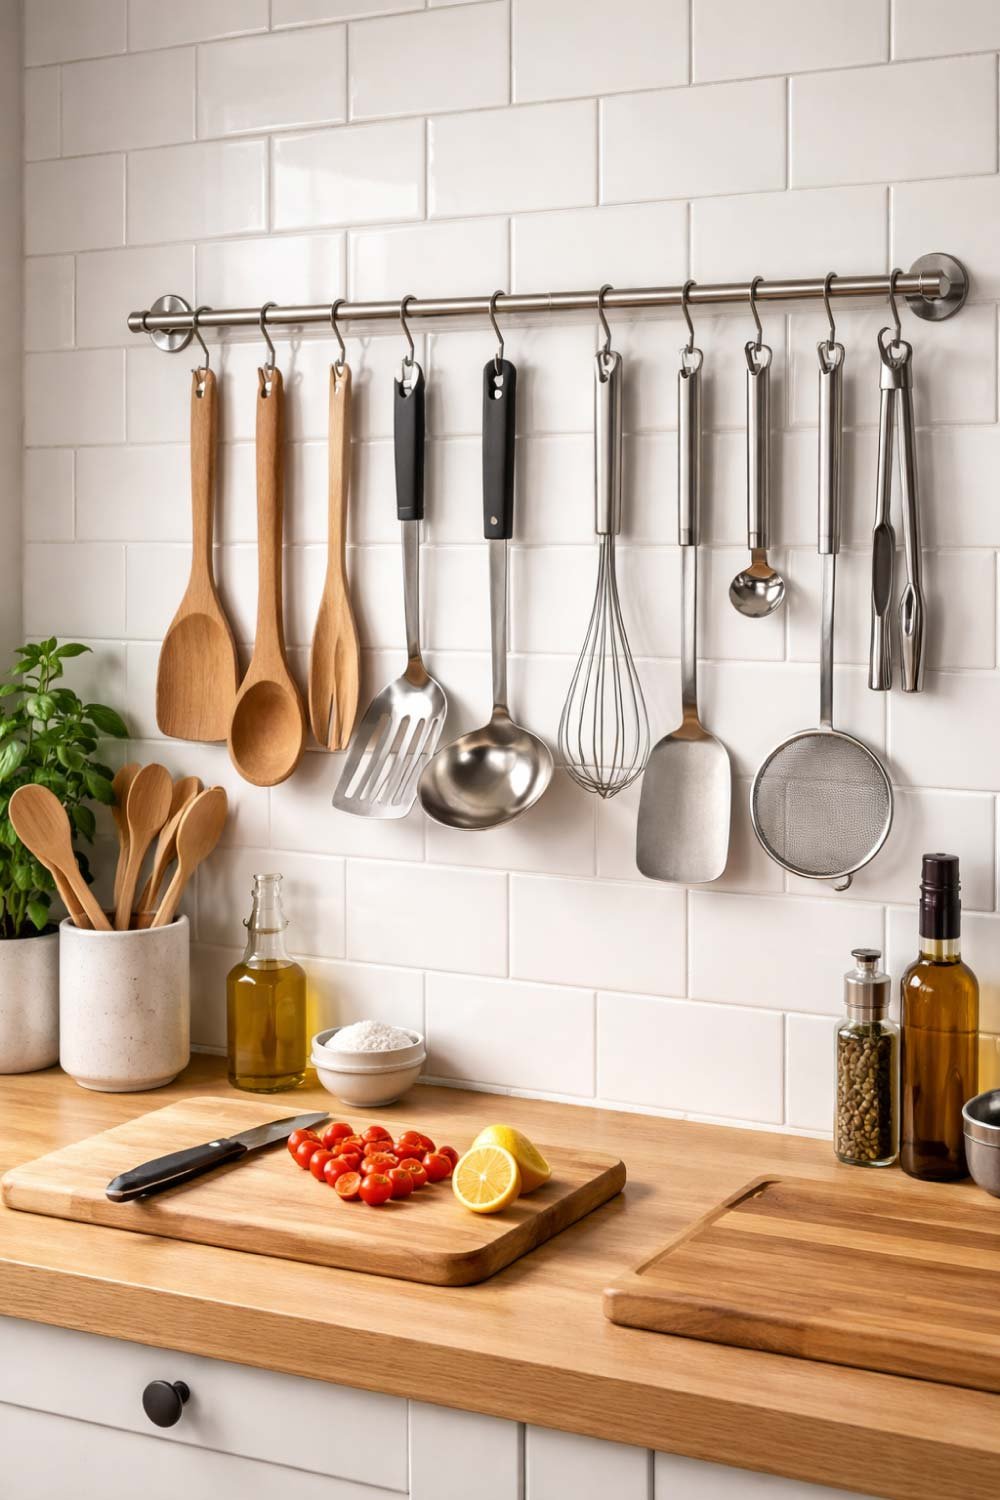
Hanging utensils on a wall rack is a practical and stylish way to organize your kitchen tools. Instead of keeping everything in drawers, you can display your utensils on hooks or rods, making them easily accessible.
This method works especially well for frequently used items like spatulas, ladles, and whisks. By keeping them within reach, you can save time while cooking and avoid the hassle of searching through drawers.
Wall racks also help free up drawer space, allowing you to use it for other items. This is particularly useful in small kitchens where storage is limited.
My experience: I used to keep all my utensils in one drawer, and it was always a mess. Finding the right tool took time, especially when I was in a hurry. After installing a wall rack, everything became much easier. I could see all my utensils at a glance and grab what I needed instantly.
Another benefit is the visual appeal. A well-arranged utensil rack can add a professional and organized look to your kitchen.
6. DIY Pull-Out Cabinet Drawers
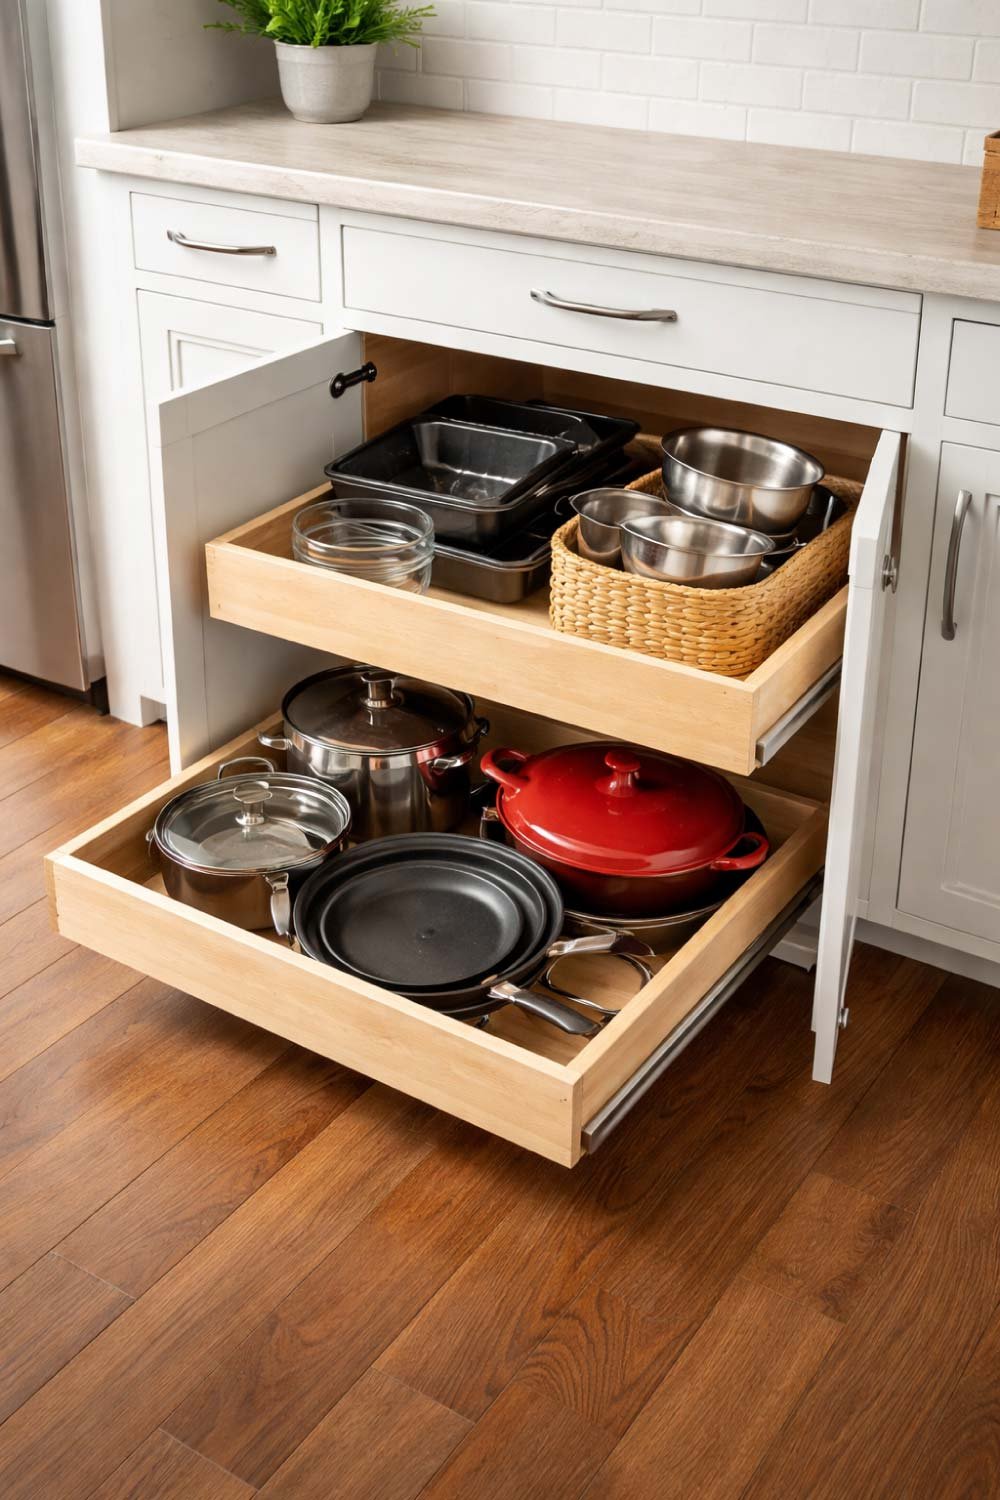
Deep cabinets can be difficult to manage because items stored at the back are hard to reach. DIY pull-out drawers solve this problem by bringing everything within easy reach.
These drawers can be created using simple sliders and wooden boards. Once installed, they allow you to pull out the entire contents of a cabinet, making it easier to access items.
This is especially useful for storing pots, pans, and heavy items. Instead of bending down and reaching into dark corners, you can simply slide the drawer out.
My experience: Before installing pull-out drawers, I often avoided using certain pots because they were too hard to reach. After adding drawers, everything became accessible. It saved time and reduced frustration.
Also Read:
7. Use Over-the-Door Organizers
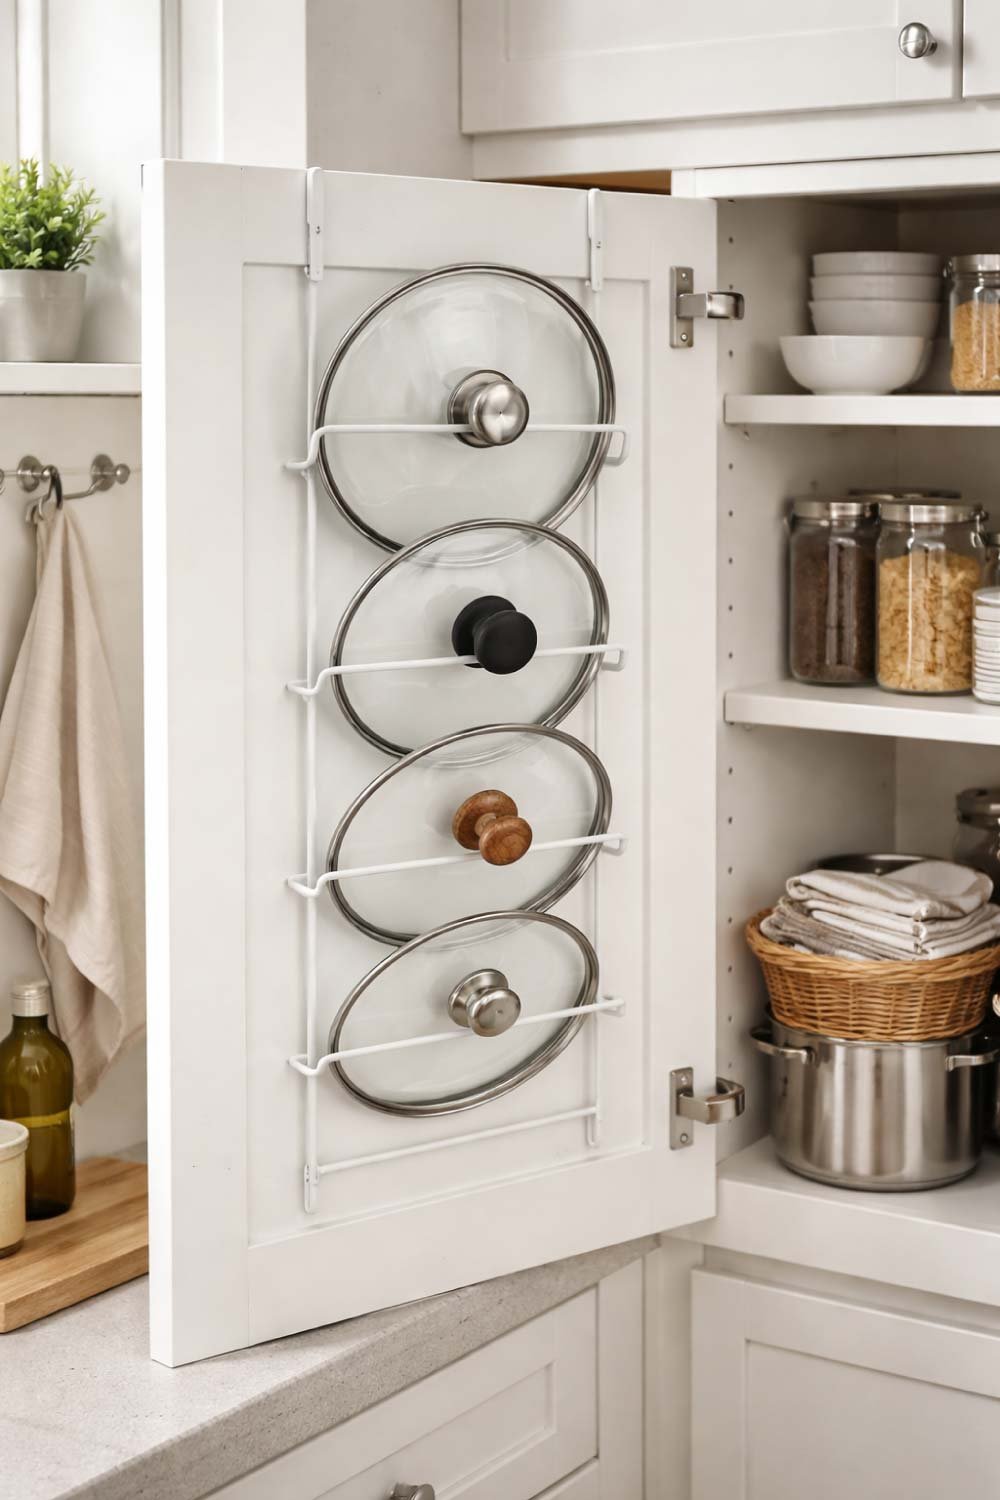
Over-the-door organizers are a smart way to utilize unused space. These organizers can be hung behind cabinet doors to store various items such as spices, lids, or cleaning supplies.
They are easy to install and don’t require any permanent changes. This makes them ideal for renters or anyone looking for a quick storage solution.
My experience: I used an over-the-door organizer for pot lids, and it completely changed my cabinet space. Before, lids were stacked awkwardly, taking up a lot of room. After organizing them behind the door, I gained an entire shelf for other items.
8. Create a Pegboard Wall
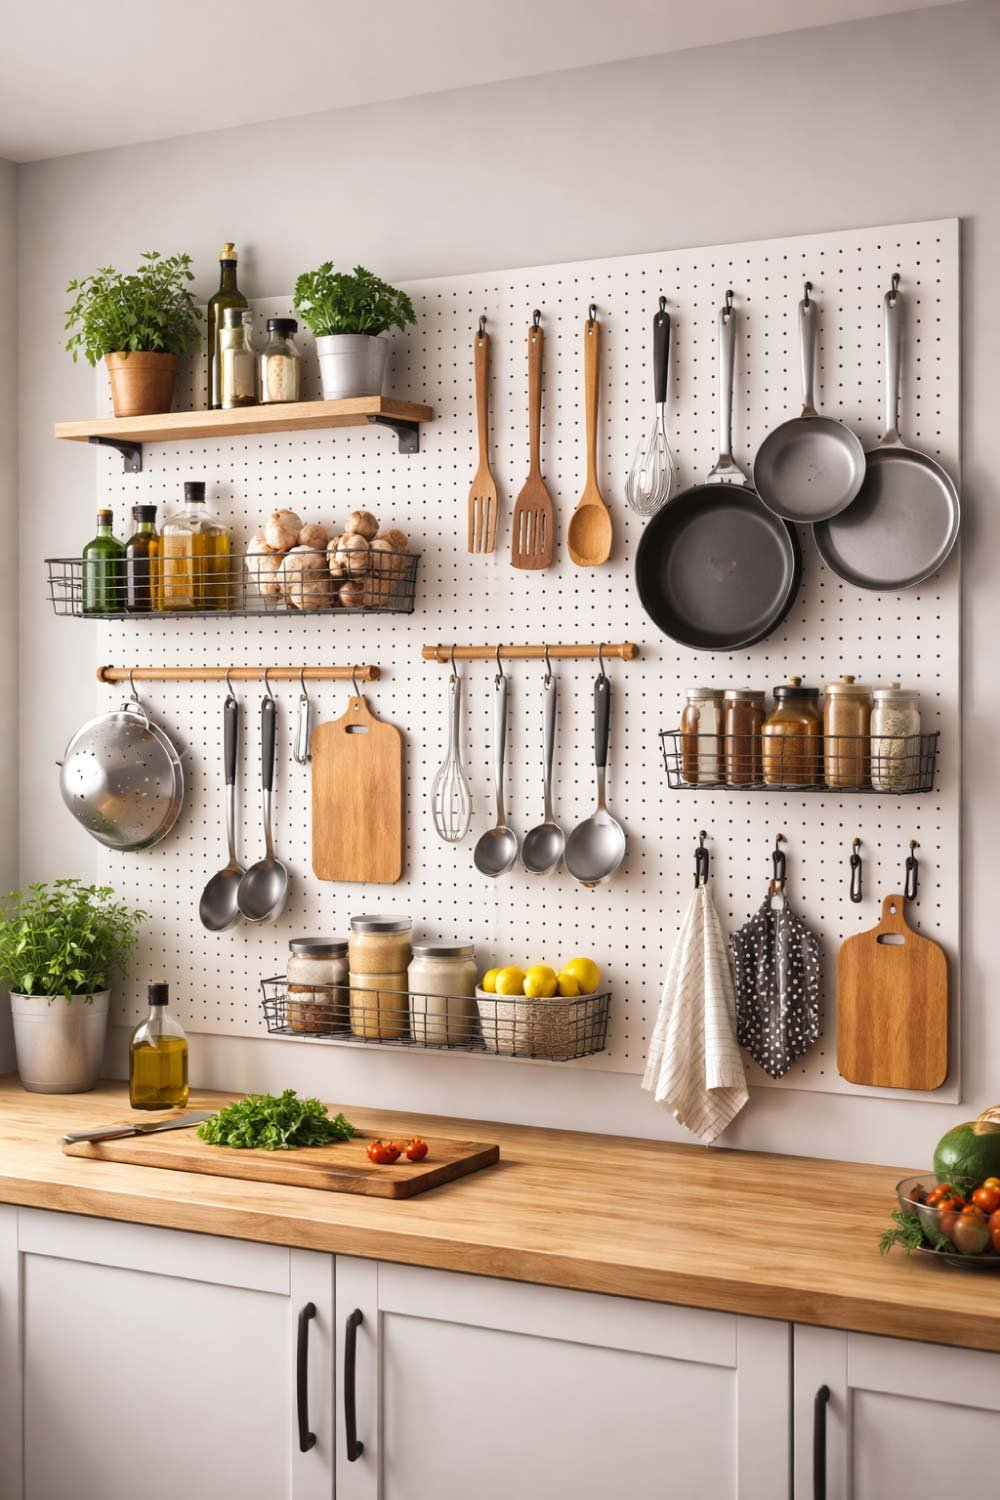
A pegboard wall is one of the most versatile storage solutions for a kitchen. It allows you to hang tools, pans, and baskets in a customizable layout.
You can easily rearrange hooks and accessories based on your needs, making it a flexible option for changing storage requirements.
My experience: I love how adaptable a pegboard is. Whenever I need more space or want to change the layout, I simply move things around. It keeps my kitchen organized and functional.
Also Read:
9. Stackable Storage Bins
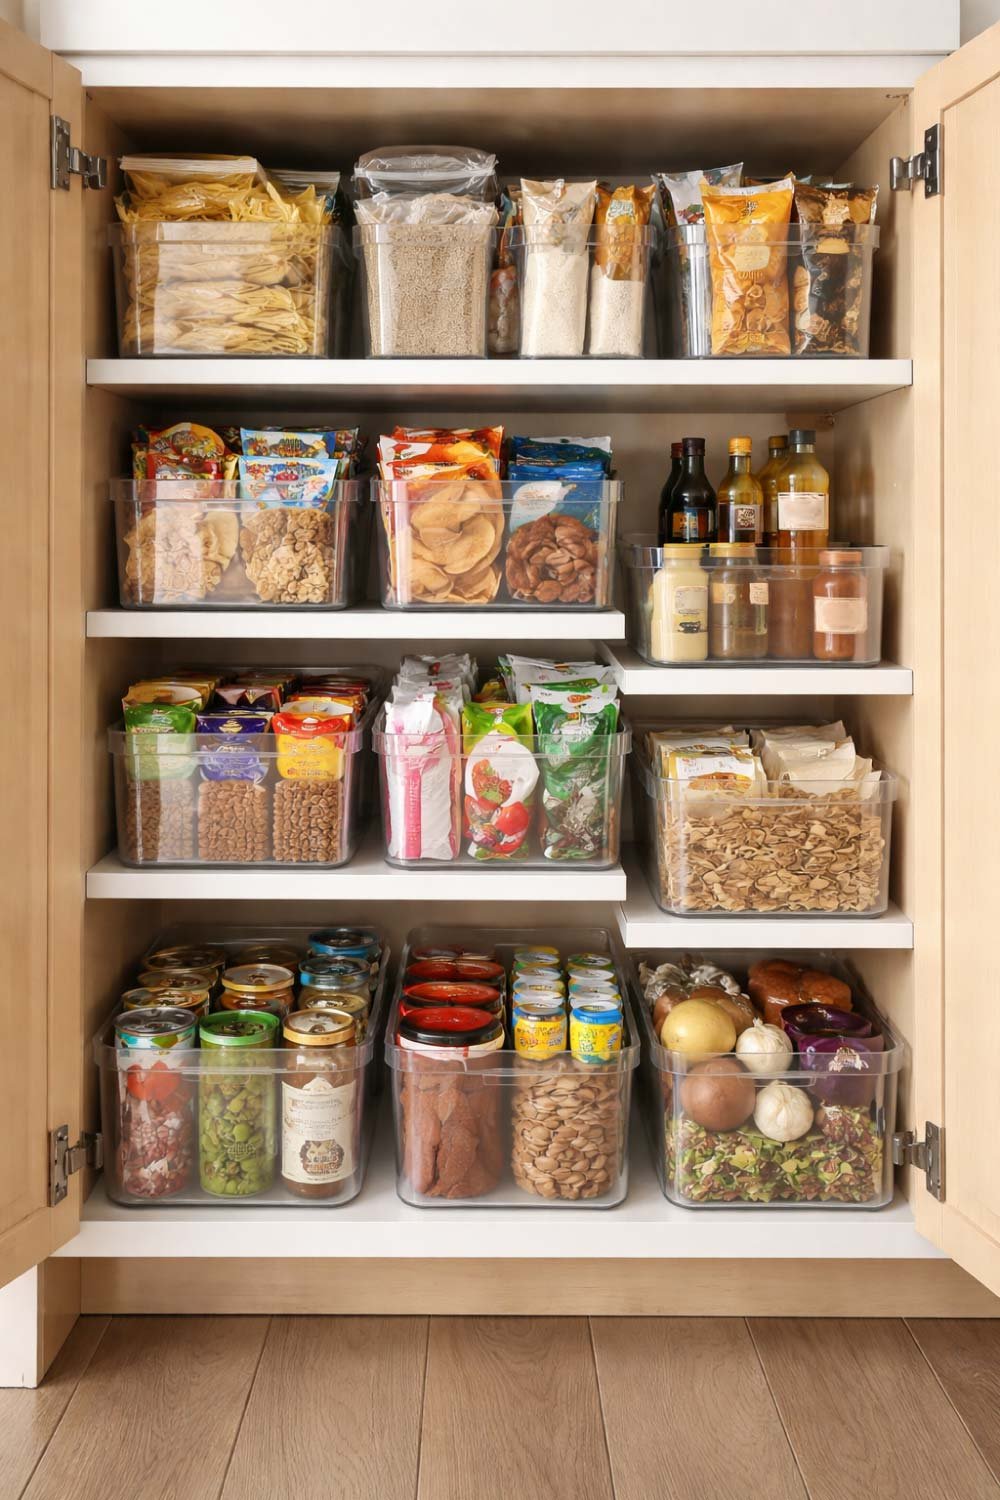
Stackable storage bins are one of the easiest and most effective ways to maximize space in your kitchen, especially in cabinets and pantry areas. Many kitchens have unused vertical space simply because items are spread out horizontally. Stackable bins allow you to take advantage of that vertical space and organize items in a neat, structured way.
These bins come in various sizes and materials, including plastic, metal, and even bamboo. You can use them to store snacks, canned goods, baking supplies, or even cleaning items. The key benefit is that they create layers within your storage space, making it easier to categorize and access items.
One of the biggest advantages of stackable bins is grouping. Instead of having items scattered across shelves, you can assign each bin a category—like breakfast items, spices, or snacks. This not only makes your kitchen more organized but also saves time when you’re cooking or looking for something.
They are also especially useful in deep cabinets where items at the back are hard to reach. By stacking bins, you can pull out a section instead of digging through everything.
My experience: Before using stackable bins, my pantry shelves were always cluttered. Items would get pushed to the back, and I’d forget what I even had. Once I introduced stackable bins, everything changed. I created separate bins for snacks, spices, and dry foods. Not only did it maximize my vertical space, but it also made my kitchen feel more structured and stress-free.
10. DIY Corner Shelves
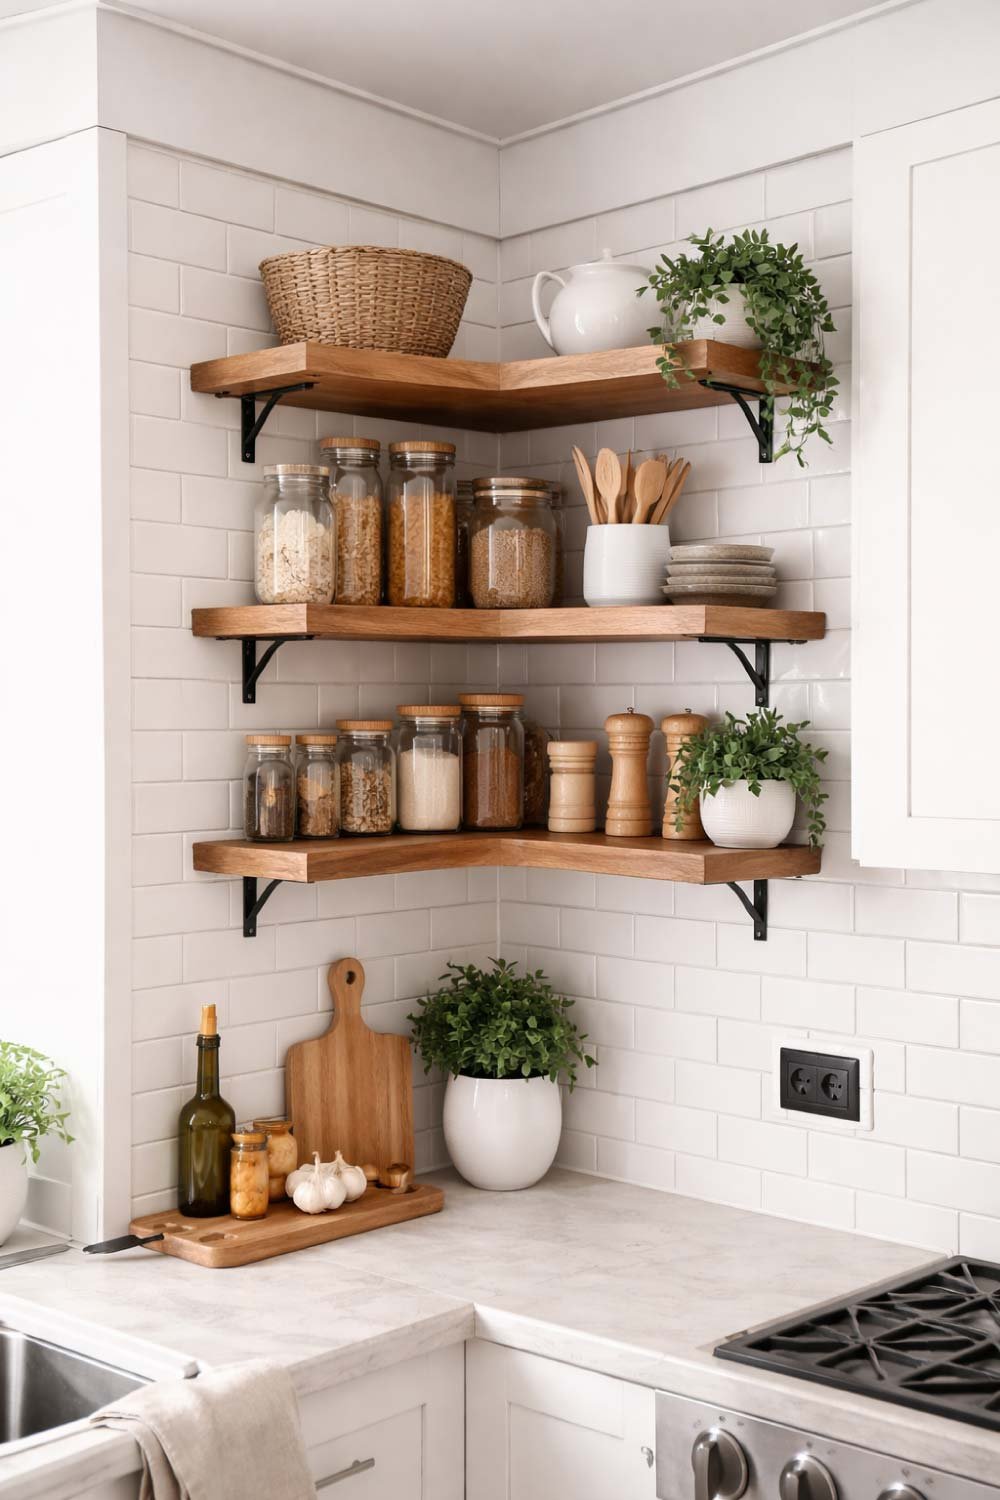
Corners in kitchens are often overlooked and underutilized. These awkward spaces can be difficult to use effectively, but with DIY corner shelves, you can turn them into valuable storage areas.
Corner shelves are perfect for storing smaller items like spices, jars, or decorative pieces. You can install simple triangular or curved shelves that fit neatly into the corner, instantly adding extra storage without taking up much room.
One of the biggest benefits of corner shelves is that they make use of space that would otherwise go to waste. Instead of leaving corners empty or cluttered, you can transform them into functional and attractive storage spots.
You can also customize the shelves based on your needs. Whether you want a rustic wooden look or a modern minimalist design, DIY corner shelves can match your kitchen style perfectly.
My experience: I had an empty corner near my countertop that I never used. It always felt like wasted space. After installing a small corner shelf, I started using it for spices. It completely transformed that area. Now, everything I need while cooking is right within reach, and the corner looks purposeful instead of empty.
Also Read:
Women Clothing Size Chart: Complete Guide for Perfect Fit and Style
11. Use a Rolling Cart
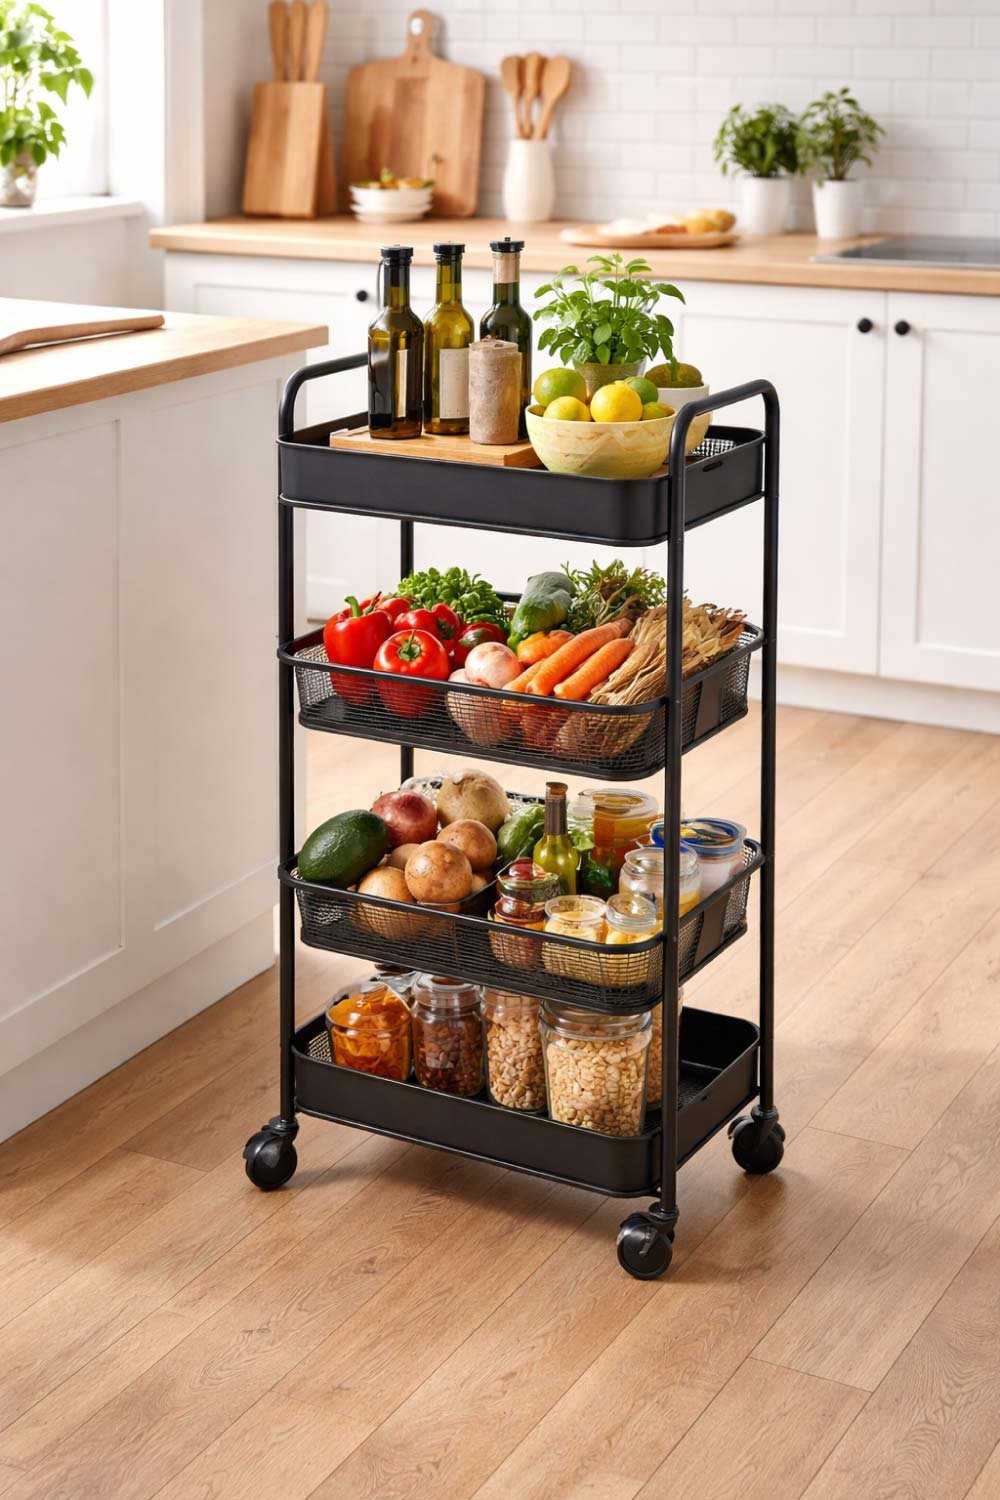
A rolling cart is a flexible and practical storage solution for any kitchen. It acts as a movable storage unit that you can place wherever needed. This is especially useful in small kitchens where space is limited.
Rolling carts typically have multiple tiers, allowing you to store a variety of items such as vegetables, fruits, snacks, or kitchen tools. Since they are mobile, you can move them around based on your needs—whether you need extra counter space or want to keep ingredients close while cooking.
One of the best features of a rolling cart is its versatility. It can function as a mini pantry, a beverage station, or even a prep station. When not in use, you can simply move it to a corner to save space.
My experience: I use my rolling cart mainly for vegetables and snacks. It’s incredibly convenient, especially when I’m cooking or need quick access to ingredients. Sometimes, I even use the top as extra counter space when preparing meals. It’s one of those items that once you have it, you can’t imagine your kitchen without it.
12. Hang Mugs Under Cabinets
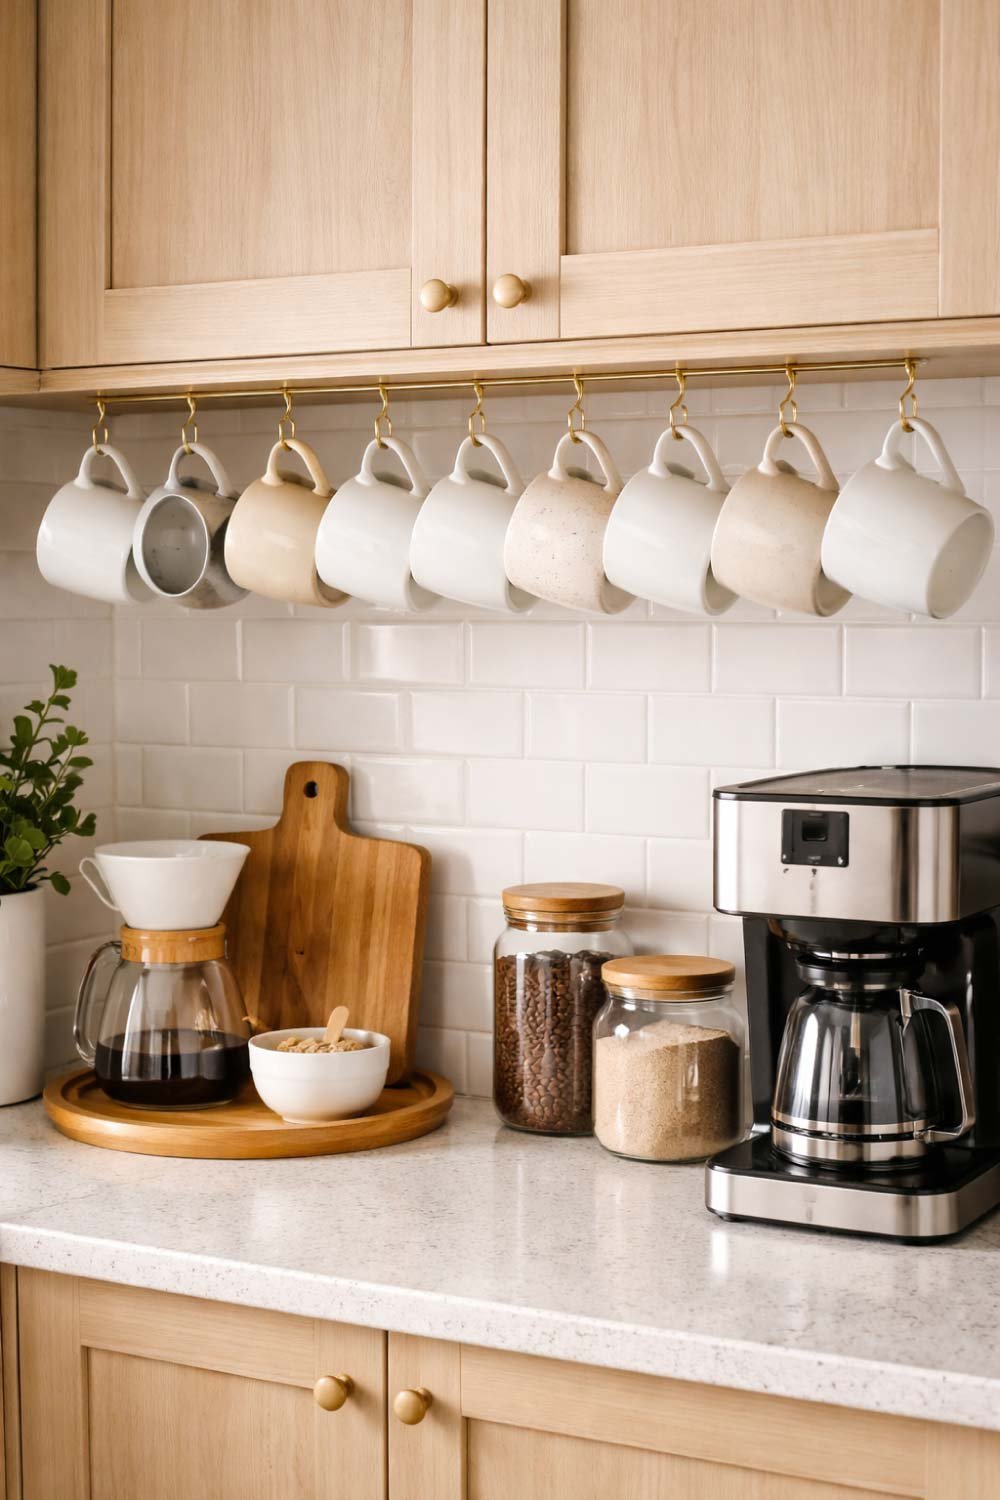
Hanging mugs under cabinets is a smart and stylish way to save space. Instead of stacking mugs inside cabinets, you can install hooks underneath shelves or cabinets and hang them by their handles.
This method not only frees up cabinet space but also makes your mugs easily accessible. It’s especially useful for coffee lovers who use mugs daily.
Another advantage is the visual appeal. Hanging mugs can add a cozy and organized look to your kitchen, especially if you use matching or decorative mugs.
My experience: Before using hooks, my mugs took up a lot of cabinet space. They were often stacked, which made it difficult to grab one without disturbing others. After installing hooks under my cabinet, everything became more convenient. My coffee routine became smoother, and I gained extra cabinet space for other items.
Also Read:
Dress Length Chart: Your Ultimate Guide to Perfect Fit and Style
13. DIY Drawer Dividers
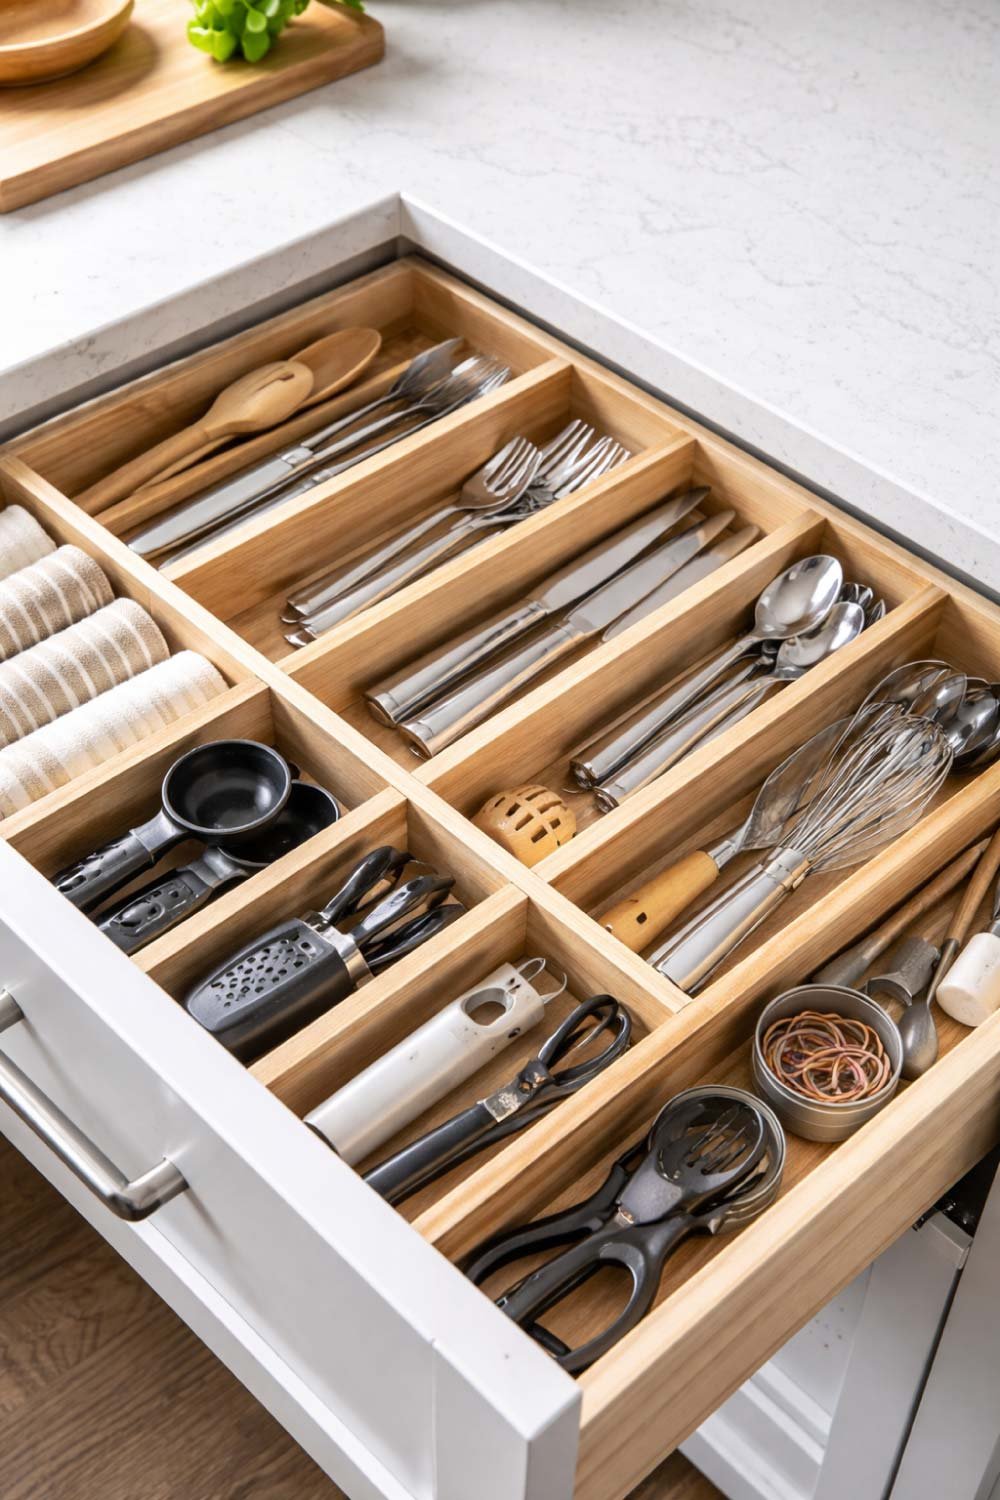
Drawers can quickly become messy if items are not properly organized. DIY drawer dividers are a simple and cost-effective solution to keep everything in place.
You can create dividers using cardboard, wood, or even plastic. The idea is to section off your drawer into compartments for different items like spoons, forks, knives, and other utensils.
This not only keeps your drawer tidy but also makes it easier to find what you need. Instead of searching through a pile of utensils, you can go straight to the section you need.
My experience: My drawers used to be complete chaos. Every time I opened one, it felt overwhelming. After adding DIY dividers, everything changed. Each item had its own place, and it became much easier to maintain order. It also saved me time during cooking since I could quickly find the tools I needed.
14. Turn Old Bottles into Dispensers
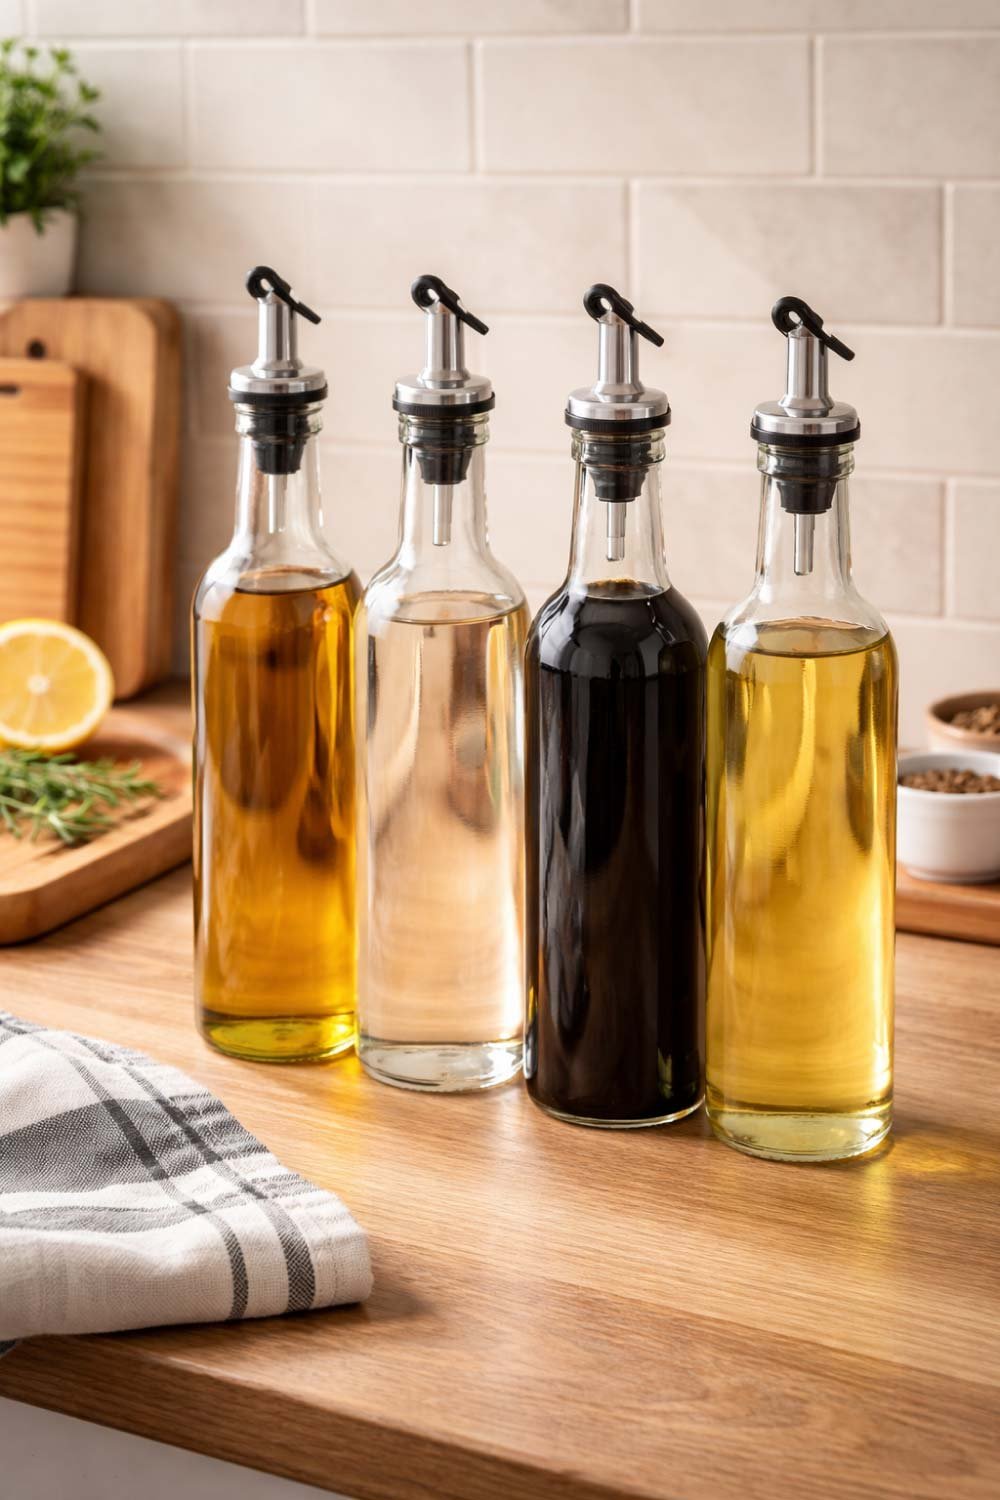
Reusing old bottles as dispensers is a creative and eco-friendly kitchen hack. Instead of throwing away glass bottles, you can repurpose them to store oil, vinegar, or sauces.
All you need is a clean bottle and a suitable pour spout. This not only reduces waste but also creates a uniform and organized look in your kitchen.
Using matching bottles can make your kitchen appear more cohesive and stylish. It also helps control the amount of liquid you pour, reducing spills and waste.
My experience: I started reusing old glass bottles for oil and vinegar, and it made a noticeable difference. My kitchen looked more organized, and I loved the fact that I was reducing waste. It’s a small change, but it has both practical and environmental benefits.
Also Read:
Clothing Size Chart: The Ultimate Guide for Men, Women, and Kids
15. Use Vertical Plate Racks
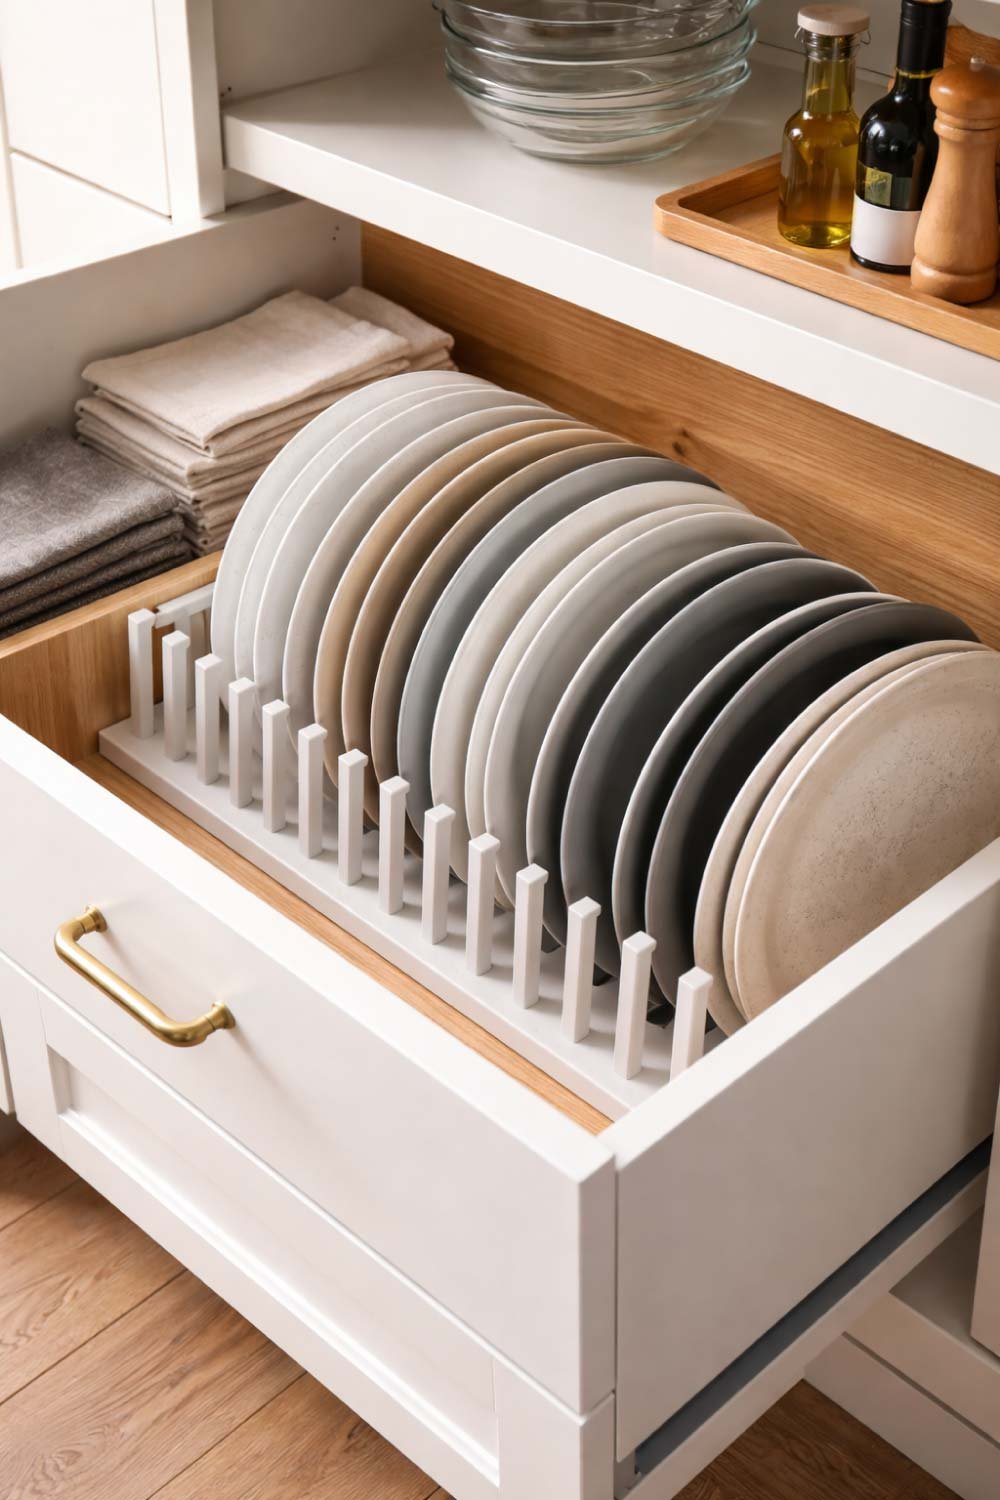
Storing plates vertically instead of stacking them is a simple yet effective way to improve accessibility and organization.
Vertical plate racks allow you to slide plates in and out individually, making it easier to grab one without disturbing the others. This also reduces the risk of breakage since plates are not stacked on top of each other.
These racks are especially useful for deep cabinets or drawers where stacking can become inconvenient.
My experience: I used to stack all my plates, and it was always a hassle to take one from the bottom. After switching to a vertical rack, everything became easier. I could access each plate individually, and it felt much safer since there was less risk of dropping or breaking them.
16. Install Under-Shelf Baskets
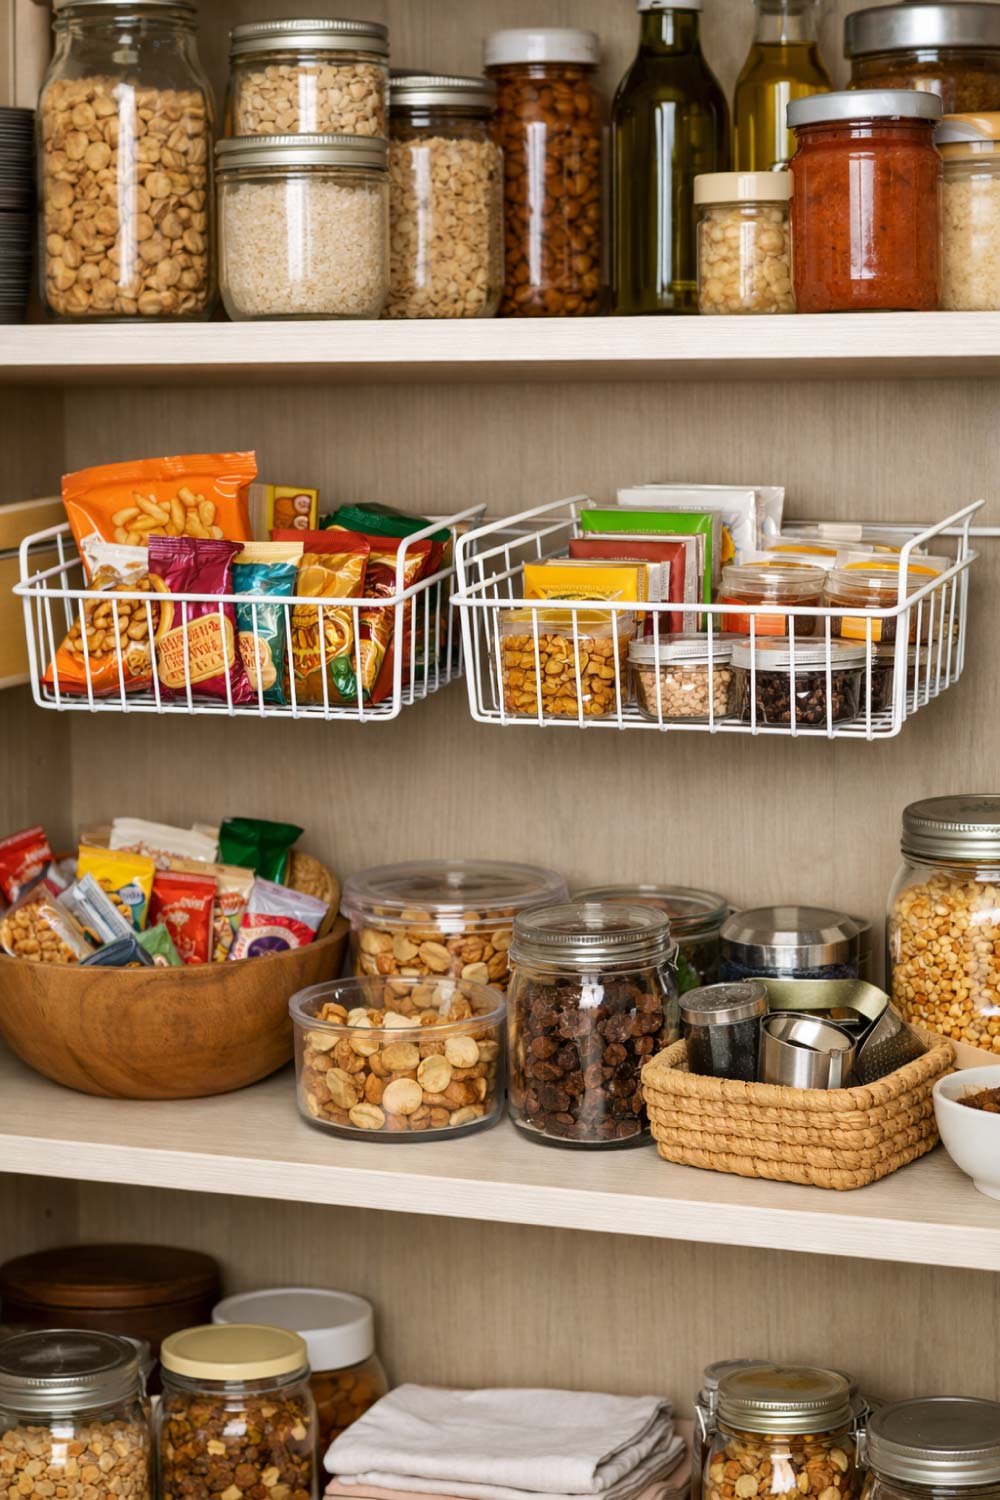
Under-shelf baskets are a clever way to create additional storage without adding new shelves. These baskets slide under existing shelves, effectively doubling your storage space.
They are perfect for storing lightweight items such as snacks, packets, or small kitchen tools. This helps you utilize unused space between shelves.
Installation is simple—most baskets just slide into place without requiring tools. This makes them ideal for quick and easy organization.
My experience: I added under-shelf baskets to my pantry for snacks and small items. It was surprising how much extra space I gained. Items that used to clutter my shelves now had their own designated spot, making everything more organized and easy to find.
17. Label Everything
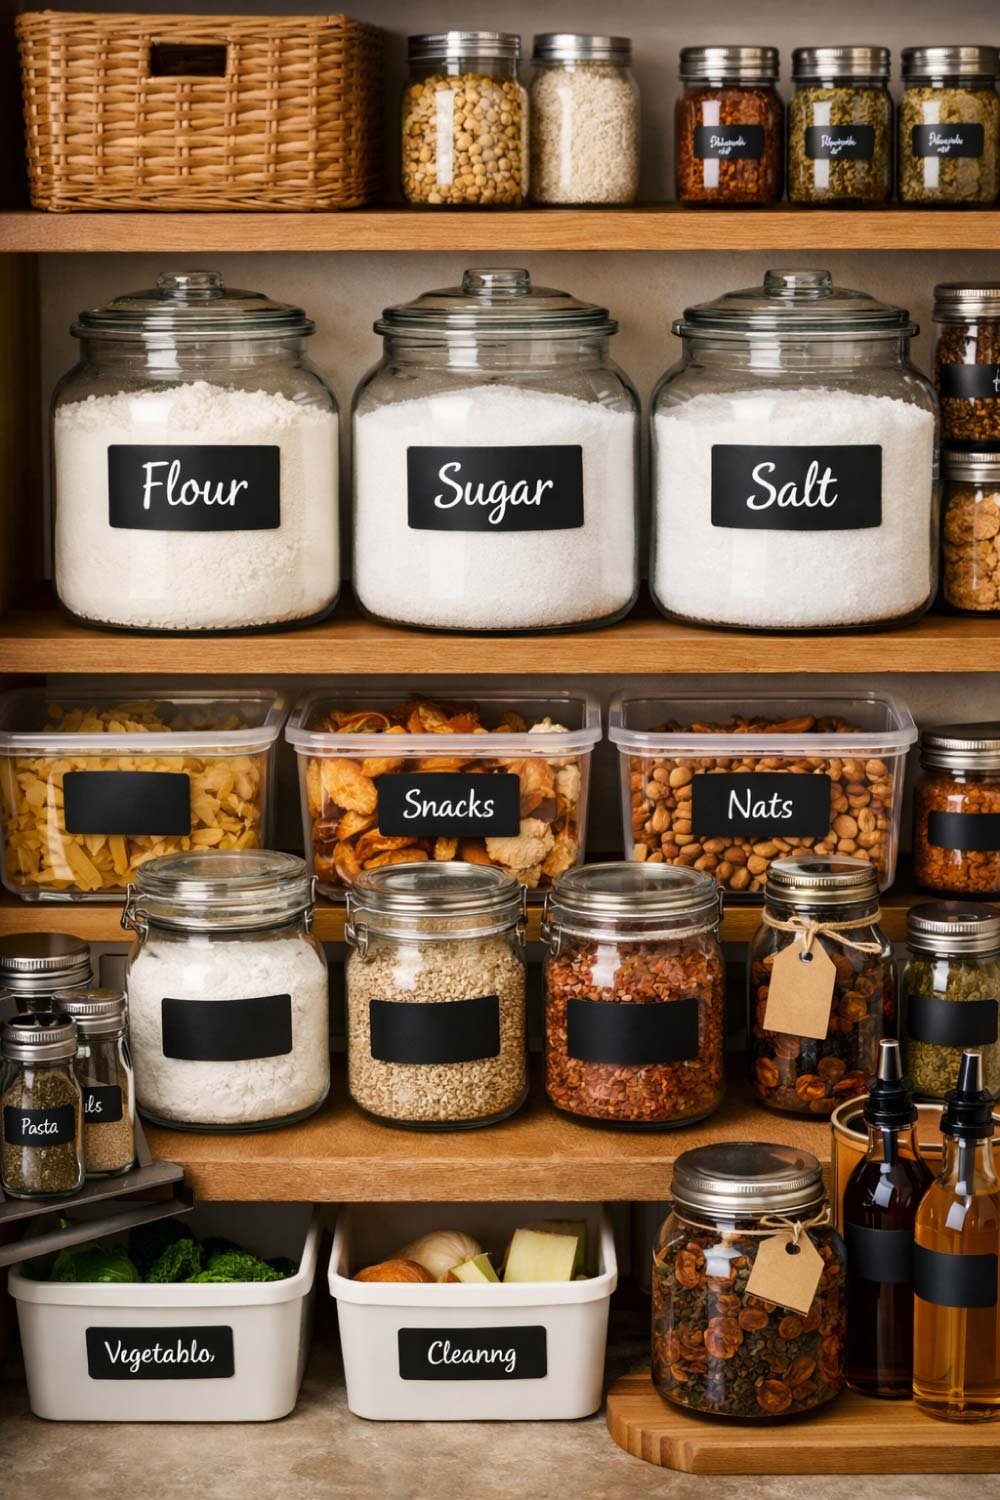
Labeling is one of the simplest yet most powerful organization techniques. By labeling jars, containers, and bins, you can instantly identify what’s inside without opening them.
This is especially helpful for ingredients that look similar, such as flour, sugar, and salt. Labels eliminate confusion and help maintain consistency in your kitchen organization.
You can use stickers, chalk labels, or even handwritten tags. The goal is to create a clear and easy-to-read system.
My experience: Labeling became essential in my kitchen. Before, I often mixed up ingredients because they looked alike. Once I started labeling everything, it saved me time and prevented mistakes while cooking. It also made my pantry look much more organized and professional.
Final Thoughts
Living with a small kitchen doesn’t mean you have to compromise on organization or functionality. These DIY storage ideas are simple, affordable, and incredibly effective. From my own experience, even small changes—like adding hooks or using jars—can make a huge difference.
The key is to use every inch wisely, think vertically, and keep things accessible. Once you start organizing, you’ll notice cooking becomes easier, faster, and much more enjoyable.
If you’re feeling overwhelmed, start with just one or two ideas from this list. Trust me—once you see the results, you’ll be motivated to transform your entire kitchen!
Also Read: